Table of Contents
Advertisement
Advertisement
Table of Contents

Subscribe to Our Youtube Channel
Related Manuals for SUNBA Lite Series


Summary of Contents for SUNBA Lite Series
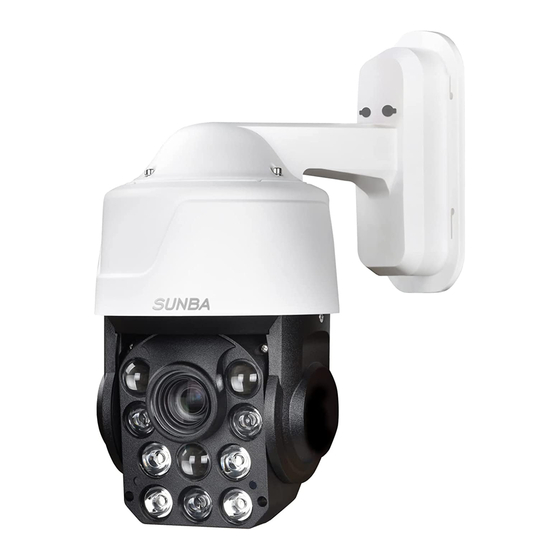
- Page 1 Lite Series Network PTZ Camera Premium Engineering. Durable Outdoor Surveillance Ideal for House or Project Site User Guide V10.0 2022/06 Version 10.0 Visit http://lite.sunbatech.com to access the step by step YouTube video tutorials for setting up Sunba IP PTZ camera.
- Page 2 FCC Warning (U.S.A) The device has been tested in compliance with limits set by Part 15 of Federal Communication Commission (Class B). The operation of the device is thus limited by the following two conditions: 1) it is not permitted to cause harmful interference to any authorized radio communications, and 2) it must accept any interference it receives.
-
Page 3: Table Of Contents
MENU 1. Camera Bench Test 2. Camera Setup by Smartphone 3. Camera Setup by VMS Client 4. WiFi Application 5. Mounting Outdoor 6. Web Access 7. Assign a Static IP 8. Access by 3rd Party Software 9. Remote Access 10. Presets,Patrol and Pattern 11. - Page 4 1. Camera Bench Test When you take the camera out of the box, please test the camera indoor first before mounting outside. Type A: With DC12V Aadapter (non-PoE) IP Camera Computer Router Do NOT extend the power cable during the bench test because DC power drops quickly along the transmission.
-
Page 5: Camera Bench Test
PoE Standard It is important to note that all Sunba pan tilt zoom cameras require to be powered by PoE+/++ adapters (injector/switch) with 802.3at/bt standard. Conventional PoE standard 802.3af delivers only 15.4W per port and using those adapters would cause underpower. -
Page 6: Camera Setup By Smartphone
Download Android Click the "+" icon to add device. ****** NOTE: iSunba/iSunba Pro/XMEye These APPs are suitable for Sunba Lite Series cameras. Register to select "Cloud Login" (push notification requires a cloud account to store picture alert). - 03 -... - Page 7 SUNBA TECH. P2P: 5935d7d9 00XXXXXX The app automatically shows all Sunba devices in LAN. Use “Search” if your camera and smartphone are connected to the same WiFi. Modify other settings such as Press the camera to password for the camera.
-
Page 8: Camera Setup By Vms Client
Control pan, tilt and zoom, watch live view and set/delete/call presets from this page. Press to speak. (device must support speaker) Turn on/off microphone. Record a video and save the clip to your smartphone. Take a snapshot and save the image to your smapphone. - Page 9 Click “IPV4 Search” and select the camera, then click “add” to connect the device. ① Try the following if no device shows up: Temporarily disable the firewall; Connect the camera directly to your parental router; Connect the camera directly to your PC/Mac for testing; Contact support@sunba.net - 06 -...
- Page 10 Now the camera status should show “Connected”. “Connected" status indicates the camera is online. Tricks: The camera’s default ports are ONVIF 8899, TCP 34567, HTTP 80 and RTSP 554. Those values must also be unique to each other. Step 3: Live View Please go to the “Live View”...
-
Page 11: Wifi Application
4. WiFi Application This chapter only applies to model 405-ECO WiFi Version . This section will provide the user with information on how to setup the WiFi connection. video tutorial wifiset.sunbatech.com Method A: Search and add the camera by smartphone. After the camera is powered on and completes the self-test, you can directly search and add the camera via XMEye APP on smartphone. - Page 12 Click Yes ****** Device searching. Click the green IPC icon Enter password. Click and start live view. - 09 -...
- Page 13 Tips: If the search fails, please refer to the following two ways to default the camera, and then refer to the above steps to search again. 1. Please manually press the button to default the camera as shown below Remove the 4 screws to take Press and hold the black button off the camera back cover.
- Page 14 Method B: Enable WiFi function via VMS/IE browser. Please refer to Chapter 3 and Chapter 6 for the steps to access the camera through the VMS/IE browser. After adding the camera, please go to Device Config > Network > WiFi (In Internet Explorer, please go to Device Config >...
-
Page 15: Mounting Outdoor
5. Mounting Outdoor Please complete bench test (see Chapter 1) before mounting the camera outdoor. Wiring Type A: Power of Ethernet Solution POE+out Injector/Swith 100~250ft 100V~250V Data out Data in POE+ 802.3at Wiring method: Router ELV (Extra-Low Voltage System) Wiring Type B: Non-PoE (DC12V) Solution 100V~250V DC 12V Power Adapter... -
Page 16: Web Access
For Non-PoE Application (if you extend the power): The camera may not work properly if the power reaches the camera is below 12V due to resistance along the extended DC line (distance dependent). If that happens, please make your AC power source near the camera, and connect it with our default adapter you received from the package. - Page 17 You can always download the web plugin separately from Sunba website if it takes too long to download the plugin from popped window. Step 2: Start a web browser (Internet Explorer) Enter the IP address of your camera in the location/host field.
- Page 18 Tips: Steps to Enable Internet Explorer Mode in Edge Browser on Windows 10 1.Open Edge Browser and click , then click Settings 2.Select Default browser and then select according to the following figure: Never Allow Restart 3.Search for Internet Explorer in Program Files - 15 -...
-
Page 19: Assign A Static Ip
7. Assign a static IP Step 1: Enter Device Config Page of Internet Explorer or VMS, and select the Network tab. Step 2: Unselect the DHCP option. Step 3: Change the camera IP and click “Apply” to save the changes. Power cycle the unit to activate the new setting. -
Page 20: Access By 3Rd Party Software
ONVIF version. If you have particular 3rd party software that you would want to use with Sunba PTZ cameras, we are happy to supply resources and assistance we can offer to integrate our protocol. -
Page 21: Remote Access
Cam or IP Cam Viewer may require you to forward ONVIF and RTSP port as well. Disclaimer: Though it is a popular method, Sunba does not recommend setting up port forwarding as it opens all ports to the public network and increases chances of information leak. -
Page 22: Presets,Patrol And Pattern
Preset PTZ Preset Position Sunba dome cameras can set preset PTZ positions for which cameras can memorize and travel directly by calling the preset. Preset positions are repre- sented by numbers. You need to “add” a preset and then “call” it. - Page 23 Pattern Different from patrol, which enables the camera to travel between different points, patterns are continuous sets of movement that Sunba cameras can perform in a record and replay fashion. Note: Patterns will not be activated unless Motion Detection and Video Blind are disabled.
-
Page 24: The Full Preset List
11. The Full Preset List Special Preset Function 0~50 Preset Conventional Position Preset XXX + Add Preset Set preset XXX. XXX + CALL Call preset XXX. 81 + CALL Reset the PT position 47 or 81 + Add Preset Set the left boundary of frame scan 48 or 82 + Add Preset Set the right boundary of frame scan 82 + CALL... -
Page 25: Camera Osd Menu
97 + 200 + CALL; Set the Patrol Dwell Time to 10s; 97 + 201 + CALL; Set the Patrol Dwell Time to 15s; ………… ………… ………… ………… (5 second added per preset increment) 97 + 215 + CALL Set the Patrol Dwell Time to 85s; 97+225;... - Page 26 Check OSDlanguage.sunba.net to learn how to switch the dis- -play language of the OSD main menu from Mandarin to English. MAIN MENU IR SETTING IR SETTING IR MODE AUTO PATTERNS IR ON SENS PARK ACT NONE IR OFF SENS PARK TIME 25 S...
- Page 27 PATTERNS This option has the same function as 84 + Add PRESET. To set up a pattern, you must use direction & zoom key to add actions and Iris+ key to end the setting. Each pattern scan can memorize no more than 31 actions. Note: If you open the video motion &...
-
Page 28: Camera Configuration
This function enables the auto scan of the camera between a set left and right boundary. It can be set using PRESET 81+Add & PRESET 82+Add as well. When setting up the frame scan, direction keys are used to set the position of the boundary. - Page 29 Set an alarm for special events such as storage device access failure or IP conflict with other devices. How to Access the Device Config: For IE: Click “DeviceCfg” For VMS: Choose Device Config (PS: You must add the camera via Sunba protocol, not ONVIF) - 26 -...
- Page 30 General: Change system language and date. Encode: Change resolution, bit rate and other factors that affect video quality and connectivity. Enable/Disable audio. Network: Configure the camera's IP address, gateway, DNS etc. NetService: Configure NTP, email alert, WiFi and other services. GUI Display: Customize camera name, time title and other display setting.
-
Page 31: Account Management
14. Account Management Warning: Camera accounts are NOT the same as VMS software account. When you open VMS, a prompt will ask you to enter password for accessing the VMS program. This account is set to prevent unauthorized use of the VMS software on your desktop. -
Page 32: Motion Detection
16. Face Capture The face capture feature is only supported by specific models (For details, you can contact us via support@sunba.net), and needs to be coupled with the Sunba NVR model F8009SE/F8010SE to be able to capture, store and browse snapshots of human faces. Firmware upgrade might be required to realize this feature. -
Page 33: Reset The Camera
Device Config-Account-Safe Questions. Option 6: Reset Tool (Factory Reset) Please go to http://reset.sunba.net to download the reset tool and send the safety code to Sunba Support Team (support@sunba.net) to retrieve a reset code. The reset code is exclusive for each individual safety code. -
Page 34: Cable Waterproof Measures
19. Cable Waterproof Measures The camera itself is IP 66 Waterproof Rating. However, the cable connect- -ors may still have exposures to water under different applications. It is always recommended for users to take precautions to protect the cable connectors of the camera. Below are 3 popular methods: 1. -
Page 35: Audio Setting
20. Audio Setting Note: The camera has built-in microphone with sound pick-up capacity. There is no need to install additional microphone on this model. Setup: how to enable the audio at camera after installation? Please remember to check the audio option in "Device Config->Encode-> video/audio->Enable it "... - Page 36 In this case, please kindly provide us with your tracking number so that we can match the return package and the refund will be manually pro- cessed within 24 hours. Please watch your email notifications. For any questions, don't hesitate to reach support@sunba.net SUNBA Technology ®...
Need help?
Do you have a question about the Lite Series and is the answer not in the manual?
Questions and answers
What does it mean when your camera does not turn on and even if its getting sufficient voltage (12V)?
If the SUNBA Lite Series camera does not turn on despite receiving sufficient voltage (12V), possible reasons include:
1. Use of Incorrect Power Source: The camera may have been damaged if a higher voltage adapter (such as 16V or 24V) was used, which voids the warranty.
2. Passive PoE Injector/Splitter Usage: If a passive PoE injector/splitter was used instead of an active one, the camera could have suffered motherboard damage.
3. Hardware Failure: Internal components, such as the power circuit or motherboard, might have been damaged due to improper power supply or other issues.
4. Insufficient Power Supply: Even if the adapter provides 12V, it must also meet the required current rating for proper operation.
Checking the power adapter, connections, and ensuring an active PoE injector (if applicable) are recommended troubleshooting steps.
This answer is automatically generated