Table of Contents
Advertisement
Quick Links
Support and E-Warranty Certificate https://www.vevor.com/support
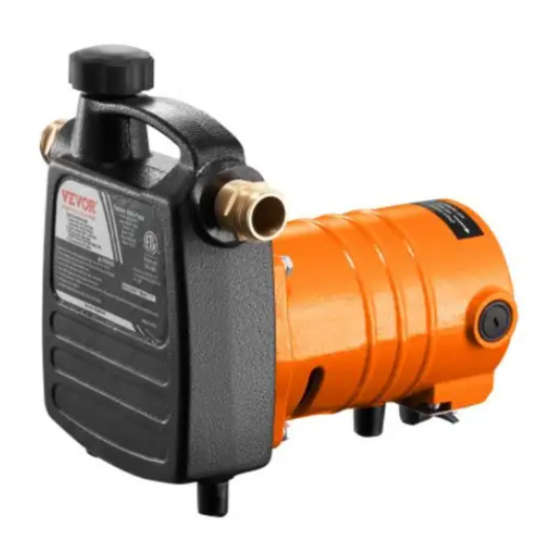
PORTABLE UTILITY PUMP
USR MANUAL
Applicable model: Q1CZ-800C1
We continue to be committed to provide you tools with competitive price.
"Save Half", "Half Price" or any other similar expressions used by us only represents an
estimate of savings you might benefit from buying certain tools with us compared to the major
top brands and doses not necessarily mean to cover all categories of tools offered by us. You
are kindly reminded to verify carefully when you are placing an order with us if you are
actually saving half in comparison with the top major brands.
Advertisement
Table of Contents

Related Manuals for VEVOR Q1CZ-800C1


Summary of Contents for VEVOR Q1CZ-800C1
- Page 1 Support and E-Warranty Certificate https://www.vevor.com/support PORTABLE UTILITY PUMP USR MANUAL Applicable model: Q1CZ-800C1 We continue to be committed to provide you tools with competitive price. "Save Half", "Half Price" or any other similar expressions used by us only represents an estimate of savings you might benefit from buying certain tools with us compared to the major top brands and doses not necessarily mean to cover all categories of tools offered by us.
- Page 2 CustomerService@vevor.com This is the original instruction, please read all manual instructions carefully before operating. VEVOR reserves a clear interpretation of our user manual. The appearance of the product shall be subject to the product you received. Please forgive us that we won't inform you again if...
-
Page 3: Important Safety
Read this material before using this product. Failure to do so can result in serious injury. SAVE THIS MANUAL. SAVE THIS MANUAL Keep this manual for the safety warnings and precautions, assembly, operating, inspection, maintenance, and cleaning procedures. Write the product s serial number on the back of the manual near the assembly diagram (or the month and year of purchase if the product has no number). -
Page 4: General Power Tool Safety
NOTICE NOTICE is used to address practices not related to personal injury. CAUTION CAUTION, without the safety alert symbol, is used to address practices not related to personal injury. GENERAL POWER TOOL SAFETY WARNING Read all safety warnings and instructions. Failure to follow the warnings and instructions may result in electric shock, fire, and/or serious injury. - Page 5 Do not abuse the cord. Never use the cord for carrying, pulling, or unplugging the power tool. Keep the cord away from heat, oil, sharp edges, or moving parts. Damaged or entangled cords increase the risk of electric shock. e.When operating a power tool outdoors, use an extension cord suitable for outdoor use.
- Page 6 use of these devices can reduce dust-related hazards h. Only use safety equipment that has been approved by an appropriate standards agency. Unapproved safety equipment may not provide adequate protection. Eye protection must be ANSI-approved, and breathing protection must be NIOSH-ap- proved for the specific hazards in the work area.
- Page 7 PORTABLE PUMP SAFETY WARNINGS 1.Maintain labels and nameplates on the tool. These carry important safety information. If unreadable or missing, contact Harbor Freight Tools for a replacement. 2.Avoid unintentional starting. Prepare to begin work before turning on the tool. 3.Do not leave the tool unattended when it i$ plugged into an electrical outlet.
- Page 8 SAVE THESE INSTRUCTIONS. GROUNDING TO PREVENT ELECTRIC SHOCK AND DEATH FROM INCORRECT GROUNDING WIRE CONNECTION : Check with a qualified electrician if you are in doubt as to whether the outlet is properly grounded. Do not modify the power cord plug provided with the tool.
- Page 9 1. Tools marked with "Grounding Required" have a three-wire cord and three-prong grounding plug. The plug must be connected to a properly grounded outlet. If the tool should electrically malfunction or break down, grounding provides a low resistance path to carry electricity away from the user, reducing the risk of electric shock.
-
Page 10: Extension Cords
complies with the applicable standards of Underwriters Laboratories, Inc., the Canadian Standard Association, and the National Electrical Code. (See Outlets for 2-Prong Plug.) Double-insulated tools may be used in either of the 115-volt outlets shown in the preceding illustration. (See Outlets for 2-Prong Plug.) EXTENSION CORDS 1.Grounded tools require a three-wire extension cord. - Page 11 condition. Always replace a damaged extension cord or have it repaired by a qualified electrician before using it. 8. Protect the extension cords from sharp objects, excessive heat, and damp or wet areas. RECOMMENDED MINIMUM WIRE GAUGE FOR EXTENSION CORDS* (115 VOLT) NAMEPLATE AMPERES...
-
Page 12: Specifications
SPECIFICATIONS Electrical Requirements 115V/60 Hz Current 7.5A Power 1/2 HP Pumping Capacity 1600 GPH Max. Inlet & Outlet Size GHT3/4 Pump Lift Capacity 120 Feet Max. UNPACKING When unpacking, check to make sure that the item is intact and undamaged. If any parts are missing or broken, please call Harbor Freight Tools at the number shown on the cover of this manual as soon as possible. -
Page 13: Instructions For Putting Into Use
LIST OF CONTENTS Description Portable Utility Pump Filter Carbon Brush Brass Adapter Instruction Manual INSTRUCTIONS FOR PUTTING INTO USE Read the ENTIRE IMPORTANT SAFETY INFORMATION section at the beginning of this manual, including all text under subheadings therein before set up or use of this product. TO PREVENT SERIOUS INJURY FROM ACCIDENTAL OPERATION: Turn the Power Switch of the tool to its "OFF"... - Page 14 ASSEMBLY 1.Inlet and outlet hoses (not included) must be attached to the pump prior to use. 2.Attach inlet and outlet hoses to Hose Fittings (3) on Pup Facing (2). Standard garden hose fitting will work. 3 Attach the Accessory Basket Filter included with the pump to the inlet end of the inlet hose.
-
Page 15: Tool Set Up
TOOL SET UP TO PREVENT SERIOUS INJURY FROM ACCIDENTAL OPERATION: Turn the Power Switch of the tool to its "OFF" position and unplug the tool from its electrical outlet before performing any inspection, maintenance, or cleaning procedures- 1.This pump operates immediately when plugged in. Do not plug in this pump when dry. -
Page 16: Maintenance And Servicing
3 Place the basket filter end of the inlet hose in the water to be pumped. 4.Rout the outlet hose so that pumped water will run off appropriately. 5.Remove Priming Plug (4) by turning counterclockwise. Fill the pump with clean water. Replace Priming Plug by turning it clockwise. 6.Plug in Power Cord (22). -
Page 17: Cleaning, Maintenance, And Lubrication
TO PREVENT SERIOUS INJURY FROM TOOL FAILURE: Do not use damaged equipment. If abnormal noise or vibration occurs, have the problem corrected before further use. CLEANING, MAINTENANCE, AND LUBRICATION 1.BEFORE EACH USE. Inspect the general condition of the tool. Check for loose screws, misalignment or binding of moving parts, cracked or broken parts, damaged electrical wiring, and any other condition that may affect its safe operation. -
Page 18: Troubleshooting
Note: New carbon brushes tend to spark when first used until they wear and conform to the motor's armature. If the supply cord of this power tool is damaged, it must be replaced only by a qualified service technician. Troubleshooting Problem Possible Causes Likely Solutions... -
Page 19: Please Read The Following Carefully
PLEASE READ THE FOLLOWING CAREFULLY THE MANUFACTURER AND/OR DISTRIBUTOR HAS PROVIDED THE PARTS LIST AND ASSEMBLY DIAGRAM IN THIS MANUAL AS A REFERENCE TOOL ONLY. NEITHER THE MANUFACTURER NOR DISTRIBUTOR MAKES ANY REPRESENTATION OR WARRANTY OF ANY KIND TO THE BUYER THAT HE OR SHE IS QUALIFIED TO MAKE ANY REPAIRS TO THE PRODUCT OR THAT HE OR SHE IS QUALIFIED TO REPLACE ANY PARTS OF THE PRODUCT. -
Page 20: Assembly Diagram
ASSEMBLY DIAGRAM List of Explosion Plans Number Spare Parts List foot set vortex chamber copper joints bolt of seal O-ring impeller ceramics seal orifice plate rubber ring bearing... - Page 21 rotor bearing bearing ring screws spring washer Sta tor pump body brush cap brush body brush screws waterproof switch spring washer screws power cable & plug cable pressure plate checker screws row box screws spring washer toothed washer...
- Page 22 *There are any minor changes to the numbers included in the user manual without prior notice. Manufacturer: Ningbo Rising Mechanical & Electric Co., Ltd. Add.: No.16 Huapu Road, QiJiashan, Beilun Zone, Ningbo City, Zhejiang, 315800, P.R. China.
- Page 23 Support and E-Warranty Certificate https://www.vevor.com/support...
Need help?
Do you have a question about the Q1CZ-800C1 and is the answer not in the manual?
Questions and answers
vevor pump q1cz-8000c1 impeller replacement where to buy and how much