Table of Contents
Advertisement
Available languages
Available languages
Quick Links
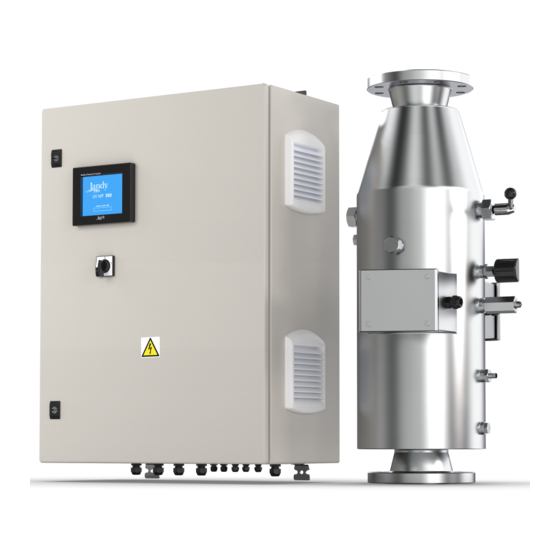
UV Medium Pressure
Models JUVMP120, JUVMP200, JUVMP320, JUVMP700)
FOR YOUR SAFETY – This product must be installed and serviced by a contractor who is licensed and qualified in pool equipment by the jurisdiction in which the product will be installed
where such state or local requirements exist. The maintainer must be a professional with sufficient experience in pool equipment installation and maintenance so that all of the instructions
in this manual can be followed exactly. Before installing this product, read and follow all warning notices and instructions that accompany this product. Failure to follow warning notices
and instructions may result in property damage, personal injury, or death. Improper installation and/or operation may void the warranty.
Improper installation and/or operation can create unwanted electrical hazard which may cause serious injury, property damage, or death.
ATTENTION INSTALLER – This manual contains important information about the installation, operation and safe use of this product. This information should be given
to the owner/operator of this equipment.
Installation and Operation Manual
Manuel d'installation et d'utilisation
Manual de instalación y operación
WARNING
Advertisement
Chapters
Table of Contents

Related Manuals for Jandy JUVMP120


Summary of Contents for Jandy JUVMP120
- Page 1 Manual de instalación y operación UV Medium Pressure Models JUVMP120, JUVMP200, JUVMP320, JUVMP700) WARNING FOR YOUR SAFETY – This product must be installed and serviced by a contractor who is licensed and qualified in pool equipment by the jurisdiction in which the product will be installed where such state or local requirements exist.
-
Page 2: Table Of Contents
ENGLISH Jandy UV Medium Pressure | Installation & Operation Manual ® Table of Contents Section 1. Important Safety Instructions ..3 4.2 Language Selection........17 4.3 Date / Time Configuration ......17 1.1 Safety Instructions ......... 3 4.4 System Initialization ........18 Section 2. -
Page 3: Section 1. Important Safety Instructions
For indoor use only. This unit is not intended for outdoor use. Prior to the installation or replacement of any system component make sure it has been previously disconnected from the mains, and there is no water flow through it. Use only spare parts supplied by Jandy. WARNING Never remove the lock nut of the quartz sleeve when the water is recirculating through the UV reactor as it could be expelled and causing damage. -
Page 4: Section 2. General Description
(algae , bacteria, viruses, fungi, yeasts, etc.) further • Unlike the previous range, Jandy UV MP systems minimizing the risks of handling and dosing of manage two parameters when setting the lamp potentially hazardous chemicals. -
Page 5: Product Specifications
Jandy UV Medium Pressure | Installation & Operation Manual ENGLISH ® Product Specifications JUVMP120 JUVMP200 JUVMP320 JUVMP700 110 gpm 175 gpm 310 gpm 600 gpm Flow (UVT 94%) 25.0 m 39.7 m 70.4 m 136.2 m Material Control panel Metallic, polyester-epoxy resin coating RAL 7035 / IP-54... - Page 6 ENGLISH Jandy UV Medium Pressure | Installation & Operation Manual ® Dimensions JUVMP 120-320 models JUVMP 700 model inch 23.6 31.5 11.8 33.0 11.0 18.7 17.7 inch 23.6 31.5 11.8 40.0 16.0 17.6 18.7 1017 Page 6...
-
Page 7: Product Contents
Observe flow direction indications located on the UV chamber. The reactor of the Jandy UV MP systems is made of AISI 316 L stainless steel within which the UV lamp is housed. The system should always be installed after... - Page 8 It is highly recommended to install the Jandy UV MP no water flow through it. Use only spare parts supplied by Jandy. system in a place of the pipe that can be easily...
-
Page 9: Control Panel Installation
Figure 2. Recommended Installation — Vertical Control Panel Installation Both the power of the Jandy UV MP system control panel and the interconnection of the UV lamp and the • Always install the control panel of the Jandy UV sensors must be made at the terminal block at the MP system vertically and on a rigid surface (wall), base inside the control panel. -
Page 10: Control Panel: Field Wiring Diagram
ENGLISH Jandy UV Medium Pressure | Installation & Operation Manual ® Control Panel: Field Wiring Diagram T. block Control panel input Cable Wire description GROUND POWER 240 VAC / 50-60 Hz / 1-phase PHASE NEUTRAL UV REACTOR BONDING GROUND LP-035/1... -
Page 11: Bonding And Grounding
Connect to the bonding point located on the power center and UV reactor to a common bonding point. Do not use the Jandy equipment as the common bonding point. Each piece of non-related pool equipment requiring a ground should also be bonded to the common, approved bonding point. -
Page 12: Uv Lamp Connection
ENGLISH Jandy UV Medium Pressure | Installation & Operation Manual ® IMPORTANT Model 240 V / 1-phase JUV-MP 120 3 x AWG 16 (3 x 1.50 mm We strongly recommend to interlock the UV system with the recirculation pump contactor through one of its NO auxiliary contacts. -
Page 13: Si5004 Flow Sensor Installation
Jandy UV Medium Pressure | Installation & Operation Manual ENGLISH ® Should also connect the ground wire to the TWO * on the end flanges of the bonding lugs marked UV chamber suitable for No. 8 AWG (US) and No. 6 AWG (Canada), and secure to the chamber by paint breaking washer and nut. -
Page 14: Tm4411 Temperature Sensor Installation
3.10 JUVMPAUTO Electric Wiper Driver (Optional) Installation Jandy UV MP systems may be equipped with automatic cleaning system of the quartz sleeve, have a rotary electric driver that activates the wiper mechanism at programmable time intervals in the control panel of the unit. -
Page 15: 3.11 Controls And Indicators
UV reactor. The Jandy UV MP treatment systems are equipped with a touchscreen located on the front of the control Connect the system using the main switch on panel, which includes an advanced software that the front side of the control panel. -
Page 16: Section 4. Operation
ENGLISH Jandy UV Medium Pressure | Installation & Operation Manual ® Section 4. Operation System Main Screen The first screen that appears when you boot the system shows the system model and a bar with the evolution of the firmware load and its version number. -
Page 17: Language Selection
From now on, all displays appear in the selected language “English”. To return to the application The Jandy UV MP system comes factory set to main screen, press “To Run mode” button. English. If you want to work in a different language... -
Page 18: System Initialization
The other screen settings are set at factory default and should not be than 113°F (45°C), the system modified without the supervision of an authorized Jandy technician. disconnects the UV lamp and the indication of “Temperature” of the screen will flash. -
Page 19: Uv Lamp(S) Power Circuit(S) Diagnostics
Jandy UV Medium Pressure | Installation & Operation Manual ENGLISH ® CONTROL PANEL OVERHEATING: The control panel is designed to work always at internal ° ° temperatures below 113 F (45 If for any reason (excessive external temperature, failure of internal cooling fan, etc.) the temperature... -
Page 20: System Event Log
ENGLISH Jandy UV Medium Pressure | Installation & Operation Manual ® Heatsink Temperature Reset Ballast State Ballast Air Temperature Lamp Electrical Parameters Lamp Error Anomalous Input Voltage Lamp Rated Power Lamp Ignitions Hardware Error Reignition Failure After 5 Minutes Fan Failure... - Page 21 Flow Cell Internal Diameter Activation of Flow-Proportional Radiation Control The configuration screen allows to modify the Unlike most systems in the market, Jandy UV MP diameter of the flow cell. Unless it was necessary systems use two parameters when setting the lamp...
-
Page 22: Section 5. Maintenance
Use only spare parts supplied Wiper Driver Frequency by Jandy. In order to modify this parameter, click on the current value. A floating keyboard where you must enter the... - Page 23 Jandy UV Medium Pressure | Installation & Operation Manual ENGLISH ® • When combined chlorine levels in the pool are Pressing the navigation key at the top right abnormally high. of the screen, you will access to the “Lamp Reset” screen. In the case of multiple-lamp...
-
Page 24: Chemical Cleaning / Replacement Of The Quartz Sleeve
ENGLISH Jandy UV Medium Pressure | Installation & Operation Manual ® Chemical Cleaning / Replacement of Insert the sleeve into the first disc of the cleaning device until it reaches the second the Quartz Sleeve cleaning disc. Frequency: 10. Move the mechanism to the other end of the •... -
Page 25: Verification Of The Control Panel Fan
Jandy UV Medium Pressure | Installation & Operation Manual ENGLISH ® If it appears that the sensor quartz window is Clean and replace if necessary, the fiber filters fully transparent, place it again in its housing inside. as described below. If it is necessary to clean Mount again the grid in its position. -
Page 26: Section 6. Troubleshooting
Check that it is properly connected to a 240 V-60 Hz supply in the pool’s electrical control panel. The unit does not turn on. Check breakers inside the control panel are engaged. If issues persist, contact Jandy Technical Support at 1-800-822-7933. Section 7. Exploded Views and Replacement Kits Page 26... - Page 27 Jandy UV Medium Pressure | Installation & Operation Manual ENGLISH ® Page 27...
- Page 28 CPU Module R0982500 HMI Screen Zodiac Pool Systems LLC 2882 Whiptail Loop # 100 Carlsbad, CA 92010, USA Jandy.com | 1.800.822.7933 Zodiac Pool Systems Canada, Inc. 2-3365 Mainway Burlington, ON L7M 1A6, Canada Jandy.ca | 1.800.822.7933 ® ©2022 Zodiac Pool Systems LLC. All rights reserved. ZODIAC is a registered trademark of Zodiac International, S.A.S.U., used under license.
- Page 29 Manual de instalación y operación Pression moyenne UV Modèles JUVMP120, JUVMP200, JUVMP320, JUVMP700) AVERTISSEMENT POUR VOTRE SÉCURITÉ : ce produit doit être installé et entretenu par un entrepreneur qualifié en équipements de piscine disposant d’un permis délivré par la juridiction dans laquelle le produit est installé...
- Page 30 Français Pression moyenne UV Jandy | Manuel d’installation et d’utilisation ® Table des matières Section 1. Consignes de sécurité 4.2 Choix de langue ..........45 importantes ........31 4.3 Configuration date/heure .........45 1.1 Consignes générales de sécurité .....31 4.4 Initialisation du système ........46 4.5 Gestion des alarmes ........46...
-
Page 31: Consignes De Sécurité Importantes
Avant l'installation ou le remplacement de tout composant du système s’assurer qu'il a été préalablement déconnecté de l'alimentation électrique principale et qu'il n'y a pas d’écoulement d'eau à travers celui-ci. Utiliser uniquement les pièces de rechange fournies par Jandy. AVERTISSEMENT Ne retirez jamais le contre-écrou du manchon en quartz lorsque l'eau recircule dans le réacteur UV, car elle pourrait être expulsée et causer des dommages. -
Page 32: Description Générale
Si le débit à traiter est inférieur à la valeur nominale, le rayonnement Le système de traitement Jandy UV MP, en plus de nécessaire le sera également, de sorte que les maintenir un certain niveau de chlore dans l'eau de systèmes réduiront la puissance de sortie de la... -
Page 33: Spécifications Du Produit
Pression moyenne UV Jandy | Manuel d’installation et d’utilisation Français ® Spécifications du produit JUVMP120 JUVMP200 JUVMP320 JUVMP700 110 gal/min 175 gal/min 310 gal/min 600 gal/min Débit (UVT 94 %) 25 m 39,7 m 70,4 m 136,2 m Matériel Panneau de Revêtement en résine polyester-époxy métallique RAL 7035/ IP-54... - Page 34 Français Pression moyenne UV Jandy | Manuel d’installation et d’utilisation ® Dimensions Modèles JUVMP 120-320 Modèle JUVMP 700 pouce 23,6 31,5 11,8 33,0 11,0 18,7 17,7 pouce 23,6 31,5 11,8 40,0 16,0 17,6 18,7 1017 Page 34...
-
Page 35: Contenu Du Produit
Observer les indications de sens du débit situées sur la chambre UV. Le réacteur des systèmes Jandy UV MP est en acier inoxydable AISI 316 L dans lequel est logée la lampe UV. - Page 36 Il est fortement recommandé d'installer le système principale et qu'il n'y a pas d’écoulement d'eau à travers celui-ci. Utiliser Jandy UV MP dans un endroit de la canalisation qui uniquement les pièces de rechange fournies par Jandy. peut être facilement isolé du reste de l'installation La mise à...
-
Page 37: Installation Du Panneau De Commande
Installation recommandée — Verticale Installation du panneau de commande L'alimentation du panneau de commande du système Jandy UV MP et l'interconnexion de la lampe UV et des • Toujours installer le panneau de commande du capteurs doivent être réalisées au niveau du bornier système Jandy UV MP verticalement et sur une... -
Page 38: Panneau De Commande : Schéma De Câblage Sur Le Terrain
Français Pression moyenne UV Jandy | Manuel d’installation et d’utilisation ® Panneau de commande : Schéma de câblage sur le terrain Bloc T. Entrée panneau de commande Câble Description du câble TERRE ALIMENTATION 240 V c.a. / 50-60 Hz / PHASE monophasé... -
Page 39: Liaison Et Mise À La Terre
Brancher le point de mise à la masse situé sur le centre d’alimentation et le réacteur UV à un point de liaison électrique commun. Ne pas utiliser l’équipement Jandy comme point de mise à la masse commun. Chaque appareil de la piscine qui n’est pas relié et qui requiert une mise à la terre devra être relié au point de liaison électrique commun dans le respect des normes locales. -
Page 40: Connexion De La Lampe Uv
Français Pression moyenne UV Jandy | Manuel d’installation et d’utilisation ® IMPORTANT Modèle 240 V / monophasé JUV-MP 120 3 x AWG 16 (3 x 1,50 mm Il est fortement recommandé d'interverrouiller le système UV avec le contacteur de la pompe de recirculation par l'un de ses contacts... -
Page 41: Installation De Capteur De Débit Si5004
Pression moyenne UV Jandy | Manuel d’installation et d’utilisation Français ® Il faut aussi connecter le fil de terre aux DEUX cosses * sur les brides de mise à la masse marquée d'un d’extrémité de la chambre UV adaptées au n° 8 AWG (États-Unis) / n°... -
Page 42: Installation De La Sonde De Température De L'eau Tm4411
3.10 Installation de l’entraînement de balayage électrique JUVMPAUTO (en option) Les systèmes Jandy UV MP peuvent être équipés d'un système de nettoyage automatique du manchon en quartz, d'un entraînement électrique rotatif qui active le mécanisme de balayage à des intervalles de temps programmables dans le panneau de commande de l'unité. -
Page 43: 3.11 Commandes Et Indicateurs
Laisser recirculer l'eau au moins quelques minutes 3.11 Commandes et indicateurs pour évacuer l'air et les salissures qui pourraient Les systèmes de traitement Jandy UV MP sont équipés se trouver à l'intérieur du réacteur UV. d'un écran tactile situé à l'avant du panneau de Connecter le système à... -
Page 44: Fonctionnement
Français Pression moyenne UV Jandy | Manuel d’installation et d’utilisation ® Section 4. Fonctionnement Écran principal du système Le premier écran qui apparaît lorsqu’on démarre le système affiche le modèle du système et une barre avec l'évolution de la charge du micrologiciel et le numéro de sa version. -
Page 45: Choix De Langue
A partir de maintenant, tous les affichages apparaissent dans la langue sélectionnée « Anglais ». Pour revenir à Le système Jandy UV MP est par défaut en anglais. l'écran principal de l'application, appuyer sur le bouton Si vous souhaitez travailler dans une autre langue « To Run mode ». -
Page 46: Initialisation Du Système
Les autres paramètres de l'écran sont définis par défaut en usine et ne de température installé dans le doivent pas être modifiés sans la supervision d'un technicien Jandy agréé. réacteur UV détecte une température de l'eau supérieure à 113°F (45°C), le système déconnecte la lampe UV... -
Page 47: Diagnostics Du Ou Des Circuits D'alimentation De Lampe Uv
Pression moyenne UV Jandy | Manuel d’installation et d’utilisation Français ® SURCHAUFFE DU PANNEAU DE COMMANDE : Le panneau de commande est conçu pour fonctionner toujours à des températures internes inférieures à ° ° 113 F (45 C). Si pour une raison quelconque (température externe... -
Page 48: Journal Des Activités Du Système
Français Pression moyenne UV Jandy | Manuel d’installation et d’utilisation ® Température du dissipateur Réinitialisation État du ballast Température d’air du ballast Paramètres électriques de la lampe Erreur de la lampe Tensions d’entrée anormale Puissance nominale de la lampe Allumages de la lampe Erreur de quincaillerie Panne de rallumage après 5... - Page 49 Contrairement à la plupart des systèmes sur le marché, changer l'emplacement du capteur de débit de sa les systèmes Jandy UV MP utilisent deux paramètres position par défaut dans le réacteur UV à un autre lors du réglage de la puissance de la lampe, le point de l'installation, car les débits mesurés étaient en...
-
Page 50: Entretien
été préalablement déconnecté de l'alimentation électrique principale et qu'il n'y a pas d’écoulement d'eau à travers celui-ci. Utiliser uniquement les pièces de rechange fournies par Jandy. AVERTISSEMENT Ne pas manipuler la lampe UV tant qu'elle n'est pas complètement froide. - Page 51 Pression moyenne UV Jandy | Manuel d’installation et d’utilisation Français ® chaque fois que l'alarme de rayonnement du En appuyant sur la touche de navigation en haut système a été active et que le nettoyage avec le à droite de l'écran, vous accéderez à l'écran de dispositif manuel du réacteur na pas été...
-
Page 52: Nettoyage Chimique / Remplacement Du Manchon En Quartz
Français Pression moyenne UV Jandy | Manuel d’installation et d’utilisation ® Nettoyage chimique / Remplacement du 10. Déplacer le mécanisme à l'autre extrémité du réacteur, et pousser d'une main le manchon, en manchon en quartz guidant en permanence avec un doigt de l'autre Fréquence :... -
Page 53: Vérification Du Ventilateur Du Panneau De Commande
Pression moyenne UV Jandy | Manuel d’installation et d’utilisation Français ® S'il apparaît que la fenêtre en quartz du capteur Nettoyer et remplacer si nécessaire les filtres en est complètement transparente, la remettre dans fibre à l'intérieur. son logement comme décrit ci-dessous. S'il Remonter la grille dans sa position. -
Page 54: Dépannage
électrique de la piscine. L'appareil ne s'allume pas. Vérifier que les disjoncteurs à l’intérieur du panneau de commande sont engagés. Si les problèmes persistent, contacter le support technique de Jandy au 1-800-822-7933. Section 7. Vues éclatées et trousses de remplacement Page 54... - Page 55 Pression moyenne UV Jandy | Manuel d’installation et d’utilisation Français ® Page 55...
- Page 56 Nº 17 R0982500 Écran IHM Zodiac Pool Systems LLC 2882 Whiptail Loop # 100 Carlsbad, CA 92010, USA Jandy.com | 1.800.822.7933 Zodiac Pool Systems Canada, Inc. 2-3365 Mainway Burlington, ON L7M 1A6, Canada Jandy.ca | 1.800.822.7933 ® ©2022 Zodiac Pool Systems LLC. Tous droits réservés. ZODIAC est une marque déposée de Zodiac International,...
- Page 57 Manual de instalación y operación Presión media UV Modelos JUVMP120, JUVMP200, JUVMP320, JUVMP700 ADVERTENCIA PARA SU SEGURIDAD: La instalación y el servicio de este producto deben estar a cargo de un contratista cualificado y matriculado para trabajar con equipamientos para piscinas en la jurisdicción en la que se instalará...
- Page 58 ESPAÑOL Presión media UV Jandy | Manual de operación e instalación ® Contenido Sección 1. Instrucciones importantes de 4.2 Selección del idioma ........73 seguridad ...........59 4.3 Configuración de fecha/hora ......73 1.1 Instrucciones de seguridad ......59 4.4 Inicialización del sistema .........74 4.5 Gestión de alarmas ..........74...
-
Page 59: Sección 1. Instrucciones Importantes De Seguridad
Antes de la instalación o del reemplazo de cualquier componente del sistema, asegúrese de que se haya desconectado antes del suministro de energía principal y que no fluya agua a través de él. Utilice únicamente repuestos suministrados por Jandy. ADVERTENCIA Nunca extraiga la tuerca de bloqueo de la funda de cuarzo cuando haya agua recirculando a través del reactor UV, debido a que puede salir expulsado y... -
Page 60: Sección 2. Descripción General
(algas, bacterias, • A diferencia de la gama anterior, los sistemas Jandy virus, hongos, levaduras, etc.) y minimiza además los UV MP gestionan dos parámetros al configurar la riesgos de manipular y dosificar productos químicos... -
Page 61: Especificaciones Del Producto
Presión media UV Jandy | Manual de operación e instalación ESPAÑOL ® Especificaciones del producto JUVMP120 JUVMP200 JUVMP320 JUVMP700 110 gpm 175 gpm 310 gpm 600 gpm Flujo (UVT 94 %) 25,0 m 39,7 m 70,4 m 136,2 m Material Panel de control Metálico, recubrimiento con resina de poliéster-epoxi RAL 7035/IP-54:... - Page 62 ESPAÑOL Presión media UV Jandy | Manual de operación e instalación ® Dimensiones Modelos JUVMP 120-320 Modelo JUVMP 700 Pulgadas 23,6 31,5 11,8 33,0 11,0 18,7 17,7 Pulgadas 23,6 31,5 11,8 40,0 16,0 17,6 18,7 1017 Página 62...
-
Page 63: Contenido Del Producto
Observe las indicaciones de dirección de flujo ubicadas en la cámara UV. El reactor de los sistemas Jandy UV MP está hecho de acero inoxidable AISI 316 L, dentro del cual está... - Page 64 Se recomienda con énfasis la instalación del sistema repuestos suministrados por Jandy. Jandy UV MP en un lugar del tubo que pueda aislarse La conexión a tierra de la cámara UV debe llevarse a cabo en los dos fácilmente del resto de la instalación mediante dos terminales de conexión equipotencial marcados con...
-
Page 65: Instalación Del Panel De Control
Figura 2. Instalación recomendada — Vertical Instalación del panel de control Tanto la energía del panel de control del sistema Jandy UV MP como la interconexión de la lámpara UV y los • Siempre instale el panel de control del sistema... -
Page 66: Panel De Control: Diagrama De Cableado En Campo
ESPAÑOL Presión media UV Jandy | Manual de operación e instalación ® Panel de control: Diagrama de cableado en campo Bloque de Entrada del panel de control Cable Descripción de los cables bornes TIERRA ENERGÍA 240 VCA/50-60 Hz/monofásica FASE NEUTRO CONEXIÓN EQUIPOTENCIAL DEL... -
Page 67: Conexión Equipotencial Y Conexión A Tierra
Conecte al punto de conexión equipotencial ubicado en el centro de energía y reactor UV a un punto de conexión equipotencial común. No use el equipo Jandy como el punto de conexión equipotencial común. Cada equipo no relacionado con la piscina que requiera conexión a tierra también deberá conectarse equipotencialmente al punto de conexión equipotencial común aprobado. -
Page 68: Conexión De Las Lámparas Uv
ESPAÑOL Presión media UV Jandy | Manual de operación e instalación ® MPORTANTE Modelo 240 V/monofásico JUV-MP 120 3 x AWG 16 (3 x 1,50 mm Recomendamos con énfasis el interbloqueo del sistema UV con el contactor de la bomba de recirculación mediante uno de sus contactos... -
Page 69: Instalación Del Sensor De Flujo Si5004
Presión media UV Jandy | Manual de operación e instalación ESPAÑOL ® Debe conectarse también el cable de conexión a tierra a los DOS terminal de conexión equipotencial * en las bridas de los extremos de la marcados con cámara UV adecuados para n.º 8 AWG (EE. UU.) y n.º... -
Page 70: Instalación Del Sensor De Temperatura Tm4411
3.10 Instalación del accionador del limpiador instalación. eléctrico JUVMPAUTO (opcional) Los sistemas Jandy UV MP pueden estar equipados con un sistema de limpieza automática de la funda de cuarzo, con un accionador eléctrico rotativo que activa el mecanismo limpiador en intervalos de tiempo programables en el panel de control de la unidad. -
Page 71: 3.11 Controles E Indicadores
3.11 Controles e indicadores suciedad que pudieran estar dentro del reactor UV. Los sistemas de tratamiento Jandy UV MP están Conecte el sistema con el interruptor principal del equipados con una pantalla táctil ubicada en el lado delantero del panel de control. -
Page 72: Sección 4. Operación
ESPAÑOL Presión media UV Jandy | Manual de operación e instalación ® Sección 4. Operación Pantalla principal del sistema La primera pantalla que aparece al arrancar el sistema indica el modelo del sistema y muestra una barra con la evolución de la carga del firmware y su número de versión. -
Page 73: Selección Del Idioma
A partir de ahora, todas las pantallas aparecen en el idioma de la selección “English” (Inglés). Para regresar El sistema Jandy UV MP viene configurado de fábrica a la pantalla principal de la aplicación, presione el en inglés. Si desea trabajar en otro idioma (francés, botón “To Run mode”... -
Page 74: Inicialización Del Sistema
ESPAÑOL Presión media UV Jandy | Manual de operación e instalación ® Inicialización del sistema FUNCIONAMIENTO: Presione esta tecla para encender la lámpara UV. ADVERTENCIA: Si la lámpara se desconecta de repente por cualquier motivo (detención, alarma, etc.), el sistema no iniciará la lámpara de inmediato, sino que llevará... -
Page 75: Diagnóstico De Los Circuitos De Energía De Las Lámparas Uv
Presión media UV Jandy | Manual de operación e instalación ESPAÑOL ® SOBRECALENTAMIENTO DEL PANEL DE CONTROL: El panel de control está diseñado para funcionar siempre a temperaturas ° internas por debajo de los 113 ° C). Si por cualquier motivo... -
Page 76: Registro De Eventos Del Sistema
ESPAÑOL Presión media UV Jandy | Manual de operación e instalación ® Temperatura del disipador Restablecer Estado del balasto Temperatura del aire del balasto Parámetros eléctricos de la lámpara Error de la lámpara Voltaje de entrada anómalo Potencia nominal de la lámpara Igniciones de la lámpara... - Page 77 A diferencia de la mayoría de los demás sistemas necesario modificar la ubicación del sensor de flujo a del mercado, los sistemas Jandy UV MP usan dos partir de su ubicación predeterminada en el reactor UV parámetros al configurar la potencia de la lámpara, a otro punto de la ubicación, debido a que los caudales...
-
Page 78: Sección 5. Mantenimiento
él. Utilice únicamente repuestos suministrados por Jandy. Frecuencia del accionador del limpiador Para modificar este parámetro, haga clic en el ADVERTENCIA valor actual. -
Page 79: Reemplazo De Las Lámparas Uv
Presión media UV Jandy | Manual de operación e instalación ESPAÑOL ® Reemplazo de las lámparas UV Para acceder a la pantalla “Configuration” (Configuración), presione el botón Frecuencia: “Diagnostics” (Diagnóstico). El sistema accede • El reemplazo de las lámparas UV debe llevarse a a las pantallas de diagnóstico del balasto... -
Page 80: Limpieza Química/Reemplazo De La Funda De Cuarzo
ESPAÑOL Presión media UV Jandy | Manual de operación e instalación ® Limpieza química/reemplazo de la Inserte la funda en el primer disco del dispositivo de limpieza hasta que alcance el segundo disco funda de cuarzo de limpieza. Frecuencia: 10. Mueva el mecanismo hacia el otro extremo •... -
Page 81: Verificación Del Ventilador Del Panel De Control
Presión media UV Jandy | Manual de operación e instalación ESPAÑOL ® Si la ventana de cuarzo del sensor aparenta estar Limpie, y reemplace si es necesario, los filtros de completamente transparente, vuelva a colocarla en fibra interiores. su alojamiento como se describe a continuación. -
Page 82: Sección 6. Resolución De Problemas
La unidad no se enciende. Verifique que los disyuntores dentro del panel de control estén acoplados. Si los problemas continúan, llame al soporte técnico de Jandy al 1-800-822-7933. Sección 7. Vistas ampliadas y kits de reemplazo Página 82... - Page 83 Presión media UV Jandy | Manual de operación e instalación ESPAÑOL ® Página 83...
- Page 84 Módulo de CPU R0982500 Pantalla de la HMI Zodiac Pool Systems LLC 2882 Whiptail Loop # 100 Carlsbad, CA 92010, EE. UU. Jandy.com | 1.800.822.7933 Zodiac Pool Systems Canada, Inc. 2-3365 Mainway Burlington, ON L7M 1A6, Canadá Jandy.ca | 1.800.822.7933 ZODIAC ©2022 Zodiac Pool Systems LLC.
Need help?
Do you have a question about the JUVMP120 and is the answer not in the manual?
Questions and answers