
Related Manuals for Njoy Astris 5K/3P2T2


Summary of Contents for Njoy Astris 5K/3P2T2
- Page 1 Astris 3Phase User Manual Manual de utilizare 319.9.23.0 Before using this product, carefully read all product documentation and retain it for future reference.
-
Page 2: Table Of Contents
Content Forward Symbol Conventions Safety 1.1 Symbols Used 1.2 Safety Precaution Product Introduction 2.1 Overview 2.2 Model Definition 2.3 Product Appearance Upack and Storage 3.1 Upack and Check 3.2 Storage Inverter 3.3 Identify Inverter Installation 4.1 Selecting the Mounting Location 4.2 Mounting Electrical Connection 5.1 Grounding... - Page 3 8.1 Troubleshooting 8.2 Maintenance...
-
Page 4: Forward
Forward Please read this manual before using the product. It is addressed to the following models: SIN320050002ATCU0B - Astris 5K /3P2T2 SIN320060002ATCU0B - Astris 6K /3P2T2 SIN320080002ATCU0B - Astris 8K /3P2T2 SIN320100002ATCU0B - Astris 10K /3P2T2 SIN320100003ATCU0B - Astris 10K /3P2T3 SIN320120003ATCU0B - Astris 12K /3P2T3 SIN320150003ATCU0B - Astris 15K /3P2T3 SIN320150004ATCU0B - Astris 15K /3P2T4... -
Page 5: Symbol Conventions
Target Group Inverters must be installed by professional electrical engineers who have obtained relevant qualifications. Symbol Conventions The following safety instructions and general information are used within this user manual. Symbol Description Indicates an imminently hazardous situation which, if not DANGER correctly followed, will result in serious injury or death. -
Page 6: Symbols Used
1.1 Symbols Used Symbol Description Danger of high voltage and electric shock! Only qualified personnel may perform work on the inverter. Danger of high voltage. Residual voltage in the inverter need 5 mins to discharge, wait 5 mins before operation. 5 mins Danger of hot surface Fire danger... - Page 7 • The temperature of some parts of the inverter may exceed 60° • during operation,do not touch the inverter during operation to avoid being burnt. • Ensure children are kept away from inverters. • Don’t open the front cover of the inverter. Apart from performing work at the wiring terminal, touching or changing components without authorization may cause injury to people, damage to inverters and annulment of the warranty ropriate measures to avoid...
-
Page 8: Product Introduction
Product Introduction 2.1 Overview The three-phase grid-tied PV inverter converts the DC generated by PV panels into three-phase alternating currentand is delivered to the grid. This series inverter is an important part of PV system and it is suitable for household use, commercial use, fishery use, agricultural use and other scenarios. -
Page 9: Product Appearance
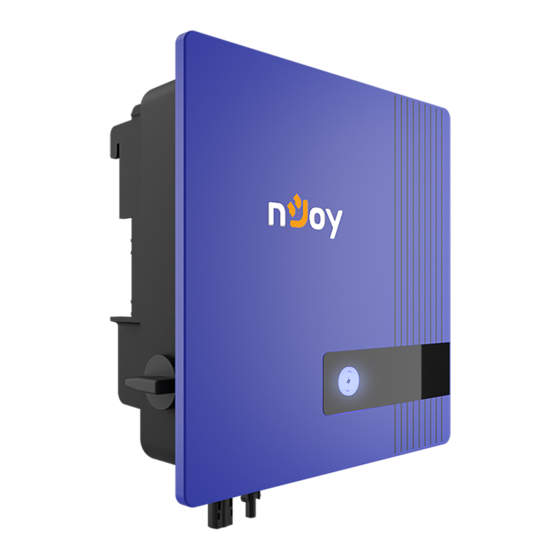
10K/3P2T2 10KTL-D3/G2 Grid-tied;second genneratio 3 Phase (3P) Output Power (10KW) 2.3 Product Appearance The following is only for reference, specific please in kind prevail 414.27mm 208.5mm 190.5mm 398mm (Only take natural cooling as an example in appearance) Natural cooling series Fan cooling series... - Page 10 Description Description DC Switch LED Indicators LCD Screen (Optional) External ground terminal Fan cooling series 2 Fan cooling series 1 Natural cooling series Description Description PV terminal RS485 communication port WiFi/GPRS/LAN model communication port (Optional) AC output port External fan (It is only suitable for Fan cooling series)
-
Page 11: Upack And Storage
Upack and Storage 3.1 Upack and Check Complete test and strict inspection shall be done before the inverter is sent out. When receiving the inverter, check that the packing materials are intact. After unpacking, examine the PV inverter and its fittings for damage and check that the deliverables are complete. -
Page 12: Storage Inverter
Inverter body label. The following is only for reference, specific please in kind prevail! Number Description Product name and model Product technical parameters SN Barcode 1234567891011 Approve and Safety identification Model Name: Part Number: Serial Number SN: nJoy 1234 ABCD 5min... -
Page 13: Installation
Installation After checking the outer packing, move the PV inverter to the designated installation position horizontally. CAUTION 1. Please place the inverter horizontally on the foam or other soft pads and ensure that the ports are free of load-bearing pressure to avoid inverter damages or scratches. - Page 14 4.1.2 Mounting Requirements Mount the inverter vertically or tilted backward by max 15°. In order to facilitate the heat dissipation of the inverter NOTICE The wrong installation mode causes the inverter to be damaged or unable to work properly.
- Page 15 4.1.3 Installation Space Requirements To ensure the operation of the inverter normally and easily, there are requirements on available spaces of theinverter, e.g. to keep enough clearance. Refer to the following figures.
- Page 16 Installation perspective schematic...
-
Page 17: Mounting
4.2 Mounting Step 1. Install the mounting bracket DANGER 1.The walls must fileproof non-flammable materials,othewise there is a fire risk. 2.Before drilling holes ,check whether there are electric power pipes buried in the walls to avoid risks. 1 ) Use a horizontally ruler to mark the position of the 3 holes on the wall. Refer to Step 1. - Page 18 Step 2. Install the inverter. Install the inverter on the bracket accurately and tighten the screws at both sides, as shown in Step 5 and Step 6. CAUTION To prevent damage of the inverter, please hang the inverter on the bracket and confirm the reverse,do not loosen the handle until the inverter is fixed...
-
Page 19: Electrical Connection
Electrical Connection System Connection 5.1 Grounding According to the EN50178 requirement, the right side of the device has a protective grounding connection. Be sure to connect the protection ground cable to this port when installing the inverter. The user can perform the ground connection according to the on-site condition... - Page 20 WARNING According to regulations,the secondary protection grounding can’t replace the PE terminal connection of the AC cable. Ensure that both are grounded reliably. Otherwise,fatal injury can occur due to the high voltage. CAUTION If the positive pole or negative pole of the PV array is required to be grounded, then the inverter output (to AC grid) must be isolated by transformer in accordance with IEC63109-1,-2 standards.
-
Page 21: Ac Connection
5.2 AC Connection 5.2.1 AC cable connection 1. Measure and access the voltage and frequency of the point to ensure that it meets the grid-tied specifications of the inverter. 2. PE wire(GND) must be well grounded to ensure that impedance between Neutral wire and Earth wire is less than 10Ω. - Page 22 -Multiple inverters are not allowed to share a circuit breaker. -Load is not allowed to connect between the inverter and the AC breaker. Inverter Model Recommended Value Astris 5K/3P2T2, Astris 6K/3P2T2, Astris 8K/3P2T2 Astris 10K/3P2T2, Astris 10K/3P2T3, Astris 12K/3P2T3 Astris 15K/3P2T3, Astris 15K/3P2T4, Astris 17K/3P2T4...
-
Page 23: Dc Connection
Internal current detection equipment for inverter, the inverter detects the leakage of the power grid that is greater than the reduced value, and will be disconnected quickly from the power grid. If the external installation leakage protection device is installed, Its action eletricity must be greater than equal to 300mA. - Page 24 NOTICE -The positive and negative terminals of PV modules can’t connect to PE wire(GND) , otherwise, the inverter will be damaged. -Ensure that the voltage of each PV string doesn’t exceed 1100V under any circumstances. -When the input voltage is 1000V to 1100V, the inverter will enter the standby state.
- Page 25 Open-circuit voltage altitude derating curve of the inverter as shown in the following figure Open-circuit voltage altitude derating curve of the inverter NOTE! To ensure that the inverter reaches the enclosure of IP65, it can only use the connector provided by supply.
-
Page 26: Communication Connection
5.3.2 PV Connection PV connection please refer to below. 5.4 Communication Connection 5.4.1 Communication Mode Description You can use the following communication modes to implement communication: Bluetooth, WIFI, GPRS and RS485 which are described as follows. • Bluetooth Module You can turn on the Bluetooth function of the mobile phone, and set parameters and monitor data of the inverter through the mobile APP. - Page 27 Module Function description WIFI WIFI module implements communication with Cloud server through wire and wireless network to monitor PV inverter’s data status.For more details, refer to WIFI Product Application Manual. GPRS GPRS module implements communication with Cloud server through wire and wireless network to monitor PV inverter’s data status.For more details, refer to GPRS Product Application Manual RS485...
- Page 28 Install RS485 following this steps: Step1 Loosen screws and remove the cover plate. Step2 Wires making,threading and wiring. Step3 Insert the 6-Pin terminal into the RS485 communication port. Step4 Install the RS485 cover. Step5 RS485 communication address setting.
-
Page 30: Startup/Shutdown Procedure
Startup/Shutdown Procedure 6.1 Check before startup/shutdown Procedure Check follwing this steps after installtion Items The inverter is firmly installed There is enough heat dissipation space,no external objects or parts left on the inverter It is convenient for operation and maintenance. The wiring of the system is correct and firm Check whether the DC and AC connection are correct with a multimeter,and whether there is a short circuit, break, or wrong connection. -
Page 31: Shutdown Procedure
6.3 Shutdown Procedure It may be necessary to shut down the inverter sometimes during the daily use. If necessary, please follow the procedures:... -
Page 32: User Interface
WARNING After the inverter is powered off, the heat sink generates heat and there is excess electricity in the inverter. To aovid electric shocks and burns, powered off inverter for at least five minutes before performing operations. User Interface Inverter display panel is consist of LED icon and LCD(Optional). - Page 33 LED status Descriptions Blue led blink Standby or startup state slowly 1s/time (not connected to the grid) Blue on Grid-tied status Green on Power limited status Red led blink slowly 1s/time Output side fault Red led blink quikly 0.25s/time Iutput side fault Red led on System internal fault Red/Green/Blue light alternately...
- Page 34 When external communications is normal and time zone is set correctly, the built-in clock of inverter will be synchronized with server’s time. Without external communications, it is recommended to use the mobile app to set up time through connecting bluetooth to the inverter. Icon stands for PV strings,when inverter is standby status, MPPT voltage of the PV string will be displayed in Meter zone.
- Page 35 Warning table Status Details Warning code Grid over voltage Grid under voltage Grid absent blink Grid over frequency slowly Grid under frequency Grid abnormal Grid high average voltage PV over voltage PV Insulation resistance abnormal blink Leakage current abnormal quickly PV Strings abnormal PV under voltage Control power abnormal...
-
Page 36: Troubleshooting And Maintenance
Boost abnormal Red on Master Lost Meter lost Fan abnormal (standby) Blue blink Remote off Blue on Fan abnormal (normal status) NOTE! If you select a machine with a LCD screen,the warning code will be displayed on the LCD screen.Non-lcd screen models need to enter the app to view the corresponding warning code. - Page 37 NOTICE -Comply with ESD protection specifications and power distribution ESD bracelets. - Avoid unnecessary contact with the circuit board. -Touching printed circuit boards or other electrostatic sensitive components may cause damage during the process. 8.1 Troubleshooting If the inverter is break down, the LED indicator will turn to red. Alarm Measures Recommended Information...
- Page 38 1.If the alarm occurs accidentally, possibly the power grid is abnormal accidentally. No extra action is needed. 2. If the alarm occurs repeatedly, contact the local power station. After receiving approval of the local power bureau, revise the electrical protection parameters setting on the inverter through APP.
- Page 39 1.If the alarm occurs accidentally, the inverter can generate power, which may cause the power grid to cause the inverter to automatically recover. No extra B2-Leakage action is needed. current 2.If the alarm occurs frequently, and is accompanied by an insulation impedance abnormal alarm.
- Page 40 1. If the alarm occurs occasionally, pls. restart the inverter. 2. If it occurs repeatedly or cannot be recovered for a long time, check whether C8-Fan the external fan is blocked by foreign objects. Otherwise, contact customer abnormal service. C9-Unbalance Dclink voltage CA-Dc-link over voltage...
- Page 41 8.2 Maintenance Routine Maintenance of inverter Check Item Check Content Maintain Maintenance content Interval Inverter output Statistically maintain the Weekly status status of electrical yield, and remotely monitor its abnormal status. Inverter appearance Check periodically and Clean periodically Yearly ensure that the heat sink the heat sink is free from dust and blockage.
- Page 42 Disposal of Old Electrical & Electronic Equipment (Applicable in the European Union and other European countries with separate collection systems) This symbol on the product or on its packaging indicates that this product shall not be treated as household waste. Instead it shall be handed over to the applicable collection point for the recycling of electrical and electronic equipment.
- Page 43 Cuprins Introducere Simboluri de siguranta Masuri de siguranta 1.1 Simboluri utilizate 1.2 Precautii de siguranta Prezentare produs 2.1 Notiuni generale 2.2 Descrierea modelului de invertor 2.3 Infatisare produs Inspectare continut si depozitare 3.1 Inspectie 3.2 Depozitarea invertorului 3.3 Identificarea modelului de invertor Instalare 4.1 Selectarea locatiei de instalare 4.2 Instalare...
- Page 44 8.1 Depanare 8.2 Mentenanta...
-
Page 45: Introducere
Introducere Va rugam sa parcurgeti manualul inainte de a instala si opera invertorul. Se adreseaza urmatoarelor modele : SIN320050002ATCU0B - Astris 5K /3P2T2 SIN320060002ATCU0B - Astris 6K /3P2T2 SIN320080002ATCU0B - Astris 8K /3P2T2 SIN320100002ATCU0B - Astris 10K /3P2T2 SIN320100003ATCU0B - Astris 10K /3P2T3 SIN320120003ATCU0B - Astris 12K /3P2T3 SIN320120004ATCU0B - Astris 12K /3P2T4 SIN320150003ATCU0B - Astris 15K /3P2T3... -
Page 46: Simboluri De Siguranta
Simboluri de siguranta Simbolurile utilizate in acest manual evidentiaza riscurile potentiale si informatiile care asigura siguranta operatorului, si sunt prezentate dupa cum urmeaza: Symbol Description Indica situatii periculoase iminente care incorect executate pot PERICOL rezulta in raniri grave, chiar moartea Indica situatii potential periculoase care incorect executate pot AVERTISMENT rezulta in raniri grave, chiar moartea... -
Page 47: Simboluri Utilizate
1.1 Simboluri utilizate Simbol Descriere Pericol de electrocutare! Doar personalul autorizat are acess la aceasta unitate! Tensiuni inalte. Pericol! Tensiunea reziduala se mentine inca 5 minute dupa oprire. Nu executati lucrari decat dupa aceste 5 5 mins minute. Suprafata foarte fierbinte Pericol de foc Perioada de utilizare in siguranta Indica o referinta catre documentatia de operare... - Page 48 60°C in timpul functionarii. Pentru a evita arsuri grave nu atingeti invertorul. • Asigurati-va ca este restrictionat accesul copiilor la invertor. • Nu deschideti carcasa invertorului. In afara interventiilor la terminale nu este permisa schimbarea componentelor interne fara autorizarea lucrarii. Aceste schimbari pot produce pagube, raniri si anularea garantiei.
-
Page 49: Prezentare Produs
Prezentare produs 2.1 Notiuni generale Invertorul hibrid Invertoarele On-Grid trifazice convertesc tensiunea continua generata de panourile solare in tensiune alternativa, punand-o atat la dispozitia retelei electrice cat si la cea a echipamentelor conectate la acestea. Aceste invertoare sunt o parte componenta importanta a sistemului fotovoltaic si se pot utiliza atat in medii rezidentiale cat si in cele comerciale. -
Page 50: Infatisare Produs
10K/3P2T2 10KTL-D3/G2 Grid-tied;second genneratio 3P - Trifazic Double MPPT;Three phase 10K - puterea invertorului Power(10KW) 2.3 Infatisare produs Urmatoarele schite sunt folosite doar ca exemplu: 414.27mm 208.5mm 190.5mm 398mm Ca exemplu ne referim doar la modelele (Only take natural cooling as an example in appearance) cu racire prin convectie naturala Natural cooling series Serie cu racire pasiva... - Page 51 Numar Descriere Intrerupator DC Indicatori LED Ecran LCD (optional) Terminal de impamantare Seria cu racire pasiva Seria 1 racire cu ventilator Seria 2 racire cu ventilator Fan cooling series 1 Fan cooling series 2 Natural cooling series Numar Descriere Terminal conectori panouri PV Port de comunicare RS485 Port de comunicare (optional) WiFi/GPRS/LAN...
-
Page 52: Inspectare Continut Si Depozitare
Inspectare continut si depozitare 3.1 Inspectie La primirea invertorului, verificati ca ambalajul sa fie intact. Dupa inlaturarea ambalajului, verificati ca toate componentele sa fie in intacte si complete, in concordanta cu lista de livrabile din comanda. Notatie Description livrabil Cantitate litera Invertor Brachetii de montare C 1... -
Page 53: Depozitarea Invertorului
Abtibildul de pe invertor contine informatiile urmatoare (informatiile sunt folosite ca exemplu). Numar Descriere Nume produs si serie model Parametrii tehnici Cod de bare Serial Number 1234567891011 Simboluri de siguranta Model Name: Part Number: Serial Number SN: nJoy 1234 ABCD 5min... -
Page 54: Instalare
Instalare After checking the outer packing, move the PV inverter to the designated installation position horizontally. AVERTISMENT 1. Va rugam asezati invertorul pe bucati de polistiren expandat sau alte materiale moi pentru a nu pune presiune pe porturile de conectare din partea inferioara si a le deteriora. 2. - Page 55 functionarii. h. Inaltimea la care se instaleaza invertorul trebuie sa fie rezonabila pentru a se executa usor lucrari de mentenanta sau observa display-ul. i. Etichetele cu avertismentele de siguranta trebuie sa fie usor de citit si dupa instalare. j. Evitati instalarea in bataia directa a soarelui, ploii sau zapezii. nu in bataia directa a nu in bataia directa a ploii fara acumulare de zapada...
- Page 56 Instalat Spre spate la un Instalat invers Instalat orizontal drept unghi ≤ 15° 4.1.3 Cerinte pentru spatiul de instalare Un spatiu de ventilare adecvat trebuie avut in vedere la momentul instalarii. Montarea invertorului trebuie sa se faca in pozitie verticala si asigurati-va ca niciun obiect nu obstructioneaza radiatorul, si implicit racirea corespunzatoare.
- Page 57 Installation perspective schematic...
-
Page 58: Instalare
4.2 Instalare Pasul 1. Instalatii bracketii de suport PERICOL 1. Peretele pe care se va efectua instalarea trebuie sa fie rezistent la foc, fara materiale inflamabile pentru a nu exista risc de incendiu. 2. Inainte de a efectua gauri pentru montare, va rugam sa va asigurati ca nu atingeti tevi de apa sau cabluri electrice. - Page 59 Fixati brachetii, suruburi M6; 2-2.5 Nm Surub de fixare complet (M6, 3 bucati). Instalati diblurile pe perete. Pasul 2. Instalati invertorul Instalati invertorul pe bracheti si strangeti suruburile de pe ambele parti cum este ilustrat in pasul 5 si 6. ATENTIONARE Pentru a preveni deterioarea invertorului, nu slabiti stabilitatea lui inainte de a va asigura ca este perfect fixat in brachetii de pe...
-
Page 60: Conexiunile Electrice
Conexiunile electrice Conectarea sistemului PERICOL Inainte de orice operatiune electrica, asigurati-va ca ambele intrari/iesiri AC si DC sunt oprite. In caz contrar se va genera un soc electric extrem de periculos. 5.1 Impamantarea In conformitate cu cerintele EN50178, in partea dreapta a echipamentului se afla conexiunea la impamantare, Asigurati-va ca va fi cablu de impamantare conectat la acest port in timpul instalarii invertorului. - Page 61 Pasul.2 Introduceti firele expuse ale cablului in clama terminalului OT si strangeti-le utilizand clesti hidraulici, cum este prezentat in schema de mai jos. Pasul 3. Indepartati suruburile de la punctele de impamantare, cum este prezentat in schema de mai jos. Obiect Remarca Surub...
-
Page 62: Conexiunea Ac
5.2 Conexiunea AC 5.2.1 Conectarea cablului AC 1. Masurati tensiunea si frecventa in acest punct pentru a va asigura ca ele corespund cu specificatiile invertorului. 2. Firul PE (GND) se va izola foarte bine pentru a asigura o impedanta mai mica de 10Ω... - Page 63 - Nu se vor conecta mai multe invertoare la acelasi intrerupator. - Nu se vor conecta consumatori pe circuit intre invertor si intrerupatorul AC. Invertor Valoare recomandata Astris 5K/3P2T2, Astris 6K/3P2T2, Astris 8K/3P2T2 Astris 10K/3P2T2, Astris 10K/3P2T3, Astris 12K/3P2T3 Astris 15K/3P2T3, Astris 15K/3P2T4, Astris 17K/3P2T4...
-
Page 64: Dc Connection
Invertorul are o protectie proprie pentru scurgerea de curent din retea, iar in cazul in care aceasta se declanseaza invertorul se va deconecta de la reteaua publica. In acest sens, daca se va instala o protectie aditionala, externa, pentru scurgere de curent, este necesar ca aceasta sa se declanseze la o valoarea mai mare sau egala cu 300mA. - Page 65 Notificare - Terminalele +/- ale panourilor nu se conecteaza la firul PE (GND), in caz contrar invertorul va fi avariat. - Asigurati-va ca tensiunea totala a fiecarui sir nu depaseste 1100V sub nicio circumstanta. - Cand tensiunea de intrare este intre 1000V si 1100V, invertorul va intra in stand-by.
- Page 66 Curba de descrestere a tensiunii in circuit deschis corelata cu cresterea altitudinii este prezentata in schema urmatoare: Open-circuit voltage altitude derating curve of the inverter NOTIFICARE! Pentru a va asigura ca invertorul este conform cu standardul IP65, se poate utiliza doar conectorul livrat de producator.
-
Page 67: Conectarea Cablurilor De Comunicatie
5.3.2 Conexiunea PV Pentru conexiunea PV utilizati schema de mai jos. Bucla de delimitare Conector pozitiv Diametru 5-8mm Conector negativ Utilizand unealta de sertizat. Bucla de delimitare nu poate fi prinsa. Strangeti capacele rezistente la apa a fiecarui Testati tensiunea si confirmati conector utilizand o cheie pentru a evita Asigurati-va ca intrerupatorul DC este oprit. - Page 68 Modul Descriere functionalitate Module Function description WIFI Acest mod se implementeaza prin Cloud si modul wireless al invertorului pentru a monitoriza statusul. Pentru mai multe detalii va rugam sa consultati manualul de utilizare al aplicatiei WI-FI. GPRS Acest mod se implementeaza prin Cloud si modul wireless al invertorului pentru a monitoriza statusul.
- Page 69 Instalati RS485 urmarind pasii: 1. Slabiti suruburile si indepartati capacul. 2. Conectati firele. 3. Inserati terminalul cu 6-pini in portul de comunicare RS485. 4. Atasati capacul RS485. 5. Setati adresa de comunicare RS485. Dezizolati cablul ca-n figura alaturata si treceti-l prin capacul de protectie.
- Page 70 1. Descarcati aplicatia prin urmatoarele proceduri: Scanati codul QR de pe invertor. Descarcati aplicatia din Appstore sau Google Play. Nota: Aplicatia va avea nevoie de permisiune pentru a accesa locatia invertorului. Puteti face acest lucru la instalare sau mai tarziu din setarile telefonului. 2.
-
Page 71: Procedura De Pornire / Oprire
Procedura de pornire / oprire 6.1 Inainte de procedura urmati acesti pasi: Inainte de procedura urmati acesti pasi: Numar Obiect Invertorul este instalat corect Este suficient spatiu pentru disiparea caldurii; niciun obiect nu este lasat pe sau in interiorul invertorului. Este instalat intr-un mod care asigura functionarea si mentenanta facila Cablarea este corecta si rezistenta Verificati corectitudinea conexiunilor DC si AC cu un multimetru si identificarea unui... -
Page 72: Procedura De Inchidere
Intrerupator DC Comutati-l pe ON Icoana LED Albastru aprins (functionare normala) 6.3 Procedura de inchidere Poate fi necesara inchiderea invertorului uneori in timpul zilei. Daca se impune, urmati procedura: Intrerupator principal de alimentare Daca exista Comutati-l pe OFF (figura este doar de referinta) Intrerupator circuit AC Comutati-l pe OFF (figura este doar de referinta) -
Page 73: Interfata Cu Utilizatorul
Intrerupator DC Comutati-l pe OFF (figura este doar de referinta) Asteptati cel putin 5 minute. Lasati invertorul sa se raceasca complet AVERTISMENT Dupa inchiderea invertorului, radiatoarele vor genera caldura si va exista electricitate in invertor. Pentru a evita socurile electrice sau arsurile grave, nu executati nicio lucrare la invertor cel putin 5 minute dupa inchidere. - Page 74 Status LED Descriere Albastru clipeste incet 1 data / s Standby sau pornire (nu este conectat la retea) Albastru pornit Conectat la retea Verde pornit Status putere limitata Rosu clipeste incet 1 data / s Eroare la iesire Rosu clipeste rapid 4 ori / s Eroare la intrare Rosu aprins Eroare interna...
- Page 75 Cand comunicatia functioneaza iar fusul orar este corect, ceasul intern va fi sincronizat cu ora serverului. In lipsa comunicatiei, este necesara folosirea aplicatiei mobile conectata prin Bluetooth la invertor. Icoana descrie panourile solare, cand invertorul este in starea Standby, tensiunea MPPT ale panourilor va fi afisata in zona Meter. Icoana descrie reteaua/grid, cand tensiunea si frecventa in grid sunt normale, icoana sta aprinsa iar in caz contrar clipeste;...
- Page 76 Tabel cu avertismente Stare Detalii Cod avertisment Grid supratensiune Grid sub tensiune Fara grid LED rosu Grid supra frecventa clipeste incet Grid sub frecventa Grid atipic Grid tensiune medie mare PV supratensiune PV rezistenta la izolare atipica blink Scurgere curent atipic quickly Panouri PV atipic PV sub tensiune...
-
Page 77: Depanare Si Mentenanta
Boost atipic LED rosu aprins Master pierdut Meter pierdut Ventilator atipic (standby) LED albastru clipeste Remote off LED albastru aprins Fan atipic (status normal) NOTA! In cazul in care aveti un invertor cu ecran LCD aceste coduri vor fi afisate pe ecran, in caz contrar codurile de avertizare vor fi afisate in aplicatia mobila. - Page 78 NOTIFICARE Intrati in conformitate cu specificatiile de protectie ESD si distributia de energie ESD bracelets. Evitati contactul inutil cu placa de circuite. Atingerea oricarei placi de circuite sau a componentelor sensibile la incarcarile electrostatice vor cauza daune. 8.1 Depanare Daca invertorul prezinta erori, indicatorul LED se va face rosu. Informatie Masuri recomandate alarma...
- Page 79 1. Daca alarma se declanseaza ocazional, e posibil ca reteaua sa fi fost temporar afectata si nu este necesara nicio actiune. 2. Daca alarma se declanseaza in mod repeteat, contactati furnizorul local de energie pentru a cere aprobare de a face schimbari la parametrii de protectie setati.
- Page 80 1. Daca alarma se declanseaza ocazional, e posibil ca reteaua sa fi fost temporar B2-Scurgere afectata si nu este necesara nicio actiune. anormala de 2. Daca alarma se declanseaza frecvent si este acompaniata de alarma de curent izolatie slaba, verificati izolatia. 3.
- Page 81 1. Daca alarma se declanseaza ocazional, reporniti invertorul. C8 - ventilator 2. Daca alarma se declanseaza frecvent sau pe perioade lungi de timp defect ventilatorul exterior este blocat. Daca nu este cazul, Contactati Suportul Tehnic. C9- tensiunea DC-link dezechilibrata supratensiune dc-link 1 CB-eroare la comunicarea...
- Page 82 8.2 Mentenanta Mentenanta periodica a invertorului Obiect de verificat Detalii de verificat Actiune Interval Stare iesire invertor Monitorizati cantitatea Saptamanal generata periodic si alarmele aparute Infatisare invertor Verificati ca radiatorul sa Curatati radiatorul Anual nu fie plin de praf Stare functionare a.
- Page 83 Dezafectarea echipamentelor electrice si electronice vechi (Se aplica pentru ţarile membre ale Uniunii Europene si pentru alte tari europene cu sisteme de colectare separata) Acest simbol aplicat pe produs sau pe ambalajul acestuia indica faptul ca acest produs nu trebuie tratat ca pe un deseu menajer. El trebuie predat punctelor de reciclare a echipamentelor electrice si electronice.
Need help?
Do you have a question about the Astris 5K/3P2T2 and is the answer not in the manual?
Questions and answers