Table of Contents
Advertisement
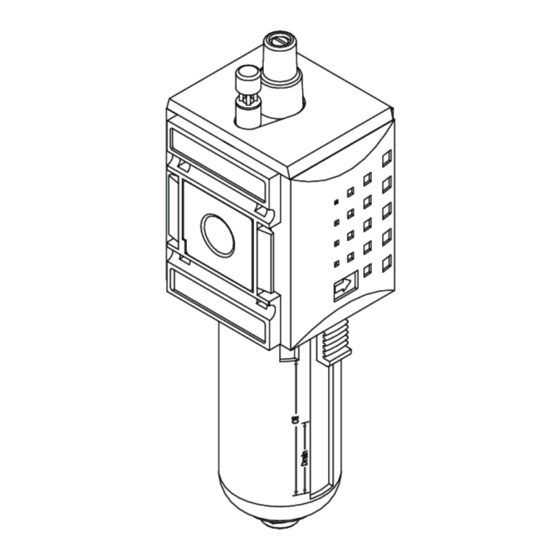
MINI-REG, MIDI-REG, MAXI-REG
Printed Matter No. 9839 1513 01
Publication Date 2019-03-27
Valid from Serial No. A148
MINI-REG-1/4-BSP
MINI-REG-1/4-NPT
MIDI-REG-1/2-BSP
MIDI-REG-1/2-NPT
MAXI-REG-3/4-BSP
MAXI-REG-3/4-NPT
MAXI-REG-1-BSP
MAXI-REG-1-NPT
Read all safety warnings and instructions
Failure to follow the safety warnings and instructions may result in
electric shock, fire and/or serious injury.
Save all warnings and instructions for future reference
4221000139
4221000140
4221000141
4221000142
4221000143
4221000144
4221000145
4221000146
WARNING
Air Filter - Regulator - Lubricator
Product Instructions
Advertisement
Table of Contents

Summary of Contents for Atlas Copco MINI-REG-1/4-BSP
- Page 1 MINI-REG, MIDI-REG, MAXI-REG Printed Matter No. 9839 1513 01 Air Filter - Regulator - Lubricator Publication Date 2019-03-27 Valid from Serial No. A148 Product Instructions MINI-REG-1/4-BSP 4221000139 MINI-REG-1/4-NPT 4221000140 MIDI-REG-1/2-BSP 4221000141 MIDI-REG-1/2-NPT 4221000142 MAXI-REG-3/4-BSP 4221000143 MAXI-REG-3/4-NPT 4221000144 MAXI-REG-1-BSP 4221000145 MAXI-REG-1-NPT...
-
Page 2: Table Of Contents
Locking the pressure regulator valve........... 10 Shutting off the pressure .............. 11 Checking the system before start-up........... 11 Locking the ball valve ................ 12 Service ........................ 13 Maintenance instructions ................ 13 Cleaning the module................ 13 Recycling ....................... 14 Recycling instruction.................. 14 © Atlas Copco Industrial Technique AB - 9839 1513 01... -
Page 3: Product Information
■ Damage to parts that occurs as a result of inadequate maintenance or performed by parties other than Atlas Copco or their Certified Service Partners during the warranty period is not covered by the warranty. ■ To avoid damage or destruction of tool parts, service the tool according to the recommended mainte- nance schedules and follow the correct instructions. -
Page 4: Website
You can find information concerning our products, accessories, spare parts and published matters on our website. Safety Data Sheets MSDS/SDS The safety data sheets describes chemical products sold by Atlas Copco. For more information, consult the website: www.atlascopco.com/sds Country of origin Please refer to the information on the product label. -
Page 5: Installation
Outlet: 2 (OUT) Assembling the coupling kit If single modules are assembled into combinations, coupling kits must be used between the individual modules. To assemble a coupling kit: Insert the sealing ring. © Atlas Copco Industrial Technique AB - 9839 1513 01... -
Page 6: Mounting The Wall Bracket
Mounting the wall bracket To mount the wall bracket: Insert the sealing ring. Place the wall bracket onto the side of the module. Push on the coupling element from the front. © Atlas Copco Industrial Technique AB - 9839 1513 01... -
Page 7: Installing The Mounting Plate And Control Panel Nut
Tighten the control panel nut to a maximum tightening torque depending on the model, as follows: ■ MINI: 8 Nm (70.8 in.lbs) ■ MIDI: 10 Nm (88.5 in.lbs) ■ MAXI: 10 Nm (88.5 in.lbs) © Atlas Copco Industrial Technique AB - 9839 1513 01... -
Page 8: Mounting The Gauge
Turn the gauge into the gauge thread, using a size 14 open-end wrench. Turn until the seal has been completely screwed onto the thread. Align the manometer by turning it clockwise or counterclockwise up to ¾ of a turn. Maximum screw- ing-in torque: 8 Nm (71 in.lbs). © Atlas Copco Industrial Technique AB - 9839 1513 01... - Page 9 MINI-REG, MIDI-REG, MAXI-REG Installation © Atlas Copco Industrial Technique AB - 9839 1513 01...
-
Page 10: Operation
Press the cap down. Turn the upper wheel of the cap to the locked position. The safety hooks will extend. Hang a lock onto one of the hooks and close. © Atlas Copco Industrial Technique AB - 9839 1513 01... -
Page 11: Shutting Off The Pressure
The system is operating under pressure. Incorrect installation could damage the unit and cause seri- ous injury. Before start-up, check that all connections, ports, and modules have been correctly installed. ► Before start-up: © Atlas Copco Industrial Technique AB - 9839 1513 01... -
Page 12: Locking The Ball Valve
In models of type MIDI or MAXI: Pull out shut-off plate. In models of type MINI: Press the film hinge downwards. Attach the padlock. Up to three locks can be used. © Atlas Copco Industrial Technique AB - 9839 1513 01... -
Page 13: Service
Solvents and aggressive cleaning agents damage the polycarbonate container of the unit. Clean polycarbonate components only with a slightly damp cloth. ► Use only water and, if necessary, a mild cleaning agent without chemical additives. ► © Atlas Copco Industrial Technique AB - 9839 1513 01... -
Page 14: Recycling
When a product has served its purpose it has to be recycled properly. Dismantle the product and recycle the components in accordance with local legislation. Batteries shall be taken care of by your national battery recovery organization. © Atlas Copco Industrial Technique AB - 9839 1513 01... - Page 16 Original instructions Atlas Copco Industrial © Copyright 2019, Atlas Copco Industrial Technique AB. All rights reserved. Any Technique AB unauthorized use or copying of the contents or part thereof is prohibited. This SE-10523 STOCKHOLM applies in particular to trademarks, model denominations, part numbers and drawings.


Need help?
Do you have a question about the MINI-REG-1/4-BSP and is the answer not in the manual?
Questions and answers