
Related Manuals for Avigilon 8.0C-H6SL-DO1-IR


Summary of Contents for Avigilon 8.0C-H6SL-DO1-IR
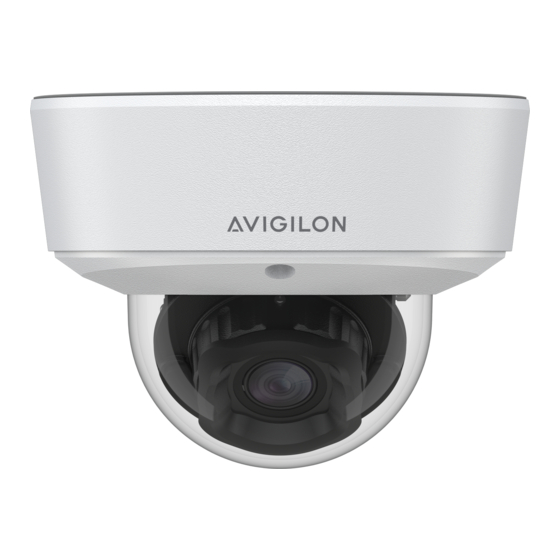
- Page 1 Avigilon H6SL Dome Camera Installation Guide 2.0C-H6SL-D1 2.0C-H6SL-D1-IR 2.0C-H6SL-DO1-IR 3.0C-H6SL-D1 3.0C-H6SL-D1-IR 3.0C-H6SL-DO1-IR 5.0C-H6SL-D1 5.0C-H6SL-D1-IR 5.0C-H6SL-DO1-IR 8.0C-H6SL-DO1-IR...
- Page 2 © 2023, Avigilon Corporation. All rights reserved. AVIGILON, the AVIGILON logo, AVIGILON CONTROL CENTER, and ACC are trademarks of Avigilon Corporation. ONVIF is a trademark of Onvif, Inc. Covered by one or more claims of the patents listed at patentlist.hevcadvance.com. Other names or logos mentioned herein may be the trademarks of their respective owners.
- Page 3 Important Safety Information This manual provides installation and operation information and precautions for the use of this device. Incorrect installation could cause an unexpected fault. Before installing this equipment read this manual carefully. Please provide this manual to the owner of the equipment for future reference. WARNING This Warning symbol indicates the presence of dangerous voltage within and outside the product enclosure that may result in a risk of electric shock, serious injury or death to persons if proper...
- Page 4 Do not use strong or abrasive detergents when cleaning the device body. Use only accessories recommended by Avigilon.
- Page 5 Consult the dealer or an experienced radio/TV technician for help. Changes or modifications made to this equipment not expressly approved by Avigilon Corporation or parties authorized by Avigilon Corporation could void the user’s authority to operate this equipment. To meet the requirements of the EN 50121-4 Railway Applications Standard, use an external power supply or POE injector that is also compliant with EN 50121-4.
- Page 6 For Korea Disposal and Recycling Information When this product has reached the end of its useful life, please dispose of it according to your local environmental laws and guidelines. European Union: This symbol means that according to local laws and regulations your product should be disposed of separately from household waste.
-
Page 7: Table Of Contents
Table of Contents Overview Camera Base Front View Camera Base Rear View Camera Base Bottom View Cover View, Surface Mount Mounting Adapter View, Surface Mount (Optional) Cover View, In-Ceiling Mount (Optional) Mounting Adapter View, In-Ceiling Mount (Optional) Cover View, Pendant Wall Mount (Optional) NPT Adapter View, Pendant Mount (Optional) Pendant Wall Mount View Pendant Wall Mount Bracket View... - Page 8 Installing the Camera Base to the Mounting Adapter Connecting to the Camera Initializing a Camera Username and Password (Optional) Using the USB Wi-Fi Adapter Assigning an IP Address Setting the IP Address Using the ARP/Ping Method Accessing the Live Video Stream Aiming the Dome Camera (Optional) Configuring microSD Card Storage (Optional) Installing the Microphone Accessory...
-
Page 9: Overview
Overview Camera Base Front View 1. IR Illuminator Provides scene illumination in the IR spectrum. Only available on IR models. 2. Ethernet port Accepts power and Ethernet connection to the network. Server communication and image data transmission also occur over this connection. 3. -
Page 10: Camera Base Rear View
Camera Base Rear View Displayed IR illuminators only available on -IR models. 1. Azimuth control Provides control of the image angle. 2. Microphone port Provides connection to the Microphone accessory (ACMICR-1001). Indoor models only. 3. I/O connector block Provides connections to external input/output and audio devices. 4. -
Page 11: Camera Base Bottom View
Camera Base Bottom View 1. Cable entry hole An entry hole for the cables required for camera operation. 2. Lanyard anchor The safety lanyard attaches to the anchor to prevent the camera from falling during installation. 3. Vent Vent to allow moisture vapor to escape the sealed housing and equalize pressure. Cover View, Surface Mount 1. -
Page 12: Mounting Adapter View, Surface Mount
Mounting Adapter View, Surface Mount 1. Lanyard Connects to the lanyard anchor on the camera base. 2. Camera housing clips Snaps to hold camera module during installation. 3. Cable entry hole An entry hole for the cables required for camera operation. 4. -
Page 13: (Optional) Mounting Adapter View, In-Ceiling Mount
1. In-ceiling mount adapter Used to mount the dome camera to a wall, ceiling or electrical box. 2. Dome cover Vandal resistant dome cover. 3. Tamper resistant screws Star-shaped captive screws to fix the dome cover to the mount adapter. (Optional) Mounting Adapter View, In-Ceiling Mount 1. -
Page 14: (Optional) Npt Adapter View, Pendant Mount
1. Pendant wall mount Used with the NPT adapter to mount the dome camera to a wall in pendant installations. 2. NPT adapter Used to mount the dome camera to NPT pipes. 3. Tamper resistant screws Star-shaped captive screws to fix the dome cover to the mount adapter. 4. -
Page 15: Pendant Wall Mount Bracket View
1. 1-1/2” NPS thread mount Female NPS thread mount for pendant camera installations. 2. Pendant wall mount screws Screws for securing the pendant wall mount to the mounting bracket. 3. NPT pipe entry hole A 3/4” NPT threaded hole for NPT pipe conduits. Pendant Wall Mount Bracket View 1. -
Page 16: Preparing The Installation
Preparing the Installation Pre-Deployment In-Box Configuration The camera comes equipped with an RJ45 configuration cable pre-installed for users that want to configure camera settings before installing the camera. The RJ45 connector on the configuration cable is accessible through the small flap on the side of the camera box for easy configuration before unpacking the camera. -
Page 17: Removing The Dome Cover
Removing the Dome Cover NOTE Be careful not to scratch or touch the dome bubble. The resulting marks or fingerprints may affect the overall image quality. Keep the protective covers on the outside of the dome bubble until the installation is complete. ... -
Page 18: Surface Mount Installation
No. 2 Phillips screwdriver — for attaching camera to an electrical box or mounting surface. Camera Package Contents Ensure the package contains the following: Avigilon H6SL Dome Camera (Indoor models) Mounting template sticker 4 screws and anchors for solid walls ... -
Page 19: Mounting The Dome Camera Using The Bottom Cable Entry
In-ceiling mounting adapter (SLSPCIL-1001). For more information, see In-Ceiling Mount Installation on page 24. Pendant NPT mounting adapter (H6SL-MT-NPTA1). For more information, see Pendant Mount Installation on page 29. Pendant wall mounting adapter (CM-MT-WALL1) — must be used with NPT mounting adapter. Mounting the Dome Camera Using the Bottom Cable Entry Perform the following steps if the required cables will be coming from inside the mounting surface and the camera will be mounted immediately over the cable hole. - Page 20 3. Slide the side cable cover off the mounting adapter. 4. Depending on the conduit used, make the required adjustments to the side cable entry hole: If you are using an interior conduit, install the side conduit cover on to the mounting adapter. Proceed to step 5.
-
Page 21: Mounting The Dome Camera To An Electrical Box
For a 3/4" conduit, remove the center knockout piece on the side conduit cover. Next, install the side conduit cover on to the mounting adapter. A 1/2" conduit will fit into the mounting adapter without a side conduit. 5. -
Page 22: Installing The Camera Base To The Mounting Adapter
1. Pull the required cables through the cable entry hole. 2. Use pan head screws to install the mounting adapter to the electrical box. Select the hole configuration that matches the electrical box shape: A — UK standard single gang box ... - Page 23 4. Crimp the Ethernet cable. Ensure that the orientation of the cable and grommet matches the one shown in the image. 5. Install the grommet into the cable entry hole on the camera base. Make sure the grommet is securely seated on the inside and outside of the cable entry hole. Apply silicone sealant to seal any gaps in the grommet.
-
Page 24: In-Ceiling Mount Installation
Appropriate tool for cutting the entry hole in the mounting surface Camera Package Contents Ensure the dome camera package contains the following: Avigilon H6SL Dome Camera (Indoor models) T20 Pin-In star-shaped driver Cable entry grommet ... - Page 25 NOTE The maximum supported ceiling thickness is 32 mm (1.25"). 1. Use the in-ceiling mounting template to cut an entry hole for the camera into the ceiling. 2. Insert the in-ceiling mounting adapter into the entry hole then pull the required cables through the adapter. Using the In-Ceiling Mounting Adapter...
- Page 26 3. Pull off the clamp retainer holding the clamps in place. 4. Push the orange clamp handles up so that the metal arms extend outside the mounting adapter. 5. With your thumb on the outside edge of the mounting adapter and your forefinger on one of the orange clamp handles, pinch the clamp down until the clamp is secured.
-
Page 27: Installing The Camera Base To The Mounting Adapter
6. Repeat the previous step on the other side. Make sure both clamps are level and horizontal. Installing the Camera Base to the Mounting Adapter After you install the mounting adapter, mount the camera base to the adapter. 1. Attach the lanyard on the mounting adapter to the anchor on the camera base. 2. - Page 28 4. Crimp the Ethernet cable. Ensure that the orientation of the cable and grommet matches the one shown in the image. 5. Install the grommet into the cable entry hole on the camera base. Make sure the grommet is securely seated on the inside and outside of the cable entry hole. Apply silicone sealant to seal any gaps in the grommet.
-
Page 29: Pendant Mount Installation
The NPT pipe (for pendant pipe mounted installations) and NPT-female to NPT-female adapter (for pendant pipe and wall mounted installations) are not supplied by Avigilon and should be sourced separately. However, if you are using the NPT adapter (H6SL-MT-NPTA1), the lock nut is included. -
Page 30: Installation Steps
1 1/2" NPT to 3/4" NPT adapter 3/4" NPT nut Wall mount gasket Installation Steps Complete the following sections to install the device. Mounting the Dome Camera to a Pipe If the dome camera needs to be installed to a pipe for a pendant installation, you can discard the surface mount adapter that is provided with the dome camera and use the NPT adapter. -
Page 31: (Optional) Mounting The Dome Camera To The Pendant Wall Mount
(Optional) Mounting the Dome Camera to the Pendant Wall Mount If the dome camera will be using the pendant wall mount, you will need to install the NPT adapter as well. 1. Determine where the cables will enter the pendant wall mount. ... - Page 32 5. Tighten the wall mount screws to secure the wall mount to the bracket. Use the T20 star-shaped key provided in the camera package. 6. If you are using the pipe entry hole, pull the cables through the pipe conduit then the wall mount. Next, apply thread seal tape to the pipe conduit and screw it into the pipe entry hole.
-
Page 33: Installing The Camera Base To The Mounting Adapter
Installing the Camera Base to the Mounting Adapter After you install the mounting adapter, mount the camera base to the adapter. 1. Attach the lanyard on the mounting adapter to the anchor on the camera base. 2. Pull the Ethernet cable through the cable entry hole on the camera base. 3. - Page 34 5. Install the grommet into the cable entry hole on the camera base. Make sure the grommet is securely seated on the inside and outside of the cable entry hole. Apply silicone sealant to seal any gaps in the grommet. 6.
-
Page 35: Connecting To The Camera
For more information, see the Avigilon Cloud Services User Guide. If you are connecting your Avigilon camera to a 3rd party VMS, you will need to set up the first user through the camera's Web Interface or Camera Configuration Tool before you connect to the 3rd party VMS. -
Page 36: Assigning An Ip Address
Device's web browser interface: http://<camera IP address>/. Network Video Management software application (for example, the Avigilon Unity Video software). ARP/Ping method. For more information, see Setting the IP Address Using the ARP/Ping Method on the next page. -
Page 37: Setting The Ip Address Using The Arp/Ping Method
The mobile web interface using the USB WiFi Adapter. For more information, see (Optional) Using the USB Wi-Fi Adapter on page 35. Web browser interface: http://< camera IP address>/. Network Video Management software application (for example, the Avigilon Unity Video software). Setting the IP Address Using the ARP/Ping Method... - Page 38 Accessing the Live Video Stream...
-
Page 39: Aiming The Dome Camera
3. Adjust the tilt angle of the camera as needed. Avigilon recommends that you adjust the tilt angle within the range indicated by the markings for best results. Tilting the camera past these markings is possible, but may result in infrared reflections and viewing angle occlusions beyond an acceptable level. -
Page 40: (Optional) Configuring Microsd Card Storage
5. Rotate the azimuth control ring to set the image to the correct angle. 6. In the camera web browser interface or the Avigilon Control Center software, adjust the camera’s Image and Display settings. (Optional) Configuring microSD Card Storage To use the camera's SD card storage feature, you must insert a microSD card into the card slot. -
Page 41: (Optional) Installing The Microphone Accessory
(Optional) Installing the Microphone Accessory NOTE If you have a Microphone accessory (ACMICR-1001), attach it to the camera's microphone port before installing attaching the dome. This accessory is only compatible with Indoor models and should NOT be installed with an external audio device. 1. -
Page 42: Installing The Dome Cover
Installing the Dome Cover NOTE Before installing the dome cover, we recommend that you first connect to the camera and adjust the aim, zoom, and focus so that the camera covers the required field of view. For more information, see: ... -
Page 43: Zooming And Focusing The Dome Camera
For more information, see the Camera Configuration Tool User Guide. If the camera is connected to the Avigilon Control Center system, you can use the client software to configure the camera. For more information, see the Avigilon Control Center Client User Guide. - Page 44 If the camera is connected to a third-party network management system, you can configure the camera's specialty features in the camera's web browser interface. For more information, see the Avigilon IP Camera Web Interface User Guide. Configuring the Camera...
-
Page 45: Connecting To External Devices
Connecting to External Devices External devices are connected to the camera through the power and I/O wires. For the locations of the I/O connector block, see Overview on page 9. The pinout for the I/O is shown in the following diagram. 1. -
Page 46: Connection Status Led Indicator
Video Server, or an ACC™ Server. The default connected setting can be changed to Off using the camera's web user interface. For more information see the Avigilon IP Camera Web Interface User Guide. Troubleshooting Network Connections and LED Behavior NOTE For any of the below LED behaviors, ensure that the camera is getting power and is using a good network cable before trying another solution. - Page 47 LED Behavior Suggested Solution described above revert button. Resetting through the camera's web interface will not produce the desired result. Troubleshooting Network Connections and LED Behavior...
-
Page 48: Removing The Dome Camera From The Mounting Adapter
Removing the Dome Camera from the Mounting Adapter 1. Loosen the star-shaped screws and remove the dome cover. 2. Locate the small arrows that point at the camera housing clips. 3. Push the camera housing clips outwards until the camera snaps out of place. 4. -
Page 49: Resetting To Factory Default Settings
Resetting to Factory Default Settings If the device no longer functions as expected, you can choose to reset the device to its factory default settings. Use the firmware revert button to reset the device. The firmware revert button is shown in the following diagram: 1. -
Page 50: For More Information
Avigilon Unity Video Client User Guide Avigilon Control Center Client User Guide Avigilon IP Camera Web Interface User Guide Camera Configuration Tool User Guide Designing a Site with Avigilon Video Analytics These guides are available on help.avigilon.com... -
Page 51: Limited Warranty And Technical Support
Limited Warranty and Technical Support Avigilon warranty terms for this product are provided at avigilon.com/warranty. Warranty service and technical support can be obtained by contacting Avigilon Technical Support: avigilon.com/contact. Limited Warranty and Technical Support...
Need help?
Do you have a question about the 8.0C-H6SL-DO1-IR and is the answer not in the manual?
Questions and answers