
Related Manuals for Nadoli DSR540048C-CL


Summary of Contents for Nadoli DSR540048C-CL
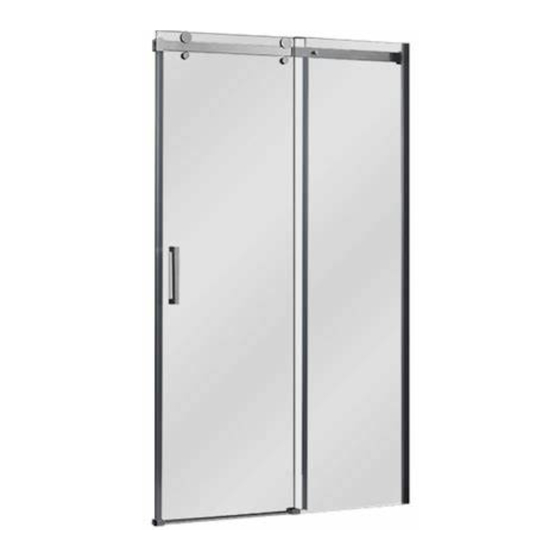
- Page 1 DSR540048C-CL 48" Sliding Linear Shower Door Dimension of shower door: (1227-1164) x 1981mm(H) / (48-5/16"~45-7/8") x 78"(H) Rail adjustment :-80mm/3-1/8" Rev.April 10,2018...
- Page 2 DSR540060C-CL 60" Sliding Linear Shower Door Dimension of shower door: (1532-1464) x 1981mm(H) / (60-5/16"~57-5/8") x 78"(H) Rail adjustment :-80mm/3-1/8"...
- Page 3 General Information * Informations générales Please inspect the product immediately upon receipt for transit damage,missing packs/parts or manufacturing fault.Damage reported later cannot be accepted.Please handle the product with care avoiding knocks and shock loading to all sides and edges of the glass * Prière de bien inspecter le produit dès la réception pour s’assurer qu’il n’a aucun défaut, bris ou pièces manquantes.
- Page 4 Assembly Drawing / Dessin d'assemblage [15] [14] [12] [13] [15] [14] [12] [24] [16] [20A] [ 19 ] [20] [21] [28] [22] [25A] [23] [20B] [27] [26] [10] [11] Item no.in exploded Description Description Q’TY Item no.in exploded Q’TY (numéro d'items (Quantité) (numéro d'items (Description)
- Page 5 Installation Steps: *Étapes d'installation: Step 1 / Étape 1 Roller holes Door handle holes Trous des roulettes Trous de poignée de porte Trim if necessary Trous de poignée de porte INTERIOR SHOWER SIDE INTÉRIEUR DE LA DOUCHE INTERIOR SHOWER SIDE TOP VIEW INTÉRIEUR DE LA DOUCHE...
- Page 6 Step 3 / Étape 3 INTERIOR SHOWER SIDE INTÉRIEUR DE LA DOUCHE Make sure your measurements are correct and that they match the base and door before you drill the holes Assurez-vous que vos mesures correspondent à celles de la base et de la porte avant de percer les trous Step 4 / Étape 4 THE HOLES ON THE SIDE OF THE...
- Page 7 Step 5 / Étape 5 INSTALL cut the rail according to the actual measurement couper le rail selon la mesure réelle Step 6 / Étape 6 3.0mm NFÉRIEUR...
- Page 8 Step 7 / Étape 7 COVER THE PLIERS’ TEETH BEFOREHAND TO AVOID SCRATCHING THE ALUMINUM PARTS RECOUVRIR LES DENTS DE LA PINCE AFIN DE NE PAS GRAFIGNER LES PIÈCES EN ALUMINIUM INTERIOR SHOWER SIDE INTÉRIEUR DE LA DOUCHE SECURE THE WALL JAMB AND FIXED PANEL WITH PLIERS SÉCURISER LE JAMBAGE ET ET PANNEAU FIXE AVEV PINCE...
- Page 9 cut the rail according to Step 9 / Étape 9 the actual measurement φ couper le rail selon la mesure réelle Wall *Mur Screw M4x35 *Vis M4x35 Fixed Panel *Panneau fixe Fixed Panel Step 10 / Étape 10 *Panneau fixe INTERIOR SHOWER SIDE INTÉRIEUR...
- Page 10 Step 11 / Étape 11 INSTALL THE DOOR PANEL INSTALLER LE PANNEAU DE PORTE SIDE VIEW VUE DU CÔTÉ INTERIOR SHOWER SIDE INTÉRIEUR DE LA DOUCHE INTERIOR SHOWER SIDE INTÉRIEUR DE LA DOUCHE Step 12 / Étape 12 LEVEL THE DOOR PANEL AND ADJUST THE ROLLERS IF NECESSARY NIVELER LE PANNEAU DE PORTE AJUSTER LES ROULETTES SI NÉCESSAIRE Level the door panel by rotating the eccentric nut to raise or lower the roller.
- Page 11 Step 13 / Étape 13 INTERIOR SHOWER SIDE INTÉRIEUR DE LA DOUCHE Do not forget the gaskets Ne pas oublier les joints Step 14 / Étape 14 INTERIOR SHOWER SIDE INTÉRIEUR DE LA DOUCHE TOP VIEW VUE DU HAUT...
- Page 12 Step 15 / Étape 15 Size for reference only La grandeur est inscrite pour référence seulement. INTERIOR SHOWER SIDE INTÉRIEUR 3.0mm DE LA DOUCHE Step 16 / Étape 16 60" shower base: Cut off drip rail *Base de douche 60" : coupez du rail d'égoutment 48"...
- Page 13 Step 17 / Étape 17 24 hours *24 heures Allow 24 hours for silicone to dry before use. *Attendez 24 heures pour que le silicone soit sec avant utilisation.
- Page 14 Shower Base Installation Manual Base de douche Manuel d'installation BS-RT513260W3 3-1/2˝(90mm) 2-1/2˝(65mm)
- Page 15 IMPORTANT / IMPORTANT 1.Read this manual carefully and completely before proceeding. * Lisez attentivement ce manuel au complet avant de continuer. 2.It is recommended that you wear safety glasses at all times during the installation * Il est recommandé de porter des lunettes de sécurité en tout temps lors de l'installation 3.Prior to installation of base, all framing and plumbing work must be completed in accordance with this instruction sheet.For renovation work, existing shower surfaces must be removed to accommodate framing requirements.
- Page 16 INSTALLATION BASE / BASE INSTALLATION Enlever la péllicule de plastique protectrice Remove protective plastic film SUITE / CONTINUED 90° 90°...
- Page 17 SUITE / CONTINUED SUITE / CONTINUED FORET 1/8" 1 8 DRILL BIT...
- Page 18 SUITE / CONTINUED Mortar FLOOR/PLANCHER Base / Base Pellicule / Film Mor?er / Mortar FLOOR/PLANCHER SUITE / CONTINUED IMPORTANT VUE SECTIONNELLE / SIDE SECTION VIEW...
- Page 19 SUITE / CONTINUED 20~30mm ATTENTION ! Attendre 24h avant d'installer votre porte de douche, afin de permettre au mortier et à la finition de sécher complètement. WARNING ! Wait 24h before proceeding with the installa-tion of the shower door. This will ensure that the finish and mortar Céramiques Tiles...
-
Page 20: Garantie Limitée
À qui la garantie s’applique-t-elle? NADOLI offre une garantie limitée de 10 ans sur les bases et portes de douche, à partir de la date d’achat, au premier acheteur, tant et aussi longtemps qu’il réside la propriété. La garantie est destinée à un usage résidentiel et/ou domestique. -
Page 21: Limited Warranty
To whom does this warranty apply? NADOLI offers a 10-year limited warranty on shower bases and doors from the date of purchase, exclusive to the first buyer as long as he/she resides in the same property. The warranty is intended for residential and/or domestic use.
Need help?
Do you have a question about the DSR540048C-CL and is the answer not in the manual?
Questions and answers