
Related Manuals for Nadoli DS623648C-CL


Summary of Contents for Nadoli DS623648C-CL
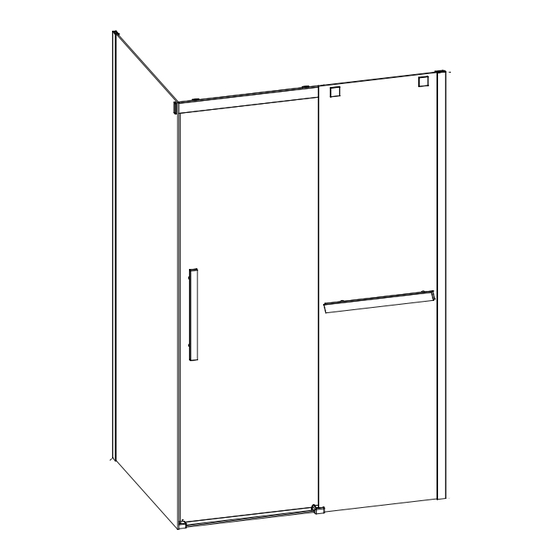
- Page 1 DS623648C-CL 36" x 48" Rectangular Sliding Shower Door Dimension of shower door: (875~900) x (1164~1189) x 1900mm(H) / (34-7/16"~35-7/16" )x (45-7/8"~46-7/8") x 75"(H) Profile adjustment: +25mm/1" Rev.April 12,2018...
- Page 3 Assembly Drawing / Dessin D'assemblage Item no.in exploded Item no.in exploded Description drawing picture Description drawing picture (Numéro d'items dans (Description) (Description) (Quantité) (Quantité) (Numéro d'items dans la vue exposée) la vue exposée) Glass fixing pieces caps Return Panel / Panneau De Retour / Pièces pour fix couvercle Wall Plugs / Cheville Water Deflector / Déflecteur d'eau...
- Page 4 Installation Steps / Étapes d'installation: Step 1 / Étape 1 MARK THE PLACEMENT OF WALL JAMB / MARQUER L’EMPLACEMENT DU JAMBAGE DO NOT INSTALL THE BOTTOM GUIDE IN THIS STEP NE PAS INSTALLER LE GUIDE INFÉRIEUR SIDE VIEW / VUE LATÉRALE TOP VIEW VUE DU HAUT Step 2 / Étape 2...
- Page 5 Step 3 / Étape 3 MARK THE LOCATION OF THE WALL JAMB HOLES ON THE WALL MARQUER L’EMPLACEMENT DES TROUS DU JAMBAGE SUR LE MUR INTERIOR SHOWER SIDE INTÉRIEUR DE LA DOUCHE Step 4 / Étape 4 DRILL , SILICONE AND INSTALL WALL PLUGS ON THE WALL PERCER, CALFEUTRER ET INSTALLER LES CHEVILLES SUR LE MUR INTERIOR SHOWER SIDE...
- Page 6 Step 5 / Étape 5 MARK THE LOCATION OF THE WALL JAMB HOLES ON THE WALL MARQUER L’EMPLACEMENT DES TROUS DU JAMBAGE SUR LE MUR INSTALL THE WALL JAMB / INSTALLER LE JAMBAGE INTERIOR SHOWER SIDE INTÉRIEUR DE LA DOUCHE Step 6 / Étape 6 INSTALL FIXED PANEL &...
- Page 7 Step 7 / Étape 7 INSTALL THE BOTTOM DOOR GASKET & DOOR HANDLE & WHEELS / INSTALLER LE JOINT INFÉRIEUR POUR LA PORTE & POIGNÉE DE PORTE/ROULETTES INTERIOR SHOWER SIDE INTÉRIEUR DE LA DOUCHE INTERIOR SHOWER SIDE INTÉRIEUR DE LA DOUCHE INTERIOR SHOWER SIDE INTÉRIEUR...
- Page 8 Step 8 / Étape 8 PLACE DOOR INSIDE THE SHOWER PLACER LA PORTE À L’INTÉRIEUR DE LA DOUCHE PLACE THE DOOR ON A TOWEL TO PREVENT SCRATCHING THE SHOWER BASE PLACER LA PORTE SUR UNE SERVIETTE POUR ÉVITER DE RAYER LA BASE DE DOUCHE Step 9 / Étape 9 INSTALL THE RUNNING RAIL ONTO THE FIXED PANEL &...
- Page 9 Step 10 / Étape 10 SECURE THE BOTTOM GUIDE INSTALLER LE GUIDE INFÉRIEUR Step 11 / Étape 11 LEVEL AND SECURE THE EXPANDERS AND WALL JAMBS /NIVELER ET SÉCURISER LES EXTENSEURS ET JAMBAGES REMOVE THE PLIERS AFTER SECURING EXPANDERS RETIRER LES PINCES ÉTAUX APRÈS AVOIR SÉCURISÉ...
- Page 10 Step 12 / Étape 12 INSTALL THE DOOR PANEL INSTALLER LE PANNEAU DE PORT INTERIOR SHOWER SIDE INTÉRIEUR DE LA DOUCHE INTERIOR SHOWER SIDE INTÉRIEUR DE LA DOUCHE SIDE VIEW VUE LATÉRAL Step 13 / Étape 13 INSTALL SIDE GASKET FOR THE DOOR PANEL AND FIXED PANEL / INSTALLER LES JOINT LATÉRAUX POUR LA PORTE ET LE PANNEAU FIXE TOP VIEW INTERIOR...
- Page 11 Step 14/ Étape 14 LEVEL TO ADJUST THE DOOR PANEL / NIVELER POUR ADJUSTER LE PANNEAU DE PORTE ADJUST INTERIOR AJUSTER SHOWER SIDE INTÉRIEUR DE LA DOUCHE SIDE VIEW VUE LATÉRAL Step 15 / Étape 15 INSTALL End Block (L/R) / INSTALLER Bloc d'estrémité...
- Page 12 Step 16 / Étape 16 INSTALL TOWEL BAR / INSTALLER BARRE A SERVIETTES Step 17 / Étape 17 SEAL THE SHOWER UNIT / CALFEUTRER LA DOUCHE 24 hours *24 Heures *Attendez 24 heures pour que le silicone soit sec avant utilisation.
- Page 13 Shower Base Installation Manual Base de douche Manuel d'installation BS-RT3648R (2LIPS) This indentation is designed to ensure the water goes back to the shower base, towards the drain. Cette fente est conçue pour permettre à l'eau de retourner vers l'intérieur de la base de douche, vers le drain. 3-5/16˝(85mm) 2-5/16˝(60mm)
- Page 14 IMPORTANT / IMPORTANT 1.Read this manual carefully and completely before proceeding. * Lisez attentivement ce manuel au complet avant de continuer. 2.It is recommended that you wear safety glasses at all times during the installation * Il est recommandé de porter des lunettes de sécurité en tout temps lors de l'installation 3.Prior to installation of base, all framing and plumbing work must be completed in accordance with this instruction sheet.For renovation work, existing shower surfaces must be removed to accommodate framing requirements.
- Page 15 INSTALLATION BASE / BASE INSTALLATION Enlever la péllicule de plastique protectrice Remove protective plastic film SUITE / CONTINUED 90° 90°...
- Page 16 SUITE / CONTINUED SUITE / CONTINUED FORET 1/8" 1 8 DRILL BIT...
- Page 17 SUITE / CONTINUED Mortar FLOOR/PLANCHER Base / Base Pellicule / Film Mor?er / Mortar FLOOR/PLANCHER SUITE / CONTINUED IMPORTANT VUE SECTIONNELLE / SIDE SECTION VIEW...
- Page 18 SUITE / CONTINUED 20~30mm ATTENTION ! Attendre 24h avant d'installer votre porte de douche, afin de permettre au mortier et à la finition de sécher complètement. WARNING ! Wait 24h before proceeding with the installa-tion of the shower door. This will ensure that the finish and mortar Céramiques Tiles...
-
Page 19: Garantie
GARANTIE Votre base de douche Bain Dépôt est garantie contre tout défauts de fabrication à partir de la date de la livraison. Cette garantie de un (1) an couvre la structure de fibre de verre ( 1 an ) et la finition d’acrylique ( 1 an ). Cette garantie s’adresse seulement au propriétaire original. -
Page 20: Warranty
WARRANTY Your Bath Depot shower base is guaranteed against any manufacturing defect from the date of delivery. This guarantee covers the fiberglass structure for a duration of one (1) year, the acrylic finish for one (1) year. This guarantee applies to the original owner. It covers parts for the first year. This guarantee does not cover travel expenses or installation fees, nor does it cover desinstallation fees of transportation.
Need help?
Do you have a question about the DS623648C-CL and is the answer not in the manual?
Questions and answers