
Related Manuals for Leitner FORD SUPER DUTY 2017-UP


Summary of Contents for Leitner FORD SUPER DUTY 2017-UP
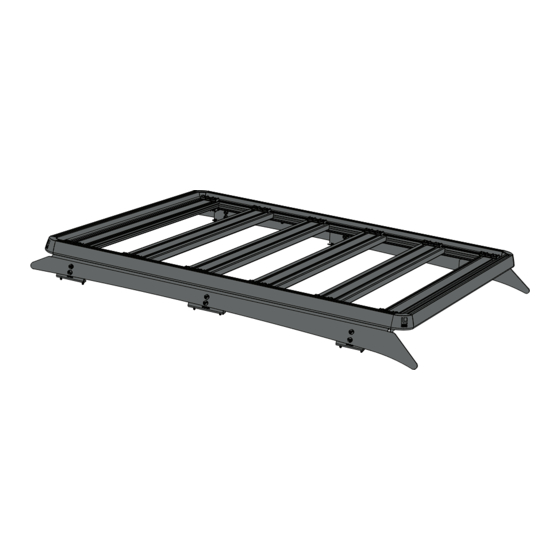
- Page 1 FORD SUPER DUTY 2017-UP LEITNERDESIGNS.COM | SALES@LEITNERDESIGNS.COM | 949-395-3049 V1 | Page 1...
-
Page 2: Assembly / Installation Instructions
ASSEMBLY / INSTALLATION INSTRUCTIONS: roof PART NUMBERS: 00-FF25017-1626 TOOLS REQUIRED INSTALLATION TIME • Torque wrench 2-3 Hours • T30 Torx bit socket Basic knowledge of hand tools required • T40 Torx bit socket SKILL LEVEL • 13mm wrench • 7MM WRENCH OR SOCKET •... -
Page 3: Assembly Overview
▼ READ BEFORE INSTALLING ACS ROOF ▼ 1. Don’t over-tighten bolts. All 8mm bolts = (16ft-lb) All 6mm bolts = 2ft-lb) 2. Lay down a large area of carpet or blankets as a work area to avoid scratching parts during assembly. 3. - Page 4 ▼ ACS ROOF hardware ▼ M5 X 16 single t-nut m8 x 14 1523-M8 X 20 m8 locknut m8 t-bolt M6 X 12 traklok nut (x12) -(x32)- -(x35)- (x22] (x8) (x10) (x8] (x3) Clamp Plate -(x16]- V1 | Page 4...
- Page 5 PREP: clamp plate • Install two M8 x 14 bolts through clamp plate and thread into t-nut. do not tighten. • Repeat for all plates • set aside for use in next step m8 x 14 T-Nut V1 | Page 5...
- Page 6 PREP: PREP FRONT AND REAR bars • Install 2 clamp plate assemblies per side into the front and rear bars as shown. make sure the teeth on the clamp plate face out. CLAMP TEETH FACE OUT V1 | Page 6...
- Page 7 assemble: frame of rack • on a soft working surface lay out the four aluminum extrusion bars as shown. we recomend a moving blanket layed out on a flat floor as the rack is to large to assemble on a table. V1 | Page 7...
- Page 8 ASSEMBLE: rack corners • PUSH ONE OF THE CORNERS OF THE RACK TOGETHER AS SHOWN BELOW. MAKE SURE THE SIDE BAR touches OFF AS SHOWN ON THE STOP LIP ON THE FRONT/BACK EXTRUSION (Yellow surfaces). Also make sure the Front/back bar fully touches the inside of the side bar (BLUE surfaces).
- Page 9 PREP: load bars • Install 1 clamp plate assemblies per side into the load bars as shown. make sure the teeth on the clamp plate face out. • IInstall the load bar into the side extrusion by angeling it in as shown in the diagram. •...
- Page 10 ADJUST: LOAD BAR DISTANCE • THE LOAD BARS ARE DESIGNED TO SLIDE AND CAN BE POSITIONED ANYWHERE ALONG THE SIDE RAIL. YOU CAN ALSO ADD AS MANY LOAD BARS AS YOU LIKE UP TO AN ALMOST FULLY FLAT PLATFORM. HOWEVER IF YOU WOULD LIKE EVENLY SPACED LOAD BARS THE DIMENSIONS ARE BELOW. 6.25"...
- Page 11 assemble: t-bolt fasteners • Flip the rack over so you can see the bottom. • install 5 t-bolts per side into the side rail extrusion on the bottom of the rack. V1 | Page 11...
- Page 12 assemble: endcaps • ASSEMBLE THE PLASTIC RETAINER INTO THE CORNER CAP AS SHOWN BELOW. (FIG A) • using two m6 x 12 fasteners secure the ENDCAPS to the corners of the rack (FIG 2) TIGHTEN TO 24 IN-LB USING A T30 TORX WRENCH. (FIG 1) (FIG 2) V1 | Page 12...
- Page 13 INSTALL: WIND DEFLECTOR • USING M8 X 14 BOLTS AND 3x TRAKLOK NUTS, FASTEN WIND deflector AS SHOWN TO the yellow t-slot in the load bar.(FIG A) • NOTE: the wind deflector can be moved to other loacations. This might be the case if it interferes with the sunroof. front good NOTE: it is extremely important that the Traklok nuts rotate fully into place...
- Page 14 REMOVE: rubber stripping from truck • REMOVE the rubberstriping in the channels on top of the truck.START BY THE REAR WINDOW AND PULL AS STRAIT UP AS POSSIBLE. THIS WILL SEPERATE THE RUBBER FROM THE RIVET IN THE TRUCK. •THE REST OF THE STRIPPING IS HELD ON BY 5 BARBED PINS. CONTINUE PULLING UP TO REMOVE THESE. V1 | Page 14...
- Page 15 REMOVE: 12 FACTORY BOLTS • REMOVE THE 12 SCREWS SHOWN IN THE DIAGRAM BELOW USING A 7MM WRENCH OR SOCKET. FRONT drivers passenger SIDE SIDE V1 | Page 15...
- Page 16 install: roof brackets • apply a heavy bead of silicone around the screw holes you removed in PREVIOUS step . • THERE ARE 3 DIFFERENT SIZE BRACKETS. THE 4” WIDE ONE GOES TOWARD THE FRONT. 5-1/2 IN THE MIDDLE AND 4-1/2 IN THE BACK. •...
- Page 17 Install: side plates • the vehicle should look like this with 3 BRACKETS INSTALLED ON EACH SIDE. V1 | Page 17...
- Page 18 Install: side plates • using 6 M8 x 20 bolts and m8 locknuts PER SIDE fasten the side plates to the brackets installed previously Torque bolts to 16 ft-lb. you will need a 13mm wrench and a t40 torx driver for this step . detail view V1 | Page 18...
- Page 19 INSTALL: RACK ON TRUCK • ALIGNE THE 10 T-BOLTS (5 PER SIDE) WITH THE SLOTS IN THE RAILS MOUNTED IN THE PREVious STEP . Thread on m8 locknuts to each. • ADJUST THE RACK SO THAT THE SIDE BAR EXTRUSIONS LINE UP WITH THE END OF THE RAILS ON EACH SIDE. “red surface to blue surface”...
-
Page 20: Use Guidelines
•All locks must be turned and moved periodically to ensure smooth operation. Use graphite or dry lubricant to help this. Leitner designs locks are designed to deter vandalism and theft but should not be considered theft proof. Remove valuable gear if your vehicle is unattended for an extended period. -
Page 21: Warranty
Warranty Leitner Designs warrants product to be free from defects in material and workmanship, for terms specified below, provided there has been normal use and proper maintenance. All remedies under this warranty are limited to the repair or replacement of any item found by the factory to be defective within the time period specified.
Need help?
Do you have a question about the FORD SUPER DUTY 2017-UP and is the answer not in the manual?
Questions and answers