Table of Contents
Advertisement
Quick Links
Advertisement
Table of Contents

Related Manuals for Quincy Compressor QOFT 20


Summary of Contents for Quincy Compressor QOFT 20
- Page 1 QOFT 20, QOFT 25, QOFT 30, QOFT 40, QOFT 50, QOFT 60 Instruction book...
- Page 3 Quincy QOFT 20, QOFT 25, QOFT 30, QOFT 40, QOFT 50, QOFT 60 Instruction book Original instructions COPYRIGHT NOTICE Any unauthorized use or copying of the contents or any part thereof is prohibited. This applies in particular to trademarks, model denominations, part numbers and drawings.
-
Page 4: Table Of Contents
Instruction book Table of contents Additional safety precautions..................5 ........................... 5 AFETY ICONS ......................5 ENERAL SAFETY PRECAUTIONS ................... 6 AFETY PRECAUTIONS DURING INSTALLATION ....................7 AFETY PRECAUTIONS DURING OPERATION ................8 AFETY PRECAUTIONS DURING MAINTENANCE OR REPAIR General description...................... 11 ..........................11 NTRODUCTION ............................ - Page 5 Instruction book 3.13 ..........................42 CCESS LEVEL Installation........................44 ........................44 IMENSION DRAWINGS ........................47 NSTALLATION PROPOSAL ........................49 LECTRIC CONNECTIONS ..........................51 ICTOGRAPHS Operating instructions....................54 .........................54 PERATION INTRODUCTION ..........................54 NITIAL START ............................56 TARTING .......................... 57 URING OPERATION ............................58 TOPPING ........................58 AKING OUT OF OPERATION Maintenance........................
- Page 6 Instruction book ..........................65 OTOR GREASING ..........................65 AFETY VALVES Faults and remedies..................... 66 Principal data........................ 68 ........................68 EADINGS ON DISPLAY ....................69 LECTRIC CABLE SIZE AND MAIN FUSES ......................73 ETTINGS OF SAFETY VALVES ....................73 VERLOAD RELAY AND FUSE SETTINGS ........................
-
Page 7: Additional Safety Precautions
Instruction book Additional safety precautions Safety icons Explanation Danger to life Warning Important note General safety precautions 1. The operator must employ safe working practices and observe all related work safety requirements and regulations. 2. If any of the following statements does not comply with the applicable legislation, the stricter of the two shall apply. -
Page 8: Safety Precautions During Installation
Instruction book 9. If compressed air is used in the food industry and more specifically for direct food contact, it is recommended, for optimal safety, to use certified Class 0 compressors in combination with appropriate filtration depending on the application. Please contact your customer center for advice on specific filtration. -
Page 9: Safety Precautions During Operation
Instruction book 12. The electrical connections must correspond to the applicable codes. The machines must be earthed and protected against short circuits by fuses in all phases. A lockable power isolating switch must be installed near the compressor. 13. On machines with automatic start/stop system or if the automatic restart function after voltage failure is activated, a sign stating "This machine may start without warning"... -
Page 10: Safety Precautions During Maintenance Or Repair
Instruction book 6. Keep all bodywork doors shut during operation. The doors may be opened for short periods only, e.g. to carry out routine checks. Wear ear protectors when opening a door. On machines without bodywork, wear ear protection in the vicinity of the machine. 7. - Page 11 Instruction book 3. Use only genuine spare parts for maintenance or repair. The manufacturer will disclaim all damage or injuries caused by the use of non-genuine spare parts. 4. All maintenance work shall only be undertaken when the machine has cooled down. 5.
- Page 12 Instruction book Also consult following safety precautions: Safety precautions during installation Safety precautions during operation. These precautions apply to machinery processing or consuming air or inert gas. Processing of any other gas requires additional safety precautions typical to the application which are not included herein. Some precautions are general and cover several machine types and equipment;...
-
Page 13: General Description
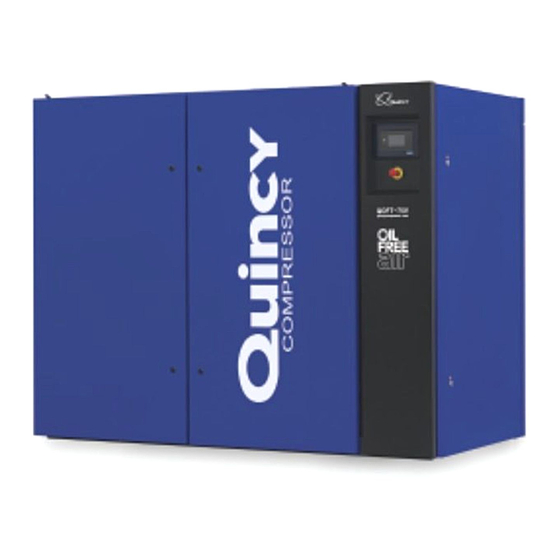
Instruction book General description Introduction General description The QOFT machines are two-stage rotary tooth compressors, driven by an electric motor. The compressors deliver oil-free air. QOFT are air-cooled. The compressors are enclosed in a sound-insulating bodywork. The compressors are built up with following major components: •... - Page 14 Instruction book Air outlet valve Emergency stop button Q-Control Touch Condensate drains Converter cabinet Front view, Pack Outlet valve Aftercooler Intercooler Oil cooler High-pressure compressor element Oil filler plug Cooling fan Compressor drive motor Fan motor Oil filter (not shown) Oil level sight glass Emergency stop button Q-Control Touch...
-
Page 15: Air Flow
Instruction book Air flow Air drawn in through air filter (AF) and the open inlet valve of the unloader assembly (UA) is compressed in the low-pressure compressor element (El) and discharged to the intercooler (Ci). The cooled air is further compressed in the high-pressure compressor element (Eh) and discharged through the pulsation damper (AS) and the aftercooler (Ca). -
Page 16: Condensate Drain System
Instruction book Condensate drain system Compressor Two condensate traps are installed on the compressor itself: one downstream of the intercooler to prevent condensate from entering the high-pressure compressor element (Eh), the other one downstream of the aftercooler to prevent condensate from entering the air outlet pipe. On QOFT, the condensate traps are integrated in the intercooler and the aftercooler outlet collector. - Page 17 Instruction book The drains are connected to the side panel of the compressor as shown in the next figure: Condensate drain connections Ref. Designation Ref. Designation Automatic drain, aftercooler Manual drain, intercooler Automatic drain, intercooler Manual drain, aftercooler 9829 3199 74...
-
Page 18: Oil System
Instruction book Oil system Oil is circulated by pump (OP) from the sump of the gear casing through oil cooler (Co) and oil filter (OF) towards the bearings and the gears. The oil system is equipped with a valve that opens if the oil pressure rises above a given value. The valve is located before the oil filter housing. - Page 19 Instruction book Q-Control Touch Control panel The detailed functioning of the Q-Control Touch is explained in the next chapter. Converter cabinet Converter cabinet,QOFT 20 up to QOFT 60 9829 3199 74...
- Page 20 Instruction book F1/2 Fuses Line contactor Star contactor Fan motor protection Delta contactor Transformer Motor overload protection Q-Control Touch IO2 Module Emergency stop button 9829 3199 74...
-
Page 21: Q-Control Touch
Instruction book 3. Q-Control Touch 3.1 Controller Figure 1: Q-Control Touch Introduction The controller has following functions: • Controlling the unit • Protecting the unit • Monitoring components subject to service • Automatic restart after voltage failure (ARAVF) Automatic control of the unit The controller maintains the net pressure between programmable limits by automatically loading and unloading the unit (fixed speed units) or by adapting the motor speed (units with frequency converter). - Page 22 Instruction book Protecting the unit Shutdown Several sensors are provided on the unit. If one o f the measured signals exceeds the programmed shutdown level, the compressor will be stopped. Example: If the element outlet temperature exceeds the programmed shutdown level, the unit will be stopped.
-
Page 23: Control Panel
Instruction book Control panel Figure 2: Control Panel Parts and functions Reference Designation Function Touchscreen Shows the unit operating condition and a number of icons to navigate through the menu. The screen can be operated by touch. Warning sign Flashes in case of a shut-down, is lit in case of a warning condition. -
Page 24: Icons Used
Instruction book Icons used Menu icons Menu Icon Menu Icon Menu Icon Data Status Inputs Outputs Counters Aux. Equipment Converters Parameters Service Service Overview Service Plan Service History Service functions Clean Screen Week Timer Week Remaining Running Time Event History Saved Data 9829 3199 74... - Page 25 Instruction book Menu Icon Menu Icon Menu Icon Machine Alarms Settings Regulation Control Parameters Aux. Equipment Converter(s) Parameters Auto Restart Controller Network Ethernet Settings Settings Settings CAN Settings Localisation Language Date/Time Units User Password Help Information Status icons Icon Description Motor Stopped 9829 3199 74...
- Page 26 Instruction book Motor Stopped Wait Running Unloaded Manual Unload Running Unloaded Wait Running Loaded Failed to Load Running Loaded Wait Manual Stop Machine Control Mode, Local Machine Control Mode, Remote Machine Control Mode, LAN Automatic Restart After Voltage Failure Week Timer Active System icons Icon Description...
- Page 27 Instruction book Antenna 50% Antenna 75% Antenna 100% Change between screens (indication) Energy recovery Element Drain(s) Analogue Output Menu Reset Auto Restart Filter(s) Cooler Valve(s) Power Meter Input icons Icon Description Pressure 9829 3199 74...
-
Page 28: Main Screen
Instruction book Temperature Special Protection Open Closed This chapter gives a general survey of available icons. Not all icons mentioned in this chapter are applicable to every machine. Main screen Function The Main screen is the screen that is shown automatically when the voltage is switched on. It is switched off automatically after a few minutes when there is no touch input. -
Page 29: Quick Access Screen
Instruction book Reference Designation Function Alarm button The alarm button can be tapped to show the current alarms. If an alarm occurs, the icon on the button will be red. Service button The service button can be tapped to show the service information. -
Page 30: Menu Screen
Instruction book Function Description Setpoints Several setpoints can be modified by tapping this icon. Control mode The control mode can be changed by tapping this icon. • Local control via start/stop buttons • Remote control via digital input(s) • LAN control via the network. When in Remote or LAN control, the start/stop buttons on the controller will not work. - Page 31 Instruction book Reference Designation Function Service The service menu contains the Service information. The ‘Clean screen’ function can be used to clean the touchscreen. Week timer Multiple Week timers and a Remaining running time can be set through this menu. Event history In case of an alarm, the Status information of the unit is saved and can be viewed through this menu.
-
Page 32: Data Menu
Instruction book Data menu Function This screen is used to display the following submenus: • Status • Inputs • Outputs • Counters • Aux. Equipment These submenus can be entered by tapping the icons. Procedure To enter the Data menu screen: 1. - Page 33 Instruction book Figure 8: Status menu screen This menu shows the current status of the unit. If an alarm is active, it can be viewed by tapping the alarm message. To reset an alarm, tap the reset button (1). Before remedying, consult the Safety precautions.
-
Page 34: Service Menu
Instruction book Voltage-free outputs may only be used to control or monitor functional systems. They should NOT be used to control, switch or interrupt safety related circuits. Check the maximum allowed load on the label. Stop the unit and switch off the supply before connecting external equipment. Check the Safety precautions. - Page 35 Instruction book Procedure To enter the Service menu screen: 1. Tap the Menu button 2. Tap the Service icon Description Figure 13: Service menu screen Reference Designation Service Service functions (Only visible as advanced user) Clean screen Service menu Tap the Service icon to enter the Service menu. Figure 14: Service menu screen This menu shows the remaining Running Hours and the remaining Real Time Hours until the next service.
-
Page 36: Week Timer Menu
Instruction book Service functions (Only visible as advanced user) Tap the Service Functions icon to enter the Service Functions menu. Figure 15: Service function screen Depending on the machine, this menu can have a different set of functions. Many of them are password protected, as they are only accessible for authorized personnel. -
Page 37: 3.10 Event History Menu
Instruction book Description Figure 17: Week timer menu screen Reference Designation Function Add or select week If less than 4 weeks are programmed, tap the ‘+’ button to add a week. Remove week Tap to remove a programmed week timer. Activate week timer A selection screen pops up. -
Page 38: 3.11 Machine Settings Menu
Instruction book Reference Designation Saved Data Saved data Tap the Saved Data icon to enter the Saved Data menu. Figure 19: Saved data screen Scroll through the items swiping up and down in this list. The event date and time is shown at the right side of the screen. - Page 39 Instruction book Description Reference Designation Alarms menu Regulation menu Control Parameters menu Aux. Equipment Parameters menu Auto Restart menu Alarms menu Tap the Alarms icon to enter the Alarms menu. A list of all alarms is shown. When pressing on one of the items in this list, the warning and/or shutdown levels are shown for this alarm.
- Page 40 Instruction book When tapping a list item, a selection screen pops up. The user can modify the setting by tapping ‘–’ or ‘+’ and can confirm by tapping ‘V’ or decline by tapping ‘X’. Change a selection When tapping a list item, a selection screen pops up. The user can change the selection by swiping up or down and confirm by tapping ‘V’...
-
Page 41: 3.12 Controller Settings Menu
Instruction book Through this menu, the automatic restart can be activated. The activation is password protected. The automatic restart settings can also be changed. Enter a password When tapping a password protected item, a selection screen pops up. The user can enter the password by swiping up or down to select the desired number. - Page 42 Instruction book Reference Designation Network Settings menu Localisation menu User Password menu Help menu Information menu Network settings menu Tap the Network Settings icon to enter the Network Settings menu. Ethernet Settings The list of Ethernet Settings is shown. When ethernet is turned off, the settings can be modified. CAN Settings The list of CAN Settings is shown.
- Page 43 Instruction book The date and time settings of the controller can be modified through this menu. Units The units displayed can be modified through this menu. Modify a setting When tapping a list item, a selection screen pops up. The user can modify the setting by tapping ‘–’...
-
Page 44: 3.13 Access Level
Instruction book This menu shows information about the controller. 3.13 Access level Function Through this pop-up screen the access level settings can be viewed or changed. Procedure The Access Level screen can be viewed or changed by tapping the Access Level button at the upper right corner of the screen. - Page 45 Instruction book Service access level Tap the Service access level icon (1) and confirm (2). The screen information bar (1) now shows the current status of the unit instead of the machine serial number. In the service menu, an extra menu item is now available. See Service menu.
-
Page 46: Installation
Instruction book Installation Dimension drawings Dimension drawing, QOFT 20 up to QOFT 30 compressor 9829 3199 74... - Page 47 Instruction book Dimension drawing, QOFT 40 up to QOFT 60 compressor 9829 3199 74...
- Page 48 Instruction book Reference Description Cooler cooling air inlet Cooler cooling air outlet Motor cooling air and compressor air inlet Cubicle cooling air inlet Cubicle cooling air outlet Electrical cable Valve rotation Automatic drain, aftercooler Automatic drain, intercooler Manual drain, aftercooler Manual drain, intercooler Approx.Mass Center of Gravity...
-
Page 49: Installation Proposal
Instruction book Installation proposal Compressor room example Installation proposal 9829 3199 74... - Page 50 = required cooling air flow (m N = nominal motor power of the compressor (kW) ΔT = temperature increase in compressor room (˚C) Y (Pack) QOFT 20, QOFT 25, QOFT 30 1.145 0.00 QOFT 40, QOFT 50, QOFT 60 1.136 0.00...
-
Page 51: Electric Connections
Instruction book Note All pipes must be connected stress-free to the compressor unit. For more information concerning air nets, cooling systems, etc. refer to the compressor installation manual. Electric connections Warning To preserve the protection degree of the electric cubicle and to protect its components from dust from the environment, it is mandatory to use a proper cable gland when connecting the supply cable to the compressor. - Page 52 Instruction book Reference Compressor TT51 Not used TT58 Not used TT59 Not used Solenoid valve, throttle Solenoid valve, breather Reference Starter cubicle Compressor control module F1...Fx Fuses Overload relay, fan motor (IT-versions) Overload relay, compressor motor Line contactor Star contactor Delta contactor Circuit breaker, fan motor Remote start/programmed stop...
-
Page 53: Pictographs
Instruction book Reference Analog and digital input expansion module (IO2) Auxiliary relay, load/unload Auxiliary relay, general shutdown Not used Auxiliary relay, automatic operation Auxiliary relay, general warning Not used Auxiliary relay, motor running Auxiliary relay, forced intercooler Auxiliary relay, compressor loaded Not used Not used Not used... - Page 54 Instruction book Reference Name Automatic condensate outlet, intercooler Automatic condensate outlet, aftercooler Warning: under tension Read Instruction book before starting the compressor Lock out/ tag out Before connecting the compressor electrically, consult the Instruction book for the motor rotation direction (fixed speed compressors) Torques for steel (Fe) or brass (CuZn) bolts Consult the Instruction book for lubrication instructions 9829 3199 74...
- Page 55 Instruction book Reference Name Switch off the voltage before removing the protecting cover inside the electric cabinet Oil the gaskets, screw on the filters and tighten by hand (approx. one half turn) Consult the Instruction book before maintenance or repair 9829 3199 74...
-
Page 56: Operating Instructions
Instruction book Operating instructions Operation introduction Warning The operator must apply all relevant safety precautions. Ambient conditions Consult Limitations for operation for the limits with regard to the ambient conditions and altitude operation. Moving/lifting In order not to damage the frame, the compressor must be moved either by a lift truck or by using lifting equipment as described below: •... - Page 57 Instruction book Example of transport fixations 5. Check the oil level: the level should be between the 2 lines on the sight-glass (SG). Add oil via the filler plug (FC) if necessary. See Oil specifications for details about the oil to be used. Detail of crankcase with oil filler plug (FC) and sight glass (SG) 6.
-
Page 58: Starting
Instruction book Starting The operator must apply all relevant safety precautions, including those mentioned in this instruction book Normal starting procedure 1. Check the oil level: the level should be between the 2 lines on the sight-glass (SG) . Top up if necessary, with the correct type of oil (see section Oil specification). -
Page 59: During Operation
Instruction book During operation When automatic operation sign (4) is alight, the Q-Control Touch is automatically controlling the compressor. The speed will continuously vary to match the air delivery to the air consumption and the compressor will start and stop whenever necessary. Keep all doors closed during operation. -
Page 60: Stopping
Instruction book Stopping Control panel 1. Press the test button on top of all electronic drains to discharge the condensate. 2. Press the stop button (6) of the Q-Control Touch: the compressor will stop and the sign for automatic operation (4) will go out. 3. -
Page 61: Maintenance
Instruction book Maintenance Maintenance warnings • Before starting any maintenance or repairs, stop the compressor and close the air outlet valve. • Press the emergency stop button (S3) below the Q-Control Touch. • Depressurize the air system, using the manual drain valves and/or the test buttons on the electronic water drains. -
Page 62: Service Kits
Instruction book Period Running Service Operation hours plan 4000 Replace air filter and oil filter element. Replace breather. 8000 See Service plan A + small maintenance inlet valve + replace oil 12000 See Service plan A 16000 See Service plan B + overhaul check valve + inlet valve and electronic drains (EWD) 40000 See Service plan C + overhaul oil pump, replace HP and LP... -
Page 63: Intelligent Connectivity System (Icons)
Instruction book Intelligent Connectivity System (ICONS) Developing a stable, profitable business starts with insights. Compressed air is the resource- ICONS enables you to plan maintenance interventions proactivity and at just the right time. Looking for opportunities to reduce your production costs? The analysis of compressor data over times give you the information you need to optimize the efficiency of your air system. -
Page 64: Storage After Installation
Instruction book Storage after installation Mechanical preservation Run the compressor regularly (e.g. twice a week) until warm. If the compressor is going to be stored without running from time to time, protective measures must be taken. Consult Quincy. Disposal of used material Used filters or any other used material (e.g. -
Page 65: Servicing Procedures
Instruction book Servicing procedures Air filter (AF) Location of the air filter Location of air filter Procedure Step Action Stop the compressor and switch off the voltage to the compressor. Remove the air filter cover and remove the filter element. Clean the cover. -
Page 66: Oil And Oil Filter Change
Instruction book Oil and oil filter change Control panel Oil system components Oil filler plug (FC), sightglass (SG) and oil drain valve (Dmo) Procedure Step Action Run the compressor until warm. Press stop button (6). Wait until the compressor has stopped, press the emergency stop button and switch off the voltage to the compressor. -
Page 67: Motor Greasing
Instruction book Step Action Fill the compressor sump with oil as specified in Oil specifications. The level should be between the 2 lines on the sight-glass (SG). Reinstall the filler plug. Switch on the voltage. Unlock the emergency stop button. Run the compressor for a few minutes. -
Page 68: Faults And Remedies
Instruction book Faults and remedies Warnings • Before starting any maintenance or repairs, stop the compressor, wait until it has stopped. • Close the air outlet valve and press the test button on top of the electronic water drains to depressurize the air system. •... - Page 69 Instruction book Condition Fault Remedy Air pressure below minimum Increase air pressure pressure EWD continuously discharges air Control air blocked Check and correct as necessary Sensor dirty Clean sensor 9829 3199 74...
-
Page 70: Principal Data
Instruction book Principal data Readings on display Display Reference Unit Reading Outlet pressure bar(e)/psig Depends on pressure setpoint Maximum working pressure bar(e)/psig See section Compressor data 9829 3199 74... -
Page 71: Electric Cable Size And Main Fuses
Instruction book Electric cable size Attention • An isolating switch and the required fuses must be installed before the compressor. This is indicated on the connection diagram as "customer's installation". The required type and maximum size of the fuses are described below. - Page 72 Instruction book Cable configuration Single supply cables Parallel supply cables Phase supply cables (Only valid for Y-D versions) Parallel phase supply cables (Only valid for Y-D versions) 9829 3199 74...
- Page 73 Instruction book (1): Power distribution panel (2): Compressor starter panel Fuse calculations for cUL, CSA and UL: The indicated fuse size is the maximum fuse size in order to protect the motor Cable sizing according to UL The table below indicates the current carrying capacities of cables for commonly used installation methods, according to standard UL 508A.
- Page 74 Instruction book • Install fuses which are smaller than or equal to the Max. fuse values from the technical data sheets or instruction manual • Size of the PE cable • Use the maximum allowed ampacity of the selected supply cables and compare with the value in the table below according to UL508A Ampacity Size of PE...
-
Page 75: Settings Of Safety Valves
Instruction book Model 460 V QOFT 20 max AWG 4 QOFT 25 max AWG QOFT 30 max AWG QOFT 40 max AWG QOFT 50 max AWG QOFT 60 busbar for M6 cable lug Settings of safety valves Settings Reference Set pressure 60 Hz... -
Page 76: Reference Conditions
Instruction book Reference conditions Reference Unit Value Absolute inlet pressure bar(a) Relative air humidity Air inlet temperature ˚C Limitations Maximum air inlet temperature 40 ˚C 104 ˚F Minimum ambient temperature 0 ˚C 32 ˚F Maximum relative humidity of ambient air 100 % at temperatures below 35 ˚C (95 ˚F), 70 % at 40 ˚C (104 ˚F) -
Page 77: Compressor Data
Instruction book Compressor data Data for 100 psi QOFT compressors QOFT 20 QOFT 25 QOFT 30 Nominal working pressure bar(e) Nominal working pressure psig Maximum working pressure, Pack bar(e) Maximum working pressure, Pack psig Nominal rated motor power 18.5 Nominal rated motor power... - Page 78 Instruction book Data for 125 psi QOFT compressors QOFT 20 QOFT 25 QOFT 30 Nominal working pressure bar(e) Nominal working pressure psig Maximum working pressure, Pack bar(e) Maximum working pressure, Pack psig Nominal rated motor power 18.5 Nominal rated motor power...
- Page 79 Instruction book Data for 150 psi QOFT compressors QOFT 20 QOFT 25 QOFT 30 Nominal working pressure bar(e) Nominal working pressure psig Maximum working pressure, Pack bar(e) Maximum working pressure, Pack psig Nominal rated motor power 18.5 Nominal rated motor power...
-
Page 80: Technical Data Controller
Instruction book Technical data controller General Supply voltage 24 V AC /16 VA 50/60Hz (+40%/-30%) 24 V DC/0.7 A Type of protection IP54 (front) IP21 (back) • Operating temperature • -10°C…..+60°C (14 °F ..140 °F) range • -30°C…..+70°C (-22 °F ..158 °F) •... -
Page 81: Instructions For Use
Instruction book Instructions for use Instructions This vessel can contain pressurized air; this can be potentially dangerous if the equipment is misused. This vessel must only be used as a compressed pulsation damper and must be operated within the limits specified on the data plate. No alterations must be made to this vessel by welding, drilling or other mechanical methods without the written permission of the manufacturer. - Page 84 Performance You Demand. Reliability You Trust. www.quincycompressor.com...
Need help?
Do you have a question about the QOFT 20 and is the answer not in the manual?
Questions and answers