
Related Manuals for Quincy Compressor QED 650


Summary of Contents for Quincy Compressor QED 650
- Page 1 INSTRUCTION AND MAINTENANCE MANUAL Refrigerant Compressed Air Dryers QED 650, QED 850, QED 1050 READ THIS MANUAL CAREFULLY BEFORE CARRYING OUT ANY OPERATIONS ON THE DRYER.
- Page 2 QUINCY QED 650, QED 850, QED 1050 Instruction book Original instructions Copyright Notice Any unauthorized use or copying of the contents or any part thereof is prohibited. This applies in particular to trademarks, model denominations, part numbers and drawings. This instruction book is valid for CE as well as non-CE labelled machines. It meets the requirements for instructions specified by the applicable European directives as identified in the Declaration of Conformity.
-
Page 3: Table Of Contents
Instruction book Table of contents Safety precautions......................5 ...........................5 AFETY ICONS ......................5 AFETY PRECAUTIONS GENERAL ...................6 AFETY PRECAUTIONS DURING INSTALLATION ....................7 AFETY PRECAUTIONS DURING OPERATION ................8 AFETY PRECAUTIONS DURING MAINTENANCE OR REPAIR General description......................10 ..........................10 NTRODUCTION ............................17 IR SYSTEM ........................19 EFRIGERATION SYSTEM ......................21 UTOMATIC REGULATION SYSTEM ......................22... - Page 4 Instruction book 3.13 .............................61 EST MENU 3.14 ..........................63 ERVICE MENU 3.15 .........................67 ROTECTIONS MENU 3.16 ...........................68 XTRA MENU 3.17 ..........................70 EB SERVER 3.18 ........................75 ROGRAMMABLE SETTINGS Installation........................76 ........................76 IMENSION DRAWINGS ........................80 NSTALLATION PROPOSAL ......................81 NSTALLATION INSTRUCTIONS ......................83 LECTRIC CABLE SIZE AND FUSES ..........................83 ICTOGRAPHS Operating instructions....................85...
- Page 5 Instruction book Pressure equipment directives...................96 2920 1818 00...
-
Page 6: Safety Precautions
Instruction book Safety precautions Safety icons Explanation Danger for life Warning Important note Safety precautions, general General precautions 1. The operator must employ safe working practices and observe all related work safety requirements and regulations. 2. If any of the following statements does not comply with the applicable legislation, the stricter of the two shall apply. -
Page 7: Safety Precautions During Installation
Instruction book Safety precautions during installation All responsibility for any damage or injury resulting from neglecting these precautions, or non-observance of the normal caution and care required for installation, operation, maintenance and repair, even if not expressly stated, will be disclaimed by the manufacturer. Precautions during installation 1. -
Page 8: Safety Precautions During Operation
Instruction book Also consult following safety precautions: Safety precautions during operation Safety precautions during maintenance. These precautions apply to machinery processing or consuming air or inert gas. Processing of any other gas requires additional safety precautions typical to the application which are not included herein. -
Page 9: Safety Precautions During Maintenance Or Repair
Instruction book Also consult following safety precautions: Safety precautions during installation Safety precautions during maintenance. These precautions apply to machinery processing or consuming air or inert gas. Processing of any other gas requires additional safety precautions typical to the application which are not included herein. - Page 10 Instruction book 18. Make sure that all sound-damping material and vibration dampers, e.g. damping material on the bodywork, is in good condition. If damaged, replace it by genuine material from the manufacturer to prevent the sound pressure level from increasing. 19.
-
Page 11: General Description
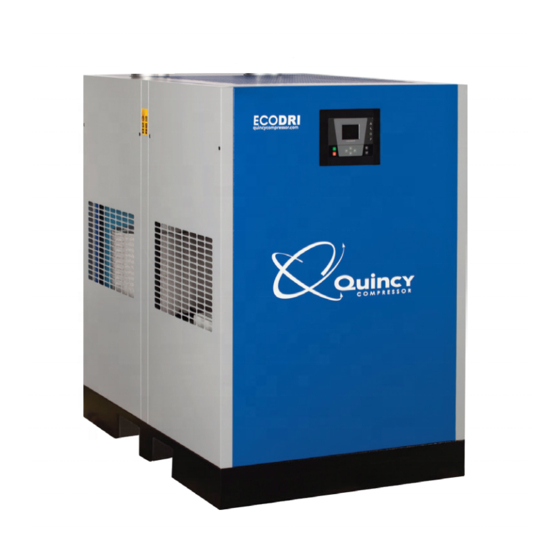
The Air Logic Controller (1) keeps the pressure dew-point stable at no load by opening or closing the solenoid valve of the hot-gas by-pass. The condenser has a cooling fan controlled by a pressure sensor. General view General view of QED 650 2920 1818 00... - Page 12 Instruction book General view of QED 850 2920 1818 00...
- Page 13 Instruction book General view of QED 1050 Reference Name Air Logic Controller Grating 2920 1818 00...
- Page 14 Instruction book Position of components Inside view of QED 650 2920 1818 00...
- Page 15 Instruction book Inside view of QED 850 2920 1818 00...
- Page 16 Instruction book Inside view QED 1050 Heat exchanger Cooling fan(s) Condenser Solenoid valve Cubicle Hot-gas by-pass valve Refrigerant compressor Liquid separator Electronic water drain (EWD) Sight-glass with moisture indicator Thermostatic expansion valve Refrigerant dryer/filter Non-return valve 2920 1818 00...
- Page 17 Instruction book Connections Rear view Compressed air outlet Compressed air inlet Cable gland, electrical connection Automatic drain hose 2920 1818 00...
-
Page 18: Air System
Instruction book Air system Air flow diagram Air and refrigerant flow diagram for QED 650 up to QED 2100 Reference Name 101a Air/air heat exchanger 101b Air/refrigerant heat exchanger 2920 1818 00... - Page 19 Instruction book Reference Name Condensate separator Non-return valve Air-cooled condenser (air-cooled version) Fan blower (air-cooled version) Thermostatic expansion valve Pressure shut-down switch Refrigerant dryer/filter Liquid separator Hot-gas by-pass valve Refrigerant compressor Solenoid valve Sight-glass Flow switch Temperature switch Pressure sensor (air-cooled version) Cubicle Automatic drain...
-
Page 20: Refrigeration System
Instruction book Refrigeration system Refrigerant flow diagram Air and refrigerant flow diagram for QED 650 up to QED 2100 Description Refrigerant compressor (209) delivers hot, high-pressure refrigerant gas, which flows through condenser (202), where most of the refrigerant condenses. 2920 1818 00... - Page 21 Instruction book The liquid flows through refrigerant dryer/filter (206) to thermostatic expansion valve (204) via sight-glass (211). The refrigerant leaves the thermostatic expansion valve at evaporating pressure. The refrigerant enters evaporator (101b), where it withdraws heat from the compressed air by further evaporation at constant pressure.
-
Page 22: Automatic Regulation System
Instruction book Automatic regulation system Air and refrigerant flow diagram Air and refrigerant flow diagram for QED 650 up to QED 2100 Description The condenser pressure must be kept as constant as possible to obtain stable operation, therefore: 2920 1818 00... -
Page 23: Condensate Drain System
(210) and hot, high-pressure gas is fed through hot-gas by-pass valve (208) to the evaporator circuit to prevent the evaporator temperature from dropping below 0 ˚C (32 ˚F). Condensate drain system Description Electronic water drain location on QED 650-1050 Electronic water drain functioning Inlet Supply line... - Page 24 Instruction book Collector Valve seat Outlet The condensate enters the Electronic Water Drain (EWD) via inlet (1) and accumulates in collector (6). A capacitive sensor (5) continuously measures the liquid level. The pilot valve (3) is activated as soon as the collector is filled up to a certain level. Diaphragm (4) opens outlet (8), discharging the condensate.
-
Page 25: Electrical System
Instruction book Checking the alarm signal • Press and hold the test button for at least 1 minute. • Check that the alarm LED flashes. • Check that a warning is generated on the display of the controller. • Release the test button. Electrical system Electrical diagrams for dryers with controller as shown 2920 1818 00... - Page 26 Instruction book Electrical diagram QED 650 2920 1818 00...
- Page 27 Instruction book Electrical diagram QED 850 and QED 1050 2920 1818 00...
- Page 28 Instruction book Position of components Electric cubicle Ref. Description Alarm contact, warning Alarm contact, shut-down Electronic Water Drain Air Logic Controller Main fuses (customer's installation) Fuse, primary winding transformer Fuse, primary winding transformer Fuse, secondary winding transformer Fuse, secondary winding transformer Fuse, secondary winding transformer Internal overload, fan motor 1 Internal overload, fan motor 2...
- Page 29 Instruction book Ref. Description High-pressure switch Flow switch Transformer, control voltage TT89 Temperature sensor, freeze protection TT90 Temperature sensor, dryer LAT block Solenoid valve Terminal strip, supply Terminal strip, motor Terminal strip, earthing Terminal strip, < or = 24 VAC Terminal strip, <...
-
Page 30: Air Logic Controller
Instruction book Air Logic Controller Air Logic Controller Control panel General description The Air Logic Controller automatically controls the dryer, i.e.: • keeps the pressure dew-point stable • stops the dryer whenever necessary • restarts the dryer when required In order to control the dryer and to read and modify programmable parameters, the controller has a control panel provided with: •... -
Page 31: Control Panel
Instruction book Protecting the dryer Shut-down • In case the pressure in the refrigerant circuit is too high, the dryer will be stopped. • The dryer will also be stopped if there is an overload of a fan motor. Warning •... -
Page 32: Icons Used
Instruction book Reference Designation Function Pictograph General alarm General alarm LED Flashes if a shut-down warning condition exists. Pictograph Service Service LED Lights up if service is needed Indicates that the controller is automatically controlling Automatic operation LED the dryer. Voltage on LED Indicates that the voltage is switched on. - Page 33 Instruction book Warning Service Service required Main screen Change main screen Main chart Input icons Icon Description Pressure Temperature Digital input Special protection System icons Icon Description Dryer Frequency converter Drain 2920 1818 00...
- Page 34 Instruction book Filter Motor Failure expansion module Network problem General alarm Menu icons Icon Description Inputs Outputs Alarms (Warnings, shutdowns) Counters Test Settings Service Event history (saved data) Access key/User password Network Set point 2920 1818 00...
-
Page 35: Main Screen
Instruction book Info Navigation arrows Icon Description Down Main screen Control panel Scroll keys Enter key Escape key Function The Main screen shows the status of the dryer operation and is the gateway to all functions implemented in the controller. The Main screen is shown automatically when the voltage is switched on and one of the keys is pushed. - Page 36 Instruction book 4. Chart (Medium resolution) 5. Chart (Low resolution) Two and four value views Typical Main screen (Two value lines) Text on figures Dryer PDP Relative humidity Starting Menu • Section A shows information regarding the dryer operation (e.g. the Dryer PDP (1), the Relative Humidity (2)).
- Page 37 Instruction book Designation Function Menu To go to the menu Modify To modify programmable settings Reset To reset a timer or message To activate an action button, highlight the button by using the Scroll keys and press the Enter key. To go back to the previous menu, press the Escape key.
-
Page 38: Calling Up Menus
Instruction book When the Chart (Low Resolution) is selected, a chart showing the pressure per day is shown on the main screen. This pressure depends on the selection made in the input screen. Each point is the average of 1 hour. The screen shows 10 days. -
Page 39: Inputs Menu
Instruction book • To go to the Menu screen, highlight the Menu button (4), using the Scroll keys. • Press the Enter key to select the menu. Following screen appears: • The screen shows a number of icons. Each icon indicates a menu item. By default, the Inputs icon is selected. - Page 40 Instruction book Scroll keys Enter key Escape key Menu icon, Inputs Function To call up information regarding the actually measured data and the status of some inputs such as the Condensing Pressure. Procedure Starting from the main screen (see Main screen), •...
-
Page 41: Outputs Menu
Instruction book Condensing pressure Evaporating pressure Dryer LAT 1 Refrigerant 1 • The screen shows the first items of a list of all inputs with their corresponding icons and readings. Use the scroll button to see the other items in the list. •... - Page 42 Instruction book • Move the cursor to the Outputs icon using the Scroll keys. • Press the Enter key. A screen similar to the one below appears: Outputs Solenoid Valve 1 HGBP1 Run Enable Dryer Motor Dryer Fan 1 Dryer Fan 2 •...
-
Page 43: Counters
Instruction book Counters Control panel Scroll keys Enter key Escape key Menu icon, Counters Function To call up: • The running hours • The number of dryer starts • The number of hours that the controller has been powered Procedure Starting from the Main screen (see Main screen),... - Page 44 Instruction book • Using the Scroll keys, move the cursor to the Counters icon (see above, section Menu icon) • Press the Enter key. Following screen appears: Text on figure Counters Running hours dryer Dryer starts Module hours The screen shows a list of all counters with their actual readings. 2920 1818 00...
-
Page 45: Event History Menu
Instruction book Event history menu Control panel Scroll keys Enter key Escape key Menu icon, Event History Function To call up the last shut-down and last emergency stop data. Procedure Starting from the Main screen (see Main screen), • Move the cursor to the Menu action button and press the Enter key. Following screen appears: •... -
Page 46: Modifying Settings
Instruction book • The list of last shut-down and emergency stop cases is shown. • Scroll through the items to select the desired shut-down or emergency stop event. • Press the Enter key to find the date, time and other data reflecting the status of the compressor when that shut-down or emergency stop occurred. - Page 47 Instruction book • Using the Scroll keys, move the cursor to the Settings icon (see above, section menu icon). • Press the Enter key. Following screen appears: • The screen shows a number of icons: Icon Function Network settings General settings Dryer Automatic restart after voltage failure settings Access key...
- Page 48 Instruction book Icon Function Main chart • Move the cursor to the icon of the function to be modified and press the Enter key. Modifying network settings • Select the network settings icon as described above and press the Enter button (2). Following screen appears: Text on figure Network...
- Page 49 Instruction book Screen for Ethernet settings • Press the Enter button; a selection bar is covering the first item (Ethernet). • Using the Scroll keys, move the cursor to the setting to be modified (e.g. Ethernet) and press the Enter button (2).
- Page 50 Instruction book Use the ↓ key of the Scroll keys to select the setting to be modified and press the Enter key. • A pop-up screen appears. Use the ↑ or ↓ key to select the required parameter and press the Enter key to confirm.
- Page 51 Instruction book Text on figure Automatic restart Maximum power down time Restart delay • The screen shows the list of all settings. • Press the Enter button (2); a selection bar is covering the first item (Automatic restart). Use the ↓ key of the Scroll keys to select the setting to be modified and press the Enter key. •...
- Page 52 Instruction book Text on figure Main chart Main chart signal Chart range Minimum Maximum Chart band High The screen shows the main chart signal, the actual settings of the chart range and the chart band. To modify these settings, proceed as follows: •...
-
Page 53: Info Menu
Instruction book 3.11 Info menu Control panel Scroll keys Enter key Escape key Menu icon, Info Function To show the internet address. Procedure Starting from the Main screen (see Main screen), • Move the cursor to the Menu action button and press the Enter key. Following screen appears: •... -
Page 54: Week Timer Menu
Instruction book • Press the Enter key. The internet address appears on the screen. 3.12 Week timer menu Control panel Scroll keys Enter key Escape key Menu icon, Week timer Function • To program time-based start/stop commands for the dryer •... - Page 55 Instruction book Week Timer Week Action Schemes Week Cycle Status Week Timer Inactive Remaining Running Time The first item in this list is highlighted. Select the item requested and press the Enter key on the controller to modify. Programming week schemes •...
- Page 56 Instruction book Week Action Scheme 1 Monday Tuesday Wednesday Thursday Friday Saturday Sunday • A new window opens. The Modify action button is selected. Press the enter button on the controller to create an action. Monday Modify • A new pop-up window opens. Select an action from this list by using the Scroll keys on the controller. When ready press the Enter key to confirm.
- Page 57 Instruction book Monday Start Save Modify • To adjust the time, use the Scroll keys on the controller and press the Enter key to confirm. Monday Start Save Modify • A pop-up window opens. Use the ↑ or ↓ Scroll keys to modify the values of the hours. Use the ← or → Scroll keys to modify the minutes.
- Page 58 Instruction book Monday Start Save Modify • A new pop-up window opens. Use the Scroll keys on the controller to select the correct actions. Press the Enter key to confirm. Monday Are you sure? Save Modify Press the Escape key to leave this window. •...
- Page 59 Instruction book Monday - Start Tuesday Wednesday Thursday Friday Saturday Sunday Press the Escape key on the controller to leave this screen. Programming the week cycle A week cycle is a sequence of 10 weeks. For each week in the cycle, one of the four programmed week schemes can be chosen.
- Page 60 Instruction book Week 3 Week 4 Modify Press twice the Enter key on the controller to modify the first week. • A new window opens. Select the action, example: Week Action Scheme 1 Week Cycle Week 1 Week Action Scheme 1 Week Action Scheme 2 Week Action Scheme 3 Modify...
- Page 61 Instruction book Week Timer Week Week Timer Inactive Week 1 • Press the Escape key on the controller to leave this window. The status shows that week 1 is active. Week Timer Week Action Schemes Week Cycle Status Remaining Running Time •...
-
Page 62: Test Menu
Instruction book Week Timer Week Action Schemes Week Cycle Status Remaining Running Time • This timer is used when the week timer is set and for certain reasons the compressor must continue working, for example, for 1 hour. This can be set in this screen. This timer is prior to the Week Timer action. Week Timer Week action schemes Remaining Running Time... - Page 63 Instruction book Menu icon, Test Function • To test the electronic water drain. Procedure Starting from the Main screen (see Main screen): • Move the cursor to the Menu action button and press the enter key (2); following screen appears: •...
-
Page 64: Service Menu
Instruction book 3.14 Service menu Control panel Scroll keys Enter key Escape key Menu icon, Service Function • To reset the service plans which are carried out. • To check when the next service plans are to be carried out. •... - Page 65 Instruction book • Using the Scroll keys, move the cursor to the Service icon (see above, section Menu icon). • Press the Enter key. Following screen appears: Text on figure Service Overview Service plan Next service History • Scroll through the items to select the desired item and press the Enter key to see the details as explained below.
- Page 66 Instruction book Overview Text on figure Overview Running Hours (green) Real Time hours (blue) Example for service level (A): The figures at the left are the programmed service intervals. For Service interval A, the programmed number of running hours is 4000 hours (upper row, green) and the programmed number of real time hours is 4000 hours, which corresponds to six months (second row, blue).
- Page 67 Instruction book Text on figure Service plan Level Running hours Real time hours Next Service Text on figure Next service Level Running hours Actual In the example above, the A Service level is programmed at 4000 running hours, of which 0 hours have passed. History The History screen shows a list of all service actions done in the past, sorted by date.
-
Page 68: Protections Menu
Instruction book 3.15 Protections menu Converter panel Scroll keys Enter key Escape key Menu icon, Test Function • To call-up and to reset the protections. Before resetting a warning or shut down message, always remedy the problem. Frequently resetting these messages without remedying may damage the dryer. Procedure Starting from the Main screen (see Main... -
Page 69: Extra Menu
Instruction book • Using the scroll keys (1), move the cursor to the protections icon (see above, section Menu icon) • Press the enter key (2). Following screen appears: • The screen shows a list of all shut-down and shut-down warning settings and the actual reading. In case of shut-down, the protection can be reset after remedying. - Page 70 Instruction book Scroll keys Enter key Escape key Menu icon, Test Function • To call-up the actual readings for the pressure dewpoint, the relative humidity and the LAT setpoint. Procedure Starting from the Main screen (see Main screen): • Move the cursor to the Menu action button and press the enter key (2). Following screen appears: •...
-
Page 71: Web Server
Instruction book 3.17 Web server The controllers have a built-in web server that allows direct connection to a PC via a local area network (LAN). This allows to consult certain data and settings via the PC instead of via the display of the controller. Getting started Make sure you are logged in as administrator. - Page 72 Instruction book • Click on View Network connections (1). • Select the Local Area connection (1), which is connected to the controller. • Click with the right button and select properties (1). 2920 1818 00...
- Page 73 Instruction book • Use the checkbox Internet Protocol (TCP/IP) (1) (see picture). To avoid conflicts, de-select other properties if they are selected. After selecting TCP/IP, click on the Properties button (2) to change the settings. • Use the following settings: •...
- Page 74 Instruction book • Click on the Connections tab (1) and then click on the LAN settings button (2). • In the Proxy server Group box, click on the Advanced button (1). 2920 1818 00...
- Page 75 Instruction book • In the Exceptions Group box, enter the IP address of your controller. Multiple IP addresses can be given but they must be separated with semicolons (;). Example: Suppose that you already added two IP addresses (192.168.100.1 and 192.168.100.2). Now you add 192.168.100.100 and separate the 3 IP addresses by putting semicolons between them (1) (see picture).
-
Page 76: Programmable Settings
Instruction book • On the left side of the interface the navigation menu can be found. If a license for ESi is foreseen, the menu contains 3 buttons. • Dryer: shows all dryer settings. • ES: shows the ESi status (if a license is provided). •... -
Page 77: Installation
Instruction book Installation Dimension drawings Dimension drawings Dimension drawing of QED 650 2920 1818 00... - Page 78 Instruction book Dimension drawing of QED 850 2920 1818 00...
- Page 79 Instruction book Dimension drawing of QED 1050 Text on figures Reference Description Automatic drain, flexible drain pipe ø 12- length = 2000 mm Electrical connection, cable gland M25 3” NPT Cooling air out 2920 1818 00...
- Page 80 Instruction book Reference Description Cooling air in Net mass, approx. Compressed air inlet Compressed air outlet Air-cooled dryer type (10) Ambient (11) Maximum ambient 2920 1818 00...
-
Page 81: Installation Proposal
Instruction book Installation proposal Example Installation proposal QED 650, QED 850 and QED 1050 Reference Description Ventilation air inlet Ventilation air outlet (fan) 2920 1818 00... -
Page 82: Installation Instructions
Instruction book Installation proposal, by-pass pipe and valve Reference Description The dryer should be installed on a level floor suitable for taking its weight. A general-purpose filter which traps solid particles down to 1 micron with a max. oil carry- over of 0.1 mg/m (0.1 ppm) can be installed. - Page 83 • The required ventilation to limit the dryer room temperature is: • For QED 650: 3180 cfm (1500 l/s) • For QED 850: 4660 cfm (2200 l/s) For QED 1050: 6780 cfm (3200 l/s) •...
-
Page 84: Electric Cable Size And Fuses
40 ˚C (104 ˚F). Fuses Dryer Supply voltage Maximum fuses, recommended type: (CSA) Class HRC Form II/(UL) Class K5 or RK5 (customer's installation) QED 650 460 V 3 x 20 A QED 850 460 V 3 x 20 A QED 1050... - Page 85 Instruction book Reference Name Warning, voltage Cooling water outlet (Only for water-cooled dryers) Cooling water inlet (Only for water-cooled dryers) Maximum air inlet temperature of 70 ˚C (158 ˚F) Switch off and depressurise the dryer before starting maintenance or repair Compressed air inlet Dry air outlet Automatic condensate drain...
-
Page 86: Operating Instructions
Instruction book Operating instructions Warnings Safety precautions The operator must apply all relevant safety precautions, including those mentioned in this manual. Altitude operation Consult your supplier if operating above 3000 m (9843 ft). Initial start Procedure for controller as shown Step Action At least 10 minutes before starting, the main supply to the dryer must be switched on to... -
Page 87: Starting
Instruction book Starting Procedure for controller as shown Step Action At least 10 minutes before starting, the main supply to the dryer must be switched on to initialize the controller and flow switch. Close the dryer by-pass valve, if installed. Press start button (14). -
Page 88: Stopping
Instruction book Regularly check: • The pressure dew-point on the display of the control panel. The pressure dew-point will deviate from nominal if the air inlet conditions or volume flow differ from nominal. • That condensate is discharged. The amount depends on the operating conditions. Stopping Procedure for controller as shown Procedure... -
Page 89: Maintenance
Instruction book Maintenance Maintenance instructions Important The dryers contain refrigerant HFC. When the automatic operation LED is lit, starting and stopping of the dryer are controlled automatically. If the dryer start/stop timer is active, the dryer may start automatically, even if it was stopped manually. - Page 90 Instruction book Contact your Customer Centre to arrange a tailor-made service agreement. This will ensure optimum operational efficiency, minimize downtime and reduce the total life cycle costs. General The following remarks should be kept in mind: • Keep the dryer clean. •...
-
Page 91: Problem Solving
Instruction book Problem solving Problem solving Valve on inlet collector Attention Use only authorized parts. Any damage or malfunction caused by the use of unauthorized parts is not covered by Warranty or Product Liability. Apply all relevant Safety precautions. Before carrying out any maintenance or repairs on the dryer, stop the dryer and switch off the voltage. - Page 92 Instruction book Condition Fault Remedy Motor overload protection of Have motor checked refrigerant compressor motor For resetting: see the section has tripped Electrical system High-pressure switch tripped See above Condensate drain remains Automatic drain system Flush the assembly by opening inoperative clogged manual drain valve.
-
Page 93: Technical Data
Maximum compressed air inlet temperature ˚F Maximum compressed air inlet temperature ˚C Air dryer data General Unit Pressure drop over dryer under nominal conditions, approx. - QED 650 3.34 - QED 650 0.23 - QED 850 3.05 - QED 850 0.21... - Page 94 Instruction book Unit Type R410a Total amount (approx.) - QED 650 4.41 - QED 650 - QED 850 6.17 - QED 850 - QED 1050 - QED 1050 QED 650 Performance data Unit At ambient °F temperature of: At ambient °C...
- Page 95 Instruction book QED 850 Performance data Unit At ambient °F temperature of: At ambient °C temperature of: Volume flow at dryer inlet under nominal conditions Volume flow at dryer inlet under nominal conditions Pressure dew-point ˚F Pressure dew-point ˚C Total power 10.3 consumption Total power...
- Page 96 Instruction book Unit Volume flow at dryer inlet under nominal conditions Pressure dew-point ˚F Pressure dew-point ˚C Total power 12.2 10.6 10.9 11.5 13.5 15.7 consumption Total power 10.1 11.7 consumption Power consumption, cooling fan Power consumption, cooling fan Cooling air flow 7600 7600 7600...
- Page 97 Instruction book Pressure equipment directives Components subject to 97/23/EC Pressure Equipment Directive Components subject to 97/23/EC Pressure Equipment Directive greater than or equal to category II. Description PED Class Compressor Heat exchanger High-pressure switch Overall rating The dryers conform to PED category II. 2920 1818 00...
- Page 99 info@quincycompressor.com | 217.222.7700 Cod. 2920 1818 00 - Edition 09/2012 quincycompressor.com...
Need help?
Do you have a question about the QED 650 and is the answer not in the manual?
Questions and answers