Chapters
Table of Contents
Troubleshooting

Subscribe to Our Youtube Channel
Related Manuals for Gold Medal ReadyServe 2785 Series


Summary of Contents for Gold Medal ReadyServe 2785 Series
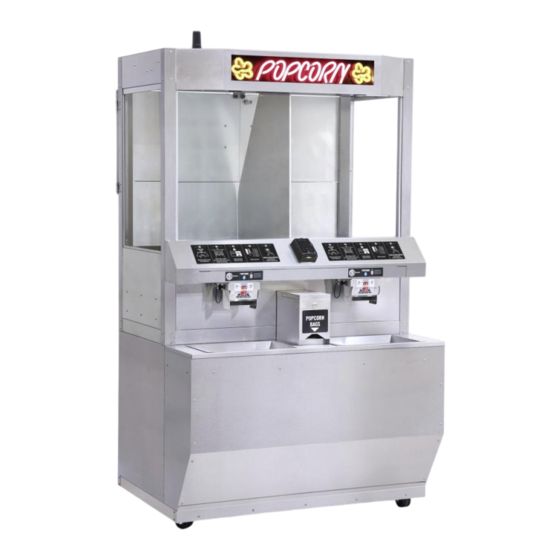
- Page 1 Instruction Manual ® ReadyServe Unit and Base ® ReadyServe Cashless Model Series 2785 Series Model 2785 (002) Model 2785 (072) 10700 Medallion Drive, Cincinnati, Ohio 45241-4807 USA © 2023 Gold Medal Products Co. Part No. 110223...
-
Page 2: Table Of Contents
ReadyServe Unit and Base ReadyServe Cashless Model Series 2785 and 2779 Table of Contents SAFETY PRECAUTIONS ........................... 3 INSTALLATION INSTRUCTIONS ........................5 Inspection of Shipment ............................5 Model Description ..............................5 Initial Setup................................6 Coil and Corn Tray Removal (Installation) ....................8 Filling the Bag Dispenser (ReadyServe Cashless only) ................ -
Page 3: Safety Precautions
Read and understand operator’s manual and all other safety instructions before using this equipment. To order copies of the operator’s manual go to gmpopcorn.com or write to Gold Medal Products Co., 10700 Medallion Drive, Cincinnati, OH 45241 USA 1-(800)-543-0862 022_060215 gmpopcorn.com... - Page 4 039_080614 Note: Improvements are always being made to Gold Medal’s equipment. This information may not be the latest available for your purposes. It is critical that you call Gold Medal’s Technical Service Department at 1-800-543-0862 for any questions about your machine operations, replacement parts, or any service questions.
-
Page 5: Installation Instructions
ReadyServe Unit and Base ReadyServe Cashless Model Series 2785 and 2779 INSTALLATION INSTRUCTIONS Inspection of Shipment After unpacking, check thoroughly for any damage which may have occurred in transit. Claims should be filed immediately with the transportation company. The warranty does not cover damage that occurs in transit, or damage caused by abuse, or consequential damage due to the operation of this machine, since it is beyond our control (reference warranty in back of manual). -
Page 6: Initial Setup
ReadyServe Unit and Base ReadyServe Cashless Model Series 2785 and 2779 Initial Setup General images shown for reference only. 1. Remove all packaging and tape prior to operation. Place unit on a sturdy, level surface for use. ReadyServe: Unit is equipped with (4) 4” (10.2 cm) leg levelers (rotate foot on leg to level cabinet as needed). - Page 7 ReadyServe Unit and Base ReadyServe Cashless Model Series 2785 and 2779 5. Make sure the Corn Tray and Coil Assembly are in position for use (see image below). Corn Tray and Corn Tray (Dispense Tray); trays are fitted to corner posts. Coil Assembly Tray Panel (coil goes under the panel).
-
Page 8: Coil And Corn Tray Removal (Installation)
3. Lift out the corn tray using both handles. shaft until snug. Filling the Bag Dispenser (ReadyServe Cashless only) The Bag Dispenser is sized to fit Gold Medal 2209E bags (bags sold separately). Bottom Lock of bag. Dispense 1. -
Page 9: Optional Mounting - Countertop Or Base (For Readyserve Unit With Legs)
ReadyServe Unit and Base ReadyServe Cashless Model Series 2785 and 2779 Optional Mounting – Countertop or Base (for ReadyServe unit with legs) Mount Unit on Countertop: The legs may be removed to set unit flush with counter, if desired. Use the 4 leg holes and 3/8-16 bolts and washers to secure unit to the counter (fasteners not included). - Page 10 ReadyServe Unit and Base ReadyServe Cashless Model Series 2785 and 2779 5. Securely plug the ReadyServe power cord into the receptacle in the base. Reference the Electrical Requirements section to plug in the power cord routed from the base. 2785-00-002_2779-00-011_Manual Install ReadyServe Unit Power Cord location (if grommet is removed to...
-
Page 11: Electrical Requirements
We recommend this equipment be on a dedicated and protected circuit. Failure to wire properly will void the warranty and may result in damage to the machine. It is Gold Medal Products Co.’s recommendation that this machine be plugged directly into a wall outlet. The use of extension cords is not recommended due to safety concerns, and may cause sacrificed and/or reduced performance. -
Page 12: Topping Installation (For Units Equipped With Topping Dispense)
(i.e., real butter). 1. Open oil access door on operator side of unit. 2. Load a box of pre-heated topping onto the rack. Gold Medal’s Backroom Warmer (2262 Series) may be purchased for pre-heating the topping. Mount the box in the rack so the topping bag nozzle is located towards the bottom of the box to permit a free flow of the topping from the bag. -
Page 13: Operating Instructions
ReadyServe Unit and Base ReadyServe Cashless Model Series 2785 and 2779 OPERATING INSTRUCTIONS Controls and Their Functions Operator Side (Switches/Controls) Main Power Main Power Left Heat Control Right Heat Control Heat Control Crisper Power Left Crisper Power Right Crisper Power Bypass Payment (Cashless only) Digital Controls... -
Page 14: Adjusting The Set Temperature
ReadyServe Unit and Base ReadyServe Cashless Model Series 2785 and 2779 TOPPING DISPENSE BUTTON - Model 2785 (000) only. Lighted Push Button Switch –Press and hold button to dispense butter flavored topping. Release button to stop dispensing topping. 1 AMP Fuse: The topping dispenser pump (if equipped) has a 1 AMP fuse to protect it from an overload condition (reference the Troubleshooting section). -
Page 15: Cashless Payment System (If Equipped)
(Serial No. of the Nayax Payment System must be assigned to your account). Note: If you do not have an account set up, contact Gold Medal Tech Support for assistance. To program or change device settings (within your Nayax account portal)—see the Device Settings section in the Nayax Quick Reference Guide at the end of this manual. -
Page 16: Operating Instructions
ReadyServe Unit and Base ReadyServe Cashless Model Series 2785 and 2779 Operating Instructions ReadyServe Operating Instructions The ReadyServe unit is easy to use and provides a convenient, sanitary way for customers to self- serve portions of popcorn. Reference the Analog Control or Digital Control instructions below to operate the unit. -
Page 17: Readyserve Cashless Operating Instructions
ReadyServe Unit and Base ReadyServe Cashless Model Series 2785 and 2779 ReadyServe Cashless Operating Instructions See previous page for ReadyServe Instructions. The ReadyServe Cashless unit provides a convenient, sanitary way for customers to self-serve portions of popcorn. Unit Startup 1. Turn the Main Power Switch ON. 2. -
Page 18: Care And Cleaning
ReadyServe Unit and Base ReadyServe Cashless Model Series 2785 and 2779 Care and Cleaning DANGER Machine must be properly grounded to prevent electrical shock to personnel. DO NOT immerse in water. DO NOT clean appliance with a water jet or steam cleaner. - Page 19 Medium Size Container (for priming unit) 1. Make sure the unit has cooled completely before attempting to clean. 2. Fill a clean bucket half-full with hot water and Gold Medal Chlor-Tech Sanitizer (reference instructions on sanitizer container for appropriate amount).
- Page 20 ReadyServe Unit and Base ReadyServe Cashless Model Series 2785 and 2779 6. Use the Topping Dispense Button to dispense solution until tubes are clean and free of topping. 7. When pumping is complete, discard dirty solution, clean the pail, and refill with clean hot water. 8.
-
Page 21: Troubleshooting
ReadyServe Unit and Base ReadyServe Cashless Model Series 2785 and 2779 Troubleshooting General Unit Issues - see the Troubleshooting table below. Nayax Cashless Device/Setting Issues – see the Troubleshooting section in the Nayax Quick Reference Guide at the end of this manual. - Page 22 ReadyServe Unit and Base ReadyServe Cashless Model Series 2785 and 2779 Issue Possible Cause Solution C. Topping Dispense C. Make sure the Main Power Switch is ON to Button/Motor supply power to the Dispense Button. Check if the Dispense Button LED is ON. If the LED is ON, and topping does not dispense when the button is pushed, the button or the motor may be faulty, contact qualified service...
- Page 23 ReadyServe Unit and Base ReadyServe Cashless Model Series 2785 and 2779 Issue Possible Cause Solution C. Set Point C. If cabinet is not heating enough, check the set point temperature; adjust as needed (see, Adjusting the Set Temperature section). If unit continues to heat past the set point, the digital control may be set on cooling (the control can be configured for heating or cooling).
-
Page 24: The Following Sections Are For Qualified Service Personnel Only
ReadyServe Unit and Base ReadyServe Cashless Model Series 2785 and 2779 THE FOLLOWING SECTIONS ARE FOR QUALIFIED SERVICE PERSONNEL ONLY MAINTENANCE INSTRUCTIONS DANGER Machine must be properly grounded to prevent electrical shock to personnel. Failure to do so could result in serious injury, or death. Make sure all machine switches are in the OFF position before plugging the equipment into the receptacle. -
Page 25: Ordering Spare Parts
Web Page: gmpopcorn.com Replacing Broken Glass Broken glass panels can be easily replaced. Gold Medal Products Co. does not ship glass. It can be obtained from a local glass shop and always purchase tempered glass. GLASS DIMENSIONS (Height x Width x Thickness) Front Glass: 26.125”... -
Page 26: Sign Options
ReadyServe Unit and Base ReadyServe Cashless Model Series 2785 and 2779 Magnet or Magnetic Clip holds glass during transit. As applicable, remove magnet or magnetic clip from above glass panel. Slide glass panel up Lower glass panel into under top ridge. bottom channel. -
Page 27: Cabinet Exterior - Front View
ReadyServe Unit and Base ReadyServe Cashless Model Series 2785 and 2779 Cabinet Exterior – Front View Antenna (Cashless only, see ReadyServe Cashless Top Interior section). *For Nayax cashless device, Cashless see note below. See Sign Options Decals For Glass, see See Base Parts Replacing section. -
Page 28: Readyserve - Rear And Top Interior View
ReadyServe Unit and Base ReadyServe Cashless Model Series 2785 and 2779 ReadyServe - Rear and Top Interior View For Sign, see Sign Options section. 20 16 6, 7 25, 26 Door Hinges Panel Latch For additional back panel parts, see Drop Panel Hinges Control View section. -
Page 29: Readyserve Cashless - Rear And Top Interior View
ReadyServe Unit and Base ReadyServe Cashless Model Series 2785 and 2779 ReadyServe Cashless - Rear and Top Interior View For Sign, see Sign Options section. 10, 11 12 13 LH and RH 27, 28 Door Hinges Panel Latch For additional back *Reference Setup section Drop Panel Hinges panel parts, see... -
Page 30: Analog Control View - Units With Topping Dispenser
Magnetic Catch (behind door) Motor and Filter View *CAUTION: If supply cord is damaged, it must be replaced by Gold Medal Products Co., its service agent, or similarly qualified persons in order to avoid a hazard. Part Number Part Number... -
Page 31: Digital Control View
ReadyServe Unit and Base ReadyServe Cashless Model Series 2785 and 2779 Digital Control View For Drop Panel parts breakdown, see Rear View section. 1, 4 (Cashless only) 15, 16 Power Cord w/GFCI Plug (ReadyServe Cashless only) Motor and Filter View *CAUTION: If supply cord is damaged, it must be replaced by Gold Medal Products Co., its service agent, or similarly General images shown for... -
Page 32: 2785 (000) Cabinet Interior - Corn Tray And Topping Dispenser
ReadyServe Unit and Base ReadyServe Cashless Model Series 2785 and 2779 2785 (000) Cabinet Interior – Corn Tray and Topping Dispenser 13, 14 Bushings See Crisper Blower 8, 9 Assembly section. 21, 22 29, 30 13, 14 Also see chute Diode for pump View with Corn Trays Removed 24, 25... - Page 33 ReadyServe Unit and Base ReadyServe Cashless Model Series 2785 and 2779 2785 (000) Cabinet Interior – Corn Tray and Topping Dispenser – Parts List Part Number Part Number Item Part Description Item Part Description 2785-00-000 2785-00-000 CORNER COVER 114112 FUSEHOLDER 74636 SCREW #8-32X3/8 PAN HD PH 74141...
-
Page 34: 2785 (002) Cabinet Interior - Corn Tray And Divider
ReadyServe Unit and Base ReadyServe Cashless Model Series 2785 and 2779 2785 (002) Cabinet Interior – Corn Tray and Divider Center 12 13, 14 Bushing See Crisper Blower 7, 8 Assembly section. 13, 14 22, 23 43, 36, 44 35, 36 34, 35 Chute Parts 45, 46... - Page 35 ReadyServe Unit and Base ReadyServe Cashless Model Series 2785 and 2779 2785 (002) Cabinet Interior – Corn Tray and Divider – Parts List Part Number Item Part Description 2785-00-002 CORNER COVER 114112 SCREW #8-32X3/8 PAN HD PH 74141 BUSHING, SNAP .875 IN 45396 STRAIN RELIEF T&B 3302 89045...
-
Page 36: 2785 (072) Cashless - Cabinet Interior - Corn Tray And Divider
ReadyServe Unit and Base ReadyServe Cashless Model Series 2785 and 2779 2785 (072) Cashless – Cabinet Interior – Corn Tray and Divider Center 12 13, 14 Bushing See Crisper Blower 7, 8 Assembly section. 19 20 13, 14 25, 26 43, 36, 44 35, 36 34, 35... - Page 37 ReadyServe Unit and Base ReadyServe Cashless Model Series 2785 and 2779 2785 (072) Cashless - Cabinet Interior – Corn Tray and Divider – Parts List Part Number Item Part Description 2785-00-072 CORNER COVER 114112 SCREW #8-32X3/8 PAN HD PH 74141 BUSHING, SNAP .875 IN 45396 STRAIN RELIEF T&B 3302...
-
Page 38: Crisper Blower Assembly
ReadyServe Unit and Base ReadyServe Cashless Model Series 2785 and 2779 Crisper Blower Assembly Blower Box Lid Thermostat 6, 7, 8 Fasteners 9, 10 9, 10 15, 16, 17 18 19 Left Hand Crisper Blower Assembly (PN 114185) shown for general parts reference only (RH Blower Assembly, PN 114184). -
Page 39: Model 2779 Series Base - Parts Breakdown
LH Door and Lock 17a, 17b **CAUTION: If supply cord is damaged, it must be replaced Model 2779 (014) by Gold Medal Products Co., its service agent, or only. similarly qualified persons in order to avoid a hazard. gmpopcorn.com Page 39... - Page 40 ReadyServe Unit and Base ReadyServe Cashless Model Series 2785 and 2779 Model 2779 Series Base – Parts List Part Number Item Part Description 2779-00-010 2779-00-011 2779-00-014 DRIP PAN INSERT 69201 DRIP PAN 69148 BAG DISPENSER, SLOT LOCK 114756S INSERT 114786 114786 INSERT (for Cashless Unit Base, decal sold 114965...
-
Page 41: Wire Diagram
ReadyServe Unit and Base ReadyServe Cashless Model Series 2785 and 2779 Wire Diagram Model No. 2785-00-000 gmpopcorn.com Page 41... - Page 42 ReadyServe Unit and Base ReadyServe Cashless Model Series 2785 and 2779 Model No. 2785-00-002 gmpopcorn.com Page 42...
- Page 43 ReadyServe Unit and Base ReadyServe Cashless Model Series 2785 and 2779 Model No. 2785-00-072 (sheet 1 of 2) gmpopcorn.com Page 43...
- Page 44 ReadyServe Unit and Base ReadyServe Cashless Model Series 2785 and 2779 Model No. 2785-00-072 (sheet 2 of 2) gmpopcorn.com Page 44...
- Page 45 Quick REFERENCE Nayax Cashless Payment System 10700 Medallion Drive, Cincinnati, Ohio 45241-4807 USA © 2023 Gold Medal Products Co. Part No. 110318...
- Page 46 Quick Reference Guide Nayax Cashless Payment System Disclaimer: The Nayax Cashless Payment System incorporated in Gold Medal cashless units is manufactured and managed by a third-party vendor. GOLD MEDAL’S GENERAL WARRANTY DOES NOT APPLY TO THE EQUIPMENT AND SERVICES RELATED TO THE NAYAX CASHLESS PAYMENT SYSTEM AND GOLD MEDAL EXPRESSLY DISCLAIMS ANY AND ALL WARRANTIES RELATED TO THE SAME.
-
Page 47: Device Settings-Screen Selection Setup
Quick Reference Guide Nayax Cashless Payment System Device Settings—Screen Selection Setup Your new unit is preprogrammed with default settings. This section Welcome shows you how to customize those settings. After review, if you have Message any setting issues, reference GM Tech Service section of this guide. Identifier In this , you will set up:... - Page 48 Quick Reference Guide Nayax Cashless Payment System Pulse/ccTalk Pulse/ccTalk has the settings necessary to get you started. Important: Only change entry fields as indicated below. If device does not respond correctly, recheck all steps. Determine number of Selection Buttons needed (1–4). For Single Dispense For RH For LH...
-
Page 49: Reimbursement Statement (Understanding Your Statement)
Quick Reference Guide Nayax Cashless Payment System Reimbursement Statement (Understanding Your Statement) The income reimbursement process for your cashless system is easy. All income, fees, and statements are between the customer and Nayax only—you received email instructions on setting up your banking after onboarding was completed. - Page 50 Quick Reference Guide Nayax Cashless Payment System Reimbursement Statement Statement Period is always for the week prior to the week your statement is received. Cost of ownership fees (processing, monthly, and unit activation fees) are automatically deducted from any income in the statement period. •...
-
Page 51: Refund A Transaction
Quick Reference Guide Nayax Cashless Payment System Refund a Transaction Transaction Information Needed: Refunding a transaction is straightforward. Place your company’s contact information on the machine • Purchaser’s name, phone number, and email. (i.e., phone number, email) and list of the purchaser’s •... - Page 52 Quick Reference Guide Nayax Cashless Payment System Refund a Transaction Select the transaction and request a refund. (Filter results as needed.) 5.1 Right click on transaction. 5.2 Select Request Refund. On pop-up, fill in Refund Details. Refund Amount Purchaser’s email (for refund confirmation) Provide reason for refund request.
-
Page 53: Compare Two Cashless Devices (Clone Settings)
Quick Reference Guide Nayax Cashless Payment System Compare Two Cashless Devices (Clone Settings) Nayax machine settings can be compared and copied from one unit to another. Compare a device to a “working or master” unit for troubleshooting, or clone settings to a new device. General images shown for reference purposes only. - Page 54 Quick Reference Guide Nayax Cashless Payment System Compare Machine Attributes Actor A (Distributor) and Machine A (Device) shows the unit you want to copy. (If not auto populated or to change the selection, use the dropdown(s) to search for a device). “Actor A”...
-
Page 55: Gold Medal Technical Service (Invite A Service Tech User)
Quick Reference Guide Nayax Cashless Payment System Gold Medal Technical Service (Invite a Service Tech User) GM Tech Support can help troubleshoot your device issue on a tech support call (1-800-543-0862; Ext: 2499). Generally, device issues are related to a setting—if the issue is not easliy located, you can invite the GM Tech as a temporary user to view your device settings while on the call. - Page 56 Quick Reference Guide Nayax Cashless Payment System Invite a Service Tech to View Settings Populate user details: 5.1. From Company menu, select the Operator you want service to reside under. 5.2. Fill in New User Information: jsmith@gmpopcorn.com Job Title: Manager (email shown as example only) Job Function: Manager New Login: see image note.
-
Page 57: Troubleshooting - Faq
Nayax Cashless Payment System Troubleshooting - FAQ Generally, device issues are related to a setting. Gold Medal Tech Support is available to help with your GM unit/cashless device issues. If the instructions below do not solve your issue, reference the Gold Medal Technical Service section of this guide, before ordering a replacement module. -
Page 58: Device Not Working After A Setting Change In Pulse/Cctalk
Nayax account representative. Purchaser wants a refund. A. Reference Refund a Transaction section of this guide for instructions. Invite a New User—allow A. Reference Gold Medal Technical Service GM Support to troubleshoot section of this guide. your settings. gmpopcorn.com... - Page 59 No claim under this warranty shall be honored in the event that components in the unit at the time of the claim were not supplied or approved by Gold Medal Products Co. This warranty is effective only when electrical items have been properly attached to city utility lines only at proper voltages.
Need help?
Do you have a question about the ReadyServe 2785 Series and is the answer not in the manual?
Questions and answers