Sign In
Upload
Download
Table of Contents
Contents
Add to my manuals
Delete from my manuals
Share
URL of this page:
HTML Link:
Bookmark this page
Add
Manual will be automatically added to "My Manuals"
Print this page
×
Bookmark added
×
Added to my manuals
Manuals
Brands
FISCHER Manuals
Measuring Instruments
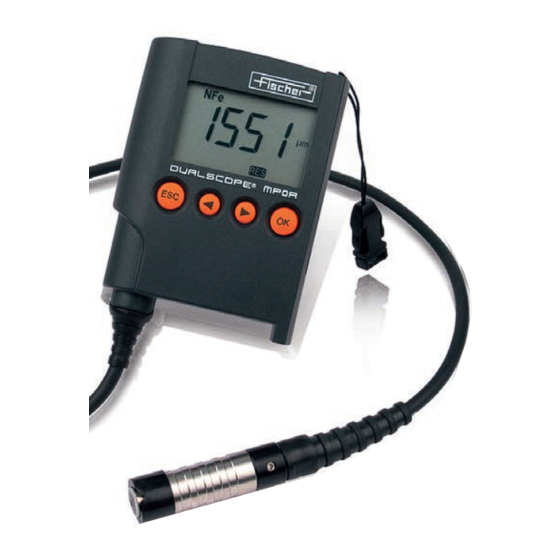
PERMASCOPE MP0R
Operator's manual
FISCHER PERMASCOPE MP0R Operator's Manual
Hide thumbs
1
2
3
Table Of Contents
4
5
6
7
8
9
10
11
12
13
14
15
16
17
18
19
20
21
22
23
24
25
26
27
28
29
30
31
32
33
34
35
36
37
38
39
40
41
42
43
44
45
46
47
48
49
50
51
52
53
54
55
56
57
58
59
60
page
of
60
Go
/
60
Contents
Table of Contents
Troubleshooting
Bookmarks
Table of Contents
Table of Contents
Instrument Description
Areas of Application
Components
Display Symbols
Instrument Keys
Main Menus - Functional Overview
Switching the Instrument on / off
Auto-Switch-Off
Manually Switch-Off
Deactivate Auto-Switch-Off
Measurement
Measurement Accept
Scroll through the Single Readings
Leave the Scroll Mode
Influencing Variables Taken into Consideration
Kinds of Calibration
Calibration - General Notes to Observe
Normalization
Corrective Calibration
Deleting the Corrective Calibration and Normalization / Restoring the Baseline of the Characteristic
Deleting Measurements
Deleting Only the Last Reading
Evaluation
Specification Limits / Offset Value
Setting the Specification Limits/Offset Value
Deleting the Specification Limits / Offset Value
Data Transmission
Prerequisite for Data Transmission
Transmitting Measurements
Transmitting the Mean Value to the PC
Triggering the Group Separator to the PC
Instrument Settings
Access to the Instrument Setting Menus
Instrument Setting Menus
Measurement Modes Std, 90.10, SSPC - Menu 1
Lock Function - Menu 1
Block Length - Menu 1
Display Resolution - Menu 1
Data Storage - Menu 1
Dimension Unit - Menu 3
Measurement Data Display - Menu 3
Acoustic Signal - Menu 3
Test Method Selection - Menu 3
Data Transmission in the Free-Running Display Mode
Menu 3
Data Transmission - Menu 4
Group Separator - Menu 4
Auto Switch-Off - Menu 4
Display Illumination - Menu 4
Free-Running Display Mode - Menu 5
Factory Reset - Menu 9
10 Trouble Shooting
10.1 Data Transmission Via USB - Trouble Shooting
11 Technical Data
12 Ordering Information
13 Disposal
Index
Advertisement
Quick Links
1
Table of Contents
2
Display Symbols
3
Measurement
4
Kinds of Calibration
5
Calibration - General Notes to Observe
Download this manual
P A U L N G A R D N E R C O MP A N Y
9 1 0 4 G U I L F O R D R O A D , S U I T E H
E MA I L G A R D C O @A L T A N A . C O M
C O L U MB I A , MD 2 1 0 4 6 U S A
P H O N E + 1 - 9 5 4 - 9 4 6 - 9 4 5 4
Table of
Contents
Previous
Page
Next
Page
1
2
3
4
5
Advertisement
Table of Contents
Troubleshooting
10 Trouble Shooting
46
10.1 Data transmission via USB - trouble shooting
50
Need help?
Do you have a question about the PERMASCOPE MP0R and is the answer not in the manual?
Ask a question
Questions and answers
Related Manuals for FISCHER PERMASCOPE MP0R
Measuring Instruments FISCHER DUALSCOPE MP0R USB Operator's Manual
Coating thickness measuring instrument (46 pages)
Measuring Instruments FISCHER Me01 Series Operating Instructions Manual
Digital manometer (9 pages)
Measuring Instruments FISCHER ME01 Series Data Sheet And Operating Manual
Digital manometer (9 pages)
Measuring Instruments FISCHER MA15F ... A Series Operation Manual
Diaphragm manometer for explosive areas (36 pages)
Measuring Instruments FISCHER ME49F Series Operating Manual
Digital manometer (20 pages)
Measuring Instruments FISCHER MS10 Instruction Manual
Contact pressure vacuum gauge (9 pages)
Measuring Instruments FISCHER MMS Inspection SPG Series Operator's Manual
(52 pages)
Measuring Instruments FISCHER DAREX 715000 Instructions For Use Manual
(60 pages)
Measuring Instruments FISCHER MMS Inspection DPM Operator's Manual
Gage type high (40 pages)
Measuring Instruments FISCHER MS11 Instruction Manual
Contact pressure gauge (8 pages)
Measuring Instruments FISCHER MD-1a Technical Reference Manual
Galvanic unit (10 pages)
Measuring Instruments FISCHER MA15F A Series Operation Manual
Diaphragm manometer for explosive areas (48 pages)
Measuring Instruments FISCHER MMS User Manual
Inspection dpm (118 pages)
Measuring Instruments FISCHER PERMASCOPE MP0 Operator's Manual
(56 pages)
Measuring Instruments FISCHER DUALSCOPE MP0R Operator's Manual
(60 pages)
Measuring Instruments FISCHER DELTASCOPE DMP10 Operator's Manual
Gauges for coating thickness measurement (88 pages)
This manual is also suitable for:
Isoscope mp0r
Dualscope mp0r
Permascope mp0r-fp
Dualscope mp0r-fp
Dualscope mp0rh-fp
Table of Contents
Save PDF
Print
Rename the bookmark
Delete bookmark?
Delete from my manuals?
Login
Sign In
OR
Sign in with Facebook
Sign in with Google
Upload manual
Upload from disk
Upload from URL


Need help?
Do you have a question about the PERMASCOPE MP0R and is the answer not in the manual?
Questions and answers