Table of Contents
Advertisement
Quick Links
Advertisement
Table of Contents

Subscribe to Our Youtube Channel
Related Manuals for Omni revvity CF-220


Summary of Contents for Omni revvity CF-220
- Page 1 CF-220 Centrifuge User Manual...
- Page 2 Data herein has been verified and validated. It is believed adequate for the intended use of the instrument. If the instrument or procedures are used for purposes over and above the capabilities specified herein, confirmation of the validity and suitability should be obtained;...
-
Page 3: Safety Information
1. SAFETY INFORMATION Before using the machine, make sure to read and understand this manual thoroughly. Keep the manual close to the machine, easily accessible to all the users. Improper operation can cause injury to persons or damage to the equipment. 1.1 WARNING SYMBOLS The following are the warning symbols that are used in this manual. -
Page 4: Intended Use
2. INTRODUCTION 2.1 INTENDED USE The CF-220 Centrifuge is a universal laboratory centrifuge. It is designed for use in medical, scientific and industrial laboratories, for separating the substances with dif- ferent specific densities by centrifugal force. In particular, it is intended for preparation of human samples (body fluids), in approved test tubes, before further analysis. -
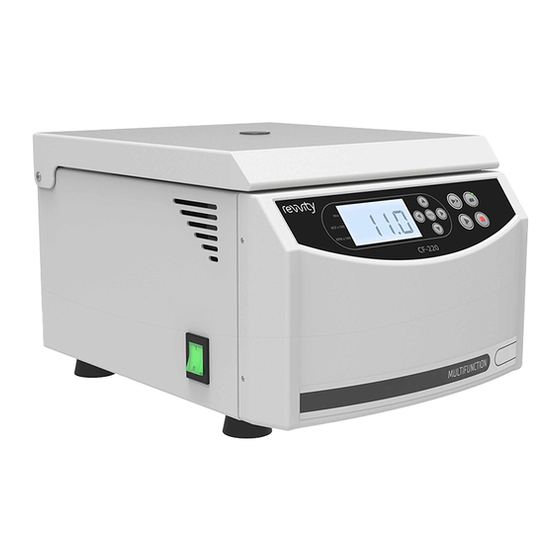
Page 5: Overall View
After installation, it is recommended that you wait for some time, before connecting the centrifuge to the mains power supply. This pre- vents damage to electronic components due to condensation, which can occur, when you bring the device from a cold environment to a warm environment. -
Page 6: Operation
Name Label Mains Socket Auxiliary Fuse Compartment Lid Release Foot 3. OPERATION Before using the centrifuge for the first time, familiarize yourself with the control panel and the functions of the knob and keys. CF-220 Centrifuge:... -
Page 7: Knob And Key Functions
DESCRIPTION: Unit for Time (min) Unit for Centrifugal Force (rcf x 100) Unit for Rotational Speed (rpm x 100) Display LEFT Key UP Key PROGRAM Key DOWN Key RIGHT Key FAST SPIN Key LID Key LID Indicator START Key STOP Key 3.1 KNOB AND KEY FUNCTIONS By pressing this key, you select operation parameters in the left direction. - Page 8 By pressing this key, you decrease the set value of selected opera- tion parameter for one step. By pressing and holding this key, the value is decreasing quickly. By pressing this key, you select operation parameters in the right direction. By pressing and holding this key, you perform the fast spin.
-
Page 9: Turning On The Centrifuge
3.2 TURNING ON THE CENTRIFUGE Use the enclosed power cord to connect the centrifuge to the mains power supply. Turn on the main switch, which is located on the front of the left side of the centrifuge. All segments are displayed on the display at first, then program version (VX.X), then centrifuge type and then centrifuge model CF-220, and finally the value of last dis- played operation parameter is displayed. -
Page 10: Rotor Loading
3.5 ROTOR LOADING You must always load the rotor with test tubes symmetrically. You may only use approved test tubes. Weight difference of the samples in test tubes should be as low as possible in order to avoid potential damages to the motor and to minimize running noise and vibration.Following are examples of correctly and wrongly loaded rotors: CORRECT CORRECT... -
Page 11: Centrifugal Force
3.6 SETTING THE ROTATIONAL SPEED AND CENTRIFUGAL FORCE By pressing LEFT and RIGHT keys, select the operation parameter you wish to set (rota- tional speed, centrifugal force, run time, acceleration level and braking level). Then use UP and DOWN keys to set the value of selected operation parameter. •... -
Page 12: Program Setting
Changing of run time during the operation: You should be aware, that when you extend run time, the difference between newly set and originally set time is added to current time, and when you shorten run time, the difference is subtracted. The centrifuge started with time set to 10 minutes. - Page 13 The following table shows factory preset values of operation parameters for all 100 programs: Rotational Acceleration Braking Run Time Program Speed Level Level (min) (RPM) (AcX) (brX) 1,000 8,000 10,000 10,000 12,000 14,000 14,000 15,000 15,000 3,000 3,000 3,000 3,000 3,000...
-
Page 14: Starting And Stopping The Centrifuge
3.8 STARTING AND STOPPING THE CENTRIFUGE Before starting the centrifuge, turn on the main switch, open the centrifuge lid, insert the rotor and load it with test tubes, close the centrifuge lid and set the operation parameters or select a suitable program. By pressing the START key, you start the run of the centrifuge. -
Page 15: Rotor Recognition
3.9 ROTOR RECOGNITION Several rotors can be used (RA 24/2, RA 12/5, RA 12/12, RA 8/15, RA 6/50, RA 4/PCR, RH 24), so rotor recognition is executed automatically every time the centrifuge starts, and maximum rotational speed is set (6,000 RPM or 15,500 RPM), to correspond with the inserted rotor. -
Page 16: Auxiliary Lid Release
3.13 AUXILIARY LID RELEASE In case of power failure, the lid can be opened manually. If power failure occurs during the operation of the centrifuge, the rotor may continue rotating for several minutes, before it stops. Before auxiliary lid release, turn off the main switch of the centrifuge and wait until rotor fully stops. - Page 17 4. MAINTENANCE AND CLEANING OF THE CENTRIFUGE 4.1 REGULAR SERVICE We recommend having the centrifuge and associated rotors checked by authorized service at least once a year. You must thoroughly clean and disinfect the centrifuge prior to service. 4.2 CLEANING THE CENTRIFUGE After every centrifugation, please remove any condensed water from the rotor chamber using a soft, absorbent cloth.
-
Page 18: Troubleshooting
5. TROUBLESHOOTING Review the information below to troubleshoot the operating problems. 5.1 ERROR MESSAGES If a an error occurs during the operation of the centrifuge, an error message appears on the display, and the centrifuge stops automatically. The display shows message ERROR and number of the error EXX (XX is the error number). - Page 19 DISPLAY PROBLEM SOLUTION REPAIRS Reduce braking level User Wait 10 min, for the braking Voltage overload User on the resistor to cool down ERROR E42 DC link (over 400 V) Error on power regulator Service Error on braking resistor Service Reduce speed User Driver tempera-...
-
Page 20: Exit From Error Display
5.2 EXIT FROM ERROR DISPLAY By pressing the STOP key, you exit from error display and go back to stand-by mode. If error is still displayed, turn off the main switch of the centrifuge and turn it on again. If the centrifuge still doesn’t return to stand-by mode, call service! 5.3 USER’S PARAMETERS With user’s parameters, you can check and set some of the operational properties of the centrifuge. -
Page 21: Replacing The Centrifuge Fuses
Note: Values in SETTING column of the above table are factory default values of user’s parameters. Values are informative only, and they depend on inserted rotor and individual centrifuge. 5.4 REPLACING THE CENTRIFUGE FUSES CF-220 Centrifuge: The following fuses are required for the CF-220 Centri- fuge: 2 x 6.3AT 250V (230V) 2 x 10AT 250V (120V) -
Page 22: Technical Data
6. TECHNICAL DATA CF-220 Centrifuge: Part Numbers: CF-220-220 - 230 V CF-220-120 - 120 V Power Supply: 230 V ± 10%, 50/60 Hz 120 V ± 10%, 50/60 Hz Power Consumption: 450 W Fuses: 230 V = 2 x 6.3 A T 120 V = 2 x 10 A T Protection Class: Rotational Speed:... -
Page 23: Calculation Of Centrifugal Force
7. APPENDIX 7.1 CALCULATION OF CENTRIFUGAL FORCE For the calculation of the centrifugal force (RCF), stated as a multiple of the gravitation- al force “g”, use the following formula: RCF = 11.18 x r x ( n / 1000 )2 RCF ...Relative centrifugal force ( x g) r ....Radius of the rotor (cm) n ....Rotational speed (RPM) -
Page 24: Transport And Storage
7.4 TRANSPORT AND STORAGE Transport and storage are allowed only in the original packaging. Remove the rotor from the centrifuge before transport and storage. The centrifuge is heavy. To prevent possible injuries, be careful when lifting and carry- ing the centrifuge. Use a transport aid for transferring the device. Permissible environmental conditions for transport and storage of the equipment: - Ambient temperature: - 25 to 60 °C... - Page 26 935 Cobb Place Blvd. Kennesaw, GA 30144 800.776.4431 • 770.421.0058 www.omni-inc.com PN: 03-2020-220 Rev. A...
Need help?
Do you have a question about the revvity CF-220 and is the answer not in the manual?
Questions and answers