
Subscribe to Our Youtube Channel
Related Manuals for Elecrow CrowView


Summary of Contents for Elecrow CrowView
- Page 1 FHD Mechanical Clamping Display User Manual ★ Compatible with 13”~16.5” laptop. Copyright 2023 ELECROW All rights reserved.
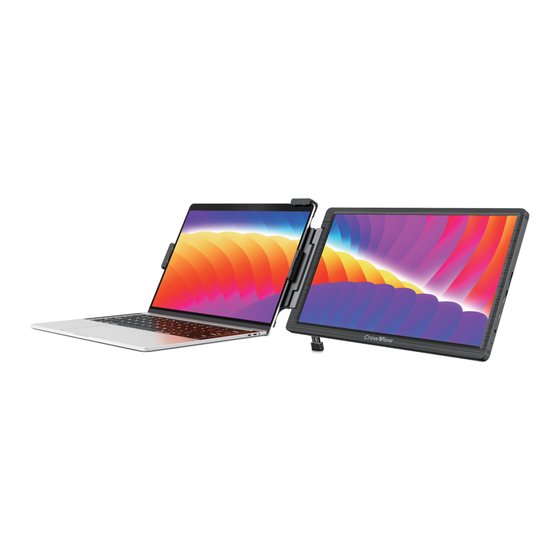
- Page 2 PRODUCT BRIEF Meeting users' demand for an extension of the visual work- space and improving work efficiency, CrowView, developed by Elecrow, comes out after research and testing. Equipped with 14 inch FHD display Lightweight and portable design. Compatible with multiple devices or game consoles.
-
Page 3: Table Of Contents
CONTENTS Part List Parts Description Buttons and Interfaces Display Setting Connection Method Placement Method PC Setting Menu Button Functions 10-12 Menu Setting Parameters... -
Page 4: Part List
PART LIST Thanks for purchasing Elecrow product. Please check that the following items are complete when opening the box. CrowView×1 Power Adapter (5V-2A)×1 Velcro Tie×2 Detachable Clip×1 USB-A to USB-C Cable×1 USB-C to USB-C Cable×1 HDMI to Mini HDMI Cable×1 User Manual×1... -
Page 5: Parts Description
PARTS DESCRIPTION ② Detachable Clip Telescopic Snap ① ④ Clamp Clasp ③ Lower Buckle The telescopic snap can flexibly adjust the clamping width. ① To disassemble the clip, press the left and right buckles and pull out. When installing, make sure to ②... -
Page 6: Buttons And Interfaces
BUTTONS AND INTERFACES Mini HDMI USB-C (Full-featured) Headphone Jack Status Lamp Exit Down Menu Support Feet Status Lamp description: Green light: normal operating; Flashing red light: power on, no signal input; Solid red light: sleep mode. Press the support feet button to extend and stabilize the foot, supporting the computer screen. The inward flipping angle should not be too small, otherwise it may cause damage. -
Page 7: Display Setting
Press the support feet button to extend and stabilize. Use a suitable cable to connect CrowView to your laptop. ( For specific connection, please see the next page "Connection Method".) After assembly, please adjust the alignment of the screens on both sides. -
Page 8: Connection Method
CONNECTION METHOD Suitable for PCs with Full-featured interface (USB 3.1) Full-featured USB-C and computer Suitable for computer equipment with HDMI interface or insufficient power supply HDMI plus power supply mode connection... -
Page 9: Placement Method
PLACEMENT METHOD PLACEMENT METHOD Right clamping Left clamping Face-to-face Place upright Place separately Storage status It is recommended that CrowView clamp it on the right side of the computer, and the support frame is used for better results. -
Page 10: Pc Setting
PC SETTINGS WINDOWS Screen Rearrange displays Enter the display settings ( > > > Select one of the displays below to change its settings. Long press (or select) a monitor, and then rearrange it by dragging. You can drag the screen to rearrange it alone. If you need to set different display modes for multiple screens, please click 1/2 (click "... - Page 11 PC SETTINGS Open System Preferences. Select "Display" in the menu bar. Click the screen to drag to adjust the position. Click the screen, enter the monitor settings page, select "Main Display", the selected screen is used as the main display, and the unselected screen is used as the extended display;...
-
Page 12: Menu Button Functions
MENU BUTTON FUNCTIONS Short press the " " button to enter the menu setting interface. Short press the "+" button to enter the BRIGHTNESS corresponding setting options. BRIGHTNESS Short press the " " button to confirm. CONTRAST STANDARD Short press the " "... -
Page 13: Menu Setting
MENU SETTING BRIGHTNESS BRIGHTNESS: Adjustable range: 0-100 BRIGHTNESS CONTRAST: Adjustable range: 0-100 BRIGHTNESS CONTRAST ECO:STANDARD/RTS/FPS/MOVIE/ STANDARD GAME/TEXT DCR: OFF/ON SHARPNESS SHARPNESS: Adjustable range: 0-4 RESOLUTION 1920×1080 60HZ HUE: Adjustable range: 0-100 SATURATION MAX RESOLUTION BRIGHTNESS SATURATION: Adjustable range: 0-100 BRIGHTNESS: Adjustable range: 0-100... - Page 14 MENU SETTING COLOR TEMP COLOR TEMP . COLOR TEMP : sRGB/USER/WARM/COOL sRGB COLOR TEMP . (RGB can only be adjusted in USER mode.) RED: Adjustable range: 0-100 GREEN GREEN: Adjustable range: 0-100 BLUE BLUE: Adjustable range: 0-100 OSD SETTINGD LANGUAGE: Available languages:English, French, German, OSD SETTING Chinese, Italian, Spanish, Portuguese, Turkish,...
- Page 15 MENU SETTING MISC MISC . ASPECT: WIDE/4: 3 WIDE ASPECT FREESYNC FREESYNC: OFF/ON OD: OFF/ON AUTO POWERDOWN AUTO POWERDOWN: OFF/10/20/30/40 HDR MODE /50/60/120/240 CLONE CLONE: OFF SIGNAL SOURCE SIGNAL SOURCE SIGNAL SOURCE: D1: TYPE C SIGNAL SOURCE D0: TYPE C/D1: TYPE C/D2: DONE LOW BLUE LIGHT LOW BLUE LIGHT: 0-4 VOLUME...
-
Page 16: Parameters
PARAMETERS Sreen Size 14” Resolution 1920x1080 (FHD) Refresh Rate 60Hz Sreen Sacle 16 : 9 Power Supply 5V-2A Power Consumption 4.8W Compatible Systems Windows/Mac/Chrome/Linux/Android Product Interface USB-C (Full-featured)x2/Mini HDMI/Headphone Jack Laptop models 13"~ 16.5" Fit size Telescopic thickness 4-8mm Telescopic length 280~400mm Size 355x217x21mm (Folded State) Weight...
Need help?
Do you have a question about the CrowView and is the answer not in the manual?
Questions and answers