Table of Contents

Subscribe to Our Youtube Channel
Summary of Contents for Elecrow RC070P
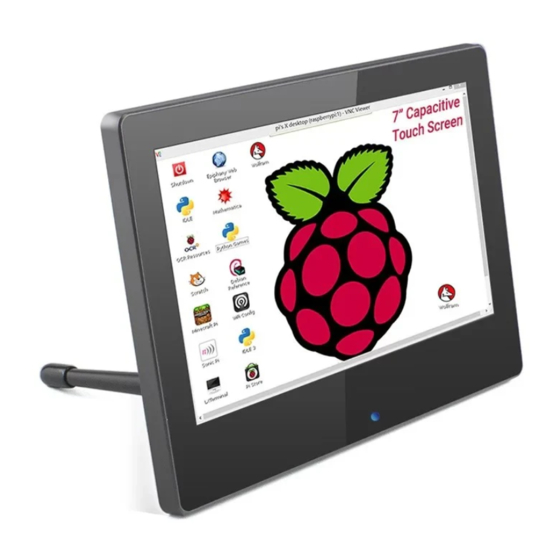
- Page 1 ELECROW 7 Inch HDMI Touchscreen Monitor Model: RC070P USER MANUAL Customer Support: Should there be any questions, please feel free to let us know and contact us with info@elecrow.com . your purchase order number at @elecrow @elecrow...
-
Page 2: Table Of Contents
2-2. Connected to PC/Laptop (with HDMI Port) Chapter 03: Screen Setup 9-10 3-1. How to Reconfigure OSD (On-Screen Display) Menu 3-2. OSD Function Introduction Chapter 04: Specifications Chapter 05: Troubleshooting Guide and Warranty 5-1. Troubleshooting Guide 5-2. Warranty 5-3. Custormer Support 2019 ELECROW All Rights Reserved. -
Page 3: Chapter 01 Before Using The Product
• 4. Wet a soft and dry cloth in water and wring thoroughly to clean the exterior of the product. • 5. Connect the power cord to the product when cleaning is finished. • 6. Power on the product and computer. 2019 ELECROW All Rights Reserved. -
Page 4: Package Contents
• 4x Copper Pillars (to support RPI) • 4x M2.5*5 Screws (to mount RPI) • 1x User Manual 1-3. Product Description 180.0mm 23.0mm Light • Blue light indicated working status. • Touch the position of light to adjust backlight. 11.9mm 134.0mm 2019 ELECROW All Rights Reserved. -
Page 5: Port Description
By default, the key is the hot key for turn down the volume. When in the OSD menu, press for up/increase adjustment. By default, the key is the hot key for turn up the volume. When in the OSD menu, press for down/decrease parameter. 2019 ELECROW All Rights Reserved. -
Page 6: Chapter 02 Connecting And Using A Source Device
2-1-2. How to Use with Raspbian /Ubuntu Mate /Retropie/Kali System Step 1. Download the Image • Raspbian Image Image download Link: https://www.raspberrypi.org/downloads/raspbian/ User: pi Password: raspberry Please download the latest Image for Raspberry Pi 4B • Ubuntu Mate Image Image download Link: https://ubuntu-mate.org/download/#xenial 2019 ELECROW All Rights Reserved. - Page 7 • Retropie Image Image download Link: https://retropie.org.uk/download/ • Kali Image image download Link: https://www.offensive-security.com/kali-linux-arm-images/ User: root Password: toor 2019 ELECROW All Rights Reserved.
- Page 8 file, save and eject SD card safely: hdmi_force_hotplug=1 max_usb_current=1 hdmi_group=2 hdmi_mode=1 hdmi_mode=87 hdmi_cvt 1024 600 60 6 0 0 0 hdmi_drive=1 Step 5. Insert the SD Card into the Slot on the Back of the Raspberry Pi Motherboard. 2019 ELECROW All Rights Reserved.
-
Page 9: Connected To Pc/Laptop (With Hdmi Port)
2-2. Connected to PC/Laptop (with HDMI Port) COMPUTER HDMI to HDMI Cable DISPLAY (touch port)Micro USB to USB A Note: The touch function will be unavailable if connecting an external power supply to the monitor. 2019 ELECROW All Rights Reserved. -
Page 10: Chapter 03: Screen Setup
0 to 100. 1024x600x60HZ • OSD Timeout: Adjust OSD timeout from 0(off) to 100. • Transparent: Adjust the transparency of OSD menu and adjusting range is from 0(off) to 7. 2019 ELECROW All Rights Reserved. -
Page 11: Chapter 04 Specifications
1024x600x60HZ Chapter 04 Specifications Model Name RC070P Panel Size 7 Inch Aspect Ratio 16:9 (W:H) Resolution 1024x600 Virtual Keyboard Backlight Adjustment Touch Function Power Source USB 5V Phys. Dimension (WxHxD) 180×125×23mm Net Weight (Esti.) 216g 2019 ELECROW All Rights Reserved. -
Page 12: Chapter 05: Troubleshooting Guide And Warranty
5-2. Warranty • ELECROW Monitors carry a one (1) year limited warranty from the purchase date. To obtain warranty service, please contact Customer Support with your purchase order number. • This limited warranty does not cover for: Improper installation or maintenance;...


Need help?
Do you have a question about the RC070P and is the answer not in the manual?
Questions and answers