Table of Contents
Advertisement
Quick Links
Advertisement
Table of Contents

Subscribe to Our Youtube Channel
Related Manuals for Thermo Scientific MATRIX PLATEMATE 2x3


Summary of Contents for Thermo Scientific MATRIX PLATEMATE 2x3
- Page 1 Part No. 801-10010...
-
Page 2: System Features
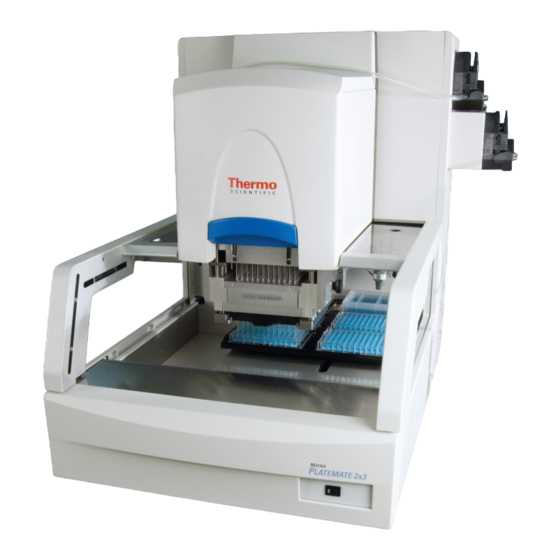
1.1 System Features The Thermo Scientific Matrix PlateMate 2x3 base unit provides a universal platform upon which a flexible automated workstation is built. This platform supports a deck offering simultaneous vessel placement for up to six vessels in any user-definable position, deep or shallow well plates, any of the standard interchangeable pipetting heads, and a host of other system accessories. - Page 3 Chapter 1 Introduction Figure 1: Thermo Scientific Matrix PlateMate 2x3 System A base unit includes these following standard features: A variable-position (portrait or landscape) microplate deck for easy plate or reservoir placement onto the device. High-resolution linear plate movement allows accurate ( 0.05mm) microplate positioning of 96, 384, 864, and 1536 well plates.
-
Page 4: About This Manual
Serial dilution feature To further expand the versatility of the Thermo Scientific Matrix PlateMate 2x3, Matrix has designed the system to support 8-, 12-, 16-, or 24- channel serial dilution applications. This is accomplished by using a dedicated 8-, 12-, 16-, or 24-channel tip magazine. -
Page 5: Manual Conventions
Warnings alert you to conditions WARNING! Do not use a that can cause personal injury and � power cord that is frayed or cut. are shown in shaded boxes next to the warning icon. Thermo Scientific PlateMate™ 2x3... -
Page 6: System Overview
2x3 provides fast, flexible and precise automated liquid delivery while ensuring zero carryover, thereby greatly reducing the risk of contamination. The Thermo Scientific Matrix PlateMate 2x3 is also compatible with a selection of positive displacement (syringe-based) pipetting heads in 96 and 384 well format for liquid handling tasks that involve viscous solutions or low volume pipetting. - Page 7 Figure 2-2: Thermo Scientific Matrix PlateMate 2x3 Robotic-Friendly Base Unit (Cat. No. 801-10005) Thermo Scientific Matrix PlateMate™ 2x3...
-
Page 8: Main System Components
4. Stepper motors: Stepper motors move the 6-position microplate deck vertically and horizontally. 5. Vacuum pump: Removes waste fluid from the tip wash station. 6. Power switch: Rocker switch turns Thermo Scientific Matrix PlateMate 2x3 on or off. User Manual... -
Page 9: Other System Components
Air displacement pipetting heads contain a silicone gasket that forms an airtight seal with tips in the tips magazine. Pipettor heads are available with 96 and 384 channels. Thermo Scientific Matrix PlateMate™ 2x3... - Page 10 Vacuum Manifold: An optional accessory that can be used on stage position 3 to perform filtration procedures on the Thermo Scientific Matrix PlateMate 2x3 deck. The manifold accessory kit includes (5) plate lifters to accommodate for the height restrictions when using short 96 or 384 format D.A.R.T.s. The manifold is compatible with 96 and 384 filtration labware.
- Page 11 Sepraseal Piercing Manifold: An optional deck accessory that allows for the simultaneous piercing of 96 seprasealed storage tubes. The piercing manifold is compatible with 1.4mL, 0.7mL, and 0.5mL Tubes. Separate piercing head is required for sepraseal piercing applications. Thermo Scientific Matrix PlateMate™ 2x3...
-
Page 12: Pre-Installation Requirements
2.2 Instrumentation 2.2.4 Pre-installation Requirements The Thermo Scientific Matrix PlateMate 2x3, with its compact size and small footprint requires little bench space. However, additional bench space is needed for reagents, buffers, waste container, and computer system. 23” (584 mm) 29.5”... -
Page 13: Creating A Program
While the command is highlighted, you can enter the Command settings that are specific to that command After you create a program, you can validate it in ControlMate before running it on the Thermo Scientific Matrix PlateMate 2x3. Thermo Scientific Matrix PlateMate™ 2x3... -
Page 14: Running A Program
2.3 Software Interface (ControlMate) 2.3.3 Running a Program Before running a program, you can check for setup instructions or last-minute notes in the Notepad. This feature is ideal for documenting any assumptions that are made during the creation of a pipetting program. It serves as a reference for the user when the program is implemented. - Page 15 Chapter 2 System Overview 2.3.4 Changing Thermo Scientific MatrixPlateMate 2x3 Components ControlMate software also provides step-by-step instructions to change Thermo Scientific PlateMate 2x3 components, such as pipetting tips or pipetting heads. 2.3.5 Calibrating Liquids For liquids that require an accuracy adjustment during volume dispensing, you can determine the calibration factor that adjusts to the specific gravity of the liquid.
- Page 16 2.3 Software Interface (ControlMate) 2.3.6 Controlling Reservoir Pumps The reservoir pumps can be used to fill reservoir vessels and can also provide finite control over the speed at which the liquid flows in either direction (fill or empty). Typically there are two pumps and their respective outlets available; these are positioned on either side of the pipetting head.
-
Page 17: Connecting To External Devices
One connector exists in the rear center of the deck by which additional externally operated devices can be attached. This command will control the activation of the DC supply to the connectors. This supply can be switched on or off and also constant or momentarily. Thermo Scientific Matrix PlateMate™ 2x3... - Page 18 2.4 Overview of Operation Overview of Operation 2.4.1 Laboratory Application Some of the possible laboratory applications for the Thermo Scientific Matrix PlateMate 2x3 are outlined below: Preparation for enzyme immunoassays (EIA): Enzyme immunoassays in the ultra-micro-liter volume range Rotavirus antigen, antibodies against toxoplasma gondii, antibodies against...
-
Page 19: General Operation
Each task is described in more detail in Section 4, System Operation. 2.4.3 Device Precision The Thermo Scientific Matrix PlateMate 2x3 was tested for precision at volumes ranging from 0.5 µl to 5.0 µl. The results are summarized below. To review the raw data, go to Appendix C, Precision Data. -
Page 20: Specifications
2.5 Specifications Specifications 2.5.1 System Specifications Instrument Dimensions 190 pounds (85.5 kilograms) Base unit weight Height 23 inches (584 millimeters) Dimensions Depth: 29.5 inches (749 millimeters) Width: 25 inches (635 millimeters) Liquid Capacity Pipetting Volume 96-Channel Head 384-Channel Head Tip 1: 0.5 µl – 30.0 µl Tip 3: 0.5 µl –... - Page 21 Chapter 2 System Overview 24 VDC, 0.4 amp/switch (0.7 amp total) Thermo Scientific Matrix PlateMate™ 2x3...
-
Page 22: Environmental Requirements
+/ 2.5% or 0.01 µl 501-102890 1.5% or 0.02 µl Stainless Steel PTFE 0.1-50 µl Positive Displacement, +/ 2.5% or 0.01 µl 501-102891 1.5% or 0.02 µl Duraflex Table 2-2: Thermo Scientific Matrix PlateMate 2x3 Accuracy and Precision User Manual... -
Page 23: Hazards And Precautions
Chapter 2 System Overview Hazards and Precautions There are no known hazards associated with the Thermo Scientific Matrix PlateMate 2x3 when it is operated in accordance with the instructions in this manual. However, you should be aware of situations that can result in serious injury. - Page 24 When unpacking or transporting the Thermo Scientific Matrix PlateMate 2x3, always support the base to prevent damage to the instrument. The Thermo Scientific Matrix PlateMate 2x3 is designed for use on a bench top. Set up the instrument on a sturdy bench or table that is capable of holding its weight and remains stable during its operation.
- Page 25 121 °C. Note: Failure to observe these cautions may invalidate your warranty. If you have questions about any aspect of operating the Thermo Scientific Matrix PlateMate 2x3 safely, please contact Thermo Fisher Scientific. Thermo Scientific Matrix PlateMate™ 2x3...
-
Page 26: Minimum System Requirements
Because the ControlMate software is tightly integrated with the Thermo Scientific Matrix PlateMate 2x3 instrumentation, you can control all Matrix PlateMate 2x3 functions from the software, such as: changing tips and pipettor heads, or fine-tuning plate movements to handle delicate pipetting operations (e.g., transferring or mixing liquids in1536 microwells). -
Page 27: Installation
Connect the serial cable to the serial (or COM) port in the back of the computer and the COM port in the side panel of the Thermo Scientific Matrix PlateMate and the COM port in the side panel of the Thermo Scientific Matrix PlateMate and the COM port in the side panel of the Thermo Scientific Matrix PlateMate 2x3. - Page 28 3.3 Configuring ControlMate 3.3 Configuring ControlMate 3.3.1 Starting ControlMate Start ControlMate by clicking “Start” in the Windows Taskbar and selecting ControlMate from the Programs menu. The following window appears: Figure 6: ControlMate Main Screen When you create a new pipetting sequence, a new window, called child dialog window, opens in the ControlMate software.
-
Page 29: Configuring Device Options
Chapter 3 ControlMate™ Software Before you begin creating pipetting programs, you must first configure ControlMate to work with your Thermo Scientific Matrix PlateMate 2x3 system. The next section describes the ControlMate configuration settings. 3.3.2 Configuring Device Options After installing and starting ControlMate, configure the software for your Matrix PlateMate 2x3 system by selecting the “Tools”... - Page 30 Send Delay Use this to change the delay between commands issued to the Thermo Scientific Matrix PlateMate 2x3 device. The lower the value the faster the response to query type commands, for example when querying for tip magazine loading status. However, too low a value may cause the response sent from the device to be lost.
-
Page 31: Command Buttons
Sequence File Editor dialogue. Fields Command This drop down box allows the selection of available module specific commands. Thermo Scientific Matrix PlateMate 2x3... - Page 32 3.3 Configuring ControlMate Limits The fields within the module specific command set have to be validated against a minimum and maximum value for the respective field. This options tab allows the setting of those values. The values are used whenever commands are changed in the Sequence File Editor dialogue or during File Validation.
- Page 33 The Positions dialogue allows the setting of the minimum and maximum values that a stage can travel on any one of the three axes at any of the defined stage positions. These values are then used within the sequence file editor for each respective command. Thermo Scientific Matrix PlateMate 2x3...
- Page 34 3.3 Configuring ControlMate Fields Position The required stage position. Adjust physical location: X and Y home Use these fields to directly enter the respective axis value, in 1/100 mm increments, to set the required position. Manual movement The manual movement buttons are used to directly control the deck motors to move the required position.
- Page 35 (Move the deck to the right) Selecting this button will reset all field values for the current position configuration to those originally set as the factory default values. Any changes that have been made, via this dialogue, will be overwritten. Thermo Scientific Matrix PlateMate 2x3...
- Page 36 3.3 Configuring ControlMate Plates To provide accurate positioning functionality for each stage, the vessel type whether it is a plate, tip wash or even a reagent reservoir must be defined in the plates library. This option is used to set dimensional and positional parameters for each vessel type.
- Page 37 The value is used to determine how near to the top of the well the tips are positioned, for example a value of 200 1/100mm will position the vessel so that the tips are approximately 2mm inside the top of the well. Thermo Scientific Matrix PlateMate 2x3...
- Page 38 3.3 Configuring ControlMate Quadrant Centers The quadrant grid can be used to enter values which represent the well centers for each quadrant. The X and Y axis offset values are measured from the tip center position when no offsets are applied, for example the dead center for a 96 well plate.
- Page 39 Command Buttons Apply Select this button to add the newly defined vessel type to the library. Cancel Select this button to cancel the entry of the newly defined vessel type. Thermo Scientific Matrix PlateMate 2x3...
- Page 40 3.3 Configuring ControlMate Motors The Motors options dialogue is useful for defining the home positions for each axis motor. The home position is the reference position from which all movements are made. Normally this information is set at the factory and does not require any further changes.
- Page 41 If checked then the current system date will be written along with the barcode data for each successful barcode read. Time stamp If checked then the current system time will be written along with the barcode data for each successful barcode read. Thermo Scientific Matrix PlateMate 2x3...
-
Page 42: Using Online Help
3.4 Creating Pipetting Programs 3.4 Creating Pipetting Programs A pipetting program is a sequence of pipetting actions that accomplishes a pipetting task. In the ControlMate software, the pipetting program is called a sequence file. Separate sequence files can be created for serial dilutions, plate- to-plate transfers, and simple dispensing operations. - Page 43 Pastes the contents of the clipboard below the current command node Pastes the contents of the clipboard below the current command node Pastes the contents of the clipboard below the current command node Thermo Scientific Matrix PlateMate 2x3 Thermo Scientific Matrix PlateMate 2x3 Thermo Scientific Matrix PlateMate 2x3...
- Page 44 3.4 Creating Pipetting Programs Toolbar Icons Views the clipboard contents Deletes the currently highlighted command Adds a new command below the current command node Views print preview Validates the current sequence file Executes the current sequence file Views configuration and default options Views help page Toolbox: The Toolbox provides easy access to intrinsic or module commands, such as: creating or calling procedures, aspirating or dispensing fluids, moving...
- Page 45 Child Dialog Windows: The Child Dialog Window opens whenever you click a ControlMate function or open a sequence file. Status Bars: The Status Bars provide information relating to the save status, open file, and auto correction. Thermo Scientific Matrix PlateMate 2x3...
-
Page 46: File Header
3.4 Creating Pipetting Programs 3.4.3 Creating Sequence Files Sequence File Editor The sequence file editor dialogue window is used to create or amend sequence file programs. The dialogue contains a number of frames: File Header The file header contains the field’s specific to the whole sequence file. Command Tree The command tree represents the program sequence. -
Page 47: Password Validation
This means that in the case of an edit lock, the file cannot be edited or in the case of a run lock, cannot be executed on the device. Thermo Scientific Matrix PlateMate 2x3... -
Page 48: Command Tree
3.4 Creating Pipetting Programs Command Tree The command tree represents the program sequence. Sequence files are executed from the top to the bottom of this tree structure. Commands can be manipulated in the tree structure in a number of different ways. Adding a new command Commands are added to the tree (or command) structure by either clicking the required command icon on the Command Toolbox dialogue or by... -
Page 49: Cut, Copy And Paste
Undo This will change the settings back to the original values prior to the current edit. Thermo Scientific Matrix PlateMate 2x3... -
Page 50: Status Bar
3.4 Creating Pipetting Programs 3.4 Creating Pipetting Programs 3.4 Creating Pipetting Programs Test mode Test mode Test mode This allows the values for the command to be tested on the device by This allows the values for the command to be tested on the device by This allows the values for the command to be tested on the device by restricting the editor to the current command only. -
Page 51: Module Specific Commands
This is useful when using the Cut, Copy and Paste features of the command tree within the sequence file editor window. Module Specific Commands The module specific commands for the Thermo Scientific Matrix PlateMate 2x3 device relate to the control of the pipetting head and the liquid handling parameters. - Page 52 3.4 Creating Pipetting Programs Aspirate Command Aspirates a specified volume. The command will cause the piston motor to aspirate the given volume. The aspiration is immediate and therefore requires the use of a preceding Move command to ensure that a vessel is correctly positioned at the tips.
- Page 53 Move command to ensure that a vessel is positioned at the tips. An option exists within the command to factorize the volume required based on volumetric calculation settings for different liquid types at different temperatures. Thermo Scientific Matrix PlateMate 2x3...
- Page 54 3.4 Creating Pipetting Programs Dispensing with blow out on the last dispense of a cycle ensures that the piston is reset to the home position. Fields If checked this will dispense all liquid in the tips. This does not perform a piston reset at the end of the action.
- Page 55 Sequence File Editor dialogue window. Movements to position for pipetting Movements for vessel placement Movements to position for pipetting Thermo Scientific Matrix PlateMate 2x3...
- Page 56 3.4 Creating Pipetting Programs Fields Position Sets the stage position. Other field parameter availability is dependent on the position selected, for example selecting a ‘Plate/Remove vessel’ position will only show fields applicable for vessel placement. Vessel type Specifies the vessel type which is situated at the target location. Different vessel types have different settings for the other fields within this command.
- Page 57 The user will then be prompted to place a vessel, the type of which as specified in the vessel type field. The user will then be required to select the ‘OK’ button to continue. Thermo Scientific Matrix PlateMate 2x3...
- Page 58 3.4 Creating Pipetting Programs Remove vessel During file execution the deck will be positioned at the location specified by the position field. The user will then be prompted to remove the vessel, the type of which as specified in the vessel type field. The user will then be required to select the ‘OK’...
-
Page 59: Pause Command
There are two types of pauses. These are: Time based. Infinite requiring a user to specify when to resume. Fields Duration This causes the device to pause for a set timed interval. Thermo Scientific Matrix PlateMate 2x3... - Page 60 3.4 Creating Pipetting Programs 3.4 Creating Pipetting Programs 3.4 Creating Pipetting Programs Seconds (duration) Seconds (duration) Seconds (duration) This specifies the time interval over which to pause if the Duration checkbox has This specifies the time interval over which to pause if the Duration checkbox has This specifies the time interval over which to pause if the Duration checkbox has been checked.
- Page 61 Note: This wash step must be preceded by a Move command for Vessel Type: Tip wash 96 well into waste bath or Tip wash 384 well into waste bath. Blowout This field will, if checked, ensure that a blowout is performed after the last wash cycle. Thermo Scientific Matrix PlateMate 2x3...
-
Page 62: Speed Control
3.4 Creating Pipetting Programs Change Tip Magazine Command This command is used to pause a sequence file execution in order for the tip magazine to be replaced. The command has the ability to check and issue the instruction to pause and replace tips each time it is called within a program sequence or by an incremental counter to check the usage. - Page 63 Reservoir Pump Control command to ensure that a reservoir vessel is positioned at the dispensing location. The “Move” command must have a ”Reservoir” position specified. The software will prevent the file from executing if this is omitted. Thermo Scientific Matrix PlateMate 2x3...
- Page 64 3.4 Creating Pipetting Programs Fields Pump – Upper/Lower Selects the outlet and associated pump to use Speed Specifies the pump speed. The faster the speed the less time taken to fill a reservoir. Slower speeds will give more volume control Direction –...
- Page 65 DC supply to the connector. This supply can be switched on or off and also constant or momentarily. Fields Connection One/Connection Two Selects the outlet to use, when using the Thermo Scientific Matrix PlateMate 2x3, use Connection One only. Connection Two is available for Matrix PlateMate 2x2 only. Action On/Off Specified whether to switch on the DC supply or to switch off the DC supply.
- Page 66 Sequence rules There are a few simple steps to follow when creating sequence files for the Thermo Scientific Matrix PlateMate 2x3 device. To achieve successful liquid transfer the following rules must be observed: A Move command must precede (not necessarily directly) each Aspirate, Dispense, Mix and Wash Tips commands.
- Page 67 Height settings within this dialogue can be tested by selecting . The stage can be reset by selecting Fields Configuration Selects the actual tip and pipettor head configuration required. Tip count Physical number of tips in the tip magazine. Thermo Scientific Matrix PlateMate 2x3...
- Page 68 3.4 Creating Pipetting Programs Tip diameter Physical measured tip diameter. This is useful since it is used in positioning movement such as tip touch and well offsets. Wash depth This value represents a physical measurement as to how far the respective tips can be pushed into the wash station chimneys during the tip wash cycle.
-
Page 69: Command Buttons
Change Pipettor and Tips. Caution: Failure to select the proper piston head and tip combination will cause the tips to crash into plates and stages and will result in improper volume accuracy. Thermo Scientific Matrix PlateMate 2x3... - Page 70 3.4 Creating Pipetting Programs To start the process, select which option is required (change pipettor and or tips to change tip magazine only), then follow the prompts in the “Action” frame. If any errors occur or a step is not successful completed then the status or follow on action will also be displayed in the “Action”...
- Page 71 Motor Steps factor This calculated field represents the value that will be used for all commands if the current entry is selected in the command as the volumetric entry to use. Thermo Scientific Matrix PlateMate 2x3...
-
Page 72: Calibrate Device
3.4 Creating Pipetting Programs Calibrate Device The device must first be calibrated to set the X and Y axis settings within the EPROM memory. This option will perform this automatically in 0.01 increment steps and need only be done once for each device. Fields Start Starts the calibration process. -
Page 73: Toolbar Buttons
Displays the following page. Last Page Displays the last page of the report. Print Sends the report to the selected printer. Printer Setup Allows the user to change the printer properties. Help This help page. Thermo Scientific Matrix PlateMate 2x3... -
Page 74: Processing Programs
This help page. 3.6.2 File Execution The File Execution dialogue controls the Thermo Scientific Matrix PlateMate 2x3 device using the sequence file from the current Sequence File Editor window. The name of the file for the current window is shown on the status bar at the foot of the main application window. - Page 75 This help dialogue. Pause or Abort File Execution When Stop button is clicked on the File Execution the following dialogue will be shown. Command Buttons Continues with the file execution. Cancel Aborts the file execution. Thermo Scientific Matrix PlateMate 2x3...
-
Page 76: System Operation
Section 4.2 contains all instrument setup procedures. Running Pipetting Program After the Thermo Scientific Matrix PlateMate 2x3 is set up, it is ready to run a pipetting program. Section 4.3 describes a sample pipetting program. Shutting Down Section 4.4 contains a checklist of tasks to shut down the instrument. - Page 77 Chapter 4 System Operation 4.2 Setting Up Thermo Scientific Matrix PlateMate 2x3 Before the Thermo Scientific Matrix PlateMate 2x3 can be used to run a pipetting program, it must be set up with the correct pipetting head, D.A.R.T. tips, reservoirs, and tip wash.
- Page 78 4.2 Setting Up Thermo Scientific Matrix PlateMate 2x3 4.2.1 Changing Pipettor Head and Tips The Thermo Scientific Matrix PlateMate 2x3 can accommodate various pipettor heads, providing different volume ranges for either 96-channel or 384- channel formats. The ControlMate Software contains step-by-step instructions to change the pipettor head and tips.
- Page 79 7. Click “Start”. The screen will remain displayed as the instructions in the Action box, shown in blue text, guide you through each step. Thermo Scientific Matrix PlateMate™ 2x3...
- Page 80 4.2 Setting Up Thermo Scientific Matrix PlateMate 2x3 8. Remove the tip magazine, then select “Done” on the ControlMate screen. The piston motor moves down to loosen the tip magazine clamp. The software screen briefly describes each instrument action as it is performed.
- Page 81 12. Close the pipettor head housing door. 13. Select “Done” in the ControlMate screen. The motor will move the pipettor head down for removal. 14. Read the next set of steps described in the screen. Thermo Scientific Matrix PlateMate™ 2x3...
- Page 82 4.2 Setting Up Thermo Scientific Matrix PlateMate 2x3 15. Pull out the alignment knobs on both sides of the pipettor housing and turn knobs approximate ¼ turn in either direction to unlock the pipettor head. Alignment Knob 16. Lift the pipettor head housing door.
- Page 83 “Done”. The system releases the tip magazine clamp to receive the new tip magazine. Thermo Scientific Matrix PlateMate™ 2x3...
- Page 84 Limit Switch Tip Magazine Stop Tip Magazine Clamping Frame 29. Select “Done”. The system resets the pistons to the home position. The Thermo Scientific Matrix PlateMate 2x3 is ready to run your pipetting program. User Manual...
- Page 85 Chapter 4 System Operation 4.2.2 Changing Pipet Tips Only Pipet tips can be replaced quickly and easily in the Thermo Scientific Matrix PlateMate 2x3. Tips can be changed before a run or during a run. The ControlMate software guides you through each step. For details on each screen, refer to Chapter 4, ControlMate Software.
- Page 86 4.2 Setting Up Thermo Scientific Matrix PlateMate 2x3 step. The piston motor loosens the tip magazine clamp. The software screen briefly describes each instrument action as it is performed. 6. Read and follow the steps on the screen. 7. Remove the old tip magazine from the instrument.
- Page 87 9. Read and follow the steps on the screen. 10. Insert the new tip magazine. 11. Click “Done”. The system resets the pistons to the home position, clamping the tips The Thermo Scientific Matrix PlateMate 2x3 is ready to run your pipetting program. Thermo Scientific Matrix PlateMate™ 2x3...
- Page 88 4.2 Setting Up Thermo Scientific Matrix PlateMate 2x3 4.2.3 Onboard Reagent Filling The Thermo Scientific Matrix PlateMate 2x3 provides onboard reagent filling and level-sensing. Stationary sensor brackets on each side of the pipettor head hold the filling nozzles and liquid-level sensors over the reagent reservoirs for automated filling and noncontact liquid-level sensing (see figure below).
- Page 89 Chapter 4 System Operation Reagent reservoirs for 96-well and 384-well pipetting are available (see following table). The Thermo Scientific Matrix PlateMate 2x3 can also use the following disposable reagent reservoirs. Catalog Capacity Material 1064-05-8 96-channel, 125mL, Non-Sterile Polypropylene 1064-15-8 96-channel, 125mL, Sterile...
- Page 90 4.2 Setting Up Thermo Scientific Matrix PlateMate 2x3 3. Manually fill the reagent reservoir to the desired fill height. 4. Use the Move command to move the filled reservoir under the liquid-level sensor. Note: The closer the level sensor is to the liquid, the more accurate the level sensing.
- Page 91 During a pipetting sequence, the system pumps reagent through the filling nozzle. The liquid-level sensor prevents overflow by signaling the pump when to stop The reagent reservoir is ready to be used in the next pipetting sequence. Thermo Scientific Matrix PlateMate™ 2x3...
- Page 92 4.2 Setting Up Thermo Scientific Matrix PlateMate 2x3 4.2.4 Using the Tip Wash Station The Tip Wash Station allows you to wash both the interior and exterior walls of D.A.R.T. tips, positive displacement pipetting heads, and stainless steel probes. It connects to the wash peristaltic pump to dispense clean wash fluid and waste vacuum line to remove the used fluid.
- Page 93 Wash Station Sensor Port 3. The Tip Wash sensor detects liquid overflow using Contact Liquid Level a conductive contact sensor Sensor on Wash Station and serves as a safety backup in case the vacuum pump stops. Thermo Scientific Matrix PlateMate™ 2x3...
- Page 94 4.2 Setting Up Thermo Scientific Matrix PlateMate 2x3 4. Insert one end of the wash tubing into the Supply Inlet, place the tubing into the lower peristaltic pump, then insert the other end of the tubing into the wash Supply Inlet container.
- Page 95 The tip wash cycle will not operate. 8. Click “Set” to save the settings. This dispense option works only when you select “Tip wash 96 (or 384) well into waste bath” in the Move to Position command. Thermo Scientific Matrix PlateMate™ 2x3...
- Page 96 To ensure zero carryover it is recommended that D.A.R.T. tips be replaced between sample transfers. This can be done manually (by an operator) or automatically by using the Thermo Scientific Matrix Tip Tower (an automated tip changing device). User Manual...
- Page 97 Previous sections showed specific fluid line attachments for the reagent reservoir and tip wash station. This section provides an overview of fluid lines in the Thermo Scientific Matrix PlateMate 2x3. The following illustration shows the pathway of the various fluid lines throughout the instrument.
- Page 98 4.2 Setting Up Thermo Scientific Matrix PlateMate 2x3 4.2.6 Defining New Plate Types The Thermo Scientific Matrix PlateMate 2x3 comes with a library of commonly- used microplate types and vessel types (for example, reservoirs and tip wash stations). When you select a microplate in the library, the Thermo Scientific Matrix PlateMate 2x3 uses the stored parameters to properly position that microplate under the pipetting tips.
- Page 99 3. Enter the description of the new plate type and make any modifications needed to match the new plate type. Refer to the help file for details on each parameter. 4. Click “Apply” to save the new vessel type. Thermo Scientific Matrix PlateMate™ 2x3...
- Page 100 4.2.7 Calibrating Stage Positions The Thermo Scientific Matrix PlateMate 2x3 comes with a six-position microplate deck that can accommodate different container types that are used in the pipetting operations, such as deep-well or shallow-well microplates.
- Page 101 This procedure is critical to pipetting accuracy. The Thermo Scientific Matrix PlateMate 2x3 instrument must be calibrated for each stage position and the minimum and maximum limits for each axis at each stage position.
- Page 102 4.2 Setting Up Thermo Scientific Matrix PlateMate 2x3 Note: To ensure positional accuracy, use a 384-well plate with 96-well tips (or 1536-well plate with 384-well tips). By aligning the D.A.R.T.s tips over the intersection of 4 wells of the 384-well plate, the tips will be correctly centered for the 96-well plate (see figure).
- Page 103 1. Check the “Notepad” for setup instructions or last-minute notes. 2. Prime buffer or reagent lines. Note: You can use the Test feature in the Move command to prime buffer or reagent lines. 3. Select “Run”, then “Start” from the Tools Menu. Thermo Scientific Matrix PlateMate™ 2x3...
- Page 104 4.3 Running Pipetting Program 4. Review the program information in the Execute window and click “Start”. You can watch the percentage completion of the program in the Progress field. Note: At any time during the pipetting sequence, you can click “Stop” to interrupt the program.
- Page 105 Steps can be grouped according to their function, using the Group Commands icon. Group commands with descriptive titles make the program easy to follow. The first step in the group commands is to move to the 96 deep well microplate. Thermo Scientific Matrix PlateMate™ 2x3...
- Page 106 4.3 Running Pipetting Program All steps that will be performed are checked. If you want to skip steps during a pipetting run, you can uncheck a Group Command to skip all steps in that group, or uncheck an individual step. The following screen shows all the steps used in this program.
- Page 107 5506, 5507, 5508 or 5501, 5502 500-10015 Landscape 501-20002 5301, 5302 500-10020 Landscape 501-20002 5311, 5312 500-10025 Landscape 501-20005 5321, 5322 500-10030 Landscape 501-20002 5316, 5317, 5318, 5416, 5417, 5418 or or 501-20005 5326, 5327, 5528 Thermo Scientific Matrix PlateMate™ 2x3...
- Page 108 4.3 Running Pipetting Program The following screen shows the steps for a serial dilution program: Figure 4-8: ControlMate Program for Serial Dilution For this example, use the following guidelines: Select pipettor configuration for single row tips Change tips to single-row or two-row SD tip magazine. Specify start and end column in Move command.
-
Page 109: Shutting Down
Chapter 4 System Operation 4.4 Shutting Down When you are ready to shut down the Thermo Scientific Matrix PlateMate 2x3, refer to the following checklist: Change pipettor head or pipet tips. Change the pipettor head if you will be using different sized pipet tips next time. Remove used tips and insert new tips for use next time. -
Page 110: External Keypad
2. Turn on the Keypad. The READY screen appears. 3. Press the “NEXT” key to enable manual movement of the Thermo Scientific Matrix PlateMate 2x3. The screen shows the current axis positions of the moveable components of the Thermo Scientific Matrix PlateMate 2x3. -
Page 111: Development Environment
Chapter 5 Alternate Computer Options 5.2 PC Command-line (Host PC Communications) Thermo Scientific Matrix PlateMate 2x3 can be PC-controlled using commands from the command-line instead of the ControlMate software. Command-line control includes stage movements, stacker sensors, and barcode communication. The following communication settings are required:... -
Page 112: Pipetting Techniques
Precision and accuracy can be difficult to obtain when pipetting small liquid volumes, such as 1.0 µL or 0.5 µL. This section describes the dispense procedure that was used to test the Thermo Scientific Matrix PlateMate 2x3 for small volumes and discusses the critical parameters that affect pipetting performance. -
Page 113: Software Programming
Software programming The following ControlMate programs were written for 0.5 µL and 1.0 µL dry dispensing into 384 and 1536 well plates. Figure 6-1: Dry Dispense using 0.5 mL Figure 6-2: Dry Dispense using 1.0 mL Thermo Scientific Matrix PlateMate 2x3... - Page 114 6.1 Optimizing Pipetting Performance Pipetting Techniques for Small Volumes The dispense procedure resulted in the following techniques to optimize pipetting precision for small dispense volumes of fluorescence into dry 384 and 1536 well plates. Critical parameters affecting performance included: Pipetting speed (slower is better for small volumes), Plate height (tip should be 0.1-0.3 mm above the well bottom) and Dwell times at the dispense step.
- Page 115 6.2 Calibrating for Different Liquids (Improving pipetting accuracy) Thermo Scientific Matrix PlateMate 2x3 is factory calibrated for distilled water at room temperature; however, you can add calibration values to improve pipetting accuracy of liquids with specific gravity that is significantly different from water.
-
Page 116: Calibration Procedure
3. Use the distilled water setting (motor factor 1.000) to dispense a specified volume of the target liquid (e.g., 10 µL). Note: Since Thermo Scientific Matrix PlateMate 2x3 is calibrated to distilled water, it uses a motor factor setting of 1.000). - Page 117 The volume calculation, average values, and motor steps factor are automatically generated. 12. Click “Update” The motor steps factor for the liquid type is saved in ControlMate and used when you select this liquid type for an aspiration or dispense step. Thermo Scientific Matrix PlateMate 2x3...
-
Page 118: Maintenance And Service
Maintenance and Service WARNING! Do not disassemble or modify the components of the � Thermo Scientific Matrix PlateMate 2x3, except as specified in this manual. Only Thermo Fisher Scientific service personnel are authorized to perform any additional service to the instrument. -
Page 119: Periodic Inspections
Inspect the instrument thoroughly for broken or loose components. Perform general maintenance and cleaning procedures. Prior to using the instrument after extended storage, have it inspected by a Thermo Fisher Scientific service engineer. Thermo Scientific Matrix PlateMate 2x3... -
Page 120: Replacing Tubing
The Thermo Scientific Matrix PlateMate 2x3 is designed with Easy-Load peristaltic pumps and quick-disconnect fittings to easily replace Reagent tubing, Tip Wash Inlet and Waste Outlet lines. The Thermo Scientific Matrix PlateMate 2x3 uses two basic fluid systems: Reagent fill Tip Wash The sections that follow describe tubing replacement for each fluid system. - Page 121 Figure 7-1: Reagent Reservoir Fluid Lines Both reagent tubing and filling nozzle can be replaced with the tubing kit included with the Thermo Scientific Matrix PlateMate 2x3 system. If additional tubing kits are needed, contact Thermo Fisher Scientific Service Department to order Part No.# 301-30030.
- Page 122 Remove and properly dispose of the used tubing. 2. Select replacement tubing that is approved for use with the Thermo Scientific Matrix PlateMate 2x3 system. 3. Insert the new filling nozzle into the sensor bracket and tighten the adjustment screw to secure the filling nozzle.
- Page 123 Chapter 7 Maintenance and Service 7. Insert the free end of the tubing into the reagent reservoir. 8. Repeat this procedure to replace the second reagent tubing, if it is needed. The new reagent tubing is ready to use. Thermo Scientific Matrix PlateMate 2x3...
- Page 124 7.2 Service Tip Wash Tubing When the Tip Wash Station is used, it occupies stage position 2 (see following diagram) and requires the lower peristaltic pump; therefore, only one reagent solution can be used in stage position 1. Waste Tubing Tip Wash Tubing Waste...
- Page 125 Remove and properly dispose of the used tubing. 2. Select replacement tubing that is approved for use with the Thermo Scientific Matrix PlateMate 2x3 system. 3. Insert the new tubing into the Supply Inlet on the side of the instrument.
- Page 126 7.2 Service 7. Insert the free end of the tubing into the Tip Wash solution. 8. Insert the new tubing for the Waste liquid into the Drain on the side of the instrument. Drain Outlet 9. Insert the free end of the tubing into the Waste Bottle. The new Tip Wash tubing is ready to use.
-
Page 127: Troubleshooting
See Section 7.2.1, Replacing Fluid Lines. Incorrect tubing was Replace with tubing recommended used. for Thermo Scientific PlateMate 2x3. Peristaltic pump is Wrong tubing was used. Replace with tubing recommended stalled or burned for Thermo Scientific PlateMate out. -
Page 128: Error Messages
Command timeout Device begins or performs Check PC connection to an action, but does not device. respond to software. Timeout is set too low. Increase timeout setting. Thermo Scientific Matrix PlateMate 2x3... - Page 129 8.2 Error Messages Error Messages Cause Action Required Z axis obstruction Pipettor head housing Close housing door to safety mechanism door opened during resume action. activated pipettor or piston head movement. Light curtain detects Remove hand or other motion or obstruction obstruction from the during pipettor or piston pipetting area before...
- Page 130 Chapter 8 Troubleshooting Thermo Scientific Matrix PlateMate 2x3...
-
Page 131: Hardware Specifications
Re-transmit Correct receive c. Transmission error with repeated “no response” is to be judged by the transmitting side. d. PC does not return “ACK” against “R” transmission from Thermo Scientific Matrix PlateMate 2x3 (5) Common Message a. Positive Response ACK (06H) -
Page 132: Control Commands
Move on Z axis Setting Speed on Z axis XS1030 – 1255 Move on S axis Setting Speed on S axis same as Thermo Scientific Matrix PlateMate 2x3 Upper comp (External Piping), OFF Upper Pump (External Piping, ON (Supp]y) Upper Pump (External Piping), ON (Drain) Setting Speed on M1*, 1010 –... - Page 133 A.2 Control Commands Lower Pump (Internal Piping). ON (Drain) Setting Speed on M2, 1010 – 1050 Drain Pump, OFF Drain Pump, ON DC Output (right), OFF DC Output (right), ON DC Output (left), OFF DC Output (left), ON Show X axis address Show Y axis address Show Z axis address Show S axis address...
- Page 134 These are the commands required for “teaching”. Obtain the address by using QX, QY, and QZ. Both X and Y Move commands can be used at the same time. A.2.2 Thermo Scientific Matrix PlateMate 2x3 All tasks are completed without fail X axis coordination...
- Page 135 Amount of movement on each axis: X : 0.05mm/1 address Y : 0.05mm/1 address Z : 0.005mm/1 address S : Same as Thermo Scientific Matrix PlateMate 2x3 Other commands: Version, Pause Reset a) Version information STX O ETX STX ACK ETX STX 1.01, F10, F20, W0, M0, T0 ETX...
- Page 136 5. “E11” is transmitted when the bar code reading fail; therefore, transmit the read error ID. 6. If the X axis slips, transmit “E01” and wait for “A” or “R.” When receiving “A,” the X axis returns to home position again and continues. Thermo Scientific Matrix PlateMate 2x3...
- Page 137 Note: Once a file has passed validation, it can be used to control a device. Unless a command is changed (added, deleted, moved or a field amended), it does not need further validation. This reduces start up time when issuing the sequence to the device. Thermo Scientific Matrix PlateMate 2x3...
- Page 138 0) or disallow (value of 1) editing via the Tools –> Option –> Limits tab External parameters may change the values within the rules set. For example, changing a Thermo Scientific Matrix PlateMate 2x3 head type would change the Volume rules settings. Thermo Scientific Matrix PlateMate 2x3...
- Page 139 ‘LIMIT_01’ and if found to be less than the minimum setting for this field bounds rule will display the message ‘Total volume too low’. The Thermo Scientific Matrix PlateMate 2x3 configuration file has the following rule declarations : Sequence_01 = MINVOL <...
- Page 140 Changing a Register’s value A command can change a register’s value by applying a ‘SET’ instruction. Example: The Matrix PlateMate 2x3 Dispense command will apply the following rule Sequence_Rule_Set = @optDispenseAll = 1 ? MINVOL = 0, @optDispenseAll = 1 ? MAXVOL = 0,...
- Page 141 B.3 Sequential Sequence Checking The DISPENSEVOL register is decremented by the value of the txtVolume field if the field optVolume has a value of ‘1’. The Thermo Scientific Matrix PlateMate 2x3 Aspirate command will apply the following rule Sequence_Rule_Set =...
- Page 142 Note: Once a file has passed validation, it can be used to control a device, unless a command is changed (added, deleted, moved or a field amended), it does not need further validation. This reduces the startup time when issuing the sequence to the device. Thermo Scientific Matrix PlateMate 2x3...
- Page 143 1303.53 Blank Plate QC 1600.00 1400.00 1200.00 1000.00 Plate Average 800.00 Column Average Row Average 600.00 400.00 200.00 0.00 0 1 2 3 4 5 6 7 8 9 101112131415 161718192021 Row or Column Number Thermo Scientific Matrix PlateMate 2x3...
- Page 144 1996.46 1983.63 559.37 28.20% 1996.46 Blank Plate QC 2500.00 2000.00 1500.00 Plate Average Column Average Row Average 1000.00 500.00 0.00 0 1 2 3 4 5 6 7 8 9 101112131415161718192021 Row or Column Number Thermo Scientific Matrix PlateMate 2x3...
- Page 145 C.3 Precision at 2.5µl into a wet 384 well plate C.3 Precision at 2.5µl into a wet 384 well plate 4784 4992 4899 4803 4866 5102 4586 4888 4964 4815 4581 4842 4985 4732 4858 4575 4995 5057 4727 4458 4541 4666 4612...
- Page 146 2985.16 30.29% 10072.94 Blank Plate QC 10800.00 10600.00 10400.00 Plate Average 10200.00 Column Average 10000.00 Row Average 9800.00 9600.00 9400.00 0 1 2 3 4 5 6 7 8 9 101112131415161718192021 Row or Column Number Thermo Scientific Matrix PlateMate 2x3...
-
Page 147: Warranty And Customer Service
Warranty and Customer Service Contact Us With Your Questions and Comments Your Thermo Scientific Matrix PlateMate 2x3 and pipetting heads are covered by a one year factory warranty. Your comments and suggestions for improving the performance and versatility of the Thermo Scientific Matrix PlateMate 2x3 system are always welcome and appreciated.
Need help?
Do you have a question about the MATRIX PLATEMATE 2x3 and is the answer not in the manual?
Questions and answers