Thermo Scientific HAAKE Viscotester iQ Instruction Manual
Hide thumbs
Also See for HAAKE Viscotester iQ:
- Instruction manual (89 pages) ,
- Instruction manual (33 pages)

Subscribe to Our Youtube Channel
Related Manuals for Thermo Scientific HAAKE Viscotester iQ


Summary of Contents for Thermo Scientific HAAKE Viscotester iQ
- Page 1 Thermo Scientific HAAKE Viscotester iQ Instruction Manual March 2020 006-3808 Version 2.3.1...
-
Page 2: Table Of Contents
The intelligent rheometer ........3 Main features of the HAAKE Viscotester iQ ......4 Chapter 2 Functional Elements. - Page 3 HAAKE Viscotester iQ........
- Page 4 HAAKE Viscotester iQ rheometer ........77...
- Page 6 WEEE Compliance This product is required to comply with the European Union’s Waste Electrical & Electronic Equipment (WEEE) Directive 2012/19/EU. It is marked with the following symbol: Thermo Fisher Scientific has contracted with one or more recycling or disposal companies in each European Union (EU) Member State, and these companies should dispose of or recycle this product.
-
Page 12: Preface
Preface This manual describes how to install and operate the HAAKE Viscotester iQ and how to mount and dismount the various temperature modules and other accessories. For a detailed description of how to operate the touch screen user interface, the optional RheoApp software and the specific parts of the RheoWin software, see the HAAKE Viscotester iQ Reference Manual, which also gives an overview over the properties of the standard measuring geometries. - Page 13 Preface Note Highlights information of general interest. Tip Highlights helpful information that can make a task easier. The HAAKE Viscotester iQ instruction manual contains the following caution-specific symbols (Table Table 1. Caution-specific symbols and their meanings Symbol Meaning Hot surface: Before touching any TM-xx-x module allow heated components to cool.
-
Page 14: Safety Notes And Warnings
• This instrument and all of its accessories must only be used for the applications it was designed for. CAUTION The HAAKE Viscotester iQ is designed for use with a rotor. All existing safety devices are based on the correct installation of the rotor. In case the lift used without a rotor installed, injuries may occur when reaching in the lift area. - Page 15 • After a repair the instruments safety must be inspected thoroughly by qualified personnel. • Have the instrument serviced by specialists at regular intervals. • The pressure of the compressed air supply for the HAAKE Viscotester iQ Air must not exceed 3 bar. A higher pressure will damage the air bearing permanently.
-
Page 16: Contacting Us
Preface CAUTION • The HAAKE Viscotester iQ is designed for the determination of the rheological behavior of fluid and semi-solid materials. These materials must not be measured with the HAAKE Viscotester iQ in case the operator (or other people) can be injured or the device can be damaged. -
Page 17: Quality Assurance
QMS is fully functional. We also check our products during the manufacturing process to certify that they are produced according to the specifications as well as to monitor correct functioning and to confirm that they are safe. The results are recorded for future reference. xviii HAAKE Viscotester iQ Thermo Scientific... -
Page 18: Warranty And Service
We recommend to have the maintenance carried out by Thermo Fisher Scientific or by staff authorised by Thermo Fisher Scientific as special knowledge and tools are required. The maintenance and calibration work carried out has to be recorded by certificates in conformity with ISO 9001 ff. Thermo Scientific HAAKE Viscotester iQ... -
Page 20: Instrument Description
Parallel plate and cone and plate geometries Unless stated differently in this manual the name HAAKE Viscotester iQ is used to describe both the HAAKE Viscotester iQ and the HAAKE Viscotester iQ Air. Thermo Scientific HAAKE Viscotester iQ... -
Page 21: The Individual Rheometer
Instrument Description The HAAKE Viscotester iQ: individual, intuitive, intelligent The HAAKE Viscotester iQ is the instrument of choice for measuring single viscosity values or for investigating the more complex rheological properties of materials ranging from low viscous liquids to highly viscous pastes. -
Page 22: The Intuitive Rheometer
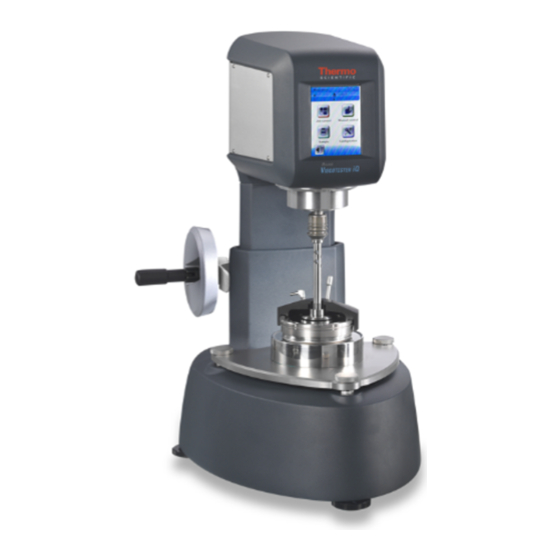
• Up to 200 editable, internal measurement and evaluation routines. • HAAKE RheoWin PC software for highly adaptable measurement and evaluation routines. Figure 2. HAAKE Viscotester iQ with lab stand and ISO spindle The intuitive rheometer. Motto: “The rheometer that makes QC more convenient for you.”... -
Page 23: Main Features Of The Haake Viscotester Iq
Instrument Description Main features of the HAAKE Viscotester iQ Main features of the HAAKE Viscotester iQ The following list sums up the main features of the HAAKE Viscotester iQ and its optional accessories. • Completely new developed drive motor with, ... - Page 24 Instrument Description Main features of the HAAKE Viscotester iQ – For (smaller size) coaxial cylinder measuring geometries. – For parallel plate and cone and plate measuring geometries using the adapter for TMPxx lower measuring plates. Temperature Module TM-PE-P –...
- Page 25 Instrument Description Main features of the HAAKE Viscotester iQ Stand-alone mode using a touchscreen panel user interface and an USB flash drive based HAAKE Viscotester iQ RheoApp PC software for, – extended measuring routine (Job) editing, – extended instrument configuration, –...
- Page 26 4 GByte of internal memory for virtually unlimited storage of Jobs and data, Easy Job and data transfer using the optional USB flash drive based HAAKE Viscotester iQ RheoApp PC software. • Two USB ports for ...
-
Page 28: Functional Elements
Functional Elements The HAAKE Viscotester iQ consists of the instrument head and the instrument base. The instrument head contains the touchscreen panel, the rheometer drive motor and the control electronics. The instrument base contains the lift mechanics and functions as the holder for the temperature modules and the heat exchanger iQ which is used with the TM-PE-x Peltier temperature modules. - Page 29 (see “Lift control” page 49). Figure 5. HAAKE Viscotester iQ (right hand side view) Socket for USB flash drive Socket for USB keyboard or USB bar-code reader Type plate Operating switch...
-
Page 30: Instrument Head
The HAAKE Viscotester iQ is equipped with a completely newly designed, direct drive, low inertia, synchronous EC motor with high precision ball bearings. The HAAKE Viscotester iQ Air is equipped with the same motor but comes with a completely new designed, very robust, air-bearing with a very low air-consumption. -
Page 31: Measuring Geometry Quick Coupling
Quick coupling Measuring geometry (rotor) Connector sockets and controls The HAAKE Viscotester iQ is equipped with the following connector sockets and controls on the right hand side of the instrument head (see Figure 1. A USB socket for connecting an USB flash drive or an USB keyboard or an USB bar-code reader or the “Fill Assist”... -
Page 32: Heat Exchanger Iq
USB 2 socket for USB keyboard or USB bar-code reader or “Fill Assist” tool Operating switch The HAAKE Viscotester iQ is equipped with the following connector sockets and controls on the back of the instrument head (see Figure 1. A RJ45 socket for the Ethernet TCP/IP connection between the instrument and a PC on which HAAKE RheoWin is running. -
Page 33: Lab Stand
Note The instrument head holder can not be removed from the instrument head. This means that the lab stand version of the Viscotester iQ instrument head can not be used on the instrument base (see Figure 3) and vice versa. HAAKE Viscotester iQ Thermo Scientific... - Page 34 The base plate is equipped with three removable clamp blocks, for clamping a sample container holder and four height adjustable support feet, for leveling the instrument. Thermo Scientific HAAKE Viscotester iQ...
-
Page 36: Installation Requirements / Ambient Conditions
Installation Requirements / Ambient Conditions This chapter lists the requirements to the laboratory environment and other ambient conditions that must be fulfilled for operating the HAAKE Viscotester iQ instrument. Space Requirements For good working conditions an area with a width of 0.5 m and a depth of 0.6 m on a (laboratory) bench is needed, when using the Viscotester iQ in stand-alone mode (that is without a PC). -
Page 37: Compressed Air Supply
Plant (or shop) air systems generally apply small amounts of oil to the compressed air to prevent rust in the piping. Compressed air from such installations can not be used directly for air-bearing of the HAAKE Viscotester iQ Air, the use of special oil filters that reduce the amount of oil to the above specification is obligatory. -
Page 38: Ambient Conditions According To En 61010
The communication between the HAAKE Viscotester iQ instrument and the HAAKE RheoWin software uses an Ethernet network connection. To be able to use the HAAKE Viscotester iQ with the computer must have at least one free Ethernet network connection port (a standard RJ45, 8P8C port). - Page 39 Installation Requirements / Ambient Conditions Computer system (PC) requirements IMPORTANT Windows administrator privileges may be needed to be able to install drivers for a network card or a USB to Ethernet adapter. HAAKE Viscotester iQ Thermo Scientific...
-
Page 40: Installation
• Always first inform the dealer or the manufacturer (Small problems can often be dealt with locally.) Contents of the delivery This section describes the contents of delivery of the different versions of the HAAKE Viscotester iQ. HAAKE Viscotester iQ Check the contents of the delivery carefully. - Page 41 Knurled thumb screws (3x) Spirit level Stylus for touchscreen Hexagonal key (4 mm) Mains cable Table 5. Standard HAAKE Viscotester iQ, HAAKE Viscotester iQ Air contents of delivery Item Part number HAAKE Viscotester iQ (instrument head + instrument base) 006-2017...
-
Page 42: Haake Viscotester Iq With Lab Stand
Viscotester iQ instrument head only (that is part number 262-0051 or 262-0054 in case of the HAAKE Viscotester iQ Air, without any accessories) is the same as that of the HAAKE Viscotester iQ with lab stand, but without the lab stand (006-2471), see Table Note The product description “HAAKE Viscotester iQ instrument head only”... -
Page 43: Haake Viscotester Iq
Installation Setting up the rheometer HAAKE Viscotester iQ To setup the HAAKE Viscotester iQ rheometer 1. Place the instrument base on a suitable (laboratory) bench, see Chapter 3, “Installation Requirements / Ambient Conditions.” IMPORTANT The instrument must be positioned such that the operating switch on the right side of the instrument head can be reached for at any moment. -
Page 44: Haake Viscotester Iq With Lab Stand
13. Apply compressed air with a pressure of 2.0 bar to the instrument. HAAKE Viscotester iQ with lab stand To setup the HAAKE Viscotester iQ rheometer with lab stand 1. Place the lab stand on a suitable (laboratory) bench, see Chapter 3, “Installation Requirements /... - Page 45 10. Mount the three clamp blocks if desired, see “To mount a clamp block on the base plate” page Note The following two steps and 12) are only needed when installing a HAAKE Viscotester iQ air. HAAKE Viscotester iQ Thermo Scientific...
-
Page 46: Haake Viscotester Iq Instrument Head Only
HAAKE Viscotester iQ instrument head only CAUTION The CE Declaration of Conformity (document 075-5024) included at the beginning of this manual is not valid for the product ”HAAKE Viscotester iQ instrument head only”, see document 075-5029 at the beginning of this manual instead. -
Page 47: Moving The Rheometer
Depending on which temperature module is used, the hoses and the electrical cable of the temperature module must be connected to the HAAKE Viscotester iQ and the heat exchanger iQ or a circulator before the module can be used. -
Page 48: Installing A Tm-Pe-C Or Tm-Pe-P Temperature Module
Installation Installing a temperature module IMPORTANT Make sure that the HAAKE Viscotester iQ has been switched off before you connect or disconnect the cables. Figure 15. Mounting/dismounting a temperature module Mounting point holes Mounting point Knurled thumb screw Mounting points... -
Page 49: Installing The Heat Exchanger Iq
Note As a cooling liquid only distilled water with a special additive (innovatekProtect IP), which is part of the TM-PE-x delivery, must be used. For more information on the innovatekProtect IP cooling liquid additive, see Appendix D, “Cooling liquid additive.” HAAKE Viscotester iQ Thermo Scientific... -
Page 50: Mounting/Dismounting A Tm-Pe-C Or Tm-Pe-P Temperature Module
Installation Installing a temperature module To fill the HX iQ with cooling liquid 1. Mount both the TM-PE-x and the HX iQ to the HAAKE Viscotester iQ, see “To mount the heat exchanger iQ” page 32 “To mount a TM-PE-x temperature module”... - Page 51 2. Guide the two fluid hoses and the cable through the opening at the rear of the Viscotester iQ instruments base, so that they end up in the instruments base temperature module compartment (see Figure 20, right image). HAAKE Viscotester iQ Thermo Scientific...
- Page 52 To dismount the heat exchanger iQ 1. Lift the HX iQ slightly upward and then backward to remove it from the back of the instrument. 2. Place the HX iQ on the bench behind the instrument. Thermo Scientific HAAKE Viscotester iQ...
-
Page 53: Installing A Tm-Li-Cxx Or Tm-Li-P Temperature Module
HX iQ from the instrument completely. It is not necessary to remove the cooling liquid from the HX iQ when the HX iQ is dismounted from the HAAKE Viscotester iQ. Installing a TM-LI-Cxx or TM-LI-P temperature module The TM-LI-C32, TM-LI-C48 and TM-LI-P are delivered with the hoses and hose connectors not yet mounted. -
Page 54: Mounting/Dismounting A Tm-Li-Cxx Or Tm-Li-P Temperature Module
8. Check the horizontal orientation of the module using the spirit level. To dismount a TM-LI-Cxx or TM-LI-P temperature module 1. Check that no rotor is fitted to the drive motor shaft. 2. Check that the instrument head is in its highest position. Thermo Scientific HAAKE Viscotester iQ... -
Page 55: Mounting The Universal Container Holder
5. Place the black slotted bar on the front mounting point and mount the front knurled thumb screw, do not tighten the thumb screw. 6. Fix the module to the holder by tightening the two rear knurled thumb screws. HAAKE Viscotester iQ Thermo Scientific... -
Page 56: Mounting The Immersion Tube
To dismount the immersion tube 1. Loosen the ring nut from the adapter ring. 2. Remove the immersion tube from the instrument head. 3. The adapter ring must not be removed from the instrument. Thermo Scientific HAAKE Viscotester iQ... -
Page 57: Mounting The External Temperature Sensor
HAAKE Viscotester iQ RheoApp software The HAAKE Viscotester iQ RheoApp software is delivered on an USB flash drive with a specific file and data structure and does not need be installed on a PC. The HAAKE Viscotester iQ RheoApp software runs directly from the USB flash drive and can thus be used on any PC running Windows XP, Windows 7, Windows 8(.1) or Windows 10 with at least one USB port. -
Page 58: Haake Rheowin Software Installation
HAAKE RheoWin software installation On the first use of the HAAKE Viscotester iQ RheoApp software a software installation key must be entered. By entering the key, the USB flash drive will be “coupled” to the serial number of the HAAKE Viscotester iQ. -
Page 60: Operation
Viscotester iQ Reference Manual. The operation of the and RheoWin PC software is also described in detail in the HAAKE Viscotester iQ Reference Manual. Information on how to setup the instrument and on how to install temperature modules can be found Chapter 4, “Installation.”... -
Page 61: Automatic Temperature Module Detection
Operation Automatic temperature module detection Figure 27. Initialization screen Extra text “Air” in case of a Instrument name and HAAKE Viscotester iQ Air firmware version Status information from Status information from the first part the second part Status information from... -
Page 62: Mounting/Dismounting A Measuring Geometry
The Viscotester iQ can be used with a wide range of coaxial cylinder, parallel plate, cone and plate and vane measuring geometries. See the HAAKE Viscotester iQ Reference Manual for more detailed information on the available measuring geometries. The following sections describe how to mount and dismount the upper part (the rotor) and the lower part (the cup or plate) of the measuring geometry to the drive motor shaft and the TM-xx-x temperature modules respectively. -
Page 63: Cleaning A Rotor
The surface of the rotor that comes in contact with the sample can be cleaned with any suitable standard laboratory solvent (for example alcohol, aceton, etc.). Figure 30. ConnectAssist rotor coupling ConnectAssist rotor coupling electrical contact area ConnectAssist rotor coupling Rotor shaft HAAKE Viscotester iQ Thermo Scientific... -
Page 64: Mounting/Dismounting A Cup
1. Loosen the bayonet clamping ring by rotating it counterclockwise (about one third of a revolution) until a stop. 2. Pull the bayonet clamping ring upwards, thereby pulling the cup out of the TM-xx-C. 3. Remove the cup from the bayonet clamping ring. Thermo Scientific HAAKE Viscotester iQ... -
Page 65: Mounting/Dismounting A Lower Plate
1. Place the lower plate on the TM-xx-P temperature module while aligning the small slot on bottom side of the plate with the pin on the TM-xx-P temperature module. 2. Place the bayonet clamping ring on the TM-xx-P temperature module. HAAKE Viscotester iQ Thermo Scientific... -
Page 66: Adjusting The Universal Container Holder
4. Slide the diameter adjusting plate backward. 5. Place the sample container on the bottom plate. 6. Adjust the height of the bottom plate if needed, see “To adjust the height of the bottom plate.” Thermo Scientific HAAKE Viscotester iQ... - Page 67 To use the diameter scale to center the sample container 1. Measure the diameter of the sample container and take note of the diameter value (in mm). 2. Loosen the two lower knurled fixing nuts. HAAKE Viscotester iQ Thermo Scientific...
-
Page 68: Lift Control
Lift control The HAAKE Viscotester iQ is equipped with a simple but effective and easy to operate lift mechanism for the axial positioning of the rotor relative to the cup or the lower plate. The lift is operated with the large hand wheel with fold-out crank handle at the left side of the instrument base. -
Page 69: Coaxial Cylinder Geometries
To setup the measuring geometry for a measurement 1. Fill the correct sample volume in the cup. For the correct sample volume see the HAAKE Viscotester iQ Reference Manual. 2. Mount the cup in the temperature module, see “Mounting/dismounting a cup.”... -
Page 70: Calipers For Cone And Plate Geometries
Adjusting screw knob Contact point Adjusting lever The gap setting tool must be mounted on the back of the instrument head in place of the standard height adjustment tool, see Figure 39 (compare with Figure 44). Thermo Scientific HAAKE Viscotester iQ... -
Page 71: Setting The Gap
4. Choose Configuration > Set measuring gap from the touchscreen panel user interface, to open the Set measuring gap menu, see Figure Now follow the on-screen instructions, see Figure Figure 41 Figure 42, which are explained in more detail below. HAAKE Viscotester iQ Thermo Scientific... - Page 72 By turning the adjusting lever forward (clockwise) and/or backward (counterclockwise), adjust the torque reading until it is in the range of 0.03 mNm < torque < 0.1 mNm. In this range the graphical torque display is green, outside this range it is red (see Figure 42). Thermo Scientific HAAKE Viscotester iQ...
- Page 73 To setup the measuring geometry for a measurement 1. Place the correct sample volume on the lower plate. For the correct sample volume see the HAAKE Viscotester iQ Reference Manual. 2. Lower the instrument head to the measurement position, see “Lift control.”...
-
Page 74: Vane Geometries
IMPORTANT For parallel plate geometries the physical gap (set using a precision caliper) must match the gap value defined in the internal Job, the RheoWin Job or the manual measurement setup, see the HAAKE Viscotester iQ Reference Manual. Vane geometries... -
Page 75: Lab Stand
Lab stand Lab stand The lab stand is especially designed to use the HAAKE Viscotester iQ (instrument head) for measurements in original sample containers, as well as other containers, like buckets, that are too large to fit in the universal container holder. By adjusting the vertical position of the end stop, a reproducible positioning of the measurement geometry, for example a vane rotor or a coaxial cylinder geometry with an immersion tube, in the sample (container) is comfortably achieved. - Page 76 (counterclockwise) to achieve that. 2. With the spanner lever kept upright with one hand, screw the knurled ring upward (counterclockwise) against the spanner lever until a stop with the other hand (without using much force). Thermo Scientific HAAKE Viscotester iQ...
-
Page 77: Touchscreen
(laboratory) gloves. Note To operate the Viscotester iQ touchscreen, tap the screen firmly with a fingertip, a finger nail or a rigid but stump stylus like tool. A special stylus is part of the instrument delivery. HAAKE Viscotester iQ Thermo Scientific... -
Page 78: Touchscreen User Interface
All functions of the HAAKE Viscotester iQ can be completely controlled using the build-in graphical user interface which is described in detail in the HAAKE Viscotester iQ Reference Manual. For the configuration of some of the more enhanced functions the HAAKE Viscotester iQ RheoApp PC software is needed, see the HAAKE Viscotester iQ Reference Manual. -
Page 79: Job Control Menu
The functionality of the Menu bar, Status bar, and the optional buttons at the bottom of the screen, is explained in detail in the HAAKE Viscotester iQ Reference Manual. Job control menu... - Page 80 Result page. The operator can switch forth and back between the four different pages at any time during a Job run. The functionality of these pages is described in the HAAKE Viscotester iQ Reference Manual. 4. Tap the Graph page...
-
Page 81: Manual Control Menu
To run a manual control measurement 1. On the Settings page select a row or manually enter a set value, see the HAAKE Viscotester iQ Reference Manual for detailed information on how to do that. 2. Tap the Graph page... -
Page 82: Sample Menu
Sample number Button: Tap to edit (scan) bar code Sample bar code See the HAAKE Viscotester iQ Reference Manual for detailed information on the Sample menu. Configuration menu From the Configuration menu several settings for the HAAKE Viscotester iQ touchscreen user interface can be made. -
Page 84: Temperature Modules
The TM-xx-x modules available for the HAAKE Viscotester iQ can be classified according to the three different technical solutions that are used in these modules: •... -
Page 85: Temperature Module Tm-Pe-C
The TM-PE-C is designed to be used with the special heat exchanger iQ (HX iQ), which is mounted to the back of the HAAKE Viscotester iQ instrument base, only. Figure 57. TM-PE-C with cable and hoses and heat exchanger iQ... -
Page 86: Working Principle
-5 °C to 160 °C can be reached without modifying the setup. The TM-PE-C and the heat exchanger iQ are directly connected to HAAKE Viscotester iQ and are controlled by the HAAKE Viscotester iQ, both in manual-control mode and in job-control mode. - Page 87 140 °C instead of 160 °C, and the lowest attainable temperature is 0 °C instead of -5 °C, see Table 10. The lowest attainable temperature depends on the ambient temperature. For every 1 °C increase in ambient temperature, the lowest attainable temperature will be 1 °C higher. HAAKE Viscotester iQ Thermo Scientific...
-
Page 88: Temperature Module Tm-Pe-P
0 °C to 160 °C. The TM-PE-P is designed to be used with the special heat exchanger iQ (HX iQ), which is mounted to the back of the HAAKE Viscotester iQ instrument base, only. Thermo Scientific... -
Page 89: Working Principle
(upper side in the TM-PE-P) of the Peltier element can be removed from the Peltier element. Without a heat sink the Peltier element will heat itself up. The heats sink consist of HAAKE Viscotester iQ Thermo Scientific... -
Page 90: Performance
-0 °C to 160 °C can be reached without modifying the setup. The TM-PE-P and the heat exchanger iQ are directly connected to HAAKE Viscotester iQ and are controlled by the HAAKE Viscotester iQ, both in manual-control mode and in job-control mode. -
Page 91: Temperature Modules Tm-Li-C32, Tm-Li-C48, Tm-Li-P
The TM-LI-C32, TM-LI-C48 and TM-LI-P are designed to be used with a separate circulator. Figure 61. TM-LI-C with cable and standard hoses The mounting and dismounting of a coaxial cylinder measuring cup in the TM-LI-C32 or TM-LI-C48 is described in “Mounting/dismounting a cup” page HAAKE Viscotester iQ Thermo Scientific... - Page 92 Only use circulators with a nominal liquid pressure ≤ 0.5 bar. Do not connect the TM-LI-C32, TM-LI-C48 and TM-LI-P to a mains water conduit. WARNING Check the hoses for possible damage on a regular basis. Thermo Scientific HAAKE Viscotester iQ...
-
Page 93: Working Principle
When the HAAKE Viscotester iQ is used in stand-alone mode, the circulator must be controlled manually from its front panel, since the HAAKE Viscotester iQ can not directly control any circulator. When the HAAKE RheoWin software is used to control the HAAKE Viscotester iQ, the circulator can also be controlled by the software in case a HAAKE RheoWin device driver is available for the circulator. -
Page 94: Hoods
TM-xx-x temperature modules can be used with a hood to cover the upper part of the measuring geometry. For the HAAKE Viscotester iQ two hoods with identical design, but made from different materials, are available. Both hoods can be used with all coaxial cylinder geometries and all parallel plates and cone... -
Page 95: Pom Hood
POM it can be used for temperatures up to 120 °C only. PEEK hood The PEEK hood is made from Polyether ether ketone (PEEK). Due to the high melting point of PEEK it can be used for temperatures up to 250 °C. HAAKE Viscotester iQ Thermo Scientific... -
Page 96: Appendix A Technical Specifications
Technical Specifications This appendix contains the technical specifications of the HAAKE Viscotester iQ rheometer and the optionally available temperature modules. For more detailed information contact your local sales representative or Thermo Scientific directly. HAAKE Viscotester iQ rheometer This section contains the technical specifications for the HAAKE Viscotester iQ rheometer. -
Page 97: Dimensions, Power Consumption
Viscotester iQ instrument and the power supply unit. Main instrument Table 15 lists the mechanical properties of the HAAKE Viscotester iQ with and without the optional heat exchanger for the TM-PE-x. The electrical properties of the instrument are defined by those of the power supply unit, see Table 18 below. -
Page 98: Lab Stand
Value valid for Viscotest iQ plus HX iQ, according to IEC 61010-1 at 1 m distance aside of the instrument Lab stand Table 17 lists the mechanical properties of the special lab stand for the HAAKE Viscotester iQ instrument head. Table 17. HAAKE Viscotester iQ lab stand mechanical properties... -
Page 99: Temperature Modules
Parallel plate and cone and plate With TMP-adapter. With the external Pt100 temperature sensor (see“Mounting the external temperature sensor” page 38) the HAAKE Viscotester iQ can measure temperatures in the range from -50 °C to +390 °C. HAAKE Viscotester iQ Thermo Scientific... -
Page 100: Appendix B Accessories
Accessories This appendix contains information on the optional accessories and their contents of delivery as well as spare parts (where applicable) that are available for the HAAKE Viscotester iQ. Temperature modules and hoods This section contains information on the contents of delivery of and spare parts for the temperature modules as well as information on the hoods. -
Page 101: Tm-Li-Cxx Temperature Modules
Plastic hose clamps (8 pieces) 000-2711 Figure 22 page 34 for a photo of the contents of delivery of the TM-LI-C32. See chapter “Temperature modules TM-LI-C32, TM-LI-C48, TM-LI-P” page 72 for more information on TM-LI-C32 module. HAAKE Viscotester iQ Thermo Scientific... -
Page 102: Temperature Offset Calibration Tool
222-2206. Hoods Table 25 for the order number and part numbers for the optional hoods which can are compatible with all TM-PE-C and TM-LI-Cxx and all measuring geometries. Thermo Scientific HAAKE Viscotester iQ... -
Page 103: Measuring Geometries And Measuring Accessories
Measuring geometries and measuring accessories For a list of the measuring geometries and adapters that are available for the HAAKE Viscotester iQ see Appendix A, “Properties of Measuring Geometries.” in the HAAKE Viscotester iQ Reference Manual. -
Page 104: Software And Network Connection
IMPORTANT In case the HAAKE Viscotester iQ RheoApp software is ordered separately from the HAAKE Viscotester iQ, the serial number of the HAAKE Viscotester iQ, with which the HAAKE Viscotester iQ RheoApp software will be used, must be included in the order. -
Page 106: Appendix C Installation Instrument Head Only
This appendix contains information on the installation of the HAAKE Viscotester iQ instrument head only in a custom setup. For using the HAAKE Viscotester iQ instrument head only in a custom setup, the following requirements must be met: • There must be an empty space of 300 mm width and 350 mm depth around the instrument head,... - Page 107 Installation Instrument Head only Figure 68. HAAKE Viscotester iQ instrument head only, space requirements, top view Distance between center of drive motor shaft and center of lab stand column mounting HAAKE Viscotester iQ Thermo Scientific...
-
Page 108: Appendix D Cooling Liquid Additive
190 ml, 50 ml of the additive is to be used (mixed) with 140 ml of distilled water. The following pages contain a copy of the original EEC-Safety Data Sheet. Figure 69. innovatekProtect IP in 250 ml plastic bottle Thermo Scientific HAAKE Viscotester iQ... - Page 109 Cooling liquid additive HAAKE Viscotester iQ Thermo Scientific...
- Page 110 Cooling liquid additive Thermo Scientific HAAKE Viscotester iQ...
- Page 111 Cooling liquid additive HAAKE Viscotester iQ Thermo Scientific...
- Page 112 Cooling liquid additive Thermo Scientific HAAKE Viscotester iQ...
- Page 113 Cooling liquid additive HAAKE Viscotester iQ Thermo Scientific...
- Page 114 Cooling liquid additive Thermo Scientific HAAKE Viscotester iQ...
- Page 116 Index compliance WEEE Connect Assist Dismount a rotor Mount a rotor Quick coupling WEEE compliance Thermo Scientific HAAKE Viscotester iQ...
Need help?
Do you have a question about the HAAKE Viscotester iQ and is the answer not in the manual?
Questions and answers
Please provide instruction were i can find operational and performance validation steps and acceptance criteria for HAAKE Viscotester IQ