Advertisement
Quick Links
Technical Support and E-Warranty Certificate www.vevor.com/support
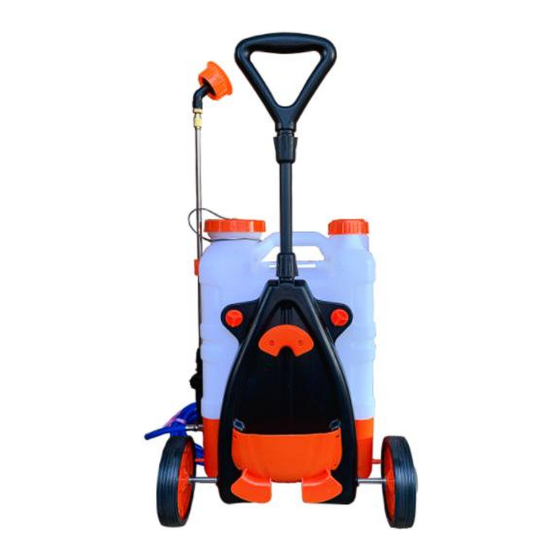
ELECTRIC SPRAYER
USER MANUAL
MODEL: FT-16(SS)
We continue to be committed to provide you tools with competitive price.
"Save Half", "Half Price" or any other similar expressions used by us only represents an
estimate of savings you might benefit from buying certain tools with us compared to the major
top brands and doses not necessarily mean to cover all categories of tools offered by us. You
are kindly reminded to verify carefully when you are placing an order with us if you are
actually saving half in comparison with the top major brands.
Advertisement

Related Manuals for VEVOR FT-16(SS)


Summary of Contents for VEVOR FT-16(SS)
- Page 1 Technical Support and E-Warranty Certificate www.vevor.com/support ELECTRIC SPRAYER USER MANUAL MODEL: FT-16(SS) We continue to be committed to provide you tools with competitive price. "Save Half", "Half Price" or any other similar expressions used by us only represents an estimate of savings you might benefit from buying certain tools with us compared to the major top brands and doses not necessarily mean to cover all categories of tools offered by us.
- Page 2 CustomerService@vevor.com This is the original instruction, please read all manual instructions carefully before operating. VEVOR reserves a clear interpretation of our user manual. The appearance of the product shall be subject to the product you received. Please forgive us that we won't inform you again if there are any technology or software updates on our product.
- Page 3 SAFETY INSTRUCTIONS EYE PROTECTION HAND PROTECTION FOOT PROTECTION DUST MASK PROTECTION WEAR WASH YOUR HAND ! For your safety and the safety of others, the following precautions must be observed when operating the sprayer: 1. During spraying operation, the personnel shall wear clothes in strict accordance with the regulations, wear masks, glasses, hats, gloves, or protective clothing against pesticide penetration, and shall not work naked.
- Page 4 base and whether the atomization effect is good. Only when everything is normal can you prepare liquid medicine for the operation. 7. When adding liquid medicine, it must pass through the filter screen. If there are impurities, the normal use of the machine will be affected. 8.
- Page 5 STRUCTURE DIAGRAM Name Name Handle Pressure regulating knob Water outlet Charger socket Water inlet Fuse Barrel body Switch Spraying nozzle Wheel Spray bar Storage box Spray bar clamp Hose storage rack Hose Battery Voltmeter Fixed nuts - 4 -...
- Page 6 COMPONENTS Picture Name and Qty Picture Name and Qty Barrel body(x1) Charger(x1) Cart rack(x1) Fuse(x2) Fan-shaped Handle(x1) nozzle(x1) Adjustable single-hole Pull rod(x1) nozzle(x1) HoseΦ8x4m(x1) Windproof nozzle(x1) F-type double Braces(x1) nozzle(x1) Single-head copper Clasp spring(x4) nozzle(x1) Stainless steel Single-head plastic gasket(x2) nozzle(x1) Copper spray Sealing gasket(x1)
- Page 7 ASSEMBLY 1. Install the handle lever A and the handle B in turn. 2. Install the hose. 3. Connect the other end of the hose to the spray rod handle. 4. Mounting the spray rod. The sealing rubber ring must be placed in the groove position(C).
- Page 8 5. Select a suitable sprinkler head and install it. (The length of the spray rod can be adjusted by loosening D.) Note: When spraying for a long time, the handle can be locked through G to ease your hand fatigue. 6.
- Page 9 7. Install the straps as shown below. A: Description of the voltmeter 1) Green Light "N": Sufficient power, can be used normally. 2) Red Light "L": The battery is insufficient and needs to be charged. Note: When charging, please turn off the power! - 8 -...
- Page 10 B: Instructions for use 1.Switch 2.Pressure regulating knob 3.Fuse 4.Charger socket Operation: Press the switch to "ON" Adjust knob 2 to proper pressure Note:Knob 2 must work only after the switch is powered on. C: Seal position Sealing gasket Green seal ring12x16x2 Green seal ring12.5x17.5x2 O-ring seal15x3.1 Green seal ring7x11x2...
- Page 11 INTRODUCTION AND APPLICATION OF NOZZLE Provide fan-shaped spray, Fan-shaped nozzle which is mostly used in scenes requiring control range, such as weeding. Rotational control spray. Adjustable single-hole Provide a small amount of nozzle spray, or linear spray (15-20ft). 1.Equipped with a protective cover to reduce the impact Windproof nozzle of wind on spray.
- Page 12 the tank, hose, pump, and spray tube with clean water. Finally, spray with clean water for 3 minutes to eliminate the possibility of a chemical reaction when other chemicals are used in the next spraying. Residues of chemicals can lead to corrosion and other damage to parts of the sprayer especially spraying nozzles, filters, and seals.
- Page 13 Flow rate and pressure 1. Suction plug. 1. Cleaning the filter 2. Power is not enough. 2. Change the battery reduction. 1. Connecting place is not 1. Tight the connecting. tight. Leaking 2 Change the o-ring. 2. The O-ring is broken. 3.
- Page 14 Manufacturer: TAIZHOU FENGTIAN SPRAYING MACHINE CO.,LTD ADD: NO.1515 FENGNAN EAST RD,JIAOJIANG DISTRICT,TAIZHOU CITY ,ZHEJIANG ,CHINA Made in China - 13 -...
- Page 16 TechnicalSupport and E-Warranty Certificate www.vevor.com/support...
Need help?
Do you have a question about the FT-16(SS) and is the answer not in the manual?
Questions and answers