Advertisement
Quick Links
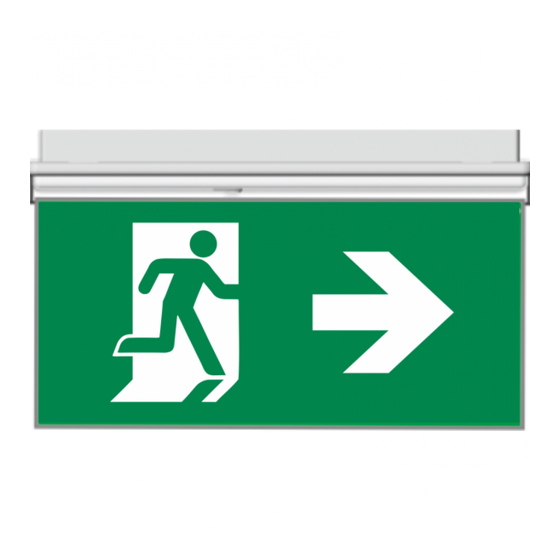
GR-427/12L SELF TESTING MAINTAINED EMERGENCY LUMINAIRE
TECHNICAL CHARACTERISTICS
OPERATION VOLTAGE
MAXIMUM POWER CONSUMPTION
BATTERY (Ni-Cd)
BATTERY PROTECTION
INDICATIONS - CONTROLS
CHARGING TIME
MINIMUM AUTONOMOUS DURATION
ILLUMINATION SOURCE
ILLUMINATION (230V / EMERGENCY)
DEGREES OF COVER PROTECTION
PRODUCED IN ACCORDANCE WITH
OPERATION TEMPERATURE RANGE
RELATIVE HUMIDITY
CONSTRUCTION MATERIALS
EXTERNAL DIMENSIONS
TYPICAL WEIGHT
GUARANTEE
GENERAL
These luminaires are used indoors (ta 40 C)
where emergency light is needed.
E a c h l u m i n a i r e m u s t b e p e r m a n e n t l y
connected to mains power supply.
In normal operation the led strip lights and the
battery is charging.
In case of a mains power supply failure the
luminaire will light the led strip automatically
in emergency mode. When the mains power
supply is restored the device turns to normal
operation.
INSTALLATION
To install the luminaire follow the installation
instructions on page 4.
Battery Cut-off
The luminaire enters in this operation when the
mains power supply fails and battery has lost
its energy. During this operation the luminaire
enters the idle state and battery consumption is
negligible, in order to be protected from deep
discharge.
Battery charging
The battery charging is completely controled. In
this case, is achieved the perfect
maintenance , as well as the elongation of its
duration. When the battery has completely
charged, it charges with a maintenance
current.
Page 1 from 5
EN 60598-1, EN 60598-2-22, ΕΝ 55015, ΕΝ 61547, ΕΝ 61000-3-2, ΕΝ 61000-3-3
Thank you for your trust in our products
Olympia Electronics - European manufacturer
o
battery
(for LED MODULE Specs. see page 5)
220-240V AC/50-60Hz
3,5W / 7VA
3,6V/3Ah
From overcharge and full discharge
Charge, lamp fault, fault indication LED, TEST button
24h
480 min
12 white LED's
100lm / 100lm
IP42
5 to 40 C
Up to 95%
Bayblend FR3010, transparent polycarbonate
272 x 121 x 50 mm
600gr.
3 years (1 year for the battery)
Manual Test
The manual test can be conducted only if the
main power supply and the battery is connected.
By pressing the test button briefly an operation
test is initiated. During this test period all
indication LEDs are OFF.
Automatic test
This test includes all the operations that provide
the manual test and is conducted automatically
every 15 days. In order to be performed, the
main power supply and the battery should be
connected.
Automatic Autonomous Test
The Automatic autonomous Test is conducted
and
measures
operation. This test is conducted automatically
every six months. In order to be performed, the
main power supply and the battery should be
connected (the battery should be charged). If
the battery is not charged, the test is postponed
until the battery is completely charged. If during
the Automatic Autonomous Test the luminaire's
duration is lower than the named, then the
battery must be replaced.
Back Up Operation
The autonomous duration of battery during
o
the
luminaire`s
back
923427000_09_005
up
Advertisement

Summary of Contents for olympia electronics GR-427/12L
- Page 1 GR-427/12L SELF TESTING MAINTAINED EMERGENCY LUMINAIRE TECHNICAL CHARACTERISTICS (for LED MODULE Specs. see page 5) OPERATION VOLTAGE 220-240V AC/50-60Hz MAXIMUM POWER CONSUMPTION 3,5W / 7VA BATTERY (Ni-Cd) 3,6V/3Ah BATTERY PROTECTION From overcharge and full discharge Charge, lamp fault, fault indication LED, TEST button...
- Page 2 emergency mode is at least the one that is ΑΤΤΕΝΤΙΟΝ!!! stated in the list of the first page. During 1. Operations for installation, maintainance or emergency mode, a LED strip test is also testing must be done by authorized personel performed.
- Page 3 MARKING PANEL SP-115 Placing the SP-115 marking panel A marking panel SP-115 can be installed on the Place the plastic mounting accessories of the luminaire in 3 different locations. This marking marking panel as shown in pictures. panel is installed perpendicular to the diffusor of the luminaire, as shown in the pictures below.
-
Page 4: Installation Instructions
INSTALLATION INSTRUCTIONS Reflector Base plastic Diffusor Cable entry channels Luminaire mounting holes Base plastic 1 To install the luminaire you must dismantle it to 3 parts. 2 Place a flat blade screwdriver in the area Α to release the diffusor’s plastic hook. -
Page 5: Warranty
Olympia Electronics reserves the right to repair or to replace the returned goods and to or not charge the buyer depending on the reason of defection. Olympia Electronics reserves the right to charge or not the buyer the transportation cost.


Need help?
Do you have a question about the GR-427/12L and is the answer not in the manual?
Questions and answers