Table of Contents
Advertisement
Available languages
Available languages
Quick Links
Advertisement
Table of Contents

Subscribe to Our Youtube Channel
Related Manuals for universalblue UAA3000R32-19


Summary of Contents for universalblue UAA3000R32-19
- Page 1 MANUAL DE INSTRUCCIONES INSTRUCTION MANUAL UAA3000R32-19, UAA4600R32-19, UAA6000R32-19 Aire Acondicionado Split Inverter A++ Inverter Air Conditioner Split A ++ www.universalblue.es P.I. Media Legua C/Decenio,1 30565 Las Torres de Cotillas (Murcia)
-
Page 2: Table Of Contents
Aire Acondicionado Split Inverter A++ Inverter Air Conditioner Split inverter A++ ÍNDICE ESPAÑOL INSTRUCCIONES DE SEGURIDAD ................3 CARACTERÍSTICAS Y NOMBRE DE LAS PARTES ............5 DISPLAY Y CONTROL REMOTO .................. 7 FUNCIONAMIENTO ....................13 INSTALACIÓN ......................20 MANTENIMIENTO ...................... 32 SERVICIO POSTVENTA .................... -
Page 3: Español
ESPAÑOL Felicidades por haber adquirido este producto. Le recomendamos que dedique algún tiempo a leer cuidadosamente este Manual de Instrucciones / Instalación con el fin de hacer un buen uso del mismo. Lea cuidadosamente todas las instrucciones de seguridad antes de utilizar el aparato y conserve este Manual de Instrucciones / Instalación para poder consultarlo en el futuro. - Page 4 • Asegúrese de que la tensión de red corresponda a la requerida por el aparato. Mantenga el interruptor o el enchufe de alimentación limpios. Inserte la clavija de alimentación correctamente. • Verifique que el enchufe sea adecuado. • No instale el aparato a una distancia de menos de 50 cm de sustancias inflamables (alcohol, etc.) o de recipientes presurizados, por ejemplo, latas de aerosol.
-
Page 5: Características Y Nombre De Las Partes
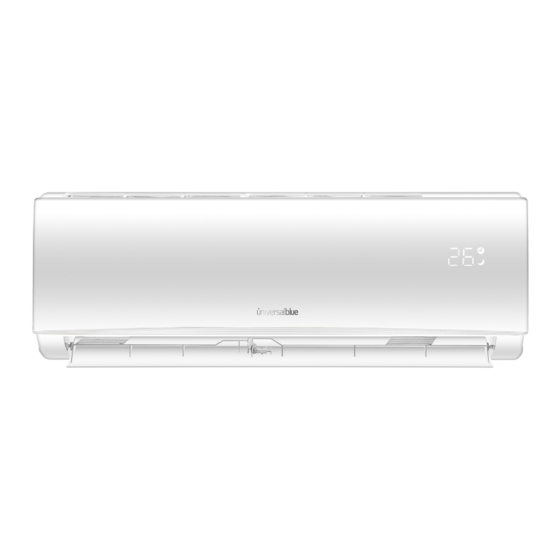
alimentación dañado. Si el cable está dañado llame al servicio técnico del aparato. • No utilice extensiones o regletas de enchufes. • No toque el aparato con los pies descalzos o partes del cuerpo mojadas o húmedas. • No obstruya la entrada o salida de aire en ninguna de las unidades, tanto interior como exterior. - Page 6 Nota: Las imágenes son orientativas y podrían variar en base al modelo adquirido. Modelo UAA3000R32-19 Motor DC inverter Clase energética A++ Con bomba de calor Con mando a distancia Con temporizador Gas R32 Potencia máxima: 3000 frigorías Ideal para estancias entre 14 y 22 m2 Capacidad de refrigeración/Calefacción: 1000-3770 / 1000-3810 W...
-
Page 7: Display Y Control Remoto
Tipo de compresor: Rotativo Precarga gas R32 a partir de 3 m: 15gr/m Unidad Conexiones frigoríficas líquidos/gas: 1/4" / 3/8" exterior Nivel sonoro: 65 DB Dimensiones: 78 x60,2 x 34,7 cm Modelo UAA6000R32-19 Motor DC inverter Clase energética A++ Con bomba de calor Con mando a distancia Con temporizador Gas R32... - Page 8 SIMBOLO FUNCIÓN SIGNIFICADO ENCENDIDO/ PAGADO Este símbolo aparece cuando la unidad está encendida NOCHE Este símbolo aparece cuando el modo noche está activado DISPLAY aparato muestra temperatura TEMPERATURA seleccionada o el código de error cuando /ERROR éste ocurre TEMPORIZADOR Este símbolo se enciende cuando el temporizador está...
- Page 9 Presione para establecer el temporizador TIMER SLEEP Presione para activar el modo noche Presione este botón para activar desactivar el modo ECO Presione este botón para seleccionar el MODE modo de funcionamiento Presione este botón para activar/desactivar la función turbo, lo que permitirá a la unidad SUPER / alcanzar la temperatura en el menor tiempo TURBO...
- Page 10 Presione ambos botones para establecer (MODE+TIMER) bloqueo seguridad niños (Opcional) Para activar la función 8º calefacción (Opcional) Para encender/apagar la función "I FEEL". I FEEL aire acondicionado regulará temperatura de la habitación en base a la temperatura ambiente unidad interior. Dicha función finalizará...
- Page 11 Indicador VELOCIDAD DEL VENTILADOR BAJA Indicador VELOCIDAD DEL VENTILADOR MEDIA Indicador VELOCIDAD DEL VENTILADOR ALTA Indicador MODO ‘NOCHE’ Indicador MOVIMIENTO DE ALETAS Indicador ‘SUPER TURBO’ Indicador ‘HEALTHY’ Indicador ‘ECO’ Indicador de BATERIA Indicador de la HORA Indicador SILENCIO Nota: Imágenes orientativas. El control remoto podría varíar en función del modelo adquirido.
- Page 12 nuevas del mismo tipo cuando la pantalla del control remoto no sea legible. No deseche las baterías en el contenedor general de residuos. Las baterías deberán reciclarse en el contenedor apropiado para ello. Cuando inserte las baterías por primera vez en el control remoto o bien si las cambia, necesita programar el control remoto en modo frío unicamente o frío y calor.
-
Page 13: Funcionamiento
4. FUNCIONAMIENTO CONTROL DEL FLUJO DE AIRE (MOVIMIENTOS) El flujo de salida de aire se distribuye uniformemente en la habitación. Es posible redireccionar el flujo de aire a través del botón (SWING) hacia arriba o hacia abajo, hasta encontrar la posición óptima. Con el botón SWING (Izq/derecha) el aire... - Page 14 La función frio permite que el aire de la habitación se enfríe, a la vez que reduce la humedad del aire. Para activar la función de frío (COOL), presione el botón MODE hasta que aparezca el símbolo de la función COOL en la plantalla. Ajuste la temperatura mediante las flechas arriba y abajo.
- Page 15 • Si el aparato está equipado bomba de calor, el encendido del equipo puede tardar unos segundos, para garantizar una salida inmediata de aire caliente • Durante el modo CALOR, el aparato puede activar automáticamente un ciclo de descongelación, esencial para limpiar el escarcha en el condensador y funcionar correctamente.
- Page 16 MODO VENTILADOR En este caso solo funcionará el ventilador del aparato. Para configurar el modo FAN, presione el botón MODE hasta que aparezca el símbolo de la función en la pantalla. presionar botón FAN, velocidad ventilador podrá ajustarse BAJO/MEDIO/ALTO/AUTO El control remoto mostará la velocidad utilizada en el modo anterior por defecto. En el modo FEEL (automático), el aire acondicionado selecciona automáticamente la velocidad del ventilador y el modo de operación (FRIO o CALOR) por lo que no se podrá...
- Page 17 MODO DESHUMIFICADOR Esta función reduce la humedad del aire en ambientes donde la humedad es elevada, obteniendo como resultado una estancia más cómoda. Para configurar el modo DRY o DESHUMFICADOR, presione MODE hasta que aparezca el símbolo de la función en la pantalla.
- Page 18 MODO NOCHE Para activar el modo de funcionamiento SLEEP o NOCHE, presione el botón SLEEP en el control remoto hasta que el símbolo de la función aparezca en la pantalla. El modo NOCHE ajusta automáticamente temperatura para hacer habitación sea más cómoda durante las horas de sueño.
- Page 19 este procedimiento hasta escuchar 3 veces el sonido EMERGENCIA: Si el control remoto falla, abra la tapa frontal de la unidad interior y busque el botón de emergencia. 1. Presione el botón de emergencia una vez (hasta escuchar un sonido) y el aparato será...
-
Page 20: Instalación
Información en base al test de fábrica realizado * * Máx. velocidad del motor de la unidad interior y el ángulo de apertura máximo de las aletas 5. INSTALACIÓN PRECAUCIONES: • El aire debe ser instalado por personal profesional autorizado. El incumplimiento de este punto podría causar la pérdida automática de la garantía del aparato. - Page 21 Nota para una correcta instalación: • El lugar de instalación debe ser una habitación bien ventilada. • El lugar de instalación debe estar libre de combustible abierto y cualquier fuente de calor superior a 548 ° C que fácilmente emita gases y humos. •...
- Page 22 INSTALACIÓN DE LA UNIDAD INTERIOR • Instale la unidad interior en una pared fuerte que no esté sujeta a vibraciones. • Los puertos de entrada y salida no deben estar obstruidos: el aire debe ser capaz de corer en la habitación. •...
- Page 23 Instalación de la tubería • Haga el orificio de la tubería en la pared con una ligera inclinación hacia el lado exterior. • Inserte el manguito de la tubería en el orificio para evitar que se dañen la tubería de conexión y el giro cuando pasando por el agujero. Nota: Mantenga la tubería en la dirección del agujero, para evitar fugas de gas.
- Page 24 identificación en la unidad) y de acuerdo con todos los códigos de seguridad nacionales vigentes. El cable que conecta las unidades exterior e interior debe ser adecuado para un uso exterior. El enchufe debe ser accesible una vez que el aparato ha sido instalado. Se debe garantizar una conexión a tierra eficiente.
- Page 25 • Apriete las conexiones utilizando una llave apretando en direcciones apuestas Drenaje del agua drenaje agua condensada fundamental para una correcta instalación. • Coloque manguera drenaje debajo de la tubería. • El tubo de drenaje debe estar inclinado para permitir el drenaje del agua. •...
- Page 26 INSTALACIÓN DE LA UNIDAD EXTERIOR • No instale la unidad exterior cerca de fuentes de calor, vapor o gas inflamable. • No instale la unidad en lugares con mucho viento o polvo. • No instale la unidad donde las personas pasan a menudo. Seleccione un lugar donde la descarga de aire y el sonido de funcionamiento no molesten a los vecinos.
- Page 27 Outdoor unit: Unidad exterior Indoor unit: Unidad interior Drenaje de agua en la unidad exterior El agua condensada y el hielo formado en la unidad exterior durante el uso en modo calor se puede drenar a través del tubo de drenaje. •...
- Page 28 Revisión de la presión La presión mínima para los aparatos con gas R32 es 0.8-1.2 Mpa y la presión máxima es 3.2-3.7 Mpa. El sistema de refrigeración será anormal cuando funciones fuera de los rangos mencionados. Purga de aire El aire y la humedad que quedan dentro del circuito de refrigerante pueden causar un funcionamiento compresor.
- Page 29 alcance un vacío absoluto de 1O mm Hg. • Con la bomba de vacío aún en funcionamiento, cierre la válvula de la bomba. Apague a continuación la bomba de vacío. • Abra la válvula de 2 vías 1/4 de vuelta y luego ciérrela después de 10 segundos. Revise todas las uniones usando jabón líquido o un dispositivo electrónico de fugas.
- Page 30 Información para el instalador MODELO 9k/12k 18k/24k Longitud del tubo con carga estandar Distancia máx entre la unidad interior y exterior 25 m 25 m Carga adicional de gas (Comienza en 5m) 15 g/m 25 g/m Diferencia de nivel máx entre la unidad interior y 10 m 10 m exterior...
- Page 31 Especificaciones del cableado 220V 7K, 9K, 12K, 15K, 16K, 18K, 22K, 24K, 30k fusible de la unidad interior es 50T, 3.15 A 110V 7K, 9K, 12K, fusible de la unidad interior es 50T, 3.15 A 115V 7K, 9K, 12K, fusible de la unidad exterior es 61T, 15 A 250V 18K, 22K, 24K fusible de la unidad exterior es 65TS, 25A...
-
Page 32: Mantenimiento
6. MANTENIMIENTO El mantenimiento periódico de este aparato es esencial. Antes de realizar cualquier mantenimiento, desconecte el aparato de la fuente de alimentación. Mantenimiento de la unidad interior Limpieza del filtro • Abra el panel frontal siguiendo la dirección de la flecha. -
Page 33: Servicio Postventa
Para ello retire la la cubierta de la espalda y coloque las nuevas baterías respetnado los símbolos + y - Use solo baterías nuevas ADVERTENCIA! No tire las pilas a la basura común, debe desecharlas en los contenedores especiales situados en los puntos de recogida. 7. - Page 34 Activar la función LED El display no funciona Fallos eléctricos Apague el aparate inmediatamente en los siguientes casos: Fallos en la placa eléctrica Fallo en los fusibles Agua dentro del aparato Sobrecalentamiento de los cables Olores fuertes del aparato ERROR LIST Tipo de fallo Código LED Código LED digital...
-
Page 35: Informacion Inherente Al Medioambiente
• Para hacer uso de la garantía acuda al centro donde compró este producto o bien contacte con nosotros de cualquiera de las siguientes formas: A través del email sat@universalblue.es, adjuntando la factura de compra e indicando sus datos de contacto y brevemente qué... - Page 36 Los materiales del embalaje de este producto son reciclables. Puede depositar estos materiales en un lugar público de recogida para su reciclaje. Puedes descargar este manual en nuestra página web: www.universalblue.es...
-
Page 37: English
ENGLISH Congratulations on your purchase of this product. We recommend that you take some time to carefully read this Instructions / Installation Manual in order to make good use of it. Carefully read all safety instructions before using the device and keep this Instruction / Installation Manual for future reference. - Page 38 • Packaging materials are recyclable and must be disposed of in the containers provided for this purpose. Take the end-of-life air conditioner to a special waste collection center for disposal. • This appliance can be used by children over 8 years of age and people with reduced physical, sensory or mental abilities or lack of experience and knowledge if they have been given supervision or instructions on the use of the application in a safe manner and understand the hazards involved.
-
Page 39: Main Parts And Features
MAIN PARTS AND FEATURES INDOOR UNIT Front panel Air filter Optional filter LED display Signal receiver Terminal protective cover Ion generator (optional) Deflectors Emergency knob Indoor unit label Airflow inlets Remote control OUTDOOR UNIT Air outlet grille Outdoor unit label Terminal protective cover Gas valve Liquid valve... - Page 40 Model UAA3000R32-19 DC inverter motor Energy class A++ With heat pump With remote control With timer Gas R32 Maximum power: 3000 frigorías Ideal for rooms between 14 and 22 m2 Cooling/heating capacity: 1000-3770 / 1000-3810 W Consumption cooling / heating: 290-1320 / 290-1400W SEER/SCOP: 6.5W /W 4W/W...
-
Page 41: Display And Remote Control
Noise level: 65 DB Dimensions: 78 x60,2 x 34,7 cm Model UAA6000R32-19 DC inverter motor Energy class A++ With heat pump With remote control With timer Gas R32 Maximum power: 6000 frigorías Ideal for stays between 27 to 45 m2 Heating/Cooling Capacity: 1830 - 7810 / 1850 -7930W Consumption cooling / heating: 410-2800 / 420-3000W SEER/SCOP: 6.5W /W 4.1W/W... - Page 42 SLEEP This symbol appears when night mode is activated. TEMPERATURE The unit displays the selected temperature ERROR DISPLAY or the error code when the error occurs. TIMER This symbol illuminates when the timer is activated. This symbol appears when the unit is turned on and disappears when the unit is turned off.
- Page 43 Press this button to select the operating MODE mode Press this button to activate/deactivate the turbo function, which will allow the unit to SUPER / reach the temperature in the shortest TURBO possible time. To activate or deactivate the horizontal SWING X / movement of the fins SWING...
- Page 44 ambient temperature of the indoor unit. This function will end automatically after 2 hours of operation (Optional) To turn on/off the I SET function, I SET detailed in this manual Turn on/off the self-cleaning function CLEAN described later in this manual. Note: It is suggested not to use this function constantly.
- Page 45 LOW FAN SPEED indicator MIDDLE FAN SPEED indicator HIGH FAN SPEED indicator SLEEP indicator FLAP SWING indicator SUPER indicator HEALTHY indicator ECO indicator BATTERY indicator CLOCK indicator Mute indicator Note: Orientative images. The remote control may vary depending on the model purchased. Remote control battery replacement Remove the battery cover from the back of the remote control by sliding it in the direction of the arrow.
- Page 46 Use 2 LRO 3 AAA (1.5V) batteries. Do not use rechargeable batteries. Replace old batteries with new ones of the same type when the remote control display is not legible. Do not dispose of batteries in the general waste container. Batteries should be recycled in the appropriate container.
-
Page 47: Operating The Appliance
4. Keep the remote control at least 1 meter away from the TV and other electrical appliances. OPERATING THE APPLIANCE AIR FLOW CONTROL The air outlet flow is evenly distributed throughout the room. It is possible to redirect the flow of air conditioning through the (SWING) button up or down until the optimum position is found. - Page 48 To activate the COOL function, press the MODE button until the COOL function symbol appears on the screen. Adjust the temperature using the up and down arrows. To optimize the operation of the unit, adjust the temperature (1), the speed (2) and the direction of the air flow (3) by pressing the indicated button.
- Page 49 TIMER The timer function is used to set the automatic switch-off time of the appliance. To program the shutdown time, press the TIMER button and adjust working time with UP and DOWN arrows in 30 minute intervals. Once the desired operating time has been set, press TIMER again.
- Page 50 In this mode, the automatic cycles of cooling and ventilation are alternated. FEEL MODE To activate the FEEL operating mode, press the MODE button on the remote control until corresponding symbol or word FEEL appears on the display. In FEEL mode the fan speed and temperature are automatically set according to the ambient temperature, which is measured through a temperature sensor built into the...
- Page 51 automatically increase by 1°C every 60 minutes, up to a maximum of 2°C. In heat mode, the set temperature is gradually reduced by 2°C during the first 2 hours of operation. After 10 hours of operation in NIGHT mode, the air conditioning will automatically turn off.
-
Page 52: Installation
3. To turn the power off, press the emergency button again (you will hear a long beep). 4. After 30 minutes of forced operation after using the emergency button, the unit will automatically run at 23º in cold mode with fan in automatic speed. TEMPERATURE SETTING The air conditioning is programmed to be used based on the temperatures listed below. - Page 53 Where LFL is the gas limit in kg / m3. For the R32 LFL is 0.306 kg / m3 - For appliances with loads between m1 and m2 the maximum load in a room must be (5/4) A1/2 according to the following formula: mmax = 2.5 x (LFL) x hº...
- Page 54 Tips for correct installation: The place of installation should be a well ventilated room. • • Installation place must be free of open fuel and any source of heat greater than 548 ° C that easily emits gases and fumes. •...
- Page 55 Mounting Panel Installation • Always mount the rear panel horizontally and vertically • Drill a hole 32 mm deep to fix the panel. • Insert the plastic anchors into the hole; • Fasten the rear panel to the wall with the supplied threaded screws. •...
- Page 56 • Open the front panel. • Remove the cover as shown in the picture (removing a screw). • For electrical connections, refer to the circuit diagram on the right side of the unit below the front panel. • Connect the wires to the screw terminals following the numbering. Use the proper cable size for power input (see nameplate on unit) and in accordance with all applicable national safety codes.
- Page 57 Connecting the indoor unit • Remove the cap that covers the piping from the indoor unit. • Insert the nut, as shown in the picture. • Tighten the connections using a wrench tightening in betting directions Water drainage The drainage of the condensed water is fundamental for a correct installation.
- Page 58 indoor unit securely to the top of the mounting panel. • Press and push the bottom of the indoor unit against the mounting panel. OUTDOOR UNIT INSTALLATION • Do not install the outdoor unit near sources of heat, steam, or flammable gas. •...
- Page 59 Installation diagram: Outdoor unit: Outdoor unit Indoor unit: Indoor unit Drainage of water in the outdoor unit Condensed water and ice formed in the outdoor unit during use in heat mode can be drained through the drain pipe. • Attach the drain tube to the 25 mm hole in the outdoor unit as shown.
- Page 60 To avoid leaks, pay attention to the following points: • Tighten the nuts with two wrenches. Be careful not to damage the pipes. • If not tightened enough, it will probably cause gas leaks. Over-tightening may also cause gas leaks if pipes are damaged. •...
- Page 61 Please follow the following notes to bleed the air from the device: • Unscrew and remove valve caps 2 and 3. Unscrew and remove the port cover. • • Connect the vacuum pump hose to the port. • Run the vacuum pump for 10 to 15 minutes until an absolute vacuum of 1O mm Hg is reached.
- Page 62 Information for the installer MODEL 9k/12k 18k/24k Tube length with standard load Max. distance between indoor and outdoor unit 25 m 25 m Additional Gas Charge (Starts at 5m) 15 g/m 25 g/m Max. level difference between indoor and outdoor 10 m 10 m unit...
- Page 63 Wiring Specifications 220V 7K, 9K, 12K, 15K, 16K, 18K, 22K, 24K, 30k indoor unit fuse is 50T, 3.15 A 110V 7K, 9K, 12K, indoor unit fuse is 50T, 3.15 A 115V 7K, 9K, 12K, outdoor unit fuse is 61T, 15 A 250V 18K,22K, 24K outdoor unit fuse is 65TS, 25A...
-
Page 64: Maintenance
MAINTENANCE Regular maintenance of this appliance is essential. Before carrying out any maintenance, disconnect the unit from the power supply. Indoor unit maintenance Cleaning the filter • Open the front panel in the direction of the arrow. • Holding the front panel up with one hand, remove the air filter with the other hand. -
Page 65: After-Sales Service
Use only new batteries WARNING ! Do not dispose of batteries in common waste; dispose of them in special containers at collection points. AFTER-SALES SERVICE Please take a few minutes to read the following troubleshooting chart before contacting service: PROBLEM POSSIBLE CAUSES The device is not plugged in / Electrical problems Damaged indoor unit / damaged outdoor unit fan... - Page 66 Electrical boards faults Fuse failure Water inside the appliance Cable overheating Strong appliance odors ERROR LIST Failure Type LED Code Digital LED Code Indoor and outdoor RUN, TIMER-both winking communication failure Outdoor communication failure RUN, TIMER-both winking Indoor room temperatura RUN-1time/8s sensor (IRT) Indoor coil temperatura sensor...
-
Page 67: Environmental Information
Through the email sat@universalblue.es, attaching the purchase invoice and indicating your contact details and briefly what problem your flask presents. By telephone (0034) 968 893691. At the following address: UNIVERSAL FOR ENGINEERING INDUSTRIES SPAIN, SL C/ Decenio N1, P.I. Media Legua. Las Torres de Cotillas (Murcia). 30565... - Page 68 www.universalblue.es...
Need help?
Do you have a question about the UAA3000R32-19 and is the answer not in the manual?
Questions and answers