Table of Contents
Advertisement
Available languages
Available languages
Quick Links
Advertisement
Table of Contents

Subscribe to Our Youtube Channel
Related Manuals for universalblue UCSB90200-21


Summary of Contents for universalblue UCSB90200-21
-
Page 2: Table Of Contents
Split de baño Bath split ÍNDICE ESPAÑOL 1. INSTRUCCIONES DE SEGURIDAD ..........3 2. PRODUCTO..................7 3. INSTALACIÓN .................. 8 4. FUNCIONAMIENTO ..............10 5. LIMPIEZA Y MANTENIMIENTO ........... 15 6. INFORMACION INHERENTE MEDIOAMBIENTE ......16 7. SERVICIO POSTVENTA ..............17 8. -
Page 3: Español
ESPAÑOL Felicidades por haber adquirido este producto. recomendamos dedique algún tiempo leer cuidadosamente este Manual de Instrucciones / Instalación con el fin de hacer un buen uso del mismo. Lea cuidadosamente todas las instrucciones de seguridad antes de utilizar el aparato y conserve este Manual de Instrucciones / Instalación para poder consultarlo en el futuro. - Page 4 • El enchufe debe retirarse de la toma de corriente antes de limpiarlo. No quite el enchufe tirando del cable de • alimentación. • Evite el uso de un cable prolongador, ya que esto puede recalentar el mismo y causar riesgo de incendio.
- Page 5 el fabricante y puede causar incendios, descargas eléctricas o lesiones. • La causa más común de sobrecalentamiento son los depósitos de polvo o pelusa en el aparato. Asegúrese retirar frecuentemente estos depósitos aspirando el orificio de ventilación. Para ello, desenchufe el aparato antes de realizar cualquier tarea.
- Page 6 hasta que sople viento fresco, luego el aparato se apagará. • Para evitar peligro debido conte momentaneo o en cortes recurrentes de luz, no conecte este aparato a ningun generador de energía ni a ningun alargador o temporizador, ya que puede llegar a ser muy peligroso.
-
Page 7: Producto
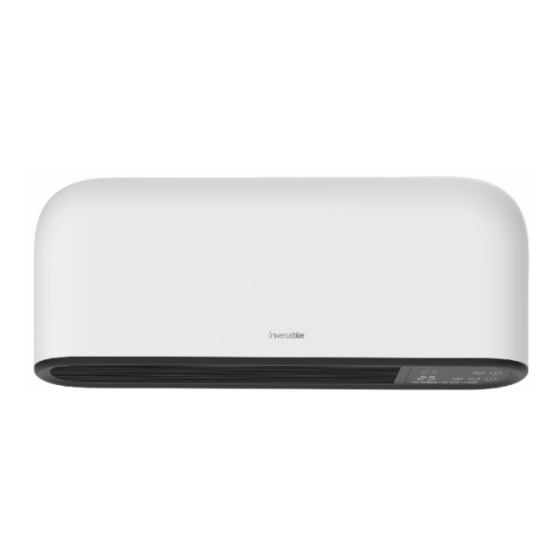
2. PRODUCTO UCSB90200-21 • Dimensiones del producto (A x F x A) (cm): 45.1 x 9.8 x 19.5 • Peso neto (kg): 2 • Dimensiones embalaje (cm): 458 x 105 x 210 •... -
Page 8: Instalación
• Modo ECO: Si • Filtros: NO • Tipo de filtros: NO • Protección contra salpicaduras: IP22 • Oscilación: NO • Temporizador 9 horas Carcasa Rejilla Panel control 3. INSTALACIÓN Paso a paso: Perforar los agujeros en la pared de acuerdo con las instrucciones del interior de la caja. - Page 9 Cuelgue la unidad en el soporte con cuidado, después de asegurarse de que la unidad está bien fijada, gire el bloqueo en el soporte como muestra la imagen. Antes de utilizar el calefactor, asegúrate de que está bien instalado en la pared. Tenga en cuenta las distancias recomendadas para que...
-
Page 10: Funcionamiento
4. FUNCIONAMIENTO PANEL DE CONTROL Luz indicadora de la modo comfort Luz indicadora de encendido Luz indicadora del estado de la calefación. Luz indicadora del modo ECO Botón de selcción de modo Botón de encendido/apagado Botón temporizador Botón para disminuir fución Botón para aumentar función CÓMO USARLO: •... - Page 11 • Por defecto de fábrica: o Modo de calefacción: Modo confort Ajuste de la temperatura objetivo: 22 ℃ o Función de apertura de ventanas: Desactivado o Temporizador: apagado o Para detener el funcionamiento del calentador, pulse para apagar el aparato. o Desenchufe el producto cuando no lo utilice.
- Page 12 • Pulse para fijar la hora actual • Pulse para confirmar el ajuste de la hora e introducir el ajuste de los minutos, con la visualización de la pantalla: • Pulse para fijar los minutos actuales • Pulse para confirmar todos los ajustes Nota: El reloj y el calendario se restablecerán a los valores de fábrica si no hay alimentación.
- Page 13 P1: (Lunes-Domingo) El programa no puede fijarse P2:(Lunes-Viernes) El programa no puede fijarse P2:(Sabado –Domingo) El programa no puede fijarse P3:(Lunes-Viernes) Programa ajustable P3:(Sabado-Domingo) Programa ajustable • Ajuste del programa P3 En el modo P3, pulse durante 3 segundos para entrar en la configuración del día.
- Page 14 Nota: cuando la pantalla muestre , pulse para finalizar todos los ajustes con la visualización de Ajuste de la potencia La potencia sólo se puede ajustar en el mando a distancia, pulse para ajustar la mitad de la potencia o la potencia total. Función de apagado del temporizador Pulse una vez, la pantalla muestra "0 H"...
-
Page 15: Limpieza Y Mantenimiento
MANDO A DISTANCIA Botón de selección de modo Botón encendido/apagado Botón para subir/selecionar modo Botón temporizador Botón para bajar/seleccionar modo Botón de estado de la calefacción 5. LIMPIEZA Y MANTENIMIENTO Este producto no requiere un gran mantenimiento. Para limpiarlo, por favor, siga las siguientes notas: •... -
Page 16: Informacion Inherente Medioambiente
6. INFORMACION INHERENTE MEDIOAMBIENTE Este aparato se ha marcado de acuerdo con la Directiva Europea 2012/19/EU referente eliminación de los Desperdicios de Aparatos Eléctricos y Electrónicos (RAEE). El símbolo del que consta en el aparato indica que el producto al final de su vida útil no se debe tratar como basura doméstica normal, sino que se debe llevar a los centros de recogida diferenciada de desperdicios eléctricos y electrónicos o bien entregar al vendedor... -
Page 17: Servicio Postventa
cumplir con sus obligaciones legales y contribuir a la protección de nuestro medio ambiente. 7. SERVICIO POSTVENTA Este producto cuenta con una garantía de 2 años contados a partir de la fecha de compra del producto, con las siguientes condiciones: •... -
Page 18: Tabla Erp
• Para hacer uso de la garantía acuda al centro donde compró este producto o bien contacte con nosotros de cualquiera de las siguientes formas: o A través del email sat@universalblue.es, adjuntando la factura de compra e indicando sus datos de contacto y brevemente qué problema presenta su producto. - Page 19 Salida de calor asistido Electricidad auxiliar por ventilador Tipo de salida de calor / control salida calor elmax temperatura ambiente nominal (seleccione uno) Salida de calor de una Con salida mínima posición y sin control elmin calor temperatura ambiente 2 o más posiciones y En modo standby elSB 0,000...
- Page 20 LAS TORRES DE COTILLAS 30565 – MURCIA-SPAIN Puedes descargar este manual en nuestra página web: www.universalblue.es *Universal for Engineering Industries Spain, S.L. se reserva el derecho de hacer cualquier cambio en las especificaciones y características de los productos sin previo aviso, debido a la mejora continua de los productos.
-
Page 21: English
ENGLISH Congratulations on the purchase of your product. We recommend you to spend some time to read this Instruction Manual in order to fully understand how to use it correctly.. Read all the safety instructions carefully before use and keep this Instruction / Installation Manual for future reference. - Page 22 • To avoid a hazard due to momentary or recurring power failure, do not connect this appliance to any power generator, extension cord or timer, as this can be very dangerous. • The appliance is designed for domestic use. Do not use it outdoors.
- Page 23 vent hole. To do this, unplug the appliance before carrying out any task. • Do not use abrasive cleaning products on this appliance. Wipe with a damp cloth (hot wet) rinsed with hot water and soap only. Always disconnected from the network before cleaning. •...
-
Page 24: Product
Cleaning and user maintenance should not be performed by children without supervision. 2. PRODUCT UCSB90200-21 • Product dimensions (W x D x H) (cm): 45.1 x 9.8 x 19.5 • Net weight (kg): 2 • Packaging product dimensions (cm): 458 x 105 x 210 •... -
Page 25: Installation
• Wi-Fi: no • Power levels : 2 • Materials: Plastic • Approval certificate: CE, ErP,RoHS,Reach • Length of the power supply cable (cm) : 130 • Electrical current intensity (A) : 8.3A • Tension (V) : 230V~ • Frecuency (Hz) : 50-60Hz •... - Page 26 To avoid any danger, please follow the following notes on the installation of the product: • The installation must be carried out by a professional agent. • Important! Make sure there are no electrical cords or other installations (for example, water pipes) near the drilling holes.
-
Page 27: Operating The Appliance
Before using the heater, make sure it’s install tightly on the wall. Please observe the recommended distances to ensure that the device functions optimally. 4. OPERATING THE APPLIANCE CONTROL PANEL Comfort mode indicator light Power indicator light Heating status indicator light ECO mode indicator light Mode selection button On/Off button... - Page 28 HOW TO USE: • Plug the appliance to AC 230V 50Hz socket with a beep sound. The indicator light is on. • Press to turn on the heater, which is in state of factory default when first time use. • Factory default: o Heating mode: Comfort mode o Target temperature setting: 22 ℃...
- Page 29 Temperature setting : When the screen display the target set temperature, press to set directly: Comfort mode or Comfort mode in P1/P2/P3: Press • to set the temperature from 10-35 ECO mode or ECO mode in P1/P2/P3: Press • to set the temperature from 6-31 Note: ECO mode=Comfort mode - 4 Clock and day of week setting: •...
- Page 30 Heating mode: • Press to enter mode selection. By pressing , heating mode runs in a continuous cycle as below: Comfort mode: Press to set the temperature • from 10-35 ECO mode: Press to set the temperature from • 6-31 Note: ECO mode=Comfort mode - 4 •...
- Page 31 • P3 adjustable program setting When under P3 mode, press over 3 secs to enter day setting. The screen displays , press to set from (Monday-Sunday). Press to confirm and enter hour setting The screen displays , press to set from 00-23). Press to choose heating mode for every hour (Comfort mode...
-
Page 32: Cleaning And Maintenance
Open window function • To turn on open window function, press together the screen will display , after 3 seconds, the screen will display the set temperature. • To turn on open window function, press together the screen will display , after 3 seconds, the screen will display the set temperature. -
Page 33: Environmental Information
• Use only a soft damp cloth and dry later. • Do not use abrasive cleaning products. • Store it in a dry and cool place. 6. ENVIRONMENTAL INFORMATION This appliance is labelled in compliance with European directive 2012/19/EU for Waste Electrical and Electronic Equipment (WEEE). -
Page 34: After Sales Service
For devices containing batteries or rechargeable batteries, these parts must be removed and disposed of in clearly marked recycling bins. Please go to the nearest recycling bin in your location or common store. Please comply with your legal obligations and contribute protecting our environment. -
Page 35: Erp Table
• To make use of the guarantee go to the store where you purchased this product or contact us by: o By email, sat@universalblue.es. Please, attach the invoice, add your contact details and explain briefly what the issue is. - Page 36 electronic heat charge control with room Maximum continuous heat max,c and/or outdoor output temperature feedback assisted heat Auxiliary electricity output Type heat output/room At nominal heat output temperature control (select one) single stage heat At minimum heat output output and no room temperature control Two or more manual In standby mode...
- Page 37 LAS TORRES DE COTILLAS 30565 – MURCIA-SPAIN Download this manual in our web site: www.universalblue.es *Universal for Engineering Industries Spain, S.L. reserves the right to make any change in the specifications and features of the products without prior notice, due to the continuous improvement of the products.
- Page 38 www.universalblue.es...
Need help?
Do you have a question about the UCSB90200-21 and is the answer not in the manual?
Questions and answers