Table of Contents
Advertisement
Available languages
Available languages
Quick Links
Advertisement
Table of Contents

Related Manuals for universalblue 1750


Summary of Contents for universalblue 1750
-
Page 2: Table Of Contents
Aire acondicionado portátil 1750 y 2300 Portable Air Conditioner 1750 and 2300 ÍNDICE ESPAÑOL 1. INSTRUCCIONES DE SEGURIDAD ..........4 2. CARACTERÍSTICAS ................. 6 3. INSTALACIÓN .................. 9 4. PANEL DE CONTROL Y OPERACIÓN .......... 14 5. USO DEL MANDO A DISTANCIA ..........21 6. -
Page 3: Español
ESPAÑOL Felicidades por haber adquirido este producto. Le recomendamos que dedique algún tiempo a leer cuidadosamente este Manual de Instrucciones / Instalación con el fin de hacer un buen uso del mismo. Lea cuidadosamente todas las instrucciones de seguridad antes de utilizar el aparato y conserve este Manual de Instrucciones / Instalación para poder consultarlo en el futuro. -
Page 4: Instrucciones De Seguridad
1. INSTRUCCIONES DE SEGURIDAD POR FAVOR LEA TODAS LAS INSTRUCCIONES CON CUIDADO ANTES DE UTILIZAR EL PRODUCTO. ESTE APARATO HA SIDO DISEÑADO PARA USO DOMÉSTICO EXCLUSIVAMENTE. Este aparato no está diseñado para ser utilizado por personas (incluidos los niños) con capacidades físicas, sensoriales o mentales reducidas o con falta de experiencia y conocimiento, a menos que sean supervisados por una persona responsable de su... - Page 5 No coloque la unidad donde el sol le dé directamente para evitar modificaciones en el color de la superficie. No utilice la unidad en agua o cerca del agua, evitando las fugas de electricidad. Tampoco con las manos mojadas o en sitios húmedos. ...
-
Page 6: Características
técnico para su comprobación y reparación en caso necesario. 2. CARACTERÍSTICAS *Imágenes de referencia. El producto final podría variar en base al modelo adquirido... - Page 7 (A x A x F) Dimensión del embalaje 88,5 x 37,9 x 35,8 cm (A x A x F) Capacidad de enfriamiento: 1750 frigorías Fuente de alimentación: 220-240V / 50 Hz Potencia (Enfriamiento) W: 780 Capacidad de enfriamiento (kw) A: 2050 Flujo de aire (m3/h): 330 Capacidad deshumificación (L/h): 0,70...
- Page 8 Ratio EER: 2,60 Clase energética: A Nivel de ruido: 65 dB (A) Con control remoto Display led Gas R290 /160g WiFi CARACTERÍSTICAS GENERALES UAP1904-21 Producto Aire acondicionado portátil 2300 Modelo UAP1904-21 Peso ( Bruto / Neto) 28/ 24 kg Dimensión del producto 70,2 x 32,5 x 29,5 cm (A x A x F) Dimensión del embalaje...
-
Page 9: Instalación
3. INSTALACIÓN Ponga el aparato en un lugar seco, horizontal, cerca de la ventana y mantenga una distancia de seguridad de al menos 50 cm alrededor del aparato. Mejor Instalación Installatio Gire el tubo de drenaje en la salida de aire detrás del panel (en sentido antihorario). - Page 10 Atornille el tubo de drenaje en la salida de aire detrás del panel (en sentido antihorario). Inserte la manguera de evacuación de aire en la placa de sellado de la ventana, ajuste el ancho de la abertura de ventana para que la ventana pueda coincidir con la placa de sellado correctamente;...
- Page 11 INSTALACIÓN INCORRECTA Es importante mantener el conducto desbloqueado. Una instalación incorrecta afectará a la efectividad del aparato. Evite que el conducto de escape se doble Asegúrese de que el aire puede fluir por el tubo INSTALACIÓN DEL KIT PARA VENTANAS ...
- Page 12 Conector Boquilla plana Conducto de escape de aire KIT DE SELLADO DE VENTANAS OPCIONAL Si su kit utiliza tornillos: 1. Mida el tamaño de la ventana; 2. Ajuste la longitud de la placa de acuerdo con el tamaño de la ventana.
- Page 13 En caso de ventana abatible, le sugerimos adquirir el kit correspondiente (modelo UACC4005-20) a través de la página web www.universalblue.es. EL CONDUCTO DE ESCAPE ESTÁ DISEÑADO ESPECIALMENTE PARA ESTE MODELO. NO LO REEMPLACE NI LO ALARGUE; DE LO CONTRARIO, SE PRODUCIRÁ...
-
Page 14: Panel De Control Y Operación
PANEL DE CONTROL Y OPERACIÓN BOTON ENCENDER/APAGAR: Para encender o apagar el aparato BOTON MODO: Presione este botón para seleccionar entre los siguientes modos, un indicador luminoso indicará que modo ha seleccionado: o Modo Frío o Modo Ventilador/Viento o Modo Deshumidificador/Seco ... - Page 15 VENTANA DISPLAY: La pantalla mostrará la temperatura establecida. VENTANA DE CONTROL REMOTO: Esta ventana indica si el aparato está recibiendo señal del control remoto. Nota: Presiona los botones de bajar /subir simultáneamente para cambiar de grados Fahrenheit a grados centígrados. MANDO A DISTANCIA 1.
- Page 16 4. BOTONES VELOCIDAD ALTA/BAJA: presione estos botones para selecionar velocidad alta o velocidad baja. 5. BOTÓN TEMPORIZADOR: Presione este botón cuando el aparato esté parado para establecer cuándo quiere que se encienda. Presione el botón de nuevo para establecer la hora de apagado. 8.
- Page 17 Seleccione este modo a través del panel de control del aparato o bien con el control remote, la luz indicadora de este modo se encenderá Este modo tiene la particularidad de regular la temperatura de la habitación de forma automática y actuar como deshumificador.
- Page 18 La luz indicadora del temporizador se encenderá cuando esta opción esté en uso. En cualquier momento cuando el aparato esté en funcionamiento, presionar la tecla de timer para eliminar la función temporizador. Utilice las flechas arriba y abajo hasta dejar el temporizador a 0.
- Page 19 2. Si no dispone de una cuenta, regístrese o inicie sesión con la verificación por SMS. 3. Para conectar el aire acondicionado al dispositivo móvil, presione el botón “VELOCIDAD” durante 5 segundos para entrar en el modo WiFi. 4. Abra la aplicación Smart Home y presione el icono “+” en la esquina superior derecho para añadir un dispositivo.
- Page 20 8. Después de conectarse correctamente, el aire acondicionado se mostrará en la página principal. Púlselo para entrar en el panel de control del dispositivo.
-
Page 21: Uso Del Mando A Distancia
Nota: Cuando el dispositivo está encendido puede ser controlado mediante la aplicación. Cuando el dispositivo este apagado, mostrará “apagado” y se podrá encender remotamente. 5. USO DEL MANDO A DISTANCIA MÉTODO DE TRANSMISIÓN Dirija el mando a distancia hacia el aire acondicionado y, a continuación, pulse el botón en el controlador. -
Page 22: Mantenimiento
SUSTITUIR LAS PILAS Cuando la señal se transmite pero el aire acondicionado no emite una señal de confirmación, significa que las pilas se han agotado y necesita reemplazarlas. Retire la cubierta de las pilas y saque las pilas usadas deslizando la tapa en la dirección de la flecha. - Page 23 Una vez que el tanque de agua interno esté drenado, vuelva a instalar el tapón de la base, asegúrese de que esté bien colocado. Coloque el aire acondicionado en el lugar deseado, vuelva a conectar la manguera de escape y enchufe el aire acondicionado.
- Page 24 LIMPIEZA DEL AIRE ACONDICIONADO Limpie la superficie de la unidad con un paño húmedo. A continuación, seque con una bayeta o similar. NO UTILICE DISOLVENTES QUÍMICOS (COMO BENCENO O ALCOHOL) PARA LIMPIAR LA SUPERFICIE DE LA UNIDAD; SI LO HACE, LA SUPERFICIE SE RAYARÁ, SE DAÑARÁ, E INCLUSO PODRÍA DEFORMARSE TODA LA CARCASA.
-
Page 25: Servicio Postventa
SI VA A ESTAR UNA TEMPORADA SIN USARSE Apague el aire acondicionado y desconéctelo de la fuente de alimentación. Realice un correcto mantenimiento del filtro de aire y de las otras piezas. Abra el tope de la placa divisoria y el tope de base para el vaciado del agua de la placa divisoria y la base. - Page 26 PROBLEMA VERIFICAR ACCIÓN El aire acondicionado no ¿Hay corriente? Es normal. funciona en absoluto ¿Esta enchufado? Empuje bien el enchufe en la ¿El fusible o interruptor toma de pared. disyuntor están apagados? Cambie el fusible o encienda Se ilumina la luz "FULL". el aparato.
- Page 27 EN CASO DE AVERÍA IMPORTANTE, DESCONECTE EL ENCHUFE DE INMEDIATO Y LLAME AL SERVICIO TÉCNICO. Este producto cuenta con una garantía de 2 años contados a partir de la fecha de compra del producto, con las siguientes condiciones: La garantía es válida sólo con la presentación de la factura de compra del producto.
-
Page 28: Informacion Inherente Al Medioambiente
Para hacer uso de la garantía acuda al centro donde compró este producto o bien, contacte con nosotros de cualquiera de las siguientes formas: o A través del email sat@universalblue.es, adjuntando la factura de compra e indicando sus datos de contacto y brevemente qué problema presenta su producto. - Page 29 Puedes descargar este manual en nuestra página web: www.universalblue.es *Universal for Engineering Industries Spain, S.L. se reserva el derecho de hacer cualquier cambio en las especificaciones y características de los productos sin previo aviso, debido a la mejora continua de los productos.
-
Page 30: English
ENGLISH Congratulations on the purchase of your product. We recommend you to spend some time to read this Instruction Manual in order to fully understand how to use it correctly.. Read all the safety instructions carefully before use and keep this Instruction / Installation Manual for future reference. - Page 31 This device is not intended for use by persons (including children) with reduced physical, sensory or mental capabilities, or lack of experience and knowledge, unless they are supervised by a person responsible for their safety. Children should be supervised to ensure that they do not play with the device.
- Page 32 To unplug the unit, hold the plug firmly and pull it out carefully. Do not use extension cords. If there is any noise, smell or smoke, turn it off and unplug it for diagnosis. Keep the unit one meter away from TVs or radios to avoid the risk of electromagnetic interference.
-
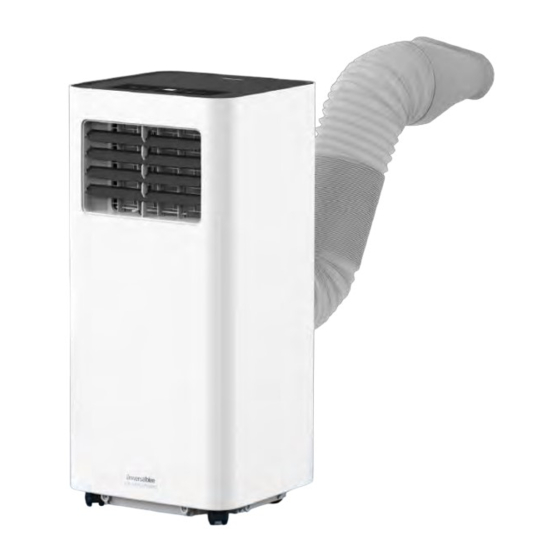
Page 33: Main Features
2. MAIN FEATURES *Pictures for reference only. Final product may be different depending on the model purchased. - Page 34 8. Duct assembly 4. Handle 9.Window kit 5. Cord storage 10.Remote control GENERAL CHARACTERISTICS UAP1903-21 Product Portable air conditioning 1750 Model UAP1903-21 Weight ( Gross / Net ) 25 /21 Kg Product Dimension 70.2 x 32.5 29.5 cm (W x H x D)
-
Page 35: Installation
(W x H x D) Dimension of the packaging 88.5 x 37.9 x 35.8 cm (W x H x D) Cooling capacity: 2300 frigories Power supply: 220-240V / 50 Hz Power (Cooling) W: 960 Cooling capacity (kw) A: 2600 Air flow (m3/h): 330 Dehumidification capacity (L/h): 0,90 EER ratio: 2.60 Energy class: A... - Page 36 Turn the drainage tube at the air outlet behind the panel (counterclockwise). Screw the drainage tube into the air outlet behind the panel (counter-clockwise). Insert the air release hose into the window sealing plate, adjust the width of the window opening so that the window can be...
- Page 37 matched to the sealing plate correctly; the length of the sealing plate is adjustable; and screw it on. INCORRECT INSTALLATION It is important to keed the duct unblocked. A correct installation will affect to the perfomance your appliance.. Avoid the duct blending at any point ...
- Page 38 WINDOW KIT INSTALLATION Installing the window kit Exhaust air duct assembly Connector Flat Nozzle Exhaust air duct Optional Window Sealing Kit If your kit uses screws: Measure the size of the window; Adjust the length of the plate according to the size of the window.
- Page 39 In case of a casement window, we suggest to purchase the corresponding kit (model UACC4005-20) through our website www.universalblue.es. THE EXHAUST PIPE IS DESIGNED ESPECIALLY FOR THIS MODEL. DO NOT REPLACE OR LENGTHEN IT, OTHERWISE A...
-
Page 40: Control And Operation Panel
STRETCHED UP TO 1500 MM. TO AVOID BENDING, STRETCH AS SHORT AS POSSIBLE. CONTROL AND OPERATION PANEL ON/OFF BUTTON: To turn the device on or off MODE BUTTON: Press this button to select between the following modes, a light will indicate which mode you have selected: ... - Page 41 REMOTE CONTROL WINDOW: This window indicates whether the device is receiving a signal from the remote control. Note: Press the down/up buttons simultaneously to change from degrees Fahrenheit to degrees Celsius. REMOTE CONTROL ON/OFF BUTTON: To turn the device on or off. ...
- Page 42 TIMER BUTTON: Press this button when the device is stopped to set when you want it to turn on. Press the button again to set the off time. C/ºF BUTTON: used to change from degrees Fahrenheit to degrees Celsius. ...
- Page 43 Select this mode via the control panel of the device or with the remote control, the indicator light in this mode will light This mode has the particularity of regulating the temperature of the room automatically and acting as a dehumidifier.
- Page 44 If you want to cancel, press the SLEEP button on the remote control or the Timer buttons and the down button on the control panel again. WIFI FUNCTION To control the fan via WiFi just follow the steps below: 1.
- Page 45 7. The device will commence the pairing process and connect to the app. 8. After successfully configuring the devices, the smart AC will be shown on the home page. Tap to enter its control page.
-
Page 46: Use Of Remote Control
Note: When device is online, it can be controlled through the app. When device is offline, it displays “Offline” and can be remotely powered on. 5. USE OF REMOTE CONTROL METHOD OF TRANSMISSION Point the remote controller at the air conditioner and press the button on the controller. -
Page 47: Maintenance
POINTS OF ATTENTION IN USING THE REMOTE CONTROLLER Do not place the remote control near high temperatures, such as heaters, radiators or electric blankets or pillows. Do not place the remote control in direct sunlight or strong light. ... - Page 48 WATER DRAINAGE The air conditioner evaporates condensed water and discharges the moisture through the hot air outlet. But in some cases it is possible that the unit is not to condensate water evaporation, then the internal water tank is full, the FULL lamp will illuminate and unit will stop running.
- Page 49 Carefully wash the air filters by immersing them in hot water (about 40 °C or 104 °F) with neutral detergent. Rinse the filter detergent and let it dry completely in a shaded area. Put the air filter back in its original place. AIR CONDITIONING CLEANING Clean the surface of the unit with a damp cloth.
-
Page 50: After Sales Service
Check that the partition plate stop and the base stop are installed correctly. Before turning the unit on, make sure the air filter is in the correct position. If the equipment is operated without the air filter, dust and other objects will cause the air conditioning to malfunction. - Page 51 PROBLEM CHECK WHAT TO DO The air conditioner is not ¿Is there electricity? That's normal. working ¿Is it switched on? Push the plug into the Does the fuse or switch wall outlet. circuit breaker is off? Change the fuse or turn The "FULL"...
- Page 52 Condensed water comes Is the base tank almost full? Discharge the condensed out when the unit is water from the water moved outlet base. This appliance has a warranty of 2 years from the date of purchase, considering the following notes: ...
-
Page 53: Environmental Information
To make use of the guarantee go to the store where you purchased this product or contact us by: o By email, sat@universalblue.es. Please, attach the invoice, add your contact details and explain briefly what the issue is. - Page 54 household waste disposal service or the shop where you purchased the product. The packaging materials are recyclable product. These materials can be deposited in public collection point for recycling. For devices containing batteries or rechargeable batteries, these parts must be removed and disposed of in clearly marked recycling bins.
- Page 55 Download this manual in our web site: www.universalblue.es *Universal for Engineering Industries Spain, S.L. reserves the right to make any change in the specifications and features of the products without prior notice, due to the continuous improvement of the products. The images shown here are illustrative, so there may be slight differences between the images and the product you have purchased.
- Page 56 www.universalblue.es...
Need help?
Do you have a question about the 1750 and is the answer not in the manual?
Questions and answers