Table of Contents
Advertisement
Available languages
Available languages
Quick Links
Advertisement
Table of Contents

Related Manuals for universalblue UAP1905-21


Summary of Contents for universalblue UAP1905-21
-
Page 2: Table Of Contents
Aire portátil 3000 frigorías Portable air conditioner 12000 BTU ÍNDICE ESPAÑOL 1. INSTRUCCIONES DE SEGURIDAD ..........4 2. CARACTERÍSTICAS DEL PRODUCTO ..........5 3. USO DEL PANEL DE CONTROL ............7 4. USO DEL MANDO A DISTANCIA ..........12 5. OPERACIÓN .................. 14 6. -
Page 3: Español
ESPAÑOL Felicidades por haber adquirido este producto. Le recomendamos que dedique algún tiempo a leer cuidadosamente este Manual de Instrucciones / Instalación con el fin de hacer un buen uso del mismo. Lea cuidadosamente todas las instrucciones de seguridad antes de utilizar el aparato y conserve este Manual de Instrucciones / Instalación para poder consultarlo en el futuro. -
Page 4: Instrucciones De Seguridad
compacto en comparación con otros con la misma capacidad de refrigeración. Se recomienda el uso de otros medios de aire acondicionado cuando la temperatura ambiente sea inferior a 18 °C (65 °F) o supere los 35 °C (95 °F). 1. INSTRUCCIONES DE SEGURIDAD POR FAVOR LEA TODAS LAS INSTRUCCIONES CON CUIDADO ANTES DE UTILIZAR EL PRODUCTO. -
Page 5: Características Del Producto
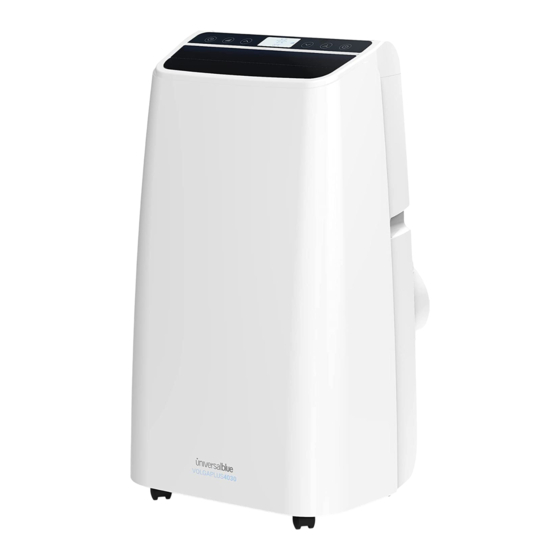
de servicio o una persona de cualificación similar a fin de evitar situaciones de peligro. Si se ha ido la electricidad, espere 3 minutos antes de volver a encender el aparato. La distancia mínima del aparato a superficies combustibles debe ser de 50 cm. ¡PRECAUCIÓN! Es posible que queden restos de agua almacenada en la base inferior. - Page 6 1.Panel de control 8.Boquilla de drenaje (función 2.Aletas de aire ajustables humidificador) 3.Mando a distancia 9.Filtro de aire frío 4.Entrada de aire 10.Boquilla de drenaje (otros 5.Recogecable modos) 6.Salida de aire 11.Tubo de drenaje 7.Ruedas 12.Kit ventanas CARACTERÍSTICAS UVT1905-21 Bomba de calor Sí...
-
Page 7: Uso Del Panel De Control
Potencia sonora (Db.) kit accesorio de acople Incluido Dimensiones 36 x 43 x 73 cm. Dimensiones con embalaje 40.3 x 48.5 x 88.5 cm. Peso neto 29,5 Peso bruto Adaptador WiFi Incluido 3. USO DEL PANEL DE CONTROL BOTON TEMPORIZADOR: Presione este botón cuando el aparato esté... - Page 8 quiere que deje de funcionar, una vez agotado el tiempo, el aire se apagará automáticamente. BOTON VENTILADOR: Pulse este botón para seleccionar el viento deseado entre bajo, medio o alto. BOTON SUBIR: Pulse este botón para subir la temperatura o el tiempo.
- Page 9 FUNCIÓN WIFI Para controlar el ventilador mediante la red WiFi sólo hay que seguir los siguientes pasos: 1. Descargue desde su dispositivo móvil la aplicación Smart Life desde la Appstore en iOs o Play Store en Android; o escaneando el siguiente código QR: 2.
- Page 10 7. El dispositivo comenzará el proceso de emparejamiento y se conectará a la aplicación. 8. Después de conectarse correctamente, el aire acondicionado se mostrará en la página principal. Púlselo para entrar en el panel de control del dispositivo.
- Page 11 Nota: Cuando el dispositivo está encendido puede ser controlado mediante la aplicación. Cuando el dispositivo este apagado, mostrará “apagado” y se podrá encender remotamente. FUENTE DE ALIMENTACIÓN ¡ATENCIÓN! La toma de CA debe ser sólida y de calidad. ...
-
Page 12: Uso Del Mando A Distancia
4. USO DEL MANDO A DISTANCIA BOTON TIMER: pulse el botón para usar el temporizador. El temporizador se puede utilizer en el momento de encendido o de apagado. Utilice los botones up/down para establecer el tiempo deseado. El tiempo seleccionado seleccionado (aparece en la pantalla de su mando) parpadeará... - Page 13 MÉTODO DE TRANSMISIÓN Dirija el mando a distancia hacia el aire acondicionado y, a continuación, pulse el botón en el controlador. La señal de instrucción será transmitida al aire acondicionado. Después de recibir la señal del mando a distancia, la unidad de aire acondicionado emitirá...
-
Page 14: Operación
5. OPERACIÓN MODO FRÍO Puede seleccionarlo en el panel de control o con el mando a distancia con la opción MODE. Se encenderá el icono de frío en la pantalla. Presione los botones UP y DOWN para incrementar / bajar la temperatura (Desde 17º... - Page 15 Presione la tecla FAN para seleccionar la velocidad deseada. TEMPORIZADOR Cuando el aparato esté apagado, presione la tecla del temporizador para configurar el tiempo de encendido. Presione las teclas SUBIR/UP y BAJAR/DOWN para configurar tiempo de encendido (0 ~ 24 H). ...
-
Page 17: Protección Del Aparato
6. PROTECCIÓN DEL APARATO Este aparato cuenta con numerosos sistemas de protección: Protección contra congelación: frío función deshumidificador si la temperatura del tubo es muy baja, el aparato se apagará automáticamente como mecanismo de protección. Cuando el tubo alcance la temperatura normal comenzará... - Page 18 Para instalar el aparato correctamente, por favor siga las siguientes instrucciones: Atornille el tubo de drenaje en la salida de aire detrás del panel (en sentido antihorario). Instale el kit de ventanas siguiendo las instrucciones indicadas más abajo,según el modelo de aire adquirido. ...
- Page 19 Inserte la manguera de escape de aire en la placa de sellado de la ventana, ajuste el ancho de la abertura de ventana para que la ventana pueda coincidir con la placa de sellado correctamente; la longitud de la placa de sellado es ajustable. El extremo plano del tubo de drenaje debe encajarse en su sitio y la tubería no deberá...
- Page 20 INSTALACIÓN INCORRECTA La longitud del tubo de drenaje debe ser de 280 ~ 1,500 mm. No use tubos de extensión ni lo reemplace con otros tubos ya que podría causar un mal funcionamiento. Es importante mantener el conducto desbloqueado. Una instalación incorrecta afectará...
- Page 21 Según el modelo de aire acondicionado portátil adquirido, el kit de ventana incluido podrá fijarse con tornillos o bien con un engache tipo ‘clip’, tal y como muestra la foto posterior: Si su kit utiliza tornillos: 1. Mida el tamaño de la ventana 2.
- Page 22 En caso de ventana abatible, le sugerimos adquirir el kit correspondiente compatible con su aparato (modelo UACC4005-20) a través de la página web www.universalblue.es. MÉTODO DE MONTAJE PARA LA FIJACIÓN DE LA MANGUERA DE SALIDA La manguera de salida de aire tiene una longitud de entre 28 y 150 cm.
- Page 23 Mantenga una trayectoria suave de toda la manguera de salida de aire, especialmente en los puntos de giro. Evite doblarla abruptamente o en ángulos pronunciados. Se recomienda el uso de otros medios de aire acondicionado cuando la temperatura ambiente sea inferior a 18 °C (65 °F) o supere los 35 °C (95 °F).
- Page 24 El aparato dispone de 2 zonas para drenar el agua, situadas en la parte inferior del aparato. En el caso de que el aparato se utilice en el modo deshumificador o en modo frío, el agua se drenará por el tapón superior de drenaje. En caso de que el aire portátil se utilice con bomba de calor, el agua se drenará...
-
Page 25: Mantenimiento/Servicio
NOTA: en el caso de utilizar la función deshumificador o el aparato en frío, también puede realizarse un drenaje continuo de la siguiente forma: Retire el tapón superior de salida de agua para drenar el agua. Coloque la manguera en la salida de agua. Sitúe el otro extremo de la manguera en un cubo o recipiente para drenar el agua. - Page 26 Para limpiar el filtro EVA, situado en la parte superior del aparato, tire para retirar la rejilla de retención y desatornille los tornillos de retención. Lave el filtro EVA con detergente neutro y agua caliente (alrededor de 40 °C o 104 °F) Para limpiar el filtro inferior o filtro de CONO, tire suaemtne de ...
-
Page 27: Resolución De Problemas
ANTES DE PONERLO EN FUNCIONAMIENTO Compruebe si las entradas y las salidas de aire de la unidad están bloqueadas. Compruebe que el tope de la placa divisoria y el tope de base estén instalados correctamente. Antes de encender la unidad, asegúrese de que filtro de aire se encuentre en la posición correcta. - Page 28 Empuje bien el enchufe funciona en absoluto ¿Esta enchufado? en la ¿El fusible o interruptor toma de pared. disyuntor están apagados? Se ilumina la luz "FL". ¿La temperatura ambiente es muy alto o muy baja? Cambie el fusible o En el modo encienda el aparato.
-
Page 29: Servicio Postventa
Demasiado ruido y El líquido interior Es normal. (refrigerador) está vibraciones Sitúelo en un suelo circulando por el interior. horizontal. ¿Está nivelado? La máquina se pone en ¿El voltaje de la fuente de Mantenga la fuente de marcha y se detiene alimentación de alimentación es normal? potencia. - Page 30 Para hacer uso de la garantía acuda al centro donde compró este producto o bien contacte con nosotros de cualquiera de las siguientes formas: o A través del email sat@universalblue.es, adjuntando la factura de compra e indicando sus datos de contacto y brevemente qué problema presenta su producto.
-
Page 31: Informacion Inherente Al Medioambiente
C/ Decenio N1, P.I. Media Legua. Las Torres de Cotillas (Murcia). 30565 INFORMACION INHERENTE AL MEDIOAMBIENTE Este aparato se ha marcado de acuerdo con la Directiva Europea 2012/19/EU referente eliminación de los Desperdicios de Aparatos Eléctricos y Electrónicos (RAEE). El símbolo del que consta en el aparato indica que el producto al final de su vida útil no se debe tratar como basura doméstica normal, sino que se debe llevar a los centros de recogida diferenciada de... - Page 32 Puedes descargar este manual en nuestra página web: www.universalblue.es *Universal for Engineering Industries Spain, S.L. se reserva el derecho de hacer cualquier cambio en las especificaciones y características de los productos sin previo aviso, debido a la mejora continua de los productos.
-
Page 33: English
ENGLISH Congratulations on the purchase of your product. We recommend you to spend some time to read this Instruction Manual in order to fully understand how to use it correctly. Read all the safety instructions carefully before use and keep this Instruction / Installation Manual for future reference. -
Page 34: Important Safeguards
This instruction manual is used for guidance and does not form part of a contract. We reserve the right to make technical changes without prior notice. 1. IMPORTANT SAFEGUARDS READ ALL INSTRUCTIONS BEFORE USING. THIS APPLIANCE HAS BEEN PRODUCED FOR DOMESTIC PURPOSES ONLY. -
Page 35: Product Features
Please wait three minutes before restarting when the power is broken. The minimum clearance from the appliance to combustible surface: 50 cm. This symbol refers to a hazard or unsafe practice which can result in severe personal injury or death. 2. - Page 36 Control panel 8. Dehumidication drainage nozzle Wind guide bar 9. Filter handle Remote control 10. Drainage nozzle Air inlet 11. Duct assembly Cord storage 12. Window kit Air outlet Caster FEATURES UVT1905-21 Heating pump 1350 Consumption (Cooling; W) 1500 Consumption (Heating. W) Maximum power heating (BTU) 3.52 Maximum power coolinh (BTU)
-
Page 37: Control Panel
Box dimensions 88,50 x 48,5 x 40,3 cm. Net weight 29,5 Gross weight WiFi adapter Included 3. CONTROL PANEL TIMMER BUTTON: press this button when the appliance is turned off to establish the time you want the appliance turns on. - Page 38 MODE BUTTON: press this button to select cool, wind, dehumidifier or heat mode. Heat mode may take some minutes to start working, it is normal. ON/OFF BUTTON: press this button to turn the appliance on or off. Some functions are activated with the following instructions: ...
- Page 39 2. If you don’t have an account, register or log in via SMS verification. 3. To connect the AC device to the mobile device, press the “SPEED” button for 5 seconds to enter the WiFi-connect mode. 4. Open Smart Home app and tap “+” in the upper right to add a new device through the network.
- Page 40 8. After successfully configuring the devices, the smart AC will be shown on the home page. Tap to enter its control page. Note: When device is online, it can be controlled through the app.
-
Page 41: Control Remote Use
When device is offline, it displays “Offline” and can be remotely powered on. POWER SUPPLY UNIT ATTENTION! AC power must be solid and of good quality. Do not connect the portable air conditioner to a multiple outlet that is also used for other electrical appliances. - Page 42 METHOD OF TRANSMISSION Point the remote control towards the air conditioning, and then press the button on the controller. The instruction signal will be transmitted to the air conditioner. After receiving the signal from the remote control, the air conditioner will emit...
-
Page 43: Operating Modes
5. OPERATING MODES COOL MODE You can select it on the control panel or with the remote control with the MODE option. The cool icon will light up on the screen. Press the UP and DOWN buttons to increase / decrease the temperature (from 17º... - Page 44 TIMER When the appliance is off, press the TIMER button to set the ON time. Press the UP and DOWN buttons to set the power-up time (0 ~ 24 H). The timer indicator light will turn on when this option is in use. ...
-
Page 45: Protection Functions
6. PROTECTION FUNCTIONS This device has numerous protection systems: Protection against freezing: In cold or dehumidifier function if the temperature of the tube is very low, the appliance will be automatically switched off as a protection mechanism. When the tube reaches the normal temperature, it will start to work automatically. -
Page 46: Installation
Automatic defrost (cold mode and heat mode): The appliance incorporates this function automatically. When this happens the display will show the heat mode symbol. Automatic thermal protection: To protect the life of the appliance, it has automatic thermal protection in heat mode. In this case, the compressor and the lower motor will stop. - Page 47 Install the window kit following the instructions below, depending on the model purchased. Place the device by the window. The distance between the body and the walls or other objects must be at least 50 cm. ...
- Page 48 The flat end of the drain pipe must fit into place and the pipe must not be turned at an angle greater than 45 °. Please keep the drainage pipe ventilation unobstructed. INCORRECT INSTALLATION The length of the drain pipe should be 280 ~ 1,500 mm. Do not use extension tubes or replace with other tubes as it may cause a malfunction.
- Page 49 Vertical window Horizontal window Window slider kit Window slider kit Minimum: 27-1/ 2" (70 cm) Minimum: 27-1/ 2" (70 cm) Maximum: 48 (122cm) Maximum: 48 (122cm) Depending on the portable AC purchases, window kit could be fixed to the window by screws or by a clip, as it is shown in the picture below: If your kit includes screws: 1.
- Page 50 In case of a casement window, we suggest to purchase the corresponding kit (model UACC4005-20) through our website www.universalblue.es. THE AIR EXHAUST HOSE MOUNTING METHOD The air escape hose is 28cm-150cm length. It is suggested that the hose should be as short as possible to achieve the maximum energy efficiency when the air conditioner works.
- Page 51 WATER DRAINAGE METHODS The air conditioner evaporates condensed water and discharges moisture through the hot air outlet. However, in some cases the unit may not be able to condense 100% of the evaporated water; if this happens, the water tank fills up, and the unit stops.
- Page 52 b. Remove the bottom cap outlet if the air has been used in heat mode. Once the internal water tank is drained, reinstall the base stop and make sure it is securely seated. Place the air conditioner in the desired location, reconnect the outlet hose and plug in the air conditioner.
-
Page 53: Cleaning & Maintenance
8. CLEANING & MAINTENANCE CLEANING THE FILTERS If the air filter is blocked due to dust, the volume of air flow will be reduced. It is recomended to clean the filter once every two weeks. 1-Retaining screw 2-Wedging block 3-Wedging block ... - Page 54 Clean the surface of the unit with a damp cloth, then dry using a duster or similar. Switch off the appliance before cleaning. Make sure there is no power to the unit before beginning to maintain or repair, prevent accident caused by elec. shock. CAUTION! Do not use chemical solvent (like benzene, alcohol glazer) to clean the surface of the unit.
-
Page 55: Troublesouting
9. TROUBLESOUTING ERROR CODE PROBLEM Abnormal sense of room temperature sensor Abnormal sense of coil pipe sensor The air conditioner is in water full alarm state Trouble Check Action Air conditioner does Is there power? It is normal not operate at all Is it plugged in? ... -
Page 56: After Sales Service
Cooling efficiency is not Is air inlet or outlet Clear the Blocked good Blocked? Move the heat source Is there any other heat Clean the air filter source in room? Set suitable fan speed Are air filters very dirty? ... - Page 57 To make use of the guarantee go to the store where you purchased this product or contact us by: o By email, sat@universalblue.es. Please, attach the invoice, add your contact details and explain briefly what the issue is.
-
Page 58: Environmental Information
UNIVERSAL FOR ENGINEERING INDUSTRIES SPAIN, SL C/ Decenio N1, Polígono Industrial Media Legua. 30565. Las Torres de Cotillas (Murcia) ENVIRONMENTAL INFORMATION This appliance is labelled in compliance with European directive 2012/19/EU for Waste Electrical and Electronic Equipment (WEEE). By ensuring that this appliance is disposed of correctly, you will help prevent any possible damage to the environment and to human health, which might otherwise be caused if it were disposed... - Page 59 Please comply with your legal obligations and contribute protecting our environment. Download this manual in our web site: www.universalblue.es *Universal for Engineering Industries Spain, S.L. reserves the right to make any change in the specifications and features of the products without prior notice, due to the continuous improvement of the products.
- Page 60 www.universalblue.es...