Table of Contents
Advertisement
Quick Links
Advertisement
Table of Contents

Related Manuals for Ecler WiSpeak TUBE3WH


Summary of Contents for Ecler WiSpeak TUBE3WH
- Page 1 WIRELESS PRO AUDIO Transmitters - Receivers USER MANUAL 50-0383-0111 WiSpeak...
-
Page 2: Table Of Contents
INDEX IMPORTANT REMARK ......................4 IMPORTANT SAFETY INSTRUCTIONS ................4 IMPORTANT NOTE ........................6 INTRODUCTION ........................6 TRANSMITTER AND RECEIVER MODELS ................. 8 5.1. CORE model ..........................8 5.2. TUBE model ..........................10 5.3. CUBE model ..........................11 5.4. GLOBE model ..........................12 5.4.1 GLOBE RM model rail-mount version (lighting rail) ........ - Page 3 11. Extended information about the WiSpeak PAIRING PROCEDURE......36 12. UNPAIR PROCEDURE ......................37 13. SPECIAL RESET PROCEDURES ..................38 14. CLEANING ..........................38 15. FUNCTION DIAGRAMS ......................39 15.1. CORE ............................39 15.2. TUBE ............................40 15.3. CUBE ............................41 15.4.
-
Page 4: Important Remark
IMPORTANT REMARK The lightning flash with arrowhead symbol, within an equilateral triangle, is intended to alert the user to the presence of uninsulated “dangerous voltage” within the product’s enclosure that may be of sufficient magnitude to constitute a risk of electric shock to persons. The exclamation point within an equilateral triangle is intended to alert the user to the presence of important operating and maintenance (servicing) instructions in the literature accompanying the appliance. - Page 5 8. Do not install near any heat sources such as radiators, heat registers, stoves, or other apparatus (including amplifiers) that produce heat. 9. Do not defeat the safety purpose of the polarized or grounding type plug. A polarized plug has two blades with one wider than the other. A grounding type plug has two blades and a third grounding prong.
-
Page 6: Important Note
Technical Services. Ecler WiSpeak hardware devices come with a 3-year warranty. INTRODUCTION Ecler WiSpeak is a technology that provides Wireless Professional Audio for fixed (permanent or temporary) installations, including transmitter devices and receiver (loudspeakers) devices. - Page 7 • Scalable: daisy-chain option from one receiver to a new transmitter, or from one transmitter to a second transmitter, to extend the total amount of loudspeakers and the area coverage • Compatible with Eutrac and Global Trac Pro lighting rail standards A WiSpeak installation is typically made up of one transmitter device and from 1, up to a maximum of 24 receiver units, where: •...
-
Page 8: Transmitter And Receiver Models
TRANSMITTER AND RECEIVER MODELS The available transmitter devices are: 5.1. CORE model Main features: External, universal Power Supply (100-240VAC 50-60Hz) • • Compatible with WiSpeak grip app for set up and control functions (available for Android and iOS), using Bluetooth® connection 3 audio inputs available: •... - Page 9 • Recommended maximum range from a CORE transmitter to any WiSpeak paired receiver (TUBE CUBE or GLOBE): 12 meters, with direct line of sight (*) • Front panel PAIR key: it allows pairing the receivers to the transmitter quickly and easily, for a basic set up of the WiSpeak system.
-
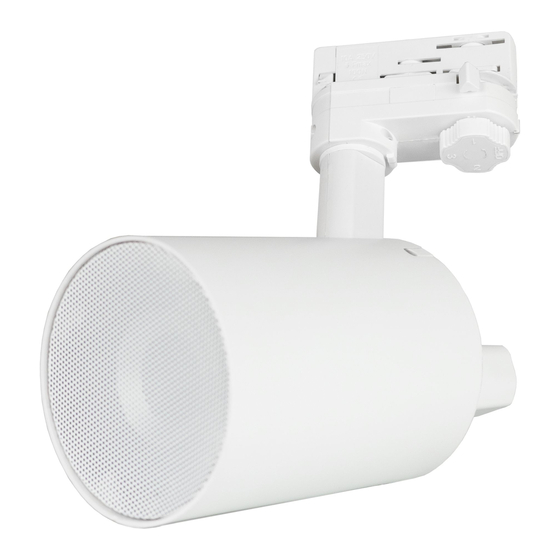
Page 10: Tube Model
The available receiver devices are: 5.2. TUBE model Main features: • Lamp style self-powered WiSpeak receiver, including 3” driver • Lighting rail mount included • Surface mount accessory available, optional (ref. TUBE SMA) • Universal, internal power supply, taking mains AC from the lighting rail bracket (100-240VAC 50-60Hz) •... -
Page 11: Cube Model
5.3. CUBE model Main features: • Loudspeaker cabinet style self-powered WiSpeak receiver, including 5” woofer and 1” tweeter drivers. • Lighting rail mount included. • Surface / wall mount accessory included. • Universal, internal power supply, taking mains AC from the lighting rail bracket (100-240VAC 50-60Hz) or from the external AC wire (both included). -
Page 12: Globe Model
5.4. GLOBE model 5.4.1 GLOBE RM model rail-mount version (lighting rail) -
Page 13: Globe Pd Model (Pendant)
5.4.2 GLOBE PD model (pendant) Main features: • 32W RMS power rating • Dispersion 360° x 160° (HxV) • ABS reinforced with fibreglass • RM version lighting rail mount compatible (Compatible light rails: 4 wire 3 circuit track system such as Global Track Pro, Eutrac or compatibles) •... -
Page 14: Wispeak Rf Technology
Available in white (RAL 9003) and black colour (RAL 9005) WiSpeak RF TECHNOLOGY Ecler WiSpeak professional wireless technology system transmit audio via radio frequency (not WIFI), using U-NII 5.1-5.8 GHz bandwidth. WiSpeak is a robust and stable system. Each CORE has two antennas: 1. -
Page 15: Installation
INSTALLATION 7.1. TUBE receivers mounting and power up The TUBE receivers come with the lighting rail bracket already mounted. Follow these steps to install a TUBE unit in a lighting rail: Ensure that the 4-position (OFF-1-2-3) circuit selector wheel in the TUBE unit is in the OFF position Insert the loudspeaker in the lighting rail, as shown in the image Connection to a GLOBAL Trac Pro / Eutrac lighting rail (three-circuit lighting track system) - Page 16 Rotate the safety lug to secure the loudspeaker on the lighting rail. Rotate the circuit selector wheel to a position other than OFF, the one matching with a circuit in the rail that will deliver mains AC to the unit. Then, the safety lug will be locked Check whether the unit is really powered ON or not by watching the LED indicators at its back panel: depending on the status of the receiver unit (at factory defaults, already paired, etc) blinking or fixed lit LEDs will appear.
-
Page 17: Cube Receivers Mounting And Power Up
7.2. CUBE receivers mounting and power up The CUBE receivers come with a lighting rail bracket already mounted, but they also include a wall / surface mount bracket that can replace the lighting bracket in case that a wall mount is the chosen option. A CUBE unit could be as well installed directly on a surface, like a desktop, shelf, table, etc, without using the rail mount or the wall mount included brackets. - Page 18 Rotate the safety lug to secure the loudspeaker on the lighting rail. Rotate the circuit selector wheel to a position other than OFF, the one matching with a circuit in the rail that will deliver mains AC to the unit. Then, the safety lug will be locked Power ON the unit by means of the back panel ON/OFF switch.
- Page 19 Follow these steps to install a CUBE unit on a wall: Drill three 6 mm holes in the wall, matching the position of the holes in the bracket. Insert three 6 mm wall plugs into them. Place the wall bracket in place, previously passing the supplied AC cable (if required) through the square hole in the bracket.
-
Page 20: Globe Receivers Mounting
7.3. GLOBE receivers mounting Follow these steps to install a GLOBE RM unit in a lighting rail: Ensure that the 4-position (OFF-1-2-3) circuit selector wheel in the GLOBE unit is in the OFF position Insert the loudspeaker in the lighting rail, as shown in the image Connection to a GLOBAL Trac Pro / Eutrac lighting rail (three-circuit lighting track system) - Page 21 Rotate the safety lug to secure the loudspeaker on the lighting rail. Rotate the circuit selector wheel to a position other than OFF, the one matching with a circuit in the rail that will deliver mains AC to the unit. Then, the safety lug will be locked Check whether the unit is really powered ON or not by watching the LED indicators at its front: depending on the status of the receiver unit (at factory defaults, already paired, etc) blinking or fixed lit LEDs will appear.
- Page 22 Hang GLOBE from the ceiling, attach the safety lanyard and connect the power cable.
- Page 23 After securing the safety cords and AC cable, fit the top cover of the wiring harness. Check whether the unit is really powered ON or not by watching the LED indicators at its front: depending on the status of the receiver unit (at factory defaults, already paired, etc) blinking or fixed lit LEDs will appear.
-
Page 24: Core Transmitter Installation
7.4. CORE transmitter installation A CORE transmitter unit is necessary to control and feed with wireless audio a WiSpeak network of TUBE, CUBE and/or GLOBE receivers, up to a maximum of 24 units. The CORE unit is suitable for installation on a wall or under a surface (table, shelf, cupboard, etc.), thanks to its design and layout of its connectors, controls and LED indicator lights. - Page 25 Example 2: the transmitter is close to a corner in a rectangular space, to be covered with WiSpeak receivers Max: 24 receivers Master (transmitter) Máx: 12 meters In the second example, the maximum coverage area will be around ¼th of the maximum coverage area in the first example Once decided its location, the CORE transmitter must be fed with up to 3 audio inputs: •...
-
Page 26: Multiple Cores Installation
(audio player) to the transmitter over long distances, which would be necessary in some cases, where it’s not possible to have booth devices close to each other. For each channel (left or right) of the balanced input, INPUT1, the wiring is as follows): Hot or direct signal >... -
Page 27: Disassembling Wispeak Receivers From Lighting Rails Installations
7.5. Disassembling WiSpeak receivers from lighting rails installations Before detaching the WiSpeak receiver, ensure that the 4-position (OFF-1-2-3) circuit selector wheel is set in the OFF position. -
Page 28: Pairing The Receivers & Starting Up The Wispeak System
PAIRING THE RECEIVERS & STARTING UP THE WiSpeak SYSTEM When a CORE transmitter is powered up for the very first time (or after a Factory Defaults reset has been applied to it), it will show the WiS LED permanently lit ON and the RX LED quickly blinking. -
Page 29: Wispeak System Receivers Protection
Note: the Bluetooth® audio input needs a standard Bluetooth® pairing process from the audio player (smartphone, tablet, computer, etc.) to the CORE transmitter. For further information on how to identify the ID and pairing code, please refer to the "Bluetooth CONNECTION TO THE MASTER UNIT" chapter of the WiSpeakGrip app manual. -
Page 30: Core Transmitter Volume Control: Remote And Mute Control Ports
CORE transmitter VOLUME control: REMOTE and MUTE control ports The CORE transmitter includes two audio control interfaces at its back panel: • MUTE port, Normally Open, Euroblock 2 pin connector: it allows to connect an external dry contact circuit (relay, switch, etc.) that, when closed, will MUTE the WiSpeak wireless audio transmission, as well as the audio delivered at the AUX OUT back panel connector. -
Page 31: Led Information, Codes And Additional Procedures
LED information, codes and additional procedures 10.1 CORE transmitter The front panel LEDs provide information about the working status of the unit and the currently selected source. • WiS / RX LEDs At the left-hand side, there are two LED indicators that provide information about the global status of the transmitter unit and its network of paired receivers: WiS (WiSpeak interface status) and RX (receivers’... - Page 32 • INPUT1 / INPUT2 LEDs o Permanently ON: IN1 or IN2 is selected, and its incoming audio signal is sent via WiSpeak wireless audio transmission to the receivers’ network. Short-press the SELECT key to modify the input selection o Blinking (gain adjust mode): when IN1 or IN2 is selected (its LED is in fixed ON condition), a long press (>...
-
Page 33: Tube / Cube / Globe Receivers
10.2 TUBE / CUBE / GLOBE receivers 10.2.1. TUBE The TUBE receiver has two LED indicators at its rear panel: WiS (WiSpeak interface status) and STR (wireless streaming reception status): The possible combinations of the status of both LEDs have the following meaning regarding the status of a TUBE receiver unit: Receiver status Green... -
Page 34: Cube
10.2.2. CUBE The CUBE receiver has the same two LED indicators, but visible through the front panel grill, under the Ecler logo. The possible combinations of the status of both LEDs have the following meaning regarding the status of a CUBE receiver unit:... -
Page 35: Globe
10.2.3. GLOBE The GLOBE receiver has the same two LED indicators, but visible through the front panel The possible combinations of the status of both LEDs have the following meaning regarding the status of a GLOBE receiver unit: Receiver status Blue LED Green LED The unit is paired with a transmitter, currently reached by it... -
Page 36: Extended Information About The Wispeak Pairing Procedure
Extended information about the WiSpeak PAIRING PROCEDURE The WiSpeak pairing procedure must be necessarily performed at least once to setup a WiSpeak system, after the transmitter and all the receivers have been physically installed and powered, and it’s time to set up and run the installation. But it can be performed later again, for a second, third, or more times if needed, and due to many possible reasons, like: One or more TUBE / CUBE / GLOBE receivers have been added to the initial batch... -
Page 37: Unpair Procedure
Warning: in case a pairing procedure results in a Partial Pairing, a new pairing process will be required, after having applied the proper countermeasures to try to pair again and get a successful result. A WiSpeak system always needs a successful pairing process to start performing in a stable and reliable way. -
Page 38: Special Reset Procedures
SPECIAL RESET PROCEDURES Sometimes it will necessary to reset the transmitter / receiver units to their factory defaults, or perhaps just the Bluetooth® module to its factory defaults as well. As both procedures are extremely dangerous for a running WiSpeak system when applied without the proper permissions, and/or without the right knowledge of their consequences, we beg you ask your official WiSpeak installer / distributor to carry them out. -
Page 39: Function Diagrams
FUNCTION DIAGRAMS 15.1. CORE RF Antenna WiSpeak LED RX LED WiSpeak Pair key Volume / MUTE Input 1 LED Input 2 LED Bluetooth ® Input Source Selector Bluetooth ® Antenna Service USB-C port Volume Remote RJ45 Port Volume Control Selector Local Aux Output Input 2: unbalanced RCA connector Input 1: balanced Euroblock connector... -
Page 40: Tube
15.2. TUBE WiSpeak interface status LED WiSpeak Pair key Wireless streaming reception status LED Local Aux Output... -
Page 41: Cube
15.3. CUBE WiSpeak interface status LED Wireless streaming reception status LED WiSpeak Pair key Local Aux Output Rail / wall bracket guide AC cable connector Mains switch... -
Page 42: Globe
15.4. GLOBE GLOBE PD Rear panel AC Euroblock connector Suspension hole for security cable Suspension hole for security cable WiSpeak interface status LED Wireless streaming reception status LED Unpair Push Button GLOBE Front panel (PD and RM) -
Page 43: Technical Characteristics
TECHNICAL CHARACTERISTICS 16.1. CORE Inputs Type IN1: Balanced, Stereo, Euroblock IN2: Unbalanced, Stereo, RCA BT: Bluetooth wireless Input Sensitivity* / Nominal Impedance IN1: -10dBV to 0dBV / >20kΩ IN2: -10dBV to 0dBV / >20kΩ BT: -10dBV FS Gain Control Range IN 1&2: 10dB Input Selector (same selection for Ch1&2) Frontal panel keys /... - Page 44 RF Wireless Audio Frequency Band U-NII 5.1 – 5.8GHz (supported worldwide) Up to 24 non-overlapping RF channels DFS support Transmission Recommended Distance Up to 12m from a TX to any paired RX, direct line of sight Audio Transmission 24bit uncompressed, 48kHz SR Audio Channels WiSpeak CH 1&2 Latency (I2S digital audio to RX output)
-
Page 45: Tube
16.2. TUBE WiS (RF WIRELESS DIGITAL AUDIO) Frequency band U-NII 5.1 – 5.8GHz (supported worldwide) Up to 24 non-overlapping RF channels DFS support Coverage range Up to 12m from a TX to any paired RX, direct line of sight Audio channels WiSpeak CH1 / CH2 Audio transmission 24bit uncompressed, 48kHz SR... - Page 46 ELECTRICAL Power supply Universal, internal power supply AC mains requirement 100-240VAC @ 50-60Hz AC mains connector From lighting rail bracket Power consumption 15W (rated) MONITORING AND CONTROL Volume control via WiSpeak grip app. Other controls SOLO: via WiSpeak grip app ID TEST SIGNAL: via WiSpeak grip app PAIR / UNPAIR: via WiSpeak grip app and Panel button...
-
Page 47: Cube
16.3. CUBE WiS (RF WIRELESS DIGITAL AUDIO) Frequency band U-NII 5.1 – 5.8GHz (supported worldwide) Up to 24 non-overlapping RF channels DFS support Coverage range Up to 12m from a TX to any paired RX, direct line of sight Audio channels WiSpeak CH1 / CH2 Audio transmission 24bit uncompressed, 48kHz SR... - Page 48 ELECTRICAL Power supply Universal, internal power supply AC mains requirement 100-240VAC @ 50-60Hz AC mains connector From lighting rail bracket, or standard 2-pin AC plug Power consumption 15W (rated) MONITORING AND CONTROL Volume control via WiSpeak grip app. Other controls SOLO: via WiSpeak grip app ID TEST SIGNAL: via WiSpeak grip app PAIR / UNPAIR: via WiSpeak grip app and Panel button...
-
Page 49: Globe
16.4. GLOBE WiS (RF WIRELESS DIGITAL AUDIO) Frequency band U-NII 5.1 – 5.8GHz (supported worldwide) Up to 24 non-overlapping RF channels DFS support" Coverage range Up to 12m from a TX to any paired RX, direct line of sight Audio channels 1 mono audio ch received from the WiS TX network Audio transmission 24bit uncompressed, 48kHz SR... - Page 50 Physical Connection type Ceiling rail AC connection for GLOBE RM Series Euroblock 3C connector for VAC in GLOBE PD Series Installation options Rail Mount / Pendant options Environmental IP10 Certifications FCC, EMC Enclosure material ABS reinforced with fibreglass Mounting system Ceiling rail connection for GLOBE RM Series Steel wire hanging 5 mts for GLOBE PD Series Rail fixing system...
-
Page 51: Wispeak Grip Control Application
WiSpeak grip Software WiSpeak control application USER MANUAL... -
Page 52: Wispeak Grip Introduction
WiSpeak grip INTRODUCTION WiSpeak grip is an Android/iOS app for the setup and control of a WiSpeak Wireless Audio System. It is compatible with Android 5.0 or higher / iOS11 or higher. A WiSpeak system is made up of one transmitter device (CORE model) and from 1 up to a maximum of 24 receiver units (TUBE or CUBE models), where: the transmitter device is the electronic unit that communicates with all the •... -
Page 53: Bluetooth Connection To The Master Unit
Bluetooth CONNECTION TO THE MASTER UNIT The control communication between WiSpeak grip and a CORE Master device is carried out using Bluetooth connectivity. Before being able to get online with the unit from the app, a Bluetooth pairing must be done, as it happens with any Bluetooth device. The pairing process depends on each operating system (Android or iOS) and version. - Page 54 3. Click to pair and enter 1234 as the PIN code (default PIN code, that can be later modified using the app): 4. Once connected it should show a message similar to “Connected for audio”: Note: The next times we try to pair to the Master device, it should already appear under the Paired devices list: Now we’re ready to open the WiSpeak grip app and continue the connection process.
-
Page 55: Wispeak Grip Main Screen - Connecting To A Master
Once the app is opened, the main screen will appear. Clicking on the DISCOVER MASTER DEVICES button will start the scan process for the available Master devices (CORE transmitter units), that will finally show all the Ecler Bluetooth devices already paired to the smart device in the past:... - Page 56 Clicking on a device that is not a WiSpeak CORE transmitter will result in a screen like this one: Valid WiSpeak CORE transmitters are shown with the following names (IDs) in the Discovered Devices list: • Android OS: CORE-XX, where XX matches the last 2 digits in each unit’s MAC address.
- Page 57 Clicking on a Master device in the list - in our example CORE-96 – will show a window to enter the Device’s Password: This is the point where the password will define the user’s profile for the app: • Profile Administrator. Default password = admin. The Administrator, which is the technical person that performs the system’s set up and fine tuning, has permission to monitor and modify all the available parameters in the Master Device:...
- Page 58 Entering admin as the password will show the Master unit (CORE) summary information page: Clicking on the left icon at the bottom bar ( ) will show the Master Settings page: Once logged as Admin, we’re ready to get to the next step: pairing the receivers and getting the WiSpeak system working.
-
Page 59: Pairing The Receivers & Starting Up The Wispeak System
PAIRING THE RECEIVERS & STARTING UP THE WiSpeak SYSTEM The last step to get the system running is pairing the network of loudspeaker receivers, TUBE and/or CUBE models, to the Master device. Click on the third icon in the bottom bar to enter to the Loudspeakers page: Once there, click on the DISCOVER AND LINK button: The Master device will then start the scan process to discover and link (pair) the available receivers in its wireless range, taking some seconds to finish:... - Page 60 When the Discover and Link process is over, a list of paired receivers will appear. In our example the Master has successfully paired with 7 receivers: At this point the system is ready to play, through these 7 loudspeakers in our example, any audio source connected to the CORE Master device.
- Page 61 The above process provides a solid “plug&play” method to set a system up and running in few minutes. But WiSpeak grip offers much more tools and flexibility to adjust and fine tune a WiSpeak system, far beyond the plug&play basic setup, matching its performance to each venue and use requirements.
-
Page 62: Master Audio Setup Advanced Features
MASTER AUDIO SETUP ADVANCED FEATURES Before going further, it is important to explain how a WiSpeak system deals with the audio incoming signals (entering the CORE transmitter) and the wireless transmission it does with them (to the TUBE / CUBE receiver loudspeakers). A WiSpeak CORE transmitter manages the audio signals in the following way: It can receive up to 3 audio input signals: •... -
Page 63: Inputs
The page shows the following sections, in the case a of a CORE transmitter model: 21.1. Inputs 1. IN1 Gain, IN2 Gain: sliding control that allows to adjust the preamplifier gain for the two available analogue audio inputs in a CORE Master device, IN1 (stereo, balanced, Euroblock connectors) and IN2 (stereo, unbalanced, RCA connectors) Note: the third available input is the Bluetooth one, which has no preamplifier, thus... -
Page 64: Outputs
21.2. Outputs Master Volume Range: sliding controls that define the effective volume control • range (from min. VOL to max. VOL) that the end user will have available. The end user will be able to adjust the general volume of the full installation, within this range, using the front panel volume knob of the CORE transmitter or the WiSpeak grip app, once logged to it with the User profile. -
Page 65: Wispeak Ch1 / Ch2 Settings
21.3. WiSpeak CH1 / CH2 Settings Each WiSpeak channel, CH1 and CH2, has a dedicated and independent section including exactly the same set of processing features and controls. The above picture shows CH1 settings section. • Low Pass Filter: 3 position selector, including no Low Pass Filter (OFF) or a Low Pass Filter with cut frequency at 120 or 150Hz. -
Page 66: Loudspeakers Page Advanced Features
LOUDSPEAKERS PAGE ADVANCED FEATURES This is the application’s page that allows doing and individual and advanced adjustment of each TUBE / CUBE receiver loudspeaker in the WiSpeak network, as well as supervision and troubleshooting. The page is accessed clicking on the third icon in the bottom bar: The main screen will be similar to this example, in this case showing a list of 7 receiver loudspeakers already paired (Paired Loudspeakers), with one line of summarised information for each one:... - Page 67 The colour of these icons does provide information about each loudspeaker’s connection status and quality: • When an icon is shown in grey colour, it indicates the receiver was paired in the past to this transmitter, but is currently offline, meaning the transmitter can’t communicate with it (no control nor audio links are available): •...
- Page 68 The next information shown in each line is the receiver unit Alias, or customisable name. By default, each receiver unit has an Alias which starts with its model name, followed by -XX where XX matches the last 2 digits of its MAC address: In the above example we can see the unit is a TUBE model, with a MAC address that finishes at 59.
- Page 69 Clicking on any of the listed receivers will drive to its personal configuration page: Information available on the top section: • Hardware MAC Address: the full MAC Address of the WiSpeak wireless interface in the unit • Hardware Firmware Version: current version of the firmware running in the receiver unit •...
- Page 70 Controls and parameters available: • Alias field: shows the Alias (name or label) for each unit, by default matching its model name, followed by -XX where XX matches the last 2 digits of its MAC address. Clicking on it allows to edit it using the OS keyboard: •...
- Page 71 Example: o TUBE receiver A individual volume set to 100 o TUBE receiver B individual volume set to 80 o CORE Master volume at 100 (maximum value): Receiver A real playback volume = 100 ▪ Receiver B real playback volume = 80 ▪...
- Page 72 • ID TEST SIGNAL button: clicking on it will start playing a test tone sequence in the receiver unit. The sequence is stopped after 10 seconds, or pressing again the same button. It is really useful to get an acoustic identification of a receiver loudspeaker in an installation, for troubleshooting and/or adjusting purposes The unit is available to active the ID test signal when the button is shown like this: ...and once activated, it shows this status, allowing clicking on it again to cancel...
-
Page 73: Master Settings Page
MASTER SETTINGS PAGE The Master Settings page is accessed by clinking on the first icon at the bottom bar in the WiSpeak grip application: The information shown is the following: Information at the top section of the screen: • Hardware MAC Address: the full MAC Address of the WiSpeak wireless interface in the CORE transmitter (or Master) unit •... - Page 74 Among the available options, please make sure you select the one, if any, that matches your local regulations. Warning: NEEC Audio BCN / Ecler is not responsible for any regulations’ unfulfilment due to a wrong Operating Region setup...
- Page 75 • Device Alias: allows to modify the transmitter’s Alias or personal identification name that will be shown for this unit in the WiSpeak grip app. Clicking on it, the OS keyboard is shown to allow making changes: • After editing the Alias, it’s still necessary to click on the APPLY CHANGES button bottom screen make...
-
Page 76: User Control Page
• User Password: password required to access WiSpeak grip app with User (end user) profile, which just includes the daily use privileges to control a WiSpeak system: general (Master) volume and source selection, with the limits defined by the Admin configuration. Clicking on it, the OS keyboard is shown to allow making changes. - Page 77 After logging as user, the information page will appear: It includes the following information: • Master: current CORE Master device (transmitter) Alias • Selected Input Master: current audio input selected in the CORE transmitter as the program audio for the WiSpeak loudspeakers network playback •...
-
Page 78: Wispeak Faqs (Jan 2020)
It shows: • Volume: sliding control to adjust the general (Master) volume of the installation, within the minimum and maximum limits defined by the Admin in the configuration process. Note: in the above example, the slider is at its maximum position, which belongs in this case to a general volume of 83, as the Admin defined this value as the maximum available for the end user control •... - Page 79 NEEC AUDIO BARCELONA S.L. reserves the right to make changes or improvements in the design or manufacturing that may affect these product specifications. For technical queries contact your supplier, distributor or complete the contact form on our website, Support / Technical requests. Motors, 166‐168 08038 Barcelona ‐ Spain ‐ (+34) 932238403 | information@ecler.com www.ecler.com...
Need help?
Do you have a question about the WiSpeak TUBE3WH and is the answer not in the manual?
Questions and answers