Table of Contents
Advertisement
Quick Links
Advertisement
Table of Contents

Related Manuals for Ecler TRAIL103


Summary of Contents for Ecler TRAIL103
-
Page 1: User Manual
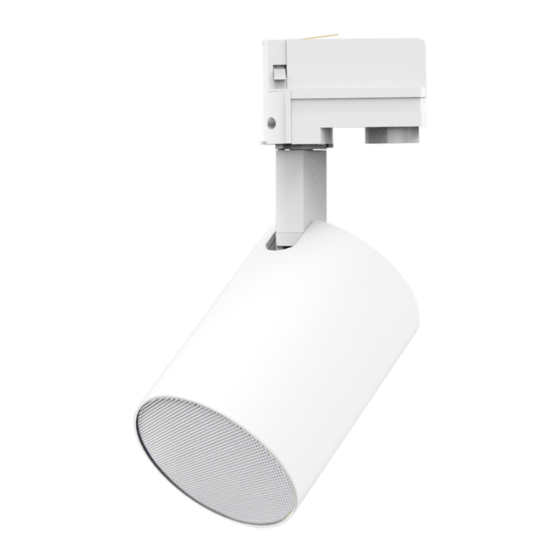
TRAIL103 ACOUSTIC CABINETS Lighting rail mount loudspeaker USER MANUAL... -
Page 2: Table Of Contents
CONTENTS Important note Precautions Introduction Main features Connecting Location and fitting Technical specifications Packaging content... -
Page 3: Important Note
IMPORTANT NOTE Congratulations. You now own the result of a well-designed, carefully produced manufacture. We thank your for your trust by having chosen our TRAIL 103 lighting rail mount loudspeaker. To achieve its maximum working order and performance, it is VERY IMPORTANT, before connecting, to read this manual carefully. -
Page 4: Introduction
INTRODUCTION TRAIL103 is a 3” loudspeaker with the appearance of a lamp. It is fitted with a three- fold installation system: in lighting rail, on a surface and using an adapter for a truss or threaded bar. It includes connections for low impedance (4 ohm) and for high impedance (15W and 30W). - Page 5 The 100V line connector makes it possible to set the maximum power with which each unit will operate. So in areas where a low noise level is required, the 0 and 15W terminals are used to connect the loudspeaker, while in areas here a higher level is required, the 0 and 30W terminals are used.
-
Page 6: Location And Fitting
At all times, install the unit on solid, firm surfaces if choosing to install on a surface (ceiling/wall). • Installation on a lighting rail: TRAIL103 is compatible with 4 thread/3 circuit lighting rail systems. • For good sound reproduction, there should be no obstacle between the loudspeakers and those listening. - Page 7 4. Place the side covers threading the audio cable through the hole made. Exert slight pressure on the covers until they are firmly in place. 5. Connect up the loudspeaker. Consult the chapter “CONNECTING” for further details. 6. Fit the rear cover. 7.
- Page 8 8. Ensure that the adapter wheel is in the OFF position. Rotate the safety lug to secure the loudspeaker on the lighting rail. Rotate the wheel until in a position other than OFF and the safety lug will be blocked. 9.
- Page 9 Thread the audio cables through the hole in the base. This is fitted with a socket inside the base to ease making connections (optional). Attach the base to the surface. Make sure that the surface is solid and firm. To this end, it has 4 holes. It is advisable to use Ø4mm screws (not included). Push the cover on the base through the loudspeaker arm to make the connections.
- Page 10 Insert the attachment for the loudspeaker arm on the previously installed based, in line with the following illustration. Attach the cover to the base. To do so, apply pressure to the cover against the base so that the groove and lugs are in line. You will hear a click when it is attached.
- Page 11 Orientate the loudspeaker to obtain the required position with the vertical and horizontal axes. Procedure for installing on a truss or threaded bar: Remove the lighting rail mounting accessory. To do so, remove the attachment screws, as shown in the illustration. Also remove the washer and plastic part on the loudspeaker arm.
- Page 12 2. Secure the mounting accessory on the threaded bar or truss, as shown in the illustration below. Make the connections. Follow steps 1 to 6 as detailed in the previous section: installing on lighting rail. Secure the loudspeaker on the threaded bar or truss and orientate the loudspeaker until obtaining the required position on the vertical and horizontal axes.
-
Page 13: Technical Specifications
All product characteristics are subject to variation due to production tolerances. NEEC AUDIO BARCELONA S.L. reserves the right to make changes or improvements in the design or manufacturing that may affect these product specifications. Motors, 166‐168 08038 Barcelona ‐ Spain ‐ (+34) 932238403 information@ecler.es www.ecler.com...
Need help?
Do you have a question about the TRAIL103 and is the answer not in the manual?
Questions and answers