Table of Contents
Advertisement
Quick Links
Download this manual
See also:
Reference Manual
Advertisement
Table of Contents

Related Manuals for Texas Instruments CBL 2


Summary of Contents for Texas Instruments CBL 2
- Page 1 Getting Started with the CBL 2™ System LabPro is a trademark of Vernier Software & Technology. Radio Shack is a trademark of Technology Properties, Inc.
- Page 2 ªCAUTION! It is very important that the ground connections of the analog inputs are never connected to different potentials. These ground connections are all in common. Connecting the grounds to different potentials may damage the CBL 2™ unit. Batteries ªWARNING! Do not heat, burn, or puncture batteries.
-
Page 3: Table Of Contents
Contents Collecting Data Out of the Box Using the CBL 2™ System...vi Introduction... 1 Keys ... 2 LEDs ... 2 Software... 2 Sensors... 3 Getting Started ... 4 Put the Pieces Together ... 4 Transfer DataMate to the Calculator ... 4 Getting Started with DataMate ... - Page 4 Installing the AA (LR6) Batteries ... A-2 Connecting an Optional AC Adapter ... A-2 Approved AC Power Adapters ... A-2 Building an External Battery Adapter Cable... A-2 Connecting an External 6-Volt Battery ... A-3 CBL 2™ S ETTING TARTED WITH THE © 2000, 2003 T YSTEM...
- Page 5 Error Messages ... A-3 DataMate Troubleshooting ... A-3 CBL 2™ Error Messages ... A-7 Texas Instruments (TI) Support and Service Information ... A-11 For General Information... A-11 For Technical Questions... A-11 For Product (hardware) Service ... A-11 Other TI Products and Services ... A-11 Warranty Information ...
-
Page 6: Collecting Data Out Of The Box Using The Cbl 2™ System
For the TI-82, TI-83, TI-83 Plus, and TI-83 Plus Silver Edition, press y 8, press ~ to RECEIVE, then press Í. 5. Press the TRANSFER button on the CBL 2. The CBL 2 detects the calculator to which it is connected and sends the appropriate version of the built-in DataMate software. - Page 7 11. You just successfully collected data. See the rest of the manual for other DataMate options (other sensors, analysis, saving data, etc.). 12. Explore the world around you. © 2000, 2003 T EXAS NSTRUMENTS NCORPORATED CBL 2™ S ETTING TARTED WITH THE YSTEM...
- Page 8 CBL 2™ S © 2000, 2003 T VIII ETTING TARTED WITH THE YSTEM EXAS NSTRUMENTS NCORPORATED...
-
Page 9: Introduction
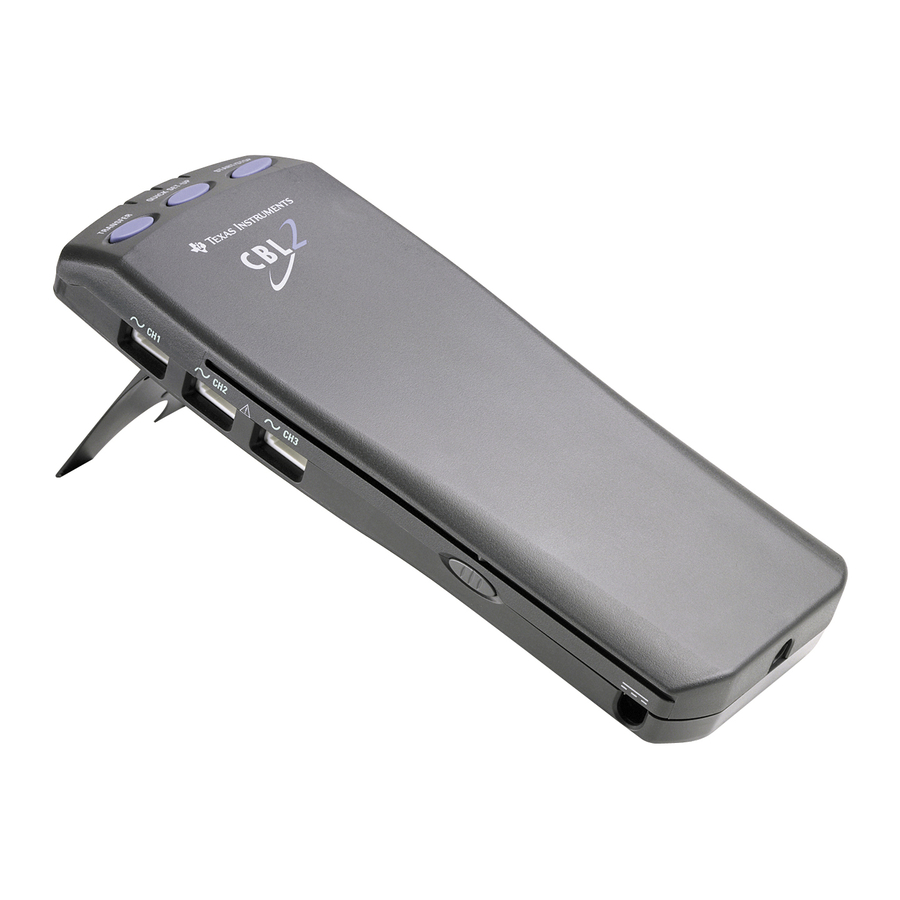
CBL 2 unit comes with a cradle which attaches the calculator to the unit so the whole thing fits easily into one hand. With a TI-GRAPH LINK™ cable (sold separately), you can also link the CBL 2 to a personal computer. As future software upgrades become available on the TI web site, you can download the software to your PC and then use a TI-GRAPH LINK cable to upgrade your CBL 2. -
Page 10: Keys
TI-83 Plus, TI-83 Plus Silver Edition, TI-86, TI-89, TI-92, TI-92 Plus, and Voyage™ 200 PLT. For the TI-83 Plus, TI-83 Plus Silver Edition, TI-89, TI-92 Plus, and Voyage 200 PLT, DataMate is a calculator software application that is run from the APPS menu;... -
Page 11: Sensors
Auto-ID sensors include the stainless steel temperature, TI voltage, and TI light sensors included with the CBL 2, as well as the CBR and the Vernier motion detector. (Additional Vernier auto-ID sensors are planned.) -
Page 12: Getting Started
Slide the back of the cradle onto the front of the CBL 2 until it clicks in place. Plug one end of the 6-inch unit-to-unit link cable into the I/O port in the end of the CBL 2, and plug the other end of the cable into the I/O port in the end of the calculator. -
Page 13: Getting Started With Datamate
When the transfer is complete, press y 5 on the calculator. See steps 4 and 5 on page vi for the TI-73, TI-82, TI-83 Plus, and TI-83 Plus Silver Edition instructions. Note: DataMate on the TI-89, TI-92 Plus, and Voyage™ 200 PLT is transferred in three segments/files, but only one will display in the App menu. -
Page 14: Special Use Calculator Keys
Press ¿ while collecting data to stop data collection. Start the DataMate App Note: If you are using the TI-73, TI-82 or TI-83, it is recommended that you remove any non- DataMate programs from the calculator before loading DataMate. See step 3 on page vi. -
Page 15: Calibrate A Sensor (Optional)
Select the Data Collection Mode on page 9. If the sensor is not auto-ID, follow the steps below to tell the CBL 2™ that the sensor is connected. On the DataMate Main Screen, press À SETUP. Press † as needed to move the cursor to the channel to which the sensor is connected. - Page 16 On the Setup screen, press † as needed to move the cursor to the sensor you want to calibrate. Press Á CALIBRATE NOW. Press  MANUAL ENTRY. Key in the slope and press Í. CBL 2™ S ETTING TARTED WITH THE © 2000, 2003 T YSTEM...
-
Page 17: Zero A Sensor (Optional)
To change the data collection mode, follow the steps below. On the DataMate Main Screen, press À SETUP. © 2000, 2003 T EXAS NSTRUMENTS NCORPORATED CBL 2™ S ETTING TARTED WITH THE YSTEM... -
Page 18: Change The Time Graph Settings (Optional)
(EXPERIMENT LENGTH in seconds is calculated automatically.) Press À OK to exit. The Setup screen appears. Press  ADVANCED to change the advanced settings. (See Change the Advanced Time Graph Settings for instructions.) CBL 2™ S ETTING TARTED WITH THE © 2000, 2003 T... -
Page 19: Change The Advanced Time Graph Settings (Optional)
(This is called threshold triggering.) ♦ For option 3, MANUAL TRIGGER, the CBL 2 will start collecting data when the START/STOP button is pressed. ♦ For option 4, NONE, no special triggering will be set. -
Page 20: Collect The Data
When the values of the data being collected reach this number, CBL 2™ will begin storing data. Key in the number (percent) of data you want the CBL 2 to prestore and press Í. The Advanced Time Graph Settings screen appears. -
Page 21: Store Latest Run
If you have multiple sensors attached to the CBL 2™, the Graph Menu screen displays automatically when you finish collecting data. Note: If you have only one sensor attached to the CBL 2, the graph itself displays. Press } or h as needed to move the cursor to the channel/data you want to view as a graph and press Í. -
Page 22: Select Region (Optional)
However, the entire data set is still stored in the CBL 2™ and can be retrieved at any time. (For instructions on how to retrieve data, see steps 5-9 on page 16.) To view a portion or “region”... -
Page 23: More Graphs (Optional)
When you choose a regression model, the calculator determines the line or curve of best fit and then gives you the option to scale the regression to your data. © 2000, 2003 T EXAS NSTRUMENTS NCORPORATED CBL 2™ S ETTING TARTED WITH THE YSTEM... -
Page 24: Collect Data With Quick Set-Up
In this mode only auto-ID sensors, CBR™, and the new Vernier auto-ID sensors can be used. Up to four sensors can be used at the same time, and CBL 2 samples at default rates pre-set in DataMate. Data will be taken continuously and stored in memory. -
Page 25: Save And Retrieve Experiments
Note: This option is available in DataMate for TI-83 Plus, TI-83 Plus Silver Edition, TI-86, TI-89, TI-92, TI-92 Plus, and Voyage™ 200 PLT. Screens shown in this section are from the TI-83 Plus. Save an Experiment If you have entered the setting for an experiment but have not collected data, only the settings are saved. -
Page 26: Load An Experiment
The experiment is saved, and the Experiment Menu is displayed again. Note: Each experiment file must have a unique name (for example, temp1, temp2, and so forth). The CBL 2™ cannot distinguish between files with the same name. All files are displayed in the order in which they were saved. -
Page 27: Delete An Experiment
Delete an Experiment Experiment files stored in the CBL 2™ system's FLASH memory appear in the order in which they are stored. New experiments are added one after another. To make the best use of memory, you should delete files when they are no longer needed. -
Page 28: Using The Cbl 2™ System With Other Programs
“external hard drive” for your calculator.) The CBL 2 has approximately 400K of FLASH memory available for storing experiment files and programs. The DATADIR program is available on the TI Resource CD and on the TI web site at education.ti.com. -
Page 29: Store A Program
Done. Note: The calculator exits the DATADIR program to make the transfer. Run the DATADIR program again to see the results of the transfer. © 2000, 2003 T EXAS NSTRUMENTS NCORPORATED CBL 2™ S ETTING TARTED WITH THE YSTEM... -
Page 30: Retrieve A Program From Storage
The DATADIR program also allows you to retrieve a program from storage in the CBL 2™ to your calculator. Although you can store several programs at once, you can retrieve only one at a time. The following instructions will guide you through this task: On the Directory Main Menu, press À... -
Page 31: Check Memory
When you finish viewing the screen, press Í. The Directory Main Menu appears. Collect Garbage The DATADIR program allows you to optimize the available memory on the CBL 2. On the directory main menu, press ¸ COLLECT GARBAGE. After completion, the program will return to the main menu. -
Page 32: Datamate Screen Reference
Allows you to determine one-variable statistics for a selected region of data. INTEGRAL Allows you to determine the integral for a selected region. *This option is not available on the TI-82 version of DataMate. CBL 2™ S ETTING TARTED WITH THE The top part of the screen shows two fields: Live Graph and Triggering. -
Page 33: Calibration
This screen is available in DataMate for TI-83 Plus, TI-83 Plus Silver Edition, TI-86, TI-89, TI-92, TI-92 Plus, and Voyage™ 200 PLT. -
Page 34: Main Screen
Sensors that are not auto-ID, such as pressure sensors and pH sensors, must be set up manually. See instructions for Connect a Sensor to the CBL 2™ on page 6. The Main Screen defaults to “meter mode” which updates readings for active sensors every few seconds. -
Page 35: Select Channel [To Zero]
Note: Not all sensors can be zeroed. DataMate displays only the sensors that can be zeroed. The default data collection mode for CBL 2™ is Time Graph. To change the mode, follow the steps in Select the Data Collection Mode on page 9. -
Page 36: Select Sensor
Displays the Experiment Menu so you can save, reload, or delete experiment files in the CBL 2 system’s FLASH memory. * The SAVE/LOAD option is available only in DataMate for the TI-83 Plus, TI-83 Plus Silver Edition, TI-86, TI-89, TI-92, TI-92 Plus, and Voyage™ 200 PLT. -
Page 37: Time Graph Settings
This option cannot be used with more than one sensor, nor can it be used with the motion sensor. Retrieves to the calculator any data that is in the CBL 2 memory. This could be data collected using the CBL 2 QUICK START feature or data from your last DataMate experiment. - Page 38 CBL 2™ S © 2000, 2003 T ETTING TARTED WITH THE YSTEM EXAS NSTRUMENTS NCORPORATED...
-
Page 39: Activity 1 - Add Them Up
Every day people use one or more batteries when they use a flashlight, their calculator and CBL 2, or any other battery-operated devices. Have you ever put batteries in a flashlight or your CBL 2? How much power do they get from the batteries inside? Look on the outer jacket of your batteries. - Page 40 Set-up First, you will use the CBL 2 and your calculator to measure the voltage of each of your five batteries. Next you will measure the voltage of one battery, then a series of two batteries, then three, and so on. It is recommended that you work in a group.
- Page 41 Reporting Sheet, question 1. (Notice that the voltage can be seen on the upper right hand corner of the DataMate Main Screen.) Next, set up the CBL 2 to take a measurement in the mode EVENTS WITH ENTRY. On the Main Screen, press À to select SETUP.
- Page 42 Press Í to see the graph of your data and the curve fit. Press Í, then À RETURN TO MAIN SCREEN, then ¸ QUIT to leave DataMate. Complete questions 9 and 10 on the Student Data Reporting Sheet. CBL 2™ S ETTING TARTED WITH THE ©...
- Page 43 Investigate the configuration of a parallel circuit and explore the total voltage of batteries set up in parallel. © 2000, 2003 T EXAS NSTRUMENTS NCORPORATED CBL 2™ S ETTING TARTED WITH THE YSTEM...
- Page 44 Press the arrow keys to trace along the data points and record your data, the voltage, in the table below: # of Batteries What do you notice about the voltage measurements? CBL 2™ S ETTING TARTED WITH THE Voltage © 2000, 2003 T...
- Page 45 Include a sketch of the batteries in series. © 2000, 2003 T EXAS NSTRUMENTS NCORPORATED of 20? ______________ of X? ______________ Y= _____________ ETTING TARTED WITH THE and B is called CBL 2™ S YSTEM...
- Page 46 Y=AX+B compares to the use of y=mx+b in their math classes. Point out that A=slope=m. Note: If the batteries are brand new, the voltage measurement might be greater than 1.4 volts. Answers Answers will vary. Sample graph: CBL 2™ S ETTING TARTED WITH THE © 2000, 2003 T YSTEM EXAS NSTRUMENTS...
- Page 47 Responses will vary. Look for the correct use of the vocabulary: slope, intercept, terminal, volts, and series. © 2000, 2003 T EXAS NSTRUMENTS NCORPORATED Batteries Voltage ETTING CBL 2™ S TARTED WITH THE YSTEM...
- Page 48 Investigate the configuration of a parallel circuit and explore the total voltage of batteries set up in parallel. Reference Data Collection Activities for the Middle Grades with the TI-73, CBL, and CBR: Johnston and Young; TI Explorations™ Book. CBL 2™ S...
-
Page 49: Activity 2 - Light From Afar
You will need a TI light sensor (included with the CBL 2) to measure light intensity. You can use either a tape measure or a measuring stick (a yardstick or a meter stick) to measure distance. - Page 50 Data Collection Connect the CBL 2 to your calculator using the unit-to-unit link cable. Connect the light sensor to the CH1 port on the CBL 2. On the calculator, run the DataMate program or app. DataMate identifies the light sensor and loads a default experiment.
- Page 51 This experiment looks at a simple relationship but there are many potential sources of experimental error. You will attempt to identify as many potential sources of error as possible and either minimize or compensate for these problems. © 2000, 2003 T EXAS NSTRUMENTS NCORPORATED CBL 2™ S ETTING TARTED WITH THE YSTEM...
- Page 52 If you do everything you can to minimize all the sources of error, what sources are left? For example, you can never measure distances exactly. How precise are your distance measurements? How might the remaining errors affect your data? CBL 2™ S ETTING TARTED WITH THE ©...
- Page 53 What would you expect the ratio to be between the light intensity measurements made at 1.5 meters and 3 meters? Compare the ratios from the actual data to your predictions above. © 2000, 2003 T EXAS NSTRUMENTS NCORPORATED Light Intensity ETTING TARTED WITH THE CBL 2™ S YSTEM...
- Page 54 What do you observe? How can you correct for extra light in the room? Repeat the original experiment doing everything you can to minimize measurement error. CBL 2™ S ETTING TARTED WITH THE © 2000, 2003 T YSTEM...
- Page 55 Sample data with sample answers: The left half of a “U.” (Intensity falls off rapidly as distance increases.) Distance © 2000, 2003 T EXAS NSTRUMENTS NCORPORATED Light Intensity .228 .070 .034 .026 .020 .014 .013 ETTING CBL 2™ S TARTED WITH THE YSTEM...
- Page 56 Make two readings at each distance from the light bulb— one with the light bulb on and the other with the light bulb off. The difference between these two readings is the intensity from the light bulb. CBL 2™ S ETTING TARTED WITH THE ©...
-
Page 57: Activity 3 - Dueling Sensors: Which Temperature Is Which
© 2000, 2003 T EXAS NSTRUMENTS NCORPORATED Science Concepts ♦ Measurement and conversions ♦ Data collection ♦ Physical science – temperature ETTING TARTED WITH THE CBL 2™ S YSTEM... - Page 58 Data Collection Connect the CBL 2 to the graphing calculator using the unit-to-unit cable. Connect one temperature sensor in Channel 1 [CH 1], and one in Channel 2 [CH 2] of the CBL 2. Place the two sensors in the lukewarm water.
- Page 59 In this case, we want to use Selected Events. Press · SELECTED EVENTS . Note: In this mode, each time you press Í while collecting data, the CBL 2 captures a data point for each probe connected to the unit.
- Page 60 L2, and Fahrenheit temperatures are in L3 as shown in the screen shot. You may want to use these for more investigations. Complete questions 4-7 on the Student Data Reporting Sheet. CBL 2™ S ETTING TARTED WITH THE © 2000, 2003 T...
- Page 61 Graph both formulas on the graphing calculator and trace the Celsius line to find the Fahrenheit temperature at .40 degrees Celsius. Other 2-sensor combinations could be used to develop conversion equations dealing with pressure, light, or force. © 2000, 2003 T EXAS NSTRUMENTS NCORPORATED CBL 2™ S ETTING TARTED WITH THE YSTEM...
- Page 62 Slope (A) by using the formula A = (Y2 – Y1)/(X2 – X1). Use the slope in question 4 and one data point from question 3 to derive another approximate conversion formula. Write this in the form Y= AX + B. CBL 2™ S ETTING TARTED WITH THE Fahrenheit (Y) ©...
- Page 63 Explain why you do or do not see differences in the graphs. © 2000, 2003 T EXAS NSTRUMENTS NCORPORATED Fahrenheit (Y) B = ______________________ Y = ______________________ ETTING TARTED WITH THE CBL 2™ S YSTEM...
- Page 64 F versus C will be linear. Sample data: Answers will vary. Sample data: Y=1.7X + 39.4, A=1.7 and B=39.4. Answers will vary. Sample answers: X1=9 X2=41.9 Answers will vary. A=1.8 CBL 2™ S ETTING TARTED WITH THE Celsius (X) Fahrenheit (Y) Y1=55.2 Y2=113.4...
- Page 65 © 2000, 2003 T EXAS NSTRUMENTS NCORPORATED Fahrenheit Y1=32 Y2=212 Y = AX + B Y= 1.8X + 32 and Y will probably be the closest ETTING TARTED WITH THE CBL 2™ S YSTEM...
- Page 66 Reference Data Collection Activities for the Middle Grades with the TI-73, CBL and CBR: Johnston and Young; Activity 2: A Tale of Two Temperatures; TI Explorations™ Book. CBL 2™ S ETTING TARTED WITH THE © 2000, 2003 T YSTSEM EXAS...
-
Page 67: Activity 4 - Fruit Battery
© 2000, 2003 T EXAS NSTRUMENTS NCORPORATED Science Concepts ♦ Data collection ♦ Experimental design ♦ Physical science ETTING TARTED WITH THE CBL 2™ S YSTEM... - Page 68 Fill in the first two columns in the table in question 2 on the Student Data Reporting Sheet. Connect the CBL 2 to your calculator. Connect the TI voltage sensor to Channel 1 (CH1) of the CBL 2. On the calculator, run the DataMate program or app.
- Page 69 Press  EVENTS WITH ENTRY. Press À OK to return to the Main Screen. Connect the leads of the TI voltage sensor to the penny and washer before inserting them into the fruit to be tested. Securely connect the red lead (+) on the penny (copper) and the black lead (.) on the washer (zinc).
- Page 70 Press } or † to move the cursor to MODE, and then press Í. Press Á TIME GRAPH to go to the Time Graph Settings menu. Press Á CHANGE TIME SETTINGS. CBL 2™ S ETTING TARTED WITH THE © 2000, 2003 T YSTEM...
- Page 71 To retrieve the data, press Í to go to the Main Screen, then press · TOOLS and Á RETRIEVE DATA. The calculator retrieves the data from the CBL 2 and plots it on the screen.
- Page 72 Press À LINEAR (CH1 VS TIME) to perform a linear regression on our voltage data. The calculator displays the linear equation and the corresponding values. Enter this information on question 11 of your Student Data Reporting Sheet. Answer questions 12-16. CBL 2™ S ETTING TARTED WITH THE © 2000, 2003 T...
- Page 73 As the experiment progressed, did you see any change in the condition of the washer or the penny? Which item made the “best” battery? Why do you believe this? © 2000, 2003 T EXAS NSTRUMENTS NCORPORATED Number Voltage CBL 2™ S ETTING TARTED WITH THE YSTEM...
- Page 74 0 match? What does happen to the data? What factors do you think did or could affect the rate at which the voltage dropped? CBL 2™ S ETTING TARTED WITH THE © 2000, 2003 T...
- Page 75 Sample Answers The open voltage or control will usually read close to zero. The reason it may not is due to the nature of the internal workings of the CBL 2. Table of batteries used for this sample data: Name of the fruit...
- Page 76 “dirty” or tarnished over time Reference Data Collection Activities for the Middle Grades with the TI-73, CBL and CBR: Young and Johnston; Activity 12: You’ll Get a Charge Out of This!; TI Explorations™ Book. CBL 2™ S ETTING TARTED WITH THE ©...
-
Page 77: Activity 5 - Lights Out
The number of times the cycle occurs per unit of time is known as the frequency. In the following activities, you will use the CBL 2 and a light sensor to collect data for two different types of periodic phenomena. You will then analyze this data with your calculator to find the period and the frequency of the observed behavior. - Page 78 Set up the Experiment Connect the CBL 2 to your calculator using the unit-to-unit cable. Then connect the light sensor into Channel 1 (CH1) of the CBL 2. On the calculator, run the DataMate program or app. DataMate automatically identifies the light sensor and loads a default experiment.
- Page 79 Record this value below. Frequency: ____________________ cycles per second © 2000, 2003 T EXAS NSTRUMENTS NCORPORATED to find the average time period. Record this value below, ETTING CBL 2™ S TARTED WITH THE YSTEM...
- Page 80 Set up the experiment Make sure the TI light sensor is connected to CH1 of the CBL 2. Run the DataMate program or app. Press À SETUP to go to the Setup screen.
- Page 81 Collect the Data Hold the light sensor close to the fluorescent light bulb, and press Á START to begin collecting data. The CBL 2 beeps when it begins collecting data. The data collection will be finished almost immediately. If your data is not satisfactory, press Á START to perform another trial.
- Page 82 (At this point, you can press Í and then press ¸ to quit the program.) Subtract A from B and then divide by C, Record this value below. Period: ____________________ seconds CBL 2™ S ETTING TARTED WITH THE (B-A) to find the average time period.
- Page 83 If the light source really is turning off every half-cycle, why isn't the minimum y-value on your intensity vs. time plot equal to zero? © 2000, 2003 T EXAS NSTRUMENTS NCORPORATED CBL 2™ S ETTING TARTED WITH THE YSTEM...
- Page 84 A= 1.05 seconds B= 7.9 seconds There were 6 cycles completed. The period is 1.14 seconds. The frequency is .88 cycles per second. CBL 2™ S ETTING TARTED WITH THE © 2000, 2003 T YSTEM EXAS...
- Page 85 119.05 cycles per second. The minimum y-value is non-zero due to the presence of background light. Reference Real-World Math with the CBL System: Activities for the TI-83 and TI-83 Plus: Brueningsen, Bower, Antinone and Brueningsen-Kerner; Activity 15: Lights Out; TI Explorations Book.
- Page 86 CBL 2™ S © 2000, 2003 T ETTING TARTED WITH THE YSTEM EXAS NSTRUMENTS NCORPORATED...
-
Page 87: Activity 6 - Night And Day
Barometric Pressure and Relative Humidity. Check out the TI web page for a listing of all sensors available for the CBL 2 at education.ti.com/cblprobes. Use the TI-9920 AC adapter to supply power for the CBL 2 for long term data collection, or to power a particular sensor use, Vernier's External Power Adapter CBL-EPA. - Page 88 Set up the Sensors Connect the stainless steel temperature sensor and the TI light sensor to Channel 1 and Channel 2 of the CBL 2, respectively. Connect the CBL 2 to the calculator. On the calculator, run the DataMate program or app.
- Page 89 We are now ready to start our experiment. Press À OK to return to the Setup screen. Press À OK to return to the DataMate Main Screen. © 2000, 2003 T EXAS NSTRUMENTS NCORPORATED CBL 2™ S ETTING TARTED WITH THE YSTEM...
- Page 90 Disconnect the calculator from the CBL 2. We are now collecting data. Note: When the experiment is active, the green LED on the CBL 2 flashes as data is being collected. After 24 hours the data collection will be completed.
- Page 91 Surf the Internet to find temperature data for your location. Does your data match the data on the Web? © 2000, 2003 T EXAS NSTRUMENTS NCORPORATED CBL 2™ S ETTING TARTED WITH THE YSTEM...
- Page 92 Channel DIG/SONIC Calculate the length of the experiment in the most appropriate units. Rate of data collection (seconds per point): Number of data points: Length of experiment: CBL 2™ S ETTING TARTED WITH THE Sensor © 2000, 2003 T YSTEM...
- Page 93 Tell a story about the data you collected. What happened in the experiment to produce the data you collected? Explain any anomalies in your data. © 2000, 2003 T EXAS NSTRUMENTS NCORPORATED CBL 2™ S ETTING TARTED WITH THE YSTEM...
- Page 94 Sample data from the experiment might look like this: Time (s) 2880 7680 14400 18240 24960 38400 44160 60480 62400 68160 72960 CBL 2™ S ETTING TARTED WITH THE Temp (°C) Light Intensity 23.8333 0.7882 23.6429 0.718241 23.7381 0.523911 22.6136 0.196464 21.5...
- Page 95 Answers will vary. © 2000, 2003 T EXAS NSTRUMENTS NCORPORATED Sensor Units Temperature degrees C Light Intensity No units (relative) Not used Not used ETTING TARTED WITH THE CBL 2™ S YSTEM...
- Page 96 If you are using TI InterActive!™ or TI-GRAPH LINK™ computer software, your students can include graphs and data from their experiment in their lab reports. Also, if you are using TI InterActive! your students can include local temperature data downloaded from the Internet. For more information about TI InterActive!, visit education.ti.com/interactive...
-
Page 97: Appendix A: General Information
The CBL 2™ is designed to operate with four AA (LR6) alkaline batteries. Factors that affect battery life are the actual time that the CBL 2 is collecting data and the amount of current used by connected probes during your experiments. To extend battery life in the classroom we recommend that you use an approved power adapter. -
Page 98: Installing The Aa (Lr6) Batteries
The Texas Instruments model AC-9920 power supply is an AC-to-DC power adapter approved for use with the CBL 2. The model AC-9201 power supply can also be used with the CBL 2. Use of other power adapters may result in RF interference and/or unacceptable performance. -
Page 99: Connecting An External 6-Volt Battery
Check batteries in the CBL 2. Disconnect the calculator from the CBL 2; then press TRANSFER on the CBL 2. If the CBL 2 does not make a sound or light the red LED, change the batteries in the CBL 2. - Page 100 Relative Humidity sensor even though the sensor was removed and DataMate was restarted.) Press ‘ to reset the CBL 2™ to initial conditions. (In general, whenever you see something on the screen that does not look correct, press ‘ to reset.)
- Page 101 NCORPORATED Explanation continued from previous page * This is the limit of the TI-82, TI-83 Plus, and TI-83 Plus Silver Edition calculator list. ** This is the data variable limit for these calculators. You must have Operating System (OS) version 2.05 or higher. The latest OS is available at education.ti.com/softwareupdates.
- Page 102 TI-89, TI-92, TI-92 Plus, or Voyage™ 200 PLT. It is caused by a loss of communications between the calculator and the CBL 2™ and usually means there is a problem with the link port on the calculator. Check that the cable is securely connected to the calculator and the CBL 2.
- Page 103 When triggering is selected, the CBL 2 does not allow a live graph. On the CBL 2, you can have either a live graph or triggering, but not both. The CBL 2 will use the one that was set up last and will turn off the other one.
-
Page 104: Cbl 2™ Error Messages
CBL 2™ Error Messages Error messages that may occur when using the CBL 2 system without the DataMate program are listed in the table below. To retrieve an error message, use Command 7 listed in Appendix B. In almost all cases, an error result will cause the unit to sound the “low tone” two or more times and illuminate the red LED two or more times. - Page 105 The equation number must be in the range of .1 to 12 for analog channels and either 0 or 13 for the sonic channel. Equation numbers outside of this range will produce this error. © 2000, 2003 T EXAS NSTRUMENTS NCORPORATED CBL 2™ S ETTING TARTED WITH THE YSTEM...
- Page 106 FLASH memory and an attempt has been made to write to FLASH memory. The batteries should be replaced immediately for the unit to continue to perform properly. A-10 G CBL 2™ S ETTING TARTED WITH THE © 2000, 2003 T...
- Page 107 Archive operations must occur only when the unit is idle. This error indicates an attempt to use a channel that does not exist on CBL 2™ (for example, channel 42). This error indicates an undefined error has occurred. This error indicates that the current load on the analog or digital ports is more than can be supplied by the unit and the power has been turned off to prevent damage.
-
Page 108: Texas Instruments (Ti) Support And Service Information
Texas Instruments (TI) Support and Service Information For General Information E-mail: Phone: Home Page: Customer Support Center: International Information: For Technical Questions Phone: For Product (hardware) Service Customers in the U.S., Canada, Mexico, Puerto Rico and Virgin Islands: Always contact Texas Instruments Customer Support before returning a product for service. -
Page 109: Warranty Information
TI strongly recommends that you insure the product for value prior to mailing. Software. Software is licensed, not sold. TI and its licensors do not warrant that the software will be free from errors or meet your specific requirements. All software is provided “AS IS.”... -
Page 110: All Other Customers
TI strongly recommends that you insure the product for value if you mail it. Software. Software is licensed, not sold. TI and its licensors do not warrant that the software will be free from errors or meet your specific requirements. All software is provided “AS IS.”... -
Page 111: Appendix B: Command Tables
A p p e n d i x B : C o m m a n d T a b l e s The tables in this section provide a quick reference to CBL 2™ commands. Please consult the Technical Reference document on the Resource CD or the TI web site for detailed explanations and additional information on the commands. - Page 112 Scales distance in feet *RT = REALTIME **NON-RT = NON-REALTIME post-processing None d/dt d/dt and d CBL 2™ S ETTING TARTED WITH THE Measures relative light intensity Measures voltage on 0-5V input of selected channel Results Performs no post processing (RT* and...
-
Page 113: Command 3
Repeats last Command 3 (used to quickly collect new data) Results Specifies number of seconds between samples Results Specifies REALTIME mode Returns error message Specifies NON-REALTIME mode and the number of points to collect CBL 2™ S ETTING TARTED WITH THE YSTEM... - Page 114 Absolute Relative Note: This default is different from the original CBL™. Default on original CBL was 0. filter No filtering CBL 2™ S ETTING TARTED WITH THE Results Takes data immediately after GET command Takes data when START/STOP is pressed...
-
Page 115: Command 4
(K 1 ) ln(X) ln(1/X) (K 1 X) No restrictions other than overflow (K 1 /X) (K 1 X) (K 1 /X) ln(K CBL 2™ S ETTING TARTED WITH THE Xƒ0 X>0 >0) (X>0) (X>0) (Xƒ0) (X‚0) (X>0) -
Page 116: Command 8
Kelvin Rankin Command 5 Data Control channel dataselect d/dt d/dt CBL 2™ S ETTING TARTED WITH THE (ln 1000X) + K Results { 4, channel, equtype, units } Results Sets the equation for sonic 1 if equtype=13 Sets the equation for sonic 1... -
Page 117: Command 9
Command 3. Data End must be greater than or equal to Data Begin (unless Data End=0) and both must be less than or equal to the number of samples sent to the CBL 2™ in the last Command 3. - Page 118 CBL 2™ S ETTING TARTED WITH THE Current software version If non-zero, CBL 2™ should be reset Results Battery is OK for use Battery is low during sampling Battery is low all the time Constant value; ensures the status...
- Page 119 Returns a list with three elements: {9 ,channel, mode } Immediately reads and returns one data point. Used to verify that setup is correct. Re-test input auto-ID value Return stored auto-ID value CBL 2™ S ETTING TARTED WITH THE YSTEM...
- Page 120 0 to 100 LowerThld 0 to 100 UpperThld RejectThld Command 12 channel {12,41,1} Send the following commands to return the data from the CBL 2™ to the host: Command: {12,41,0} {12,41,.1,Start,Stop} {12,41,.2,Start,Stop} {12,41,2,direction} direction low active pulse high active pulse...
- Page 121 {12,41,3,direction} direction low active pulse high active pulse Send the following commands to return the data from the CBL 2™ to the host: Command: {12,41,0} {12,41,.1,Start,Stop} {12,41,.2,Start,Stop} {12,41,4,direction} direction low active pulse high active pulse Send the following commands to return the data from the CBL 2 to the host:...
-
Page 122: Command 102
Command 102 Power Control Command pwrctl 1 through 1000 Note: Please see the Technical Information provided on the TI web site or the Resource CD for additional important information regarding this command. Command 115 channel=1, 2, 3, or 11 Returns the following information: CBL 2™... -
Page 123: Command 1998
Command 1998 Set LED Command Yellow Green Note: Leaving a LED turned on will run down the batteries in the CBL 2™. Command 1999 Sound Command length [You can enter up to 32 pairs of values.] Command 2001 Direct Output to Dig-Out data1...dataN... -
Page 124: Command 201
Archive Operations Command {201,operation,operand1,operand2,related_info_list} This command allows the calculator to determine the contents of FLASH memory. Please see the CBL 2™ Technical Reference provided on the TI web site for detailed instructions on using this command. B-14 G CBL 2™ S...
Need help?
Do you have a question about the CBL 2 and is the answer not in the manual?
Questions and answers