Table of Contents
Advertisement
Quick Links
T-CANOPY RANGEHOOD
USER MANUAL
330422
Warning notices: Before using this product, please read this manual carefully and keep it for future reference.
The design and speci cations are subject to change without prior notice for product improvement.
Consult with your dealer or manufacturer for details.
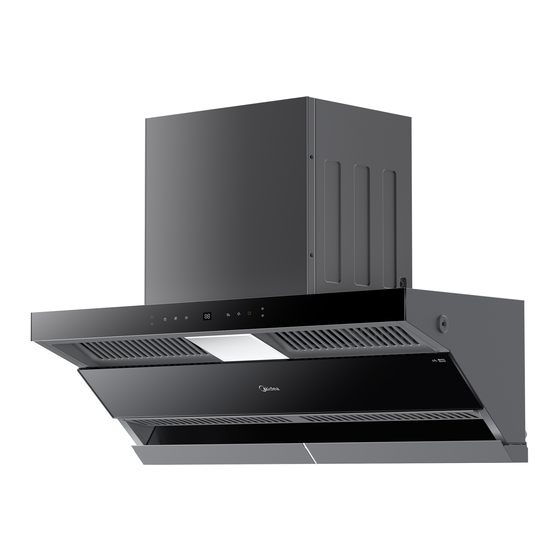
The diagram above is just for reference. Please take the appearance of the actual product as the standard.
Advertisement
Table of Contents

Subscribe to Our Youtube Channel
Related Manuals for Midea 330422


Summary of Contents for Midea 330422
- Page 1 T-CANOPY RANGEHOOD USER MANUAL 330422 Warning notices: Before using this product, please read this manual carefully and keep it for future reference. The design and speci cations are subject to change without prior notice for product improvement. Consult with your dealer or manufacturer for details.
-
Page 2: Table Of Contents
THANK YOU LETTER Thank you for choosing Midea! Before using your new Midea product, please read this manual thoroughly to ensure that you know how to operate the features and CONTENTS THANK YOU LETTER SAFETY INSTRUCTIONS SPECIFICATIONS PRODUCT OVERVIEW PRODUCT INSTALLATION... -
Page 3: Safety Instructions
SAFETY INSTRUCTIONS Intended Use The following safety guidelines are intended to prevent unforeseen risks or damage from unsafe or incorrect operation of the appliance. Please check the packaging and appliance on arrival to make sure everything is intact to ensure safe operation. If you nd any damage, please contact the retailer or dealer. - Page 4 WARNING This appliance is not intended for use by persons (including children) with reduced ● physical, sensory or mental capabilities, or lack of experience and knowledge, unless they have been given supervision or instruction concerning use of the appliance by a person responsible for their safety.
-
Page 5: Specifications
As the upper panel is closing, don’t put your hands between the upper panel and the ● body in case of clamp your hand. As steam generator is working, be careful of hot steam out of the body. ● SPECIFICATIONS Model 330422 Voltage/Frequency 220V-240V~/50Hz Rated power 1600W Lighting power 4W x 1... -
Page 6: Product Overview
PRODUCT OVERVIEW Components Ref. Qty. Product Components Range hood body Exhaust pipe Check valve Check valve Sealing gasket Installation plate Expansion bolt Screws (ST2.9x9.5) Screws (ST4.2x16) Screws (5x50) Screw (M5x16) Screw (ST5x45) Screws (ST4.2x9.5) Oil cup Water cup Water Pipe... -
Page 7: Product Installation
PRODUCT INSTALLATION Determine location Range hood should be installed horizontaly on the top of the stove, the installation ● diagram is as follows: Suspended Exhaust pipe Cupboard ceiling 905~915... - Page 8 The top of machine Wall Schematic diagram of the hole size of the exhaust pipe at the ceiling Note: This installation height is only applicable to electric stove, if installed above the gas stove, the installation height should be in accordance with the installation height requirements of gas stove.
- Page 9 lnstallation plate Installation plate Drill five holes with a diameter of 10mm and a depth of 50-60mm in the corresponding position of the wall as shown in the figure. The single hole on the upper side is used to fix the limit block. Press the plastic expansion tube into the hole, and then fix the body hanging plate reliably with the randomly equipped 5×50 countersunk head wood screw.
-
Page 10: Operation Instructions
OPERATION INSTRUCTIONS Range Hood Can Be Used After Power Gesture control left Gesture control right Short press: 0.5 second Long press: 2~3 seconds Button Name Function Short press: Turn on the light; Light Long press: Adjust the light. Short press: Open the gesture; Gesture Short press: Close the gesture. -
Page 11: Cleaning And Maintenance
CLEANING AND MAINTENANCE Cleaning On The Surface The surface of the range hood and filter should be clean regularly, do not use clean ● balls, brushes, coarse cloth, so as not to scratch the surface of the machine. It’s suggested that the oil cup should be cleaned every half a month to avoid any ●... - Page 12 Clean the inside after the Close the condensation plate by condensation plate is open holding the both sides and insert the clip to the screws Pull upward to fix After cleaning,insert the power plug LED Light Imformation Max Power Voltage Picture Lamp Cap Square/Diameter:...
-
Page 13: Trouble Shooting
washing drying Press "Steam Washing" for 3 Steam washing: 12 min seconds to start the steam washing. Drying: 3 min Steam washing process oil cup 1:Cancel the steam washsing reminder (not washing):Long press 2 seconds + Remove oil cup short press twice to fast forward to Dump accumulated oil the end. -
Page 14: Trademarks, Copyrights And Legal Statement
Midea may constitute trademark infringement or unfair competition in violation of relevant laws. This manual is created by Midea and Midea reserves all copyrights thereof. No entity or individual may use, duplicate, modify, distribute in whole or in part this manual, or bundle or sell with other products without the prior written consent of Midea. -
Page 15: Data Protection Notice
European Economic Area. Further information are provided on request. You can contact our Data Protection Officer via MideaDPO@midea.com. To exercise your rights such as right to object your personal date being processed for direct marketing purposes, please contact us via... - Page 16 © Midea 2023 all rights reserved 16173000A23427 V1.1...
Need help?
Do you have a question about the 330422 and is the answer not in the manual?
Questions and answers