Advertisement
Quick Links
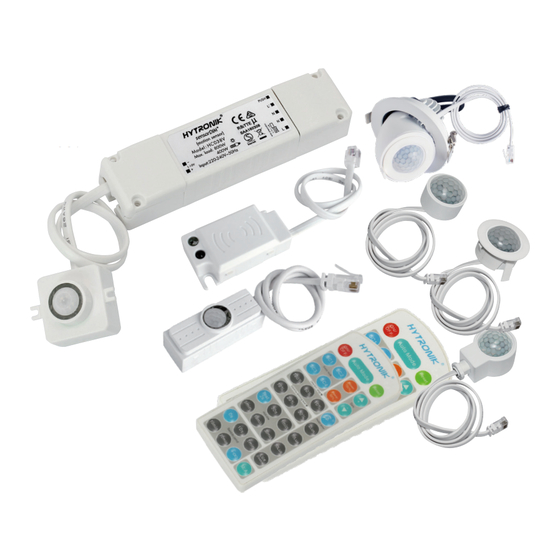
Tri-level Control Sensor
HC438V
HCD438
Detached Linear Version with Remote Control
Applications
Occupancy detector with tri-level dimming control suitable for indoor use:
Of ce / Commercial Lighting
Classroom
Meeting Room
Use for new luminaire designs and installations
Features
24 hour daylight monitoring dawn/dusk sensor
Daylight
Monitoring
Special photocell to measure and differentiate natural light from LED light
Photocell Advance
Lux off function, daylight threshold prior to motion detection
Intelligent
Photocell
Tri-level dimming control based upon occupancy (also known as corridor function)
TM
Optional 1-10V or DALI dimming control method
One-touch daylight learning via remote control
Ambient daylight
threshold
Zero crossing detection circuit reduces in-rush current and prolongs relay life (HC438V)
Loop-in and loop-out terminal for ef cient installation (HC438V)
Loop in
Loop out
5-year warranty
Technical Data
Input Characteristics
Model No.
Mains voltage
Stand-by power
Load ratings:
Capacitive:
HC438V
200VA~120V / 400VA~277V
Resistive:
500W~120V / 1200W~277V
HCD438
30mA, 16VDC (max. 15 devices)
Warming-up
Environment
Operation temperature
Case temperature (Max.)
IP rating
Safety and EMC
Safety standard
FCC standard
Certi cate
Subject to change without notice.
HC438V HCD438
120~277VAC 50/60Hz
<0.5W
20s
Ta: -20
O
C ~ +55
O
C
Tc: +75
O
C
IP20
UL773A , CSA-C22.2 No. 284
FCC Part 15C
UL, CUL, FCC
Class 2
Sensor Data
SAM7 SAM7/I HIR02 HIR04
Model No.
Sensor principle:
SAM7 SAM7/I
HIR02 HIR04 HIR19
SAM7 SAM7/I
Operation frequency
Transmission power
Detection range:
SAM7
Max installation height
Max Detection range
HIR02 HIR04
Max installation height
Max Detection range
HIR09 & HIR19
Max installation height
Max Detection range (Ø)
HIR09/AA
Installation height
Max Detection range
Detection angle
Edition: 12 Oct. 2023
HIR09/S HIR09/F HIR09/C HIR09/AA
HIR19/S HIR19/F HIR19/C
High Frequency (microwave)
PIR Detection
5.8GHz +/- 75MHz
<0.2mW
6m
12m (Diameter)
3m
6m (Diameter)
15m (forklift)
12m (single person)
24m (forklift)
20m (single person)
3m
15m (Diameter)
O
O
30
~ 150
Ver. A0
Page 1/11
Advertisement

Related Manuals for Hytronik HCD438


Summary of Contents for Hytronik HCD438
- Page 1 Sensor Data Technical Data SAM7 SAM7/I HIR02 HIR04 Model No. HIR09/S HIR09/F HIR09/C HIR09/AA Input Characteristics HIR19/S HIR19/F HIR19/C Model No. HC438V HCD438 Sensor principle: Mains voltage 120~277VAC 50/60Hz High Frequency (microwave) SAM7 SAM7/I Stand-by power <0.5W HIR02 HIR04 HIR19...
- Page 2 Sensor Main Body HC438V (1-10V output) RJ12 connector Push L’ 1-10V- 1-10V+ HCD438 (DALI output) RJ12 connector DALI Push 110.5 There are ten different sensor antenna modules to choose from: HF sensorDIM Antenna module 35.2 LED indication Model SAM7 Infrared remote receiver...
- Page 3 RJ12 The cable length is around 30cm. 11 sensor antennas and 2 control units offer 22 combinations in total: Microwave antenna SAM7 + DALI control HCD438 Microwave antenna SAM7 + 1-10V control HC438V Microwave antenna SAM7/I + DALI control HCD438...
-
Page 4: Functions And Features
Function (SAM7/I, HIR04) It’s well known that LED lights have a totally different spectrum to natural light. Hytronik uses this principle and comes up with special photocell and sophisticated software algorithm to measure and differentiate natural light from LED light, so that this photocell can ignore the LED light and only respond to the natural light. - Page 5 Manual Override This sensor reserves the access of manual override function for end-user to switch on/off, or adjust the brightness by push-switch, which makes the product more user-friendly and offers more options to t some extra-ordinary demands: * Short Push (<1s): on/off function; On →...
- Page 6 DALI Driver DALI DALI DALI DALI DALI Driver HCD438 Push 1. 200 metres (total) max. for 1mm² CSA (Ta = 50℃) 2. 300 metres (total) max. for 1.5mm² CSA (Ta = 50℃) Detection Pattern (Ceiling mounted) Model SAM7 & SAM7/I Model HIR02 &...
- Page 7 Model HIR09/AA The installation data conduct by following testing conditions: 1. Environmental humidity: 80.5%; 2. Single person walking; 3. Sensor not connected to any driver that may have soft-on period; 4. Testing temperature Ta = 31.5°C; 5. The testing is conducted in an open and spacious indoor eld, without noticeable obstacles or infuences that may affect PIR performances. Installation height 3m:...
- Page 8 HIR09 & HIR19 (High-bay) HIR09 & HIR19: High-bay lens detection pattern for forklift @ Ta = 20℃ (Recommended installation height 10m-15m) Tangential (A) A: Tangential movement B: Radial movement Radial (B) Mount height max 380m (Ø = 22m) max 201m (Ø...
- Page 9 AUTO mode Press button “AUTO” to initiate automatic mode. The sensor starts working and all settings remain as before the light is switched ON/OFF. SEMI-AUTO mode 1. Press button “Shift”, the red LED ashes for indication. 2. Press button “SEMI-AUTO/AUTO” to initiate semi-auto mode. The xture is manually turned on by pressing the push-switch, and goes off automatically after stand-by time.
- Page 10 Stand-by time (corridor function) Press buttons in zone “stand-by time” to set the stand-by period at 0s / 10s / 1min / 5min / 10min / 30min / 1h / +∞. Note: “0s” means on/off control; “+∞” means the stand-by time is in nite and the xture never switches off. Stand-by dimming level Press the button in zone “stand-by dimming level”...
- Page 11 ->knowledge ->Introduction of Photocell Advance 2. Regarding precautions for microwave sensor installation and operation, please kindly refer to www.hytronik.com/download ->knowledge ->Microwave Sensors - Precautions for Product Installation and Operation 3. Regarding precautions for PIR sensor installation and operation, please kindly refer to www.hytronik.com/download ->knowledge ->PIR Sensors - Precautions for Product Installation and Operation...
Need help?
Do you have a question about the HCD438 and is the answer not in the manual?
Questions and answers