Table of Contents
Advertisement
Quick Links
Advertisement
Table of Contents

Subscribe to Our Youtube Channel
Related Manuals for klover AURA 80 PLUS


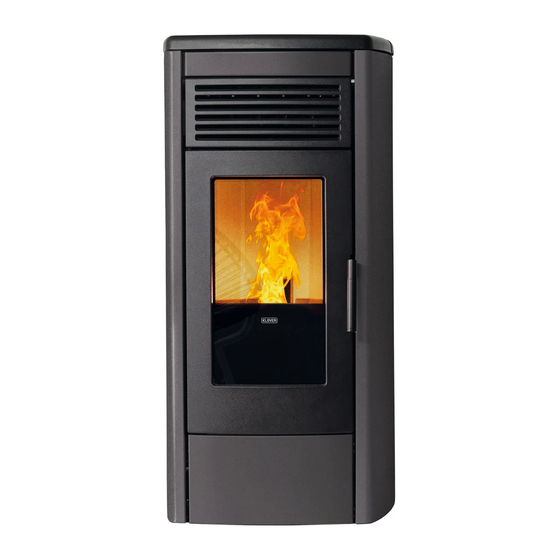
Summary of Contents for klover AURA 80 PLUS
- Page 1 AURA 80 CLASS 90 AURA 80 PLUS AURA 100 AURA 120 REA 100 REA GLASS OPERA TWIN OMEGA OMEGA PLUS MISS ISTRUZIONI USO INSTRUCTIONS FOR USE INSTRUCTIONS D’UTILISATION INSTRUCCIONES DE USO GEBRAUCHSANLEITUNG GEBRUIKSAANWIJZING CS.A80.IST-1 / Rev 1.0...
-
Page 2: Table Of Contents
Copyright © 2021 KLOVER srl All rights reserved. The reproduction of any part of this manual, in any form, without the explicit written permission of KLOVER Srl. is forbidden. The content of this manual may be modified without notice. Although the documentation contained in this manual has been carefully compiled and checked, KLOVER srl cannot be held liable for any damages arising from the use of the same. -
Page 3: Introduction
The installation and initial start-up of the appliance must be performed by skilled personnel trained in the relevant safety standards. They will be fully responsible for the definitive installation of the appliance and its proper operation. KLOVER srl shall not be held liable if these precautions are not observed. -
Page 4: The Machine And The Pellets
CS.A80.IST-1 / Rev 1.0 ENGLISH THE MACHINE AND THE PELLETS Components of the appliance The appliance is delivered with the following equipment: No. 1 - User, installation and maintenance guide; No. 1 - Power supply cable; No. 1 - Front heat exchanger cleaning hook; No. -
Page 5: Technical Specifications
CS.A80.IST-1 / Rev 1.0 ENGLISH Technical Specifications AURA 80 AURA 80 PLUS REA 100 AURA120 CLASS 90 REA GLASS OMEGA MISS OPERA AURA 100 OMEGA PLUS TWIN 8,51 10,24 12,1 Nominal heat input kcal/h 7.350 8.772 10.406 6.020 2,64 3,78... -
Page 6: Pellet Properties
CS.A80.IST-1 / Rev 1.0 ENGLISH Pellet properties The appliance has been tested with all types of pellets available on the market. The pellets must have the following properties: Diameter 6 mm. Maximum length 35 mm. Maximum humidity content 8 – 9 %. 100% wood. -
Page 7: Spaces Around And Above The Appliance
CS.A80.IST-1 / Rev 1.0 ENGLISH Spaces around and above the appliance The figure below shows the minimum distances from walls or other not-easily-removable furniture, that need to be taken into consideration when positioning the appliance. Any shelves or false ceilings mounted above the appliance must be at least 50 cm away from the top part of it. Furniture and movable objects made from flammable materials must be positioned at least 50 cm from the side surfaces of the appliance;... -
Page 8: The Flue And Connection To The Same
CS.A80.IST-1 / Rev 1.0 ENGLISH The flue and connection to the same The flue is an essential element for the efficient operation of the appliance. The flue must have a minimum cross-sectional area as that indicated in the technical specifications of the appliance (80 mm). Each product must be equipped with its own flue, without other adjoining elements (boilers, chimneys, stoves, etc.). -
Page 9: Chimney
CS.A80.IST-1 / Rev 1.0 ENGLISH If the flue should be old or too big (internal diameter greater than 15 cm), duct the flue using a stainless steel pipe, properly insulated with rock wool or vermiculite, and sized according to the route. The connection to the flue must be appropriately sealed. When assembling the flue, there must be no more than 4 direction changes, including the initial T-shaped fitting. -
Page 10: Electrical Connection
KLOVER srl declines all responsibility for injury to persons and animals or damage to objects due to failure to connect the appliance to earth or to comply with IEC specifications. -
Page 11: Description Of Components
CS.A80.IST-1 / Rev 1.0 ENGLISH DESCRIPTION OF COMPONENTS Remote control Display Key 5 – ESC Key 1 – INCREASE Key 2 – DECREASE Key 4 – SET Key 3 – ON/OFF The remote control must be fitted with 3 AAA 1.5 V batteries (mod. LR03 / MN2400); The battery life depends on how often the remote control is used. The table explains how the keys on the remote control work. -
Page 12: Support Panel
CS.A80.IST-1 / Rev 1.0 ENGLISH Support panel Led 6 – WIFI Led 4 – RECEPTION Led 5 – ALARM Led 3 – POWER STATUS Key 2 – POWER / WPS Led 2 – POWER STATUS Serial Connection for Remote Control Led 1 –... -
Page 13: Display
CS.A80.IST-1 / Rev 1.0 ENGLISH Display The remote control display shows information concerning the operating status of the appliance. The display is activated by pressing key 3 (On/Off). The figure below shows the display when the appliance is in normal operating mode. Room temperature Operating status Power setting in POWER SET... - Page 14 CS.A80.IST-1 / Rev 1.0 ENGLISH The image below shows the screen when STAND-BY is enabled: Enable field MENU 02 – TIMER Allows you to access the different timer programmes (daily, weekly and weekend). In order to avoid any undesired switching on/off operations, only activate and use a single programme at a time (daily, weekly or weekend programme). •...
- Page 15 CS.A80.IST-1 / Rev 1.0 ENGLISH • Sub-menu 02 – 03 – Weekly timer Allows you to enable, disable and set the timer weekly program functions. The weekly timer has four operating time slots can be set according to the following table (it is not essential to use all of them at the same time): Switch on time Days display field enabled: (OFF tells the clock to ignore...
- Page 16 CS.A80.IST-1 / Rev 1.0 ENGLISH MENU 03 – DATE AND TIME Allows for setting the current day, date and time. MINUTES Clock HOURS Clock MONTH Date DAY Date YEAR Date Keys 1 and 2 (Increase and Decrease) allow you to modify the selected value. Key 4 (Set) selects the subsequent value.
- Page 17 3%. * Access by non-expert users can cause serious damage to the equipment, to things and the environment as well as personal injuries. Klover declines any responsibility for damages arising from inappropriate calibration. MENU 10 – TECHNICAL CALIBRATION Allows you to access all data reserved for the Technical Assistance Centre.
-
Page 18: Initial Configurations
Connection to the WiFi network The appliance is equipped with a Wi-Fi board that enables it to be remotely controlled via the “KLOVER HOME” App, which can be downloaded to smartphones or tablets from various stores (Apple, Android, etc.). -
Page 19: Initial Start-Up
CS.A80.IST-1 / Rev 1.0 ENGLISH INITIAL START-UP First start-up Perform the following operations: Connect the appliance to the electrical system by using the provided cable; Set the “power ON/OFF switch” on the rear side of the appliance to “( ”׀on); Fill the pellet tank;... -
Page 20: Switch-Off Cycle
CS.A80.IST-1 / Rev 1.0 ENGLISH Switch-off cycle Pressing key 3 (On/Off) on the remote control or key 1 (On/Off) on the support panel, will switch off the appliance. The display will show “SWITCHING OFF”. The pellet loading stops and the flue gas extractor speed increases to maximum and then switches off after the cooling of the appliance, displaying "OFF”. -
Page 21: Modifying The Temperature Setting For Ducted Rooms
CS.A80.IST-1 / Rev 1.0 ENGLISH During this operation, the display will appear as in the following picture: SET DUCTING 2 (Speed of ducted air fan for zone 2) SET DUCTING 1 (Speed of ducted air fan for zone 1) Modifying the temperature Setting for ducted rooms See the chapter on “THE MENU”... -
Page 22: Alarm Signals
Every alarm causes the appliance to switch-off immediately. The alarm state is reached after the time set on Pr11 (set as default at 90”) and it can be reset by pressing button 3 for a while. In the event of a fault, contact the Klover Authorised technical assistance centre. -
Page 23: Cleaning And Maintenance
CS.A80.IST-1 / Rev 1.0 ENGLISH CLEANING AND MAINTENANCE Precautions before cleaning Before carrying out any cleaning or maintenance operations, make sure that: the appliance is off and has cooled down completely; the ash is completely cold. the ash vacuum device used for cleaning is suitable and its filter is in good condition. Before re-starting the appliance, re-install all previously removed components. -
Page 24: Non-Routine Cleaning
CS.A80.IST-1 / Rev 1.0 ENGLISH Use a suitable ash vacuum device to remove any ash deposited in the brazier (fig. 6) and around the brazier (fig. WARNING: use suitable ash vacuum devices equipped with a fine mesh filter in order to prevent ash from being blown into the room and to prevent damaging the vacuum cleaner. -
Page 25: Cleaning The Vermiculite
CS.A80.IST-1 / Rev 1.0 ENGLISH Remove the front panel below. To remove it, unscrew both screws (fig. 11 and 12). On AURA 100, AURA 120, REA 100, OMEGA and OMEGA PLUS the bottom front panel is fastened with a hinge and, therefore, does not need to be removed. -
Page 26: Cleaning The Ceramic Glass
You must periodically check the seals because the latter guarantee the air- and water-tightness of the appliance and its good functioning; if they are worn or damaged you need to be replace them immediately by contacting a Klover Authorised technical assistance centre. -
Page 27: Standard Warranty Conditions
(for example before tiling, installation of pilasters, or painting “Consumer Code”, where applicable. of the walls). Klover Srl is not liable for any costs incurred as a result of removal The Klover Warranty is limited to Italy. Klover Srl invites Consumers not based in... - Page 28 SAFETY DEVICES KEY: COMPONENT KEY: ALp = Fire door closing micro-switch M1 = Auger gearmotor ALt = Manual reset thermostat M2 = Brazier cleaning gearmotor ALf = Smoke pressure switch V = Primary air fan (excluding natural convection model) ALs = Pellet tank door closing micro-switch or V1 = Ducted air 1 fan (configured models only) fireplace guides micro-switch or primary air fan (natural convection model)
- Page 30 KLOVER SRL Via A. Volta, 8 37047 San Bonifacio (VR) P.IVA 02324280235 www.klover.it...
Need help?
Do you have a question about the AURA 80 PLUS and is the answer not in the manual?
Questions and answers