
Related Manuals for klover STYLE 140


Summary of Contents for klover STYLE 140
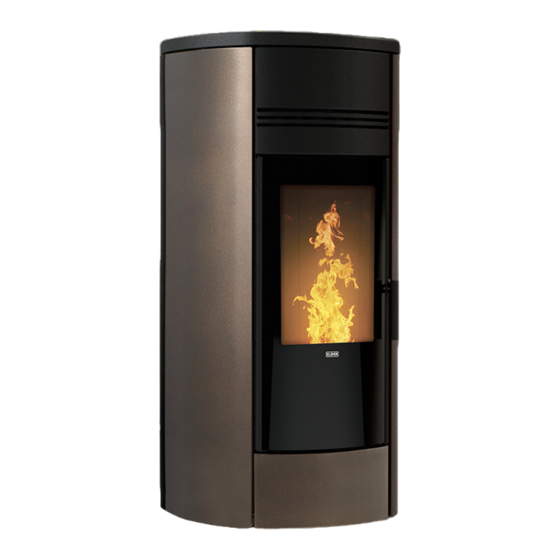
- Page 1 STYLE 140, ENGLISH STYLE 180, STYLE 220 pellet stove INSTALLATION, USE, MAINTENANCE AND HELPFUL TIPS...
-
Page 3: Table Of Contents
........................... 3 MPORTANT SAFETY INSTRUCTIONS THE MACHINE AND THE PELLETS ..........................4 ............................. 4 OMPONENTS OF THE APPLIANCE STYLE 140 ........................... 7 VERALL DIMENSIONS STYLE 180 / STYLE 220 ......................8 VERALL DIMENSIONS STYLE 140 ........................9 ONNECTIONS DATA SHEET FOR STYLE 180 / STYLE 220 .................... - Page 4 STANDARD WARRANTY CONDITIONS ......................... 46 Dear client, First of all we would like to thank you for choosing a “KLOVER” product and we hope you will be satisfied with this product. Carefully read the manual and warranty certificate on the last page of this User guide.
-
Page 5: Introduction
They will be responsible for the definitive installation of the appliance and its proper operation. KLOVER Srl shall not be held liable if these precautions are not observed. - During the installation and use of the appliance, all local regulations - including those referring to national and European Standards - must be observed. -
Page 6: The Machine And The Pellets
- This user guide constitutes an integral part of the appliance. If the product is sold to another user, this manual must be passed on to the new owner. KLOVER S.R.L. DECLINES ALL LIABILITY IN CASE OF ACCIDENTS DUE TO FAILURE TO COMPLY WITH THE SPECIFICATIONS OF THIS MANUAL. - Page 7 STYLE 140, STYLE 180, STYLE 220 PELLET STOVE EN - Rev. 1.2 The images below show certain details of the appliance: Hook for cleaning the front heat exchanger. REAR VIEW CE label with technical data, serial Opening number and model.
- Page 8 STYLE 140, STYLE 180, STYLE 220 PELLET STOVE EN - Rev. 1.2 LEFT SIDE VIEW Pellet tank. Flue pressure switch. Flue gas intake device. Overpressure valve. RIGHT SIDE VIEW Safety valve (2.5 bar). Automatic air vent valve (jolly). Pressure gauge.
-
Page 9: Overall Dimensions Style 140
STYLE 140, STYLE 180, STYLE 220 PELLET STOVE EN - Rev. 1.2 Overall dimensions STYLE 140... -
Page 10: Overall Dimensions Style 180 / Style 220
STYLE 140, STYLE 180, STYLE 220 PELLET STOVE EN - Rev. 1.2 Overall dimensions STYLE 180 / STYLE 220... -
Page 11: Connections Data Sheet For Style 140
STYLE 140, STYLE 180, STYLE 220 PELLET STOVE EN - Rev. 1.2 Connections data sheet for STYLE 140 REAR VIEW Description of connections M = System Delivery 3/4" M R = System Return 3/4" M X = Safety valve drain 1/2"... -
Page 12: Connections Data Sheet Style 180 / Style 220
STYLE 140, STYLE 180, STYLE 220 PELLET STOVE EN - Rev. 1.2 Connections data sheet STYLE 180 / STYLE 220 REAR VIEW Description of connections M = System Delivery 3/4" M R = System Return 3/4" M X = Safety valve drain 1/2"... -
Page 13: Technical Specifications Style 140
STYLE 140, STYLE 180, STYLE 220 PELLET STOVE EN - Rev. 1.2 Technical specifications STYLE 140 Heat input (nominal setting) kW (Kcal/h) 17,7 (15.220) Heat input (reduced setting) kW (Kcal/h) 5,9 (5.091) Nominal thermal output kW (Kcal/h) 17,0 (14.620) Reduced thermal power kW (Kcal/h) 5,8 (4.945) -
Page 14: Technical Specifications Style 180
STYLE 140, STYLE 180, STYLE 220 PELLET STOVE EN - Rev. 1.2 Technical specifications STYLE 180 Heat input (nominal setting) kW (Kcal/h) 23.4 (20,120) Heat input (reduced setting) kW (Kcal/h) 7.4 (6,370) Nominal thermal output kW (Kcal/h) 22.3 (19,170) Reduced thermal power kW (Kcal/h) 7.2 (6,190) -
Page 15: Pellet Properties
STYLE 140, STYLE 180, STYLE 220 PELLET STOVE EN - Rev. 1.2 Pellet properties The appliance has been tested with all types of pellets available on the market. The pellets must have the following properties: - Diameter 6 mm. - Maximum length 35 mm. -
Page 16: Spaces Around And Above The Appliance
STYLE 140, STYLE 180, STYLE 220 PELLET STOVE EN - Rev. 1.2 The unit must be installed on a floor with a suitable load capacity. If the existing building does not fulfil this requirement appropriate measures (e.g. load distribution plate) must be taken. -
Page 17: The Flue And Connection To The Same
STYLE 140, STYLE 180, STYLE 220 PELLET STOVE EN - Rev. 1.2 If there are other heating or extraction devices inside the room, the air vents must guarantee a sufficient amount of air for properly operating all the devices. Only sealed appliances (e.g. C type gas appliances, according to the UNI 7129 Standard) or appliances that do not cause a lower pressure compared with the external environment can pre-exist or be installed in the place where the appliance is installed. -
Page 18: Chimney
STYLE 140, STYLE 180, STYLE 220 PELLET STOVE EN - Rev. 1.2 - It is forbidden to allow other air intake conduits and system pipes to transit inside the flue gas pipes, even if they are over-sized. FURTHER SPECIFICATIONS TO BE CONSIDERED - The appliance works with the combustion chamber in depression and the flue pipe in pressure;... -
Page 19: Electrical Connection
Do not pass electric cables in the immediate vicinity of the flue gas pipe, unless they are insulated with suitable materials. KLOVER Srl declines all responsibility for injury to persons and animals or damage to objects due to failure to connect the appliance to earth or to comply with IEC specifications. -
Page 20: Control Of A Possible Three-Way Motorized Valve For Dhw System Management
STYLE 140, STYLE 180, STYLE 220 PELLET STOVE EN - Rev. 1.2 BROWN COUPLED BOILER R.T. PUMP CONTACT BLUE Control of a possible three-way motorized valve for DHW system management The pellet appliance is equipped as standard with a control for a possible 3-way motorised valve to be installed on the domestic water circuit based on the selected system type (see “System... -
Page 21: Hydraulic Connection
STYLE 140, STYLE 180, STYLE 220 PELLET STOVE EN - Rev. 1.2 HYDRAULIC CONNECTION The plumbing connections must be made in a rational way using the connections on the template of the appliance. The appliance can be coupled with any other boiler already installed on the system. In this case it is essential to fit all the necessary safety devices and shut-off valves based on the system and intended use. -
Page 22: The Display
STYLE 140, STYLE 180, STYLE 220 PELLET STOVE EN - Rev. 1.2 THE DISPLAY The appliance's operating mode is displayed on the console. After turning on the menu, it is possible to choose from many types of display and available settings according to the selected menu. - Page 23 STYLE 140, STYLE 180, STYLE 220 PELLET STOVE EN - Rev. 1.2 The meanings of the status signals appearing on the top right side of the display are described below (2nd LED SERIES). - LED 1: the LED lights up when the daily programme of the on off settings is active.
-
Page 24: The Menu
STYLE 140, STYLE 180, STYLE 220 PELLET STOVE EN - Rev. 1.2 Switches the appliance on and/or off when pressed Working.. for 2 seconds. ON/OFF In alarm block.. Releases the alarm. Outlet Moves you to the previous menu level, saving the Menu/programming mode.. - Page 25 STYLE 140, STYLE 180, STYLE 220 PELLET STOVE EN - Rev. 1.2 Submenu 03 – 02 – daily program Allows you to enable, disable and set the programmable thermostat daily programme functions. Two operating time slots can be set according to the following table, where OFF signals the clock to ignore the...
- Page 26 STYLE 140, STYLE 180, STYLE 220 PELLET STOVE EN - Rev. 1.2 PROGRAMME 4 MENU LEVEL SELECTION MEANING POSSIBLE VALUES 03 – 03 – 29 START PROG 4 Turn-on time of the fourth programme Time – OFF 03 – 03 – 30...
- Page 27 By reducing the value by a single unit, the flue gas extractor speed (and therefore the flow of combustion air) is reduced by about 3%. * Unauthorised access can cause serious damage to equipment, objects and the environment, as well as personal injuries. Klover declines all responsibility deriving from improper calibration of these values.
-
Page 28: Initial Start-Up
STYLE 140, STYLE 180, STYLE 220 PELLET STOVE EN - Rev. 1.2 INITIAL START-UP System configuration Before commissioning the appliance it is advisable to choose which type of system it has been connected to, by accessing “Menu 06 – System type”. - Page 29 STYLE 140, STYLE 180, STYLE 220 PELLET STOVE EN - Rev. 1.2 T.A. Bollitore cylinder accumulo Plumbing layout 3 involves connecting the boiler stove to a heating system managed by one or more room thermostats. These are connected to the terminal located inside the appliance’s left technical compartment. DHW will be generated by means of a hot water cylinder fitted outside of the boiler and controlled by a temperature probe connected to the appliance.
-
Page 30: Initial Filling Of The System
STYLE 140, STYLE 180, STYLE 220 PELLET STOVE EN - Rev. 1.2 Plumbing layout 4 involves connecting the boiler to a centralised puffer controlled by a temperature probe connected to the appliance. The boiler stove will therefore operate only at the set temperature of the centralised puffer (“SET PUFFER”... -
Page 31: Switch-Off Cycle
STYLE 140, STYLE 180, STYLE 220 PELLET STOVE EN - Rev. 1.2 Summary: The ignition cycle can last 20/25 minutes max. and is divided into five steps: Step 1 - START = Flue gas intake device switches on and automatic brazier cleaning. -
Page 32: Changing The Air Fan Speed
STYLE 140, STYLE 180, STYLE 220 PELLET STOVE EN - Rev. 1.2 After setting the desired value, press button 4 or wait a few seconds to confirm. During the working mode the appliance enters “Economy mode operation” when that temperature value is reached. -
Page 33: Problems, Alarms, Useful Tips
STYLE 140, STYLE 180, STYLE 220 PELLET STOVE EN - Rev. 1.2 PROBLEMS, ALARMS, USEFUL TIPS Useful info… Listed below is some important information regarding the appliance: - It is normal for the appliance to emit a smell of paint during its first few days of operation. We recommend properly ventilating the installation room during the initial start-up. -
Page 34: Alarm Signals
STYLE 140, STYLE 180, STYLE 220 PELLET STOVE EN - Rev. 1.2 If the outage lasts longer than Pr48, when power is restored, the appliance will enter the “STOP FIRE” (stand-by) mode running the entire switch-off cycle until cooling. When this phase is over, the appliance can be restarted resuming work at the set power. -
Page 35: Cleaning And Maintenance
STYLE 140, STYLE 180, STYLE 220 PELLET STOVE EN - Rev. 1.2 CLEANING AND MAINTENANCE Precautions before cleaning Before carrying out any cleaning or maintenance operations, make sure that: - the appliance is off and has cooled down completely; - the ash is completely cold. -
Page 36: Non-Routine Cleaning
STYLE 140, STYLE 180, STYLE 220 PELLET STOVE EN - Rev. 1.2 After having removed the upper collar of the brazier (Figure 3), thoroughly clean the bottom of the brazier to eliminate any residues. Use a suitable ash vacuum device to remove any ash deposited around the brazier... - Page 37 STYLE 140, STYLE 180, STYLE 220 PELLET STOVE EN - Rev. 1.2 After removing the underlying front panel (Figure 7), remove the cover of the inspection port by loosening the two screws (Figure Then, vacuum the residues inside the inspected compartment (Figure After completing this operation, put the previously removed components back in place.
-
Page 38: Annual Cleaning
STYLE 140, STYLE 180, STYLE 220 PELLET STOVE EN - Rev. 1.2 Annual cleaning The annual cleaning of the appliance must be done at least once a year so as to always guarantee efficient performance and optimal operation. To complete these operations, we recommend contacting the Authorised Technical Assistance Centre, which will proceed as explained below: Perform routine and extraordinary cleaning;... -
Page 39: Cleaning The Ceramic Glass
STYLE 140, STYLE 180, STYLE 220 PELLET STOVE EN - Rev. 1.2 Unscrew the four hex-headed screws, following the sequence given in the photo (Figure 15). Then, unscrew the two knobs and washers (Figure 16). Remove the upper cap (Figure... -
Page 40: Cleaning The Flue
You must periodically check the seals because the latter guarantee the air- and water-tightness of the appliance and its good functioning; if they are worn or damaged you need to be replace them immediately by contacting a Klover Authorised technical assistance centre. -
Page 41: Pcb Parameters
The following parameters are already stored during the testing of the appliance directly in the factory; these parameters are the result of special tests using several types of pellets and must not be changed without the authorisation of Klover srl so as not to impair the operation of the appliance. - Page 42 STYLE 140, STYLE 180, STYLE 220 PELLET STOVE EN - Rev. 1.2 Parameters “DEFAULT SETTINGS” - Mod. SL140 (N04_071119) Database Parameter Menu level Description Display Measurement Value field Pr01 M08 – 6 – 01 Ignition cycle maximum time IGNIT- MINUTES Minutes 5 –...
-
Page 43: Parameter Tables Style 180
STYLE 140, STYLE 180, STYLE 220 PELLET STOVE EN - Rev. 1.2 Parameter tables STYLE 180 Parameters “VARIOUS SETTINGS” - Mod. SL180 (N04_071119) Database Parameter Menu level Description Display Measurement Value field RE-IGNIT Pr38 M08 – 4 – 01 Re-ignition block Minutes 0 –... - Page 44 STYLE 140, STYLE 180, STYLE 220 PELLET STOVE EN - Rev. 1.2 Parameters “DEFAULT SETTINGS” - Mod. SL180 (N04_071119) Database Parameter Menu level Description Display Measurement Value field Pr01 M08 – 6 – 01 Ignition cycle maximum time IGNIT- MINUTES Minutes 5 –...
-
Page 45: Parameter Tables Style 220
STYLE 140, STYLE 180, STYLE 220 PELLET STOVE EN - Rev. 1.2 Parameter tables STYLE 220 Parameters “VARIOUS SETTINGS” - Mod. SL220 (N04_071119) Database Parameter Menu level Description Display Measurement Value field RE-IGNIT Pr38 M08 – 4 – 01 Re-ignition block Minutes 0 –... - Page 46 STYLE 140, STYLE 180, STYLE 220 PELLET STOVE EN - Rev. 1.2 Parameters “DEFAULT SETTINGS” - Mod. SL220 (N04_071119) Database Parameter Menu level Description Display Measurement Value field Pr01 M08 – 6 – 01 Ignition cycle maximum time IGNIT- MINUTES Minutes 5 –...
-
Page 47: Wiring Diagram
STYLE 140, STYLE 180, STYLE 220 PELLET STOVE EN - Rev. 1.2 WIRING DIAGRAM SCHEDA ESPANSIONE Q055 Q055 EXPANSION BOARD (OPZIONALE) (OPTIONAL) LEGENDA COMPONENTI: COMPONENT LEGEND: M1 = Motoriduttore coclea M1 = screw feeder gear motor M2 = Motoriduttore pulizia turbolatori... -
Page 48: Standard Warranty Conditions
The Klover Warranty will remain in effect for a period of 2 years from the date of purchase, if proven by a delivery note or other proof of purchase (e.g. receipt), stating the name of the seller, the product that was bought, and the date of purchase. - Page 49 Klover Products must undergo functional testing before any related masonry works are carried out (for example before tiling, installation of pilasters, or painting of the walls). Klover Srl is not liable for any costs incurred as a result of removal and/or reconstruction of related installations, or for any other ancillary intervention even if it is the result of works to replace defective parts.
- Page 50 STYLE 140, STYLE 180, STYLE 220 PELLET STOVE EN - Rev. 1.2...
- Page 51 STYLE 140, STYLE 180, STYLE 220 PELLET STOVE EN - Rev. 1.2...
- Page 52 Code CS.IST.SL-EN KLOVER Srl Via A. Volta, 8 37047 San Bonifacio (VR) VAT No. 02324280235 www.klover.it...
Need help?
Do you have a question about the STYLE 140 and is the answer not in the manual?
Questions and answers