Table of Contents

Related Manuals for Apex Digital CloudPower Series


Summary of Contents for Apex Digital CloudPower Series
- Page 1 CloudPower™️ Series CloudPower™️ Series REMOTE CONTROLLABLE CLASS-D INSTALLATION AMPLIFIERS REMOTE CONTROLLABLE CLASS-D INSTALLATION AMPLIFIERS O p e r a t i o n M a n u a l V 2 CP354 CP354D CP704 CP704D CP1504 CP1504D CP3004 CP3004D CP716D...
- Page 2 CloudPower™️ Series CloudPower™️ Series REMOTE CONTROLLABLE CLASS-D INSTALLATION AMPLIFIERS REMOTE CONTROLLABLE CLASS-D INSTALLATION AMPLIFIERS O p e r a t i o n M a n u a l V 2 F i r mwa r e ve r s i o n 1. 3 For any support related questions please contact: info@apex-audio.be Keep this manual and a record of the product serial number for future reference.
-
Page 3: Important Safety Instructions
Important Safety Instructions Important Safety Instructions The mains plug, the appliance coupler or the mains CAUTION: to reduce the risk of electric shock, do not switch is used as the disconnect device. Either device remove cover (or back). No user-serviceable parts shall remain readily operable when the apparatus is inside. - Page 4 Important Safety Instructions Cleaning, Maintenance and Servicing your local waste administration, waste collection company or dealer. Unplug the apparatus from the wall outlet before cleaning. Do not use liquid cleaners or aerosol cleaners. Use a damp cloth for cleaning. Do not attempt to service this product yourself, as opening or removing covers may expose you to dangerous voltage or other hazards.
-
Page 5: Table Of Contents
Table of Contents Table of Contents Important Safety Instructions Table of Contents Introduction Product Highlights APEX CloudPower Series Before You Get Started Front Panel Rear Panel Processing & Signal Flow Processing Details Output Operation 70/100V Presets Operation Interfaces Front Panel Operation... -
Page 6: Table Of Contents
Table of Contents IntelliCloud Web Interface Sidebar Menu | Network Devices GROUPS Edit Groups Assign Groups Gain Delay Settings Menu Device Name Global Preset Library Output Mode (70/100V, Bridge) Network Settings Hotspot Cloud Connect Login Credentials Streaming Services Spotify Apple AirPlay Firmware Update About Speaker Preset Creator... -
Page 7: Introduction
Introduction Dear Customer, Thank you for choosing the Apex CloudPower™️ for your sound reinforcement needs. The innovative CloudPower™️ series is a professional amplifier solution equipped with integrated DSP features and secure remote control capabilities via the cloud. With APEX IntelliCloud, you can conveniently manage your amplifiers remotely from your office environment. -
Page 8: Product Highlights
Product Highlights Product Highlights • Class D, DC coupled amplifiers • All models can directly drive low impedance or 70/100V loudspeakers • Intuitive IntelliCloud web interface • Remote management from anywhere in the world • Built-in Wi-Fi Hotspot for access without network connectivity •... -
Page 9: Apex Cloudpower Series
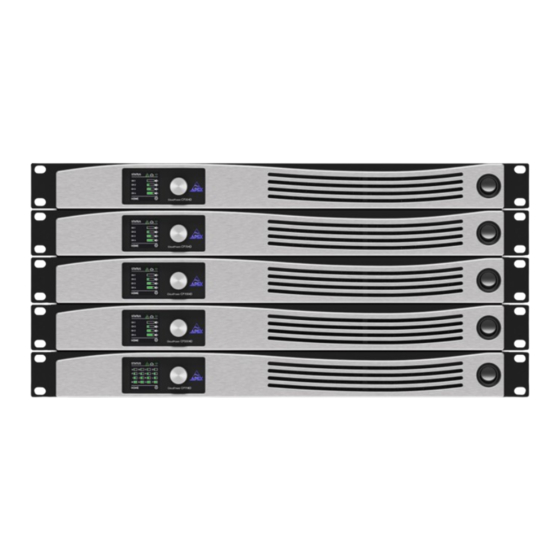
CloudPower™ Series APEX CloudPower™ Series CP354 4 x 350W CP354D 4 x 350W with 4x4 Dante™ CP704 4 x 700W CP704D 4 x 700W with 4x4 Dante™ CP1504 4 x 1500W CP1504D 4 x 1500W with 4x4 Dante™ CP3004 4 x 3000W CP3004D 4 x 3000W with 4x4 Dante™... -
Page 10: Before You Get Started
Before You Get Started Before You Get Started Power Requirements Before you connect any unit to the mains, please make sure that the voltage of your local AC supply is About this Manual within the acceptable range of the unit. Carefully read all instructions and warnings before The Apex CloudPower™... -
Page 11: Front Panel
Front Panel Front Panel Front Panel The front panel features a modern and intuitive design, with a daylight-viewable color OLED display a single rotary encoder for front-panel operation, a physical power switch and ventilation vents. All in- corporated within a compact 1U 19” rack frame, ensuring both functionality and space efficiency. Rotary Encoder for menu navigation and data entry. -
Page 12: Rear Panel
Rear Panel Rear Panel Rear Panel CP354D - 4 channel CP716D - 16 channel IEC connectors accept worldwide operation Balanced analog line inputs are available from 100-240Vac. CloudPower™️ must be on terminal block connectors with clearly marked hot (+), cold (-) and ground terminals. grounded (earthed) with the safety ground pin to the mains distribution system. - Page 13 Rear Panel Terminal block connector for REMOTE applications, EN-54 ready. Standby If you connect the two STBY pins, the amplifier will go into standby. The pins must be connected potential free. You may not apply voltage to them. RELAY Relay If the amplifier is turned off or if a fault is detected, the connection between C (center) and NC (normally closed) is established.
-
Page 14: Processing & Signal Flow
Processing & Signal Flow Processing & Signal Flow Processing & Signal Flow The CloudPower™️ offers DSP processing in three stages. Speaker specific processing can be provided by a manufacturer and loaded onto a channel using a SPEAKER PRESET. Additionally, users can apply two layers of processing: first, through the USER controls, affecting individual channels, and second, through six GROUP controls, which can affect multiple channels simultaneously. - Page 15 Processing & Signal Flow SPEAKER PRESET Processing Features SPEAKER PRESET Processing Features SPEAKER PRESETS are channel-based features that can be loaded onto individual channels using preset files that can be made in the preset creator or provided by OEM manufacturers. The user doesn’t have direct access to these controls but can choose to load or clear the speaker preset from a channel.
-
Page 16: Processing Details
Details Processing Details Processing Details Delay from input to output Min: 1 ms caused by latency, even with all processing features enabled (exept for delay). Max: 1 ms latency + 250 ms user/group delay + 30 ms speaker preset delay = 281 ms in total. Max PEQ bands per channel 12 user bands + 6 x 12 group bands + 12 speaker preset bands = 96 PEQ bands in total. -
Page 17: Operation Interfaces
Operation Interfaces Operation Interfaces Operation Interfaces A CloudPower™️ device can be controlled through either of the following interfaces: IntelliCloud Web Interface The web interface serves as the primary method of operating the amplifier and can be accessed in the following ways: »... -
Page 18: Front Panel Operation
Front Panel Operation Front Panel Operation Front Panel Operation While the CloudPower™️ is primarily designed for use with its intuitive IntelliCloud web interface, the front panel provides a secondary method of controlling the amplifier’s most important features without the need for network connectivity. It grants access to the amplifier’s IP configuration and allows adjustment of most audio settings. -
Page 19: Homepage
Front Panel Operation Homepage The homepage displays the most important statuses of the amplifier, including the output level and mute status of all channels, along with the status of the network features. display the current status of the network, cloudconnect and STATUS ICONS hotspot respectively. -
Page 20: Settings
Front Panel Operation Settings Menu The settings menu provides access to the audio processing features, global and speaker presets, and network features. Turning the encoder will highlight the selected submenu. To enter the submenu, press the rotary encoder. Select and press the return icon to navigate back one level in the menu and return to the hompage. -
Page 21: Mixer Matrix
Front Panel Operation Settings / Audio / Mixer Matrix Each of the CloudPower™️ channels has its own mixer matrix, allowing you to create a custom mix of input signals for every channel. You can access the mixing matrix through the front panel by navigating to Settings >... -
Page 22: Delay
Front Panel Operation Settings / Audio / Delay Each output channel of the CloudPower™️ can have a delay of up to 250 ms inserted by the user. Note: the total delay of 250 ms per channel is shared between the user delay and group delay. You can access the user delay function through the front panel by navigating to Settings >... -
Page 23: X-Over
Front Panel Operation Settings / Audio / X-Over The CloudPower™️ provides a crossover with both a high-pass filter (HPF) and low-pass filter (LPF) for every channel. You can access this function through the front panel by navigating to Settings > Audio > X-Over. -
Page 24: Limiter
Front Panel Operation Settings / Audio / Limiter Each of the CloudPower™️ channels can potentially have four active limiters, two of which are the user RMS and Peak limiters. They are accessible from the front panel via Settings > Audio > Lim. The user can choose to manually set the limiters or have the CloudPower™️... -
Page 25: Presets
Front Panel Operation Settings / Presets Menu The CloudPower™️ amplifier features two types of preset libraries: Global and Speaker Presets. For further details, please refer to pages 16, 52 (global) and 59 (speaker) in this manual. Access the Global and Speaker Presets from the front panel via Settings > Presets. The initial Presets submenu allows you to access either the global or speaker preset library. -
Page 26: Hotspot
Front Panel Operation Settings / Hotspot Each CloudPower™️ amplifier features a Hotspot, enabling users to control the amplifier using any mobile device (smartphone, tablet, or laptop) without needing access to the local network to which the amplifier is connected through its port. -
Page 27: Cloud
Front Panel Operation Settings / Network The Network menu gives access to the IP setting of the CloudPower™️ which can be set from the front panel by navigating to Settings > Network. Connect via a router Connect the CloudPower™️ device’s connector together with a PC to a router. -
Page 28: Notes On Networking
Notes On Networking Notes on Networking Providing that the network is properly configured, IntelliCloud is capable of automatically detecting and controlling any CloudPower™️ device connected to the network. Please refer to the IntelliCloud documentation for more details on controlling the CloudPower™️ remotely. Quick setup tip : •... - Page 29 Notes On Networking Going wireless Using wireless networks may be challenging, but the key to success is to use good quality rugged wireless access points and to configure them correctly. Configuring an access or router point is not that difficult. There is no requirement to install any software as the computer’s web browser is sufficient (all access points have a built-in web-server).
-
Page 30: Intellicloud Web Interface
IntelliCloud WebUI IntelliCloud Web Interface IntelliCloud Web Interface The primary mode of operating a CloudPower™️ amplifier is through the user-friendly IntelliCloud interface. This fully web-based software is hosted by the CloudPower™️ amplifier itslef and can be accessed by any device with a browser. This eliminates the requirement for any software installation, regardless of which operating system you are using. -
Page 31: Accessing The Web Ui
IntelliCloud WebUI Accessing the Web UI To access the IntelliCloud interface, you need to establish a connection between your device and the amplifier’s server. This can be accomplished using one of the methods outlined below. For more information, please refer to the Web UI / Settings / Network section of this manual. Via a LAN 1. -
Page 32: Login
IntelliCloud WebUI Login When connection has been established, the interface will prompt you for the login and password. By default, both are set to: admin You can change these credidentials via the web interface > Settings > Network • For optimal performance, we recommend using Google Chrome or Mozilla Firefox. •... -
Page 33: User Homepage
IntelliCloud WebUI Homepage | USER Processing After logging in, the Homepage will be displayed. This is where you have an overview of all the channels and can access the various submenus. USER The image below displays the homepage for the 4 channel models. The top section allows you to navigate submenus, mute and select channels. -
Page 34: Delay
IntelliCloud WebUI menu contains all channel-based processing options available to the user. The Mixer, USER PEQ, X-Over, Limiter, and Speaker menus pertain to individual channels; ensure you have the correct channel selected. The Gain and Delay menus display controls for all channels simultaneously. Gain Limiter Preset loaded on... -
Page 35: Mixer Matrix
IntelliCloud WebUI USER / Mixer Matrix The Mixer matrix enables users to route and blend input signals for each individual channel. Within its side menu, you can rename channels and access the internal signal generator. Select the channel you want to control Select the Mixer submenu All faders can be operated in five different ways: •... -
Page 36: Gain
IntelliCloud WebUI USER / Gain The Gain submenu show the master input faders for every channels. This is where you will control the volume for each amplifier output. Note: the gain values can be offset if the channel is assinged to a with gain settings other then unity (0.0 dB). - Page 37 IntelliCloud WebUI USER / Delay The Delay submenu enables users to set a delay time for each channel, ranging from 0 to 250 ms, with increments of 0.1 ms. The limit of 250 ms is shared between the delay. USER GROUP You do not have to select a channel, every channel’s delay control is visable from the same submenu.
- Page 38 IntelliCloud WebUI USER / PEQ The CloudPower™️ offers 12 bands of EQ per channel, with a wide variation of filter types to USER choose from. Select the channel you want to control Select the PEQ submenu Drag EQ nodes The ALL tab provides an overview of all 12 band settings The EQ bands can be set in multible ways: and allows control over the full PEQ.
- Page 39 IntelliCloud WebUI Tap a filter band for detailed control, which can be particularly useful when using tablets or phones. The tab will turn green when its filter is activated, and the selected tab will be outlined in blue. Use the three value boxes to enter the data by sliding the fader, clicking the - and + buttons for small increments or entering the data in the input filed.
- Page 40 IntelliCloud WebUI Both the PEQ and the X-Over charts offer features to enhance usability and provide feedback. The active nodes on the chart can be moved by dragging them with your finger or mouse. Lock horizontal movement of the notes in order to avoid changing the frequency.
- Page 41 IntelliCloud WebUI USER / X-Over The CloudPower™️ amplifier provides both a high-pass and a low-pass filters in its user interface. These filters offer a choice of 19 different classic X-over filter types, including Bessel, Butterworth, and Linkwitz Riley, with slopes ranging from 6 to 48 dB/octave. Select the channel you want to control Select the X-Over submenu Drag filter nodes...
-
Page 42: Limiter
IntelliCloud WebUI USER / Limiter To protect the connected loudspeakers from damage, each CloudPower™️ channel is equipped with a dual-stage Limiter that includes an RMS stage which responds to the signal’s average power, and a Peak stage designed to react to fast signal spikes and transients. Select the channel you want to control Select the Limiter submenu The red meters show the selected channel’s RMS and Peak... - Page 43 IntelliCloud WebUI Clicking the calculator icon opens a window where you can calculate appropriate starting values for your limiter. This calculation is based on the impedance and the maximum output wattage of your speaker and the high-pass filter settings from the crossover menu. The frequency of the X-Over’s high-pass filter Enter the impedance and maximum peak wattage (HPF) is used to determine attack and release...
-
Page 44: Speaker Preset
IntelliCloud WebUI USER / Speaker Preset Library The CloudPower™️ provides a feature to load pre-made processing presets onto each channel, specifically designed to apply speaker-specific settings. These presets can be created using the speaker preset creator or can be supplied by speaker manufacturers. It’s important to note that a speaker preset doesn’t alter the parameters of the processing;... -
Page 45: Sidebar Menu | Network Devices
IntelliCloud WebUI Sidebar Menu | Network Devices The sidebar menu grands access to the network devices and the GROUP processing. Click the Sidebar button to exand it The sidebar displays the currently connected device as the “Local device,” and it lists other CloudPower™️ amplifiers in the network as “Network devices.”... -
Page 46: Groups
IntelliCloud WebUI Click to open the menu. GROUPS The amplifier’s custom name and IP adress. Click the info icon to display a popup window containing the amplifier details and its status. The model is also displayed in the CP Icon. Small versions of the output meters which turn red when a limiter is active, providing an overview of the output activity in the network. -
Page 47: Edit Groups
IntelliCloud WebUI Edit Groups The first thing you want to do is give your groups a custom name. This is done in the Edit Group menu. With the sidebar expanded, click Click on Edit Groups to access the page where you can to open the menu. -
Page 48: Assign Groups
IntelliCloud WebUI Assign Groups Next, you’ll want to assign the channels to one or multiple groups. You can easily do this using the routing matrix in the Group Assign menu. Click on Assign Groups to show the routing matrix. Click on the amplifier headers to show their channels in the matrix. The selected amplifiers header is blue. -
Page 49: Gain
IntelliCloud WebUI GROUP / Gain You are now ready to start using the processing. GROUP First in the chain is the Gain. Be sure to select the GROUP correct group at the bottom of the screen first. Click Gain to access the gain contols. Click the phase button to flip the Polarty of every channel in the group with 180°. -
Page 50: Peq
IntelliCloud WebUI GROUP / PEQ PEQ enables you to apply an additional layer of EQ processing to all the channels assigned GROUP to the group. If a single channel is assigned to multiple groups, it will undergo processing from all the PEQs of those groups. -
Page 51: Settings Menu
IntelliCloud WebUI Web UI / Settings Menu To access the CloudPower™️ settings menu, click on the gear icon located in the interface’s header. This will open a new page with various setting tabs. Click on the Gear icon in the interface’s header to open the settings menu. Web UI / Settings / Device Name In the Device Name tab, you have the option to assign a custom name to your amplifier. -
Page 52: Global Preset Library
IntelliCloud WebUI Web UI / Settings / Global Presets Library Global Preset files contains all audio DSP settings of every channels of the amplifier, including: parameters. USER GROUP SPEAKER PRESET They do not contain any other settings found in the settings menu such as: Output operation and configuration (100V HPF, bridge mode), network settings and streaming account details. -
Page 53: Output Mode (70/100V, Bridge)
IntelliCloud WebUI Web UI / Settings / Output Mode In the output window, you have the option to configure channel bridging for both A-B (1-2) and C-D (3- 4) on the 4-channel CP354 and CP704 models. When the bridge mode is enabled, refer to the diagram below for the correct wiring configuration of the output terminals. -
Page 54: Network Settings
IntelliCloud WebUI Web UI / Settings / Network In the network tab, you can access all network-related settings, including the device’s LAN, hotspot and cloud settings, and login credentials. The LAN section gives control over the amplifiers IP configuration. In DHCP mode, an IP address will be automatically displayed when a connection is established with the router. -
Page 55: Cloud Connect
IntelliCloud WebUI Every CloudPower™️ amplifier is equipped with a Cloud feature. This feature enables users to remotely manage the amplifier via the internet. To enable this, the CONTROL port (on the rear side of the amplifier) must be connected to a router with an internet connection. Using a secure connection, users can operate the amplifier and all other CloudPower™️... -
Page 56: Streaming Services
IntelliCloud WebUI Web UI / Settings / Stream Services CloudPower™️ is the first amplifier in its class with an integrated audio source and streaming capability, allowing easy streaming of background music from devices running apps such as Spotify or AirPlay. Please note it is not possible to stream Spotify and Airplay simultaneously. -
Page 57: Apple Airplay
IntelliCloud WebUI AirPlay streaming can be enabled and customized. Ensure that your mobile device is connected to the same network as your CloudPower™️ device. Airplay name This is the name that will be displayed on your devices. Password Optionally, you can set a password to prevent unauthorized individuals from connecting to the CloudPower. -
Page 58: Firmware Update
IntelliCloud WebUI Web UI / Settings / Firmware Update Updating the firmware can conveniently be done through the web interface. Firmware updates will be available when new features are implemented. Please note that you need to restart the amplifier manually to complete the process. To update the firmware: 1. -
Page 59: Speaker Preset Creator
IntelliCloud WebUI Speaker Preset Creator The web interface hosts its own Preset Creator software for designing speaker presets. To access this feature, simply add “/preset.html” after the IP address in the URL. For instance: http://192.168.0.10/preset.html Access to this preset creator page can be secured with an OEM code if necessary. The control interface operates similarly to the interfaces, with a few exceptions. -
Page 60: Speaker Preset Library
IntelliCloud WebUI After designing a preset, it can be stored in the speaker preset library and optionally protected with an OEM code. These presets can be included with the amplifier upon shipping or made available through a speaker manufacturer’s website. Click Manage New speaker presets can be saved in User Folders using the Save As Preset button. -
Page 61: Oem Configuration
IntelliCloud WebUI OEM Configuration To secure the speaker creator and avoid incorrect presets from being loaded, an OEM code can be set in the OEM Config window. To reach this page, add “/oem.html” after the IP address in the URL. For example: http://192.168.0.10/oem.html To set up an OEM configuration: •... -
Page 62: Application Examples
Application Examples Application Examples Application Examples In this bar example, the two rooms are each equipped with their own speaker system comprising of a bar zone with ceiling mount loudspeakers and a dancing area with a stereo set of full range loudspeakers. Each of the systems is able to play any of the selected analog sources. - Page 63 Application Examples In this restaurant example, the four rooms are each equipped with their own speaker system comprising of a bar zone with full range loudspeakers, a Karaoke area with a small PA system, a restaurant with ceiling loudspeakers and the rest rooms, also equipped with ceiling loudspeakers.
-
Page 64: Specifications
Specifications Specifications 4 Channel Models Specifications 4 Channel Models Operating conditions Temperature 0° to 50° C, 10 to 60 % non-condensing Storage temperature -20° to 70° C Safety / Compliance CE Certificate Amplification and power supply Amplification class Class D GlidePath technology Power supply model Universal switch mode power supplies with active PFC Power Factor... - Page 65 Specifications User processing functions per channel Gain: -80 to +15dB, 0,1dB steps Polarity: Normal / inverted Delay: 0 to 250 ms (Shared between User and Group settings) PEQ: 12 x PEQ. Each PEQ can be set to a choice of 16 filter types (1) HP/LP filters: Bessel , Butterworth and Linkwitz Riley with slopes from 6 to 48 dB/oct Limiter:...
- Page 66 Specifications Amplifier model CP354 / 354D CP704 / 704D CP1504 / 1504D CP3004 / 3004D Total burst power (all channels driven) 1400 2800 6000 12000 2 ohms (with correct limiter setup) 1500 3000 4 ohms 1500 3000 8 ohms 1500 2000 16 ohms 1000...
- Page 67 Specifications Specifications CP716D Specifications CP716D Operating conditions Temperature 0° to 50° C, 10 to 60 % non-condensing Storage temperature -20° to 70° C Safety / Compliance CE Certificate Amplification and power supply Amplification class Class D GlidePath technology Power supply model Universal switch mode power supplies with active PFC Power Factor >...
- Page 68 Specifications User processing functions per channel Gain: -80 to +15dB, 0,1dB steps Polarity: Normal / inverted Delay: 0 to 250 ms (Shared between User and Group settings) PEQ: 12 x PEQ. Each PEQ can be set to a choice of 16 filter types (1) HP/LP filters: Bessel , Butterworth and Linkwitz Riley with slopes from 6 to 48 dB/oct Limiter:...
- Page 69 Specifications Amplifier model CP716D Total burst power (all channels driven) 11200 2 ohms (with correct limiter setup) 4 ohms 8 ohms 16 ohms Hi-Z 70V Hi-Z 100V Max Output Power bridged mode 4 ohms 1200W 8 ohms 1400W 16 ohms 1000W Power and Thermal 115V Idle Power...
-
Page 70: Warranty
Warranty Limited Warranty Limited Warranty GiVa Audiovisual Technologies BV “Apex” warrants you, the original purchaser, or any party that purchases the device from you, that its products are free from defects in material and workmanship under normal use for a period of five (5) years from the date of original purchase. The date of purchase is the date which appears on the first invoice or any other proof of purchase provided by an Apex approved dealer.
Need help?
Do you have a question about the CloudPower Series and is the answer not in the manual?
Questions and answers