
Related Manuals for Apex Digital CloudPower Series


Summary of Contents for Apex Digital CloudPower Series
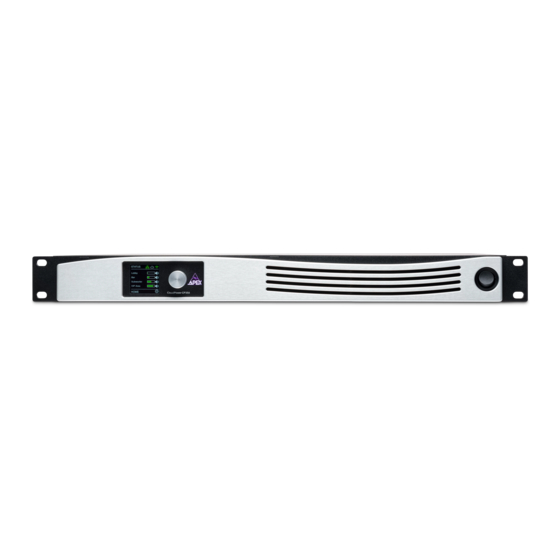
- Page 1 CloudPower Series 4 channel amplifier with DSP and remote control O p e r a t i o n M a n u a l V1.0 CP 354 CP 704 CP 1504 CP 3004...
- Page 2 CloudPower Series 4 channel amplifier with DSP and remote control Serial number of this product: © 1999 - 2021 GIVA BVBA All rights reserved. This manual may not be reproduced or transmitted, either in part or as a whole, by any means, be they mechanical or elec-...
-
Page 3: Important Safety Instructions
Important safety instructions Important safety instructions The mains plug, the appliance coupler or the mains CAUTION: to reduce the risk of electric shock, do not switch is used as the disconnect device. Either device remove cover (or back). No user-serviceable parts shall remain readily operable when the apparatus is inside. - Page 4 Cleaning, maintenance and servicing regulations including those governing the recovery and recycling of waste electrical and electronic Unplug the apparatus from the wall outlet before equipment. Contact your local waste administration, cleaning. Do not use liquid cleaners or aerosol waste collection company or dealer. cleaners.
-
Page 5: Table Of Contents
Table of contents Table of contents Important safety instructions Introduction Product highlights Foreword Before you get started About this manual Inspection and unpacking Operating environment Power requirements Installation Front and rear panel description Front panel Rear panel Signal Flow Presets Front panel operation Front panel homepage menu Settings menu... - Page 6 Stream services Firmware update About menu Application examples Specifications Limited waranty...
-
Page 7: Introduction
Introduction Dear customer Thank you for choosing the Apex CloudPower for your sound reinforcement needs. The all- new CloudPower series is a professional amplifier series with feature built-in DSP and remote control over the cloud – securely. Log in to APEX Cloud and remotely-manage your amplifi- ers from your office. -
Page 8: Before You Get Started
Before you get started About this manual Power requirements Carefully read all instructions and warnings before BEFORE you connect any unit to the mains, please operating this device. Keep this manual in a safe make sure that the voltage of your local AC supply place so that it can be referred to when required. -
Page 9: Front And Rear Panel Description
Front Panel Front panel The front panel design is very clean and intuitive, it contains only two hardware buttons and a daylight viewable colour OLED display. Daylight viewable colour OLED display. Function Icons Rotary control for menu navigation, data entry, etc. -
Page 10: Rear Panel
Rear Panel Rear panel Terminal block connector for remote applica- worldwide operation IEC connector accepts tions, EN-54 ready. from 100-240Vac. CloudPower must be grounded (earthed) with the safety ground pin to the mains distribution system. NEVER disconnect the earth (ground) pin on the If you connect the two standby pins to- mains cable (AC power cord). - Page 11 Rear Panel RJ-45 Ethernet connectors for optional digital audio network. Each optional Audio network card has two network ports; a primary and a secondary. When the device is connected to an active network, the yel- low LINK LED illuminates above the connector in use. Data activity on the network is indicated by illumination of the green ACT LED.
-
Page 12: Signal Flow
Signal Flow Signal Flow User Group Speaker User The User block contains the following controls: Input selector selection for primary and secondary input, analog or digital. ( Note digital is not possible as a secondary input when analog is primary) Mute Mute selector for each source Gain... - Page 13 Signal Flow Group Groups provide powerful control over all channels in a system. Amplifier channels can be assigned to mul- tiple Groups, and each amplifier channel can be a member of up to 6 different Groups. Adjusting group parameters will affect all amplifier channels across the network assigned to that group. Multiple Groups can be used to logically partition a large-scale system.
- Page 14 Signal Flow Speaker A speaker preset file contains one channel of loudspeaker setting information which can be recalled on an amplifier channel. The red properties below indicate the speaker preset parameters. The end user chooses a brand/type of loudspeaker in a list and doesn’t have to worry about the actual parameters. These speaker presets are created in the WebUI by the speaker OEM and can be uploaded and stored in the amplifier speaker preset folders.
-
Page 15: Presets
Presets Presets... -
Page 16: Front Panel Operation
Front panel operation Front panel operation Home page menu The homepage will indicate output level, IP status, cloud connection status, current preset or output name for each output channel and global preset loaded. The network symbol turns green when The cloud symbol turns green when a wired network is connected. -
Page 17: Settings Menu
Front panel operation Settings menu Pressing the encoder inwards will activate the selected settings submenu. Pressing will always return the menu up one level from every menu or sub menu. Audio Menu The Audio Menu is where the basic audio parameters and settings can be adjusted. The top page of the Audio Menu offers three further sub menus. -
Page 18: Audio Menu Source
Front panel operation Audio Menu / Source From the source sub menu, you can select the type of in- put for each amplifier channel. There are four input op- tions for each channel. Analog 1- 4, Stream L, Stream R, Network 1 - 4. -
Page 19: Presets Menu
Front panel operation Presets Menu The CloudPower amplifier has two types of preset libraries, global and speaker presets. A global pre- set file contains all audio DSP settings of the four channels of the amplifier.(User,group and preset set- tings) A speaker preset file contains one channel’s loudspeaker settings information which can be recalled and inserted on the amplifier channel. -
Page 20: Hotspot Menu
Front panel operation Hotspot Menu Every CloudPower amplifier has an Hotspot option. This allows the user to control the amplifier with any mobile device. (Smartphone, Tablet or laptop). The software of the CloudPower s web based, so there is no need for a software installation. From the frontpanel,turn the Hotspot option on and search for the amp in your device wifi networks. -
Page 21: Network Menu
Front panel operation The CloudPower amplifier can also be controlled in a wired network application. Connect the CloudPower device(s) Ethernet remote connector together with your PC to a router . The use of a router is mandatory in DHCP mode to obtain IP addresses. After a connection is established with the router, the CloudPower device will receive an IP address that will displayed in the network menu. -
Page 22: Notes On Network
Front panel operation Notes on Networking Providing that the network is properly configured, IntelliCloud is capable of automatically detecting and controlling any CloudPower device connected to the network. Please refer to the IntelliCloud documentation for more details on controlling the CloudPower remotely. Quick set up tip : •... -
Page 23: About Menu
Front panel operation Going wireless Using wireless networks may be challenging, but the key to success is to use good quality rugged wireless access points and configure them correctly. Configuring an access or router point is not that difficult. There is no requirement to install any software as the computer’s web browser is sufficient (all access points have a built-in web-server). -
Page 24: Apex Intellicloud
IntelliCloud Software Apex IntelliCloud Software Once your device is connected to the CloudPower the home screen will be displayed. Please note that on smart-phones and tablets the software will only work in landscape mode. Your device will display a warning when you hold it in portrait mode. Metering, channel select and mute function for the four amplifier channels together with the selected source are al- ways on top of the screen regardless of the chosen menu. -
Page 25: User Gain Menu
IntelliCloud Software Gain: opens a window where you can set gain and phase for any of the four inputs, regardless of what channel is selected. Gain can be set with the fader, keyboard arrows or by dialling in the desired level. -
Page 26: User Peq Menu
IntelliCloud Software The CloudPower has a very powerful EQ section. Each amplifier channel can be processed by a total of 96 EQ filters.(12 filters in the user block, 72 in the group section and 12 in the speaker block). On top of that there is a FIR filter option available in the speaker block. - Page 27 IntelliCloud Software To avoid accidental guesture operations in touch mode, there are three “Drag Locking” options. *Locks the gain setting for the selected filter. *Locks the gain setting for the selected filter. Locks the freq setting when using a touch screen. The overview screen has different view options in the PEQ window Tap the View options icon to open the PEQ view options panel...
- Page 28 IntelliCloud Software The PEQ view window uses different line and colours to indicate in an intuitive way what filters are active and which filter is in edit mode. The blue line indicates the active EQ curve of the PEQ Filter that is in edit mode.
-
Page 29: User X-Over Menu
IntelliCloud Software The CloudPower amplifier offers 19 different types of classic X-over filters :Bessel , Butterworth and Linkwitz Riley with slopes from 6 to 48 dB/oct in the user block. From the Home page tap the X-Over tab to access the X-Over main page. Tap the filter symbol to open the filter window. - Page 30 IntelliCloud Software The overview screen has different view options in the X-Over window Tap the View options icon to open the PEQ view options panel The X-over view window uses different line and colours to indi- cate in an intuitive way what filters are active and which filter is in edit mode.
-
Page 31: User Limiter Menu
IntelliCloud Software Limiter: opens a window where you can adjust the limiter parameters for the selected output chan- nel. To fully protect loudspeakers from damage, each output is provided with a two-stage limiter. One stage responds to the RMS level of the signal, the other is a very fast-acting limiter responding to signal peaks. -
Page 32: Speaker Preset Menu
From the speaker preset page you can recall all the protected speaker preset files that are created from the IntelliCloud speaker creator webui or those supplied from brand manufacturers. The preset file will be loaded in the selected channel. When the desired preset file is selected, and after pressing the Load button, a pop up will appear to avoid accidental preset loading. -
Page 33: Group Menu
IntelliCloud Software Groups provide powerful control over all channels in a system. Amplifier channels can be assigned to mul- tiple groups, and each amplifier channel can be a member of up to six different groups. Adjusting group parameters will affect all amplifier channels across the network assigned to that group. Multiple Groups can be used to logically partition a large-scale system. - Page 34 IntelliCloud Software Tap the edit Group tab to edit names for the six groups Toggle the arrow to open Selecting the Assign Group or close the group assign tab will open or close the As- view for one or all amps in sign Group window.
-
Page 35: Group Gain Menu
IntelliCloud Software Gain: opens a window where you can set gain and phase for the selected group. Values can be set with the fader, keyboard arrows or by dialling in the desired level. Gain range can be set from -80 to +15 dB. Group gain is a relative value that will add or detract gain from the amplifier channel that is part of the group. -
Page 36: Group Peq Menu
IntelliCloud Software PEQ: opens a window where you can select twelve PEQ filters, for each of the selected group, with the same functionality as for the User PEQ menu (See section User EQ Menu on page 28). The group PEQ filters are on top of the User PEQ. Select one of the six groups to edit with these tabs. -
Page 37: Settings Menu
IntelliCloud Software A tab on the settings wheel Icon will bring you to all the available settings for the selected device. The Global Device Audio Preset menu gives access to the global preset folders and files. A Global audio preset file contains all audio DSP settings of the four channels of the amplifier;... -
Page 38: Device Status
IntelliCloud Software The Status sub menu gives some technical informa- tion about the status of the amplifier. All the network settings are concentrated in this window. The cloudpower can be accessed in three different ways as described in the frontpanel part on pages 20 and 21. default setting CloudPower... -
Page 39: Network Menu
IntelliCloud Software Every CloudPower device has its own Hot- After a connection is estab- spot. In this menu you lished to the hotspot, dial in the can give the device its IP address “172.24.0.1” in your own unique Hotspot browser and the login page of name, along with a the IntelliCloud will pop up. - Page 40 IntelliCloud Software From this menu Spotify and Airplay streaming services can be activated and personalized. Make sure that your mobile device is on the same network as your CloudPower device. A unique spotify device name can be entered here. It will appear un- Restaurant der your device list in the spotify device list on your mobile device.
- Page 41 IntelliCloud Software The About menu only displays technical information about the device.
- Page 42 Application examples Dual amplifier example with analog and digital inputs In this restaurant example, the four rooms are equipped with their own speaker system comprising of a bar zone with full range loudspeakers a concert area with a small PA system, a restaurant with ceiling loudspeakers and the rest rooms, also equipped with ceiling loudspeakers.
- Page 43 Application examples Single amplifier example with analog inputs In this bar example, the two rooms are equipped with their own speaker system comprising of a bar zone with ceiling mount loudspeakers and a dancing area with a stereo set of full range loudspeakers. Each of the systems is able to play any of the selected analog sources.
- Page 44 Application examples Dual amplifier example with Karaoke area In this restaurant example, the four rooms are equipped with their own speaker system comprising of a bar zone with full range loudspeakers a Karaoke area with a small PA system, a restaurant with ceiling loudspeakers and the rest rooms, also equipped with ceiling loudspeakers.
- Page 45 Application examples Large set up example with analog and digital inputs and remote cloud control In this museum example, all the zones are equipped with their own speaker and amplifier system. The CloudPower devices are connected to a central switch with standard network cabling.
- Page 46 Specifications specifications Output Power CP354: 4 x 350W @ 4ohm, 350W @ 8ohm, 280W @ 70V, 140W @ 100V CP704: 4 x 700W @ 4ohm, 500W @ 8ohm, 280W @ 70V, 140W @ 100V CP1504: 4 x 1500W @ 4ohm, 1500W @ 8ohm, 1500W @ 70V, 1500W @ 100V CP3004: 4 x 3000W @ 4ohm, 2000W @ 8ohm, 3000W @ 70V, 3000W @ 100V Inputs...
- Page 47 Mechanical Dimensions Unit Width: 483 mm Height: 44 mm Depth: 400 mm Package (Shipping) Width: 560 mm Height: 120 mm Depth: 560 mm Weight Unit (Nett): CP354: 5 kg, 11 Lbs CP704: 6 kg,13 Lbs CP1504: 8 kg, 17 Lbs CP3004: 10 kg, 22 Lbs Package (Shipping):...
- Page 48 Limited warranty GIVA BVBA (“Apex”) warrants you, the original purchaser, or any party that purchases the device from you, that its products are free from defects in material and workman- ship under normal use for a period of two (2) years from the date of original purchase. The date of purchase is the date which appears on the first invoice or any other proof of purchase provided by an Apex approved dealer.
Need help?
Do you have a question about the CloudPower Series and is the answer not in the manual?
Questions and answers