Table of Contents
Advertisement
Advertisement
Table of Contents

Related Manuals for Boca Systems LEMUR-S


Summary of Contents for Boca Systems LEMUR-S
- Page 1 LEMUR TICKET PRINTERS Operator’s Manual LEMUR-S LEMUR Rev C: 10.24.23...
- Page 2 Table of Contents Page FCC Notice & Warranty Information Important Safety Information Unpacking the printer Introduction Installation Media Supply Media Load Procedure Media Width Adjustment Configuration Standard Interface Pinouts Thermal Paper – Theory & Specifications 10.0 Maintenance and Adjustments 10.1 Paper Guide and Print Head Assembly 10.1.1 Black Mark Opto Sensor...
-
Page 3: Fcc Notice
FCC NOTICE NOTE: The equipment has been tested and found to comply with the limits for a class A digital device, pursuant to part 15 of the FCC rules. These limits are designed to provide reasonable protection against harmful interference when the equipment is operated in a commercial environment. This equipment generates, uses, and can radiate radio frequency energy and, if not installed and used in accordance with the instruction manual, may cause harmful interference to radio communications. -
Page 4: Important Safety Information
1.0 Important Safety Information WARNING: The appearance of this symbol indicates the proximity of an exposed high voltage area. Please follow all directions carefully for your personal safety. You must read the following safety information carefully before working on the printer. As a safety precaution, all service to the printer should be done by qualified persons with power off... -
Page 5: Unpacking The Printer
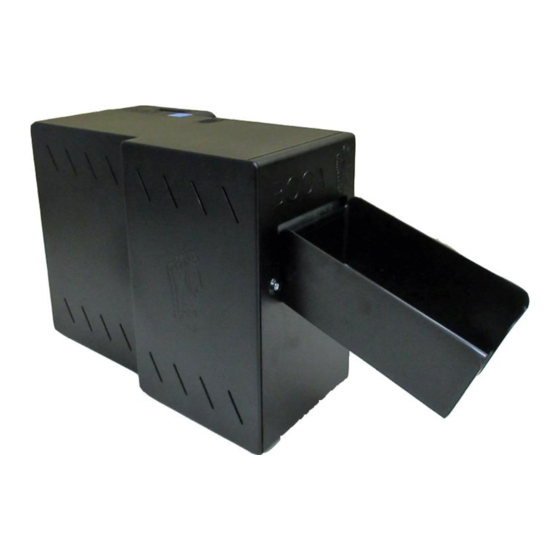
Hopper (if applicable) c) AC power cord d) Interface cable (optional) e) Mounting Plate (optional) Above photo is of a Lemur-S printer. Lemur-S with top insert removed. The shipping box and packaging material are specifically designed for your printer. - Page 6 The cover may be removed in the following manner. There is a locking tab that is located on Press down on the locking tab to unlock and slid cover back a little. top of the Lemur-S cover With two hands slide the cover completely off.
- Page 7 The cover may be installed in the following manner: 1. Partially install the cover onto the printer. 2. Ensure the cover is properly aligned with the cabinet. 3. Once aligned slide the cover until place until the locking tab locks. Locking Tab...
-
Page 8: Installation
Prior to site preparation and installation, the printer should be powered up and run in the self-test mode. • Lay the printer flat on a counter top. On a Lemur-S model printer you will need to remove the side cover. •... -
Page 9: Test Button
Lemur or Lemur-K • The LCD (is so equipped) will display PAPER OUT and the red CHECK PAPER led will be illuminated. You will hear the cutter motor cycle if the printer contains a cutter. CHECK PAPER RED LED • Begin loading tickets into the paper guide entrance slot with a smooth motion until the printer takes the media and automatically positions it. - Page 10 Above sample was printed on a 4” x 6” ticket using a 300dpi FGL protocol printer. Above sample was printed on a 2” x 5.5” ticket using a 200dpi FGL protocol printer. Above sample was printed on a 2” x 5.5” ticket using a 300dpi PCL protocol printer. Your printout may vary depending on printer configuration and ticket stock used.
-
Page 11: Media Supply
5.0 Media Supply The Lemur series printer has several basic requirements for dispensing the media to the printer from a fan-fold or roll media which include: • Align printer with media – The media fan-fold stack or must should align with the left side of printer (from where stock is loaded into the printer) to keep the media un-damaged and prevent ticket jams. - Page 12 ROLL STOCK MEDIA If the entrance of the media into the printer will fall below the red highlighted area shown above, then the highlighted yellow area should have a continuous physical barrier separating the media from coming in contact with the cabling, printer body, kiosk chassis seams, etc. Label or Wristband Media When feeding media into the printer the leading edge must be lying flat and not curled upwards.
-
Page 13: Media Load Procedure
6.0 Media Load Procedure 1. Turn the printer on and wait five seconds. The red CHECK PAPER led will be illuminated (if your printer has an optional LCD then it will display PAPER OUT). CHECK PAPER RED LED Begin loading the tickets through the entrance slot with a smooth motion until the ticket stock comes to a stop (at this point the stock is between the thermal head and platen). -
Page 14: Media Width Adjustment
6.1 Media Width Adjustment The below reviews how to adjust paper path of a Universal Paper Guide (UPG) printer for use with a different ticket width. Adjust the slider bar down to the proper ticket width, making sure the bar is not too tight against the ticket. - Page 15 7.0 Configuration Lemur series printer is factory configured for a variety of customer requirements. For a comparison of the different electronics packages, refer to the BOCA Systems website under the BASIC section. For a listing of configuration choices, refer to the BOCA Systems...
-
Page 16: Standard Interface Pinouts
8.0 Standard Interface Pinouts RJ12 Serial Connection +5VDC RJ12 Connector TYPICAL DB9 to RJ12 PIN CONNECTIONS 9 pin host BOCA RJ12 Transmit Receive USB USB 2.0 compliant devices. ETHERNET (Optional) is a standard RJ45 Ethernet cable connection. WI-FI (Optional) Support 802.11b/g/n Wi-Fi router. On dual-band router our printer needs be configured for the 2.4GHz band. -
Page 17: Specification
9.0 Thermal Paper - Theory & Specification Refer to the BOCA Systems website at www.bocasystems.com, THERMAL TICKETS section for the most current paper specifications. The print head’s life expectancy is composed of both a mechanical and an electrical component. Both of these factors are strongly influenced by the quality of the thermal paper used. -
Page 18: Maintenance And Adjustments
The most common adjustments and replacements regarding this assembly follow: Above is a Lemur Above is a Lemur-S – Routine maintenance should normally be done a minimum once a year. Printer Routine Maintenance may require increased maintenance due to usage and environmental conditions. - Page 19 10.1.1 Black Mark Opto Sensor There is an optical sensor (cut/ tear opto) mounted on white plastic rail that senses the black timing mark on the ticket stock. This sensor controls the cut or tear position of the media. The sensor may be on either side of the paper path depending on printer’s configuration.
- Page 20 10.1.2 Load Opto Sensor The load opto sensor is responsible for letting the printer know when it has media loaded into it in the printer. The sensor will be located towards near the platen rubber roller and may be on either side of the paper path depending on printer’s configuration.
-
Page 21: Thermal Print Head
10.1.3 Thermal Print Head The print head should be cleaned periodically to prevent debris from building up on the print element. The required cleaning interval varies greatly depending on the quality of the ticket stock and the amount of dust entering the print area. Excessive dirt buildup on the print head will result in reduced quality. - Page 22 7. Clean the thermal print head surface (the side that makes contact with the paper) with isopropyl alcohol & paper towel. Clean This Surface Mounting Plate Tab Mounting Plate Tab 8. Install the head mounting plate by reversing the above procedures. Make sure the print head mounting plate tabs are in the correct print cage slots.
- Page 23 10.1.4 Thermal Print Head Replacement Below reviews how to replace the thermal print head in your printer. Different type of print heads is used due to manufacture date, dots per inch (DPI) and size. A DPI of a printer may be determined by taking a look at the Width and DPI area of the printer’s serial number tag.
- Page 24 10.1.5 Platen The Platen (rubber drive roller) should be cleaned once a year to prevent paper dust from building up on the roller. (NOTE: The platen may require more frequent cleaning in dusty environments or when using inferior ticket stock.) The follow needs to be done with the printer powered off and unplugged from the AC source.
-
Page 25: Cutter Assembly
10.2 Cutter Assembly The BOCA cutter system is a fully integrated cutter knife mechanism powered by a stepper motor. The cutter requires no adjustments and is rated for approximately 750,000 cuts. Please be aware of the following: • Wait five seconds before feeding ticket stock into the printer after power up. During this time the cutter knife will move up and down. -
Page 26: Logic Board (Removal)
1. Gain access to the logic board. This is normally done by removing the electronics cover or rear access panel. a. Lemur & Lemur-K - Remove 4 Philip head screws. b. Lemur-S (plastic cabinet) – Remove 1 Philip head screw. Lemur Lemur-S 2. -
Page 27: Spare Parts List
Main Logic board – (RFID option & Ethernet) software ID of BR## FGLBR46-RFID-E Main Logic Board – Ethernet (600dpi print head) software ID of BR## FGLBR46-E-600 423952-B-20PT Cabinet, Lemur-S 424009-L Power Supply 24VDC (65W) 420880-CB-EXT Printer Mounting Plate (including 65W power supply) - Page 28 Cash Drawer serial Paper (optional) (optional) optional The same paper guide assembly is used in the Lemur, Lemur-K and Lemur-S model printers. Above is Lemur with optional cutter and LCD display 200 DPI Print Head (200L4) 300 DPI Print Head (300L4)
- Page 29 2C Print Head (200C3) Lemur-S Lemur or Lemur-K Vertical Cutter Horizontal Cutter...
- Page 30 Print Head Guide A DPI of a printer may be determined by taking a look at the DPI area of the printer’s serial number tag. The below chart should aid in determining the correct print head to order. Width Print head p/n Does not matter 300L4 Does not matter...
-
Page 31: Troubleshooting Guide
13.0 Troubleshooting Guide This is a simplified troubleshooting guide listing some of the typical problems. It is not intended to provide technical details or repair methods, but can serve as a guide to fault isolation in the field. As a safety precaution, all service to the printer should be done by qualified persons with power off and the AC... - Page 32 NO PRINT OUT a. Check for defective media. Try a differ stack of tickets. b. Check head cable for electrical connection at both ends c. Check to make sure head cable is plugged in properly into the thermal head. d. Perform routine maintenance (https://www.bocasystems.com/documents/LemurMaintenance.pdf e.
-
Page 33: Appendix A - Control Panel
APPENDIX A - CONTROL PANEL The FGL46 printers allow the user to adjust various printer options through the optional control panel. To access the control panel menu, press both MENU and TEST switches simultaneously for about 3 seconds. The LCD will display the “OPERATOR MENU!”... - Page 34 The following is a brief overview of some representative Menu options: BAUD RATE? Controls the serial interface baud rate, parity bit, data bits and stop bits. Here are the following choices: 1200,N,8,1 4800,N,8,1 19200,N,8,1 38400,E,7,1 1200,E,7,1 4800,E,7,1 19200,E,7,1 57600,N,8,1 1200,O,7,1 4800,O,7,1 19200,0,7,1 57600,E,7,1...
- Page 35 INC CUT1/2 COUNT? moves the cut/tear position to the left (towards the ticket entrance area). Cut counts are increments of .003” for 300dpi and .005” for 200dpi. Depressing CHOICES changes the count value. 16 is factory default. (1 is for path one; 2 is for path 2 [dual only).
- Page 36 BT RECONNECT? Enables the operator to change the reconnect mode setting. For iPad connection only. DISABLE Printer will NOT automatically attempt to restore a connection if it is dropped. default ENABLE Printer will automatically attempt to restore a connection if it is dropped. BT OPER MODE? Enables the operator to change the connection mode setting.
-
Page 37: Appendix B - Vertical Printer Installation
APPENDIX B - VERTICAL PRINTER INSTALLATION Prepare the counter top by cutting a rectangular hole in accordance with the dimensions specified for your printer model. NOTE: The table or counter top must be able to support at least four times the weight of the printer. Top view of standard 421421Z-P top plate If you are looking to make the cutout just big enough to fit the printer then we recommend making the cutout 0.50”... -
Page 38: Appendix E -Ethernet Parameters
APPENDIX E –ETHERNET PARAMETERS General Each Boca Ethernet Printer is assigned a unique MAC address based in part on the printer's serial number. All Boca printers are factory configured in DHCP enabled mode. (Exceptions may be made by special request.) If the printer is unable to get a dynamic IP address from the customer's network in the allotted time period (about four minutes), it will default to the 169.xxx.xxx.xxx address. - Page 39 Below shows the configuration page • If you are going to set a static IP address then you will need to change the ETHERNET setting to YES. Set IP address, Subnet Mask and Default Gateway to the values you want. •...
- Page 40 5. Continue steps 3 & 4 to program the desired IP address value. 6. At the end the display will show EXIT AND SAVE. Press the MENU button. 7. The display will show JUST EXIT. Press the MENU button. SUBNET MASK? will be shown on the display. Changing Subnet Mask address 1.
- Page 41 APPENDIX F – TESTING A LEMUR Boca Systems, Inc. has developed various program that allows customers to communicate from a host computer or mobile device to the printer. Below are the various configure and test programs we offer: WINDOWS: (Allow connection via Ethernet/ Wi-Fi, Parallel, Serial, USB-HID interfaces and print driver connection) https://www.bocasystems.com/documents/Testing%20a%20BOCA.pdf...
-
Page 42: Appendix G - Downloading Software Commands
APPENDIX G – DOWNLOADING SOFTWARE COMMANDS For those Lemurs model printers without LCD display the menu setting changes may be done by utilizing the software commands listed below. This is best done using the BOCA test program for Windows OR MAC (see Appendix F If needed, the printer may be defaulted back to its originally factory settings as follows. - Page 43 APPENDIX H – CHANGING SPECIAL HEAD SETTING For those Lemurs model printers without LCD display the special head setting changes may be done by utilizing the software commands listed below. This is best done using our configure and test program (see Appendix F If needed, the printer may be defaulted back to its originally factory settings as follows.
-
Page 44: Appendix I - Bluetooth Connection
APPENDIX I – BLUETOOTH CONNECTION If your printer is equipped with an optional Bluetooth interface port then you will see the following in the Interface 2 or Interface 3 field of the serial number tag. • BT+ - Printer is configured for Bluetooth Classic Mode. •... - Page 45 4. Once turned ON, a list of Bluetooth devices will be shown. Under AVAILABLE DEVICES you should see the serial number of the printer you are trying to pair to (Boca######) For example if your printer was serial number 523706 then you would see Boca523706.
- Page 46 4. Under DEVICES you should see the serial number of the printer you are trying to pair to (Boca######) For example if your printer was serial number 000000 then you would see Boca000000 Tap on printer you want to pair. 5.
- Page 47 Windows 11 Connection The below provides an overview of a Windows 11 connecting to a BOCA printer with optional Bluetooth interface. In your Windows Bluetooth device settings, set Bluetooth devices discovery setting from Default to Advanced. The below link reviews how to set Bluetooth to advanced setting. https://help.cricut.com/hc/en-us/articles/16511514972183-Windows-11-Bluetooth-Devices-Discovery- Issues#:~:text=Open%20open%20Bluetooth%20settings%20and,setting%20from%20Default%20to%20Advance When you do your search, you should now see Boca######.
- Page 48 The Bluetooth will need to be disabled if you choose to communicate to the printer via the USB port. This may be done as follows: 1. Depress both the MENU and TEST buttons while turning on the printer. Keep both buttons depressed unit OPERATOR MENU appears in the LCD window or the display starts scrolling through different topics.
-
Page 49: Appendix J - Configure Wi-Fi Connection
APPENDIX J – CONFIGURE WI-FI CONNECTION To use the wireless capabilities of a printer equipped with the optional 802.11b wireless interface (Wi-Fi), it will first be necessary to setup the printer with information and security settings that match the settings of the IEEE 802.11b compatible wireless server/router you are connecting to. - Page 50 5. You will need to enter the SSID value. The Service Set Identifier is a 1 to 32 byte string. This normally would be the name of the Wi-Fi router you are connection to. Please note the ID is case sensitive. Security Mode: you will need to choose the security mode that is appropriate for your WiFi router.
- Page 51 8. WEP Security Mode – Allows the user to communicate through the network using WEP wireless encryption. With WEP one can select 64 bit or 128-bit encryption. When the security encryption mode is chosen it will be required to enter the “Key” for the local wireless network. Please note the key is case sensitive. Some networks also enforce the use of a default transmit key.
- Page 52 The Wi-Fi will need to be disabled if you choose to communicate to the printer via the USB port. This may be done as follows: Depress both the MENU and CHOICES buttons while turning on the printer. Keep both buttons depressed unit FACTORY MENU appears in the LCD window or the display starts scrolling through different topics.
- Page 53 APPENDIX K – WINDOWS DRIVER INSTALLATION GUIDE Do not connect the printer to your computer’s USB port until instructed. Please contact your software provider to confirm if the use of our driver is required for their ticketing software. We recommend that the print driver is installed by either your system administrator or IT support staff.
-
Page 54: Appendix M - Adhesive Stock
APPENDIX M – ADHESIVE STOCK When using the adhesive label stock in your BOCA printer the below setting changes need to be made via the control panel to ensure proper operation of your printer. If your printer doesn’t have a LCD display then please see the bottom section of this document. - Page 55 APPENDIX N – SERVICE PLANS For enhanced warranty coverage or out of warranty printer, we offer two types of service plans. GOLD SERVICE • Printer repair at BOCA facility (3 business day turnaround) Replace defective parts (ship within one business day) – customer must return defective parts •...
-
Page 56: Appendix P - Reference Drawings
APPENDIX P – REFERENCE DRAWINGS...
Need help?
Do you have a question about the LEMUR-S and is the answer not in the manual?
Questions and answers
How do you fix a cutter failure on Lemur-S SN 454557?