Sign In
Upload
Download
Table of Contents
Contents
Add to my manuals
Delete from my manuals
Share
URL of this page:
HTML Link:
Bookmark this page
Add
Manual will be automatically added to "My Manuals"
Print this page
×
Bookmark added
×
Added to my manuals
Manuals
Brands
Omron Manuals
Industrial Equipment
FH-5550
Setup manual
Omron FH-5550 Setup Manual
Vision system
Hide thumbs
1
2
3
4
5
6
7
8
9
Table Of Contents
10
11
12
13
14
15
16
17
18
19
20
21
22
23
24
25
26
27
28
29
30
31
32
33
34
35
36
37
38
39
40
41
42
43
44
45
46
47
48
49
50
51
52
53
54
55
56
57
58
59
60
61
62
63
64
65
66
67
68
69
70
71
72
73
74
75
76
77
78
79
80
81
82
83
84
85
86
87
88
89
90
91
92
93
94
95
96
97
98
99
100
101
102
103
104
105
106
107
108
109
110
111
112
113
114
115
116
117
118
119
120
121
122
123
124
125
126
127
128
129
130
131
132
133
134
135
136
137
138
139
140
141
142
143
144
145
146
147
148
149
150
151
152
153
154
155
156
157
158
159
160
161
162
163
164
165
166
167
168
169
170
171
172
173
174
175
176
177
178
179
180
181
182
183
184
185
186
187
188
189
190
191
192
193
194
195
196
197
198
199
200
201
202
203
204
205
206
207
208
209
210
211
212
213
214
215
216
217
218
219
220
221
222
223
224
225
226
227
228
229
230
231
232
233
234
235
236
237
238
239
240
241
242
243
244
245
246
247
248
page
of
248
Go
/
248
Contents
Table of Contents
Bookmarks
Table of Contents
Intended Audience
Applicable Products
Relevant Manuals
Manual Structure
Page Structure
Special Information
Sections in this Manual
Table of Contents
Terms and Conditions Agreement
Warranty, Limitations of Liability
Application Considerations
Disclaimers
Safety Precautions
Symbols and the Meanings for Safety Precautions Described in this Manual
Meanings of Alert Symbols
Warning
Precautions for Safe Use
Condition of the Fitness of OMRON Products
Installation Environment
Power Supply and Wiring
Grounding
Others
Precautions for Correct Use
Installation and Storage Sites (FH-1000/2000/3000/5000 Series)
Installation and Storage Sites (FH-L Series)
Orientation of Product
Ambient Temperature
Noise Resistance
Component Installation and Handling
Maintenance
Communications with Upper Device
Failsafe Measures
Connecting the Sensor Controller and Monitor with a Switcher and Splitter
Regulations and Standards
All Series
FH-1000/2000/3000/5000 Series
FH-L Series
Related Manuals
Terminology
Sensor Controller
Revision History
Sensor Controller
FH-2£££/FH-3£££/FH-5£££ Series
10/FH-2£££-10/FH-3£££-10/FH-5£££-10 Series
FH-1£££-20/FH-2£££-20/FH-3£££-20/FH-5£££-20 Series
FH-L£££ Series
FH-L£££-10 Series
Sold Separately
FH Application Software
Cameras and Related
Monitor
Lighting and Lighting Controller
Accessories
Cable
Software
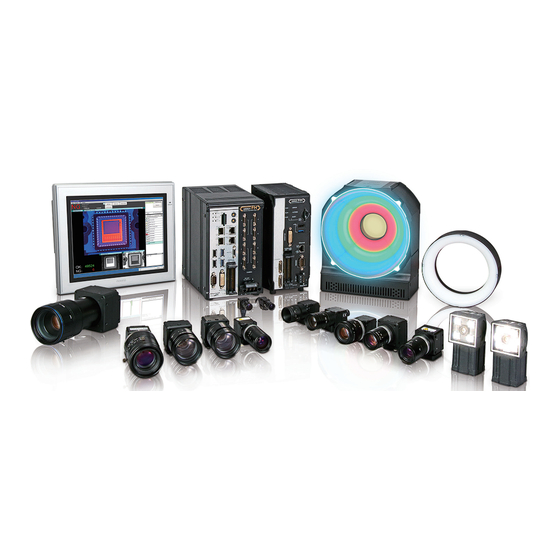
Overview of FH Series
Overview of System
Basic System of Measurement
FH-1000/FH-2000/FH-3000/FH-5000 Series
FH-L Series
System Configuration
FH-1000/2000/3000/5000 Series
FH-L Series
Flow of Use Procedure
Configuration
Sensor Controller
FH-1000/2000/3000/5000 Series
FH-L Series
Camera
High-Speed Digital CMOS Camera (FH-S Camera Series)
Digital CMOS Camera
Digital CCD Camera: FZ-S Camera Series
High-Speed Digital CCD Camera: FZ-SH Camera Series
Small Digital CCD Cameras: FZ-S Camera Series
Intelligent Compact Digital CMOS Camera: FZ-S Camera Series
Camera Cable
Camera Cable and Right-Angle Camera Cable
Bend Resistant Camera Cable and Bend Resistant Right-Angle Camera Cable
Bend Resistant Camera Cable and Bend Resistant Right-Angle Cam- Era Cable
Long-Distance Camera Cable and Long-Distance Right-Angle Camera Cable
Long-Distance Camera Cable and Long-Distance Right-Angle Cam- Era Cable
Cable Connection Table
Cable Extension Units
Lens
C-Mount Lens for 1/3-Inch Image Sensor (SV-V Series)
C-Mount Lens for 2/3-Inch Image Sensor (SV-H Series)
C-Mount Lens for 1-Inch Image Sensor (VS-H1 Series)
C-Mount Lens for 4/3-Inch Image Sensor (VS-LLD Series)
M42-Mount Lens for Large Image Sensor (VS-L/M42-10 Series)
Lenses for Small Camera (FZ-LES Series)
Vibration and Shock Resistant C-Mount Lens for 2/3-Inch Image Sensor (VS-MCA Series)
Vibration and Shock Resistant C-Mount Lens for 1-Inch Image Sensor (VS-MCH Series)
Vibration and Shock Resistant C-Mount Lens for 1-Inch Image Sen- Sor (VS-MCH Series)
Vibration and Shock Resistant C-Mount Lens for 1-Inch Image Sensor (VS-MCH1 Series)
Vibration and Shock Resistant C-Mount Lens for 1-Inch Image Sen- Sor (VS-MCH1 Series)
Vibration and Shock Resistant M42-Mount Lens for 1.8-Inch Image Sensor (VS-MCL/ M42-10 Series)
Vibration and Shock Resistant M42-Mount Lens for 1.8-Inch Image Sensor (VS-MCL/M42-10 Series)
High-Resolution Telecentric Lens for C-Mount Lens for 2/3-Inch Image Sensor (VS-TCH Series)
High-Resolution Telecentric Lens for C-Mount Lens for 1.1-Inch Image Sensor (VS-TEV Series)
High-Resolution Telecentric Lens for C-Mount Lens for 1.1-Inch IM- Age Sensor (VS-TEV Series)
Extension Tubes
Meaning of Optical Chart
Touch Panel Monitor and Cable
LCD and Cable
Sysmac Studio
Handling and Installation Environment
All Series
FH-1000/2000/3000 Series
FH-L Series
Setup and Wiring
When Turning on and off
All Series
FH-1000/2000/3000/5000 Series
Fail-Safe Measures
Sensor Controller Installation
All Series
FH-1000/2000/3000/5000 Series
FH-L Series
Setup Touch Panel Monitor or Monitor
All Series
FH-1000/2000/3000/5000 Series
FH-L Series
Camera Installation
All Series
FH-1000/2000/3000/5000 Series
FH-L Series
Insert/Remove SD Memory Card or USB Flash Drive
Common in All Series
Use by Connecting Software
Sysmac Studio FH Tool
FZ_FH Remote Operation Tool
Simulation Software
Installation in a Control Panel
All Series
FH-1000/2000/3000/5000 Series
FH-L Series
I/O Interface
Parallel Interface
All Series
FH-1000/2000/3000/5000 Series
FH-L Series
Other (Parallel Converter Cable)
Encoder Interface
FH-1000/2000/3000/5000 Series
Ethercat Interface
FH-1000/2000/3000/5000 Series
Ethernet Interface
FH-L Series
Serial Interface
All Series
Advertisement
Quick Links
1
Power Supply and Wiring
Download this manual
Vision Sensor
FH Series
Vision System
Hardware Setup Manual
FH-1£££/FH-1£££-££
FH-2£££/FH-2£££-££
FH-3£££/FH-3£££-££
FH-5£££/FH-5£££-££
FH-L£££/FH-L£££-££
Z366-E1-15
Table of
Contents
Previous
Page
Next
Page
1
2
3
4
5
Advertisement
Table of Contents
Need help?
Do you have a question about the FH-5550 and is the answer not in the manual?
Ask a question
Questions and answers
Related Manuals for Omron FH-5550
Accessories Omron FH-3 Series Reference Manual
Vision sensor fh/fz5 series (904 pages)
Controller Omron SYSMAC FH Series User Manual
Vision sensor vision system (882 pages)
Machine Vision Systems Omron SYSMAC FH Series User Manual
For communication settings (647 pages)
Machine Vision Systems Omron FH-1 series User Manual
(582 pages)
Machine Vision Systems Omron FH Series User Manual
Vision sensor (582 pages)
Machine Vision Systems Omron FH-1 series User Manual
Vision sensor fh series; fz5 series (384 pages)
Industrial Equipment Omron sysmac FH Series Hardware Setup Manual
Vision sensor (260 pages)
Accessories Omron fh series Hardware Manual
Vision sensor (254 pages)
Accessories Omron FHV7H-C004-H19-MC Hardware Setup Manual
Vision sensor (244 pages)
Accessories Omron Sysmac FH Series Hardware Setup Manual
Vision system (244 pages)
Industrial Equipment Omron Sysmac FH Series Operation Manual
Vision system, for sysmac studio (176 pages)
Robotics Omron FH Series Hardware Setup Manual
Vision system (122 pages)
Accessories Omron FH Series Connection Manual
Vision sensor (62 pages)
Accessories Omron FH Series Robot Connection Manual
Vision sensor (54 pages)
Machine Vision Systems Omron FH-L550 Series Manual
(34 pages)
Controller Omron FH-L550 Instruction Sheet
Image processing system (2 pages)
This manual is also suitable for:
Fh-2 series
Fh-3 series
Fh-5 series
Fh-l series
Fh-5050
Fh-1 series
...
Show all
Fh-5050-10
Fh-5550-10
Fh-5050-20
Fh-5550-20
Fh-2050
Fh-2050-10
Fh-2050-20
Fh-3050
Fh-3050-10
Fh-3050-20
Fh-1050
Fh-1050-10
Fh-1050-20
Fh-l550
Fh-l550-10
Table of Contents
Print
Rename the bookmark
Delete bookmark?
Delete from my manuals?
Login
Sign In
OR
Sign in with Facebook
Sign in with Google
Upload manual
Upload from disk
Upload from URL


Need help?
Do you have a question about the FH-5550 and is the answer not in the manual?
Questions and answers