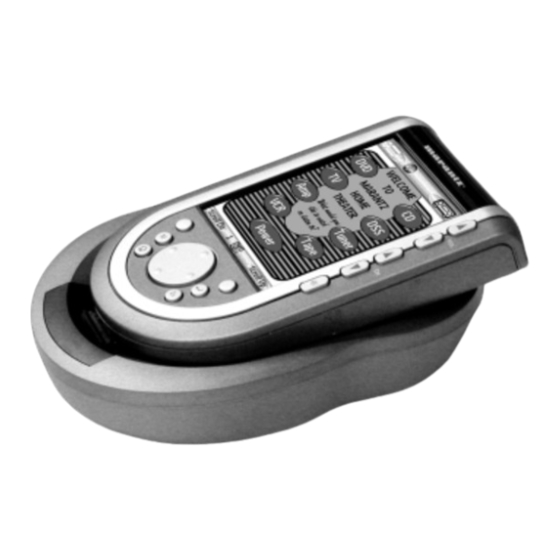
Marantz RC9200 User Manual
Touch screen remote controls
Hide thumbs
Also See for RC9200:
- User manual (69 pages) ,
- Full line catalog (36 pages) ,
- Service manual (34 pages)

Subscribe to Our Youtube Channel
Related Manuals for Marantz RC9200


Summary of Contents for Marantz RC9200
- Page 1 User Guide To the RC9200/RC5200 Touch Screen Remote Controls Automating Your Home Theater With Marantz...
- Page 2 RC9200/5200 Remote Control User Guide The information in this manual is copyright-protected. No part of this manual may be copied or reproduced in any form without prior written consent from Marantz America, Inc. MARANTZ AMERICA, INC. CORPORATION SHALL NOT BE LIABLE FOR OMIS- SIONS OR FOR TECHNICAL OR EDITORIAL ERRORS CONTAINED IN THIS MANUAL.
-
Page 3: Table Of Contents
Table of Contents Introduction 1. The Marantz RC9200/5200 2. Battery Getting Started 1. Activating the RC9200/5200 2. Navigating Control Panels 3. Operating a Device 4. Adjusting the Settings 5. The Mode Menus 6. Managing Memory Customizing Your RC9200/5200 1. Introduction 2. -
Page 4: Introduction
Introduction The Marantz RC9200/5200 The RC9200/5200 is designed to control most devices that understand infrared remote control signals. Its easy-to-use touchscreen and its intuiti- ve interface make it a perfect remote control for every user. The RC9200/5200 is completely customizable and programmable. You can add devices and functions, relabel buttons, record macros and animate your macros. -
Page 5: Battery
Introduction Tap the Scroll Arrows: to scroll to other panels within the active group. Tap the Device menu bar: Tap the Macro menu Bar: to operate devices. to use your one touch Tap again and a Macro buttons. Tap again menu of all your and a menu of all of your devices appears. - Page 6 Introduction Installing the Battery Pack 1 Press the latch on the battery cover and remove the battery cover from the Remote Control. 2 Place the battery pack in the battery compartment. 3 Plug the cable of the battery pack in the connector as illustrated. 4 Place the battery cover back on.
- Page 7 Recharge the Remote Control as soon as possible to ensure perfect performance. Note The RC9200/5200 retains all settings when the AA batteries have run out. You will only have to reset the clock. User Guide...
-
Page 8: Getting Started
Use Mode The RC9200/5200 has different modes. When you activate the RC9200/5200 for the first time, it starts up in Use mode allowing you to immediately operate your devices. In Use mode the menu bar at the top of the screen is visible . If a label (like ) covers the icon, just tap the label. -
Page 9: Navigating Control Panels
N avigating Control Panels Three Divisions of Control Panel Types Your RC9200/5200 is capable of displaying hundreds of different control screens. By grouping them into sensible divisions, it is easy to navigate to the control panel you want. The three main divisions... - Page 10 Note When you jump to a Device, the RC9200/5200 will change the input of your home theater receiver/preamp (using the pull down menus is exactly the same thing as pressing a Home button).
- Page 11 1 Jumps to the main panel of the Device Group. 2 Changes your home theater receiver/preamp to the appropriate input. See page 30 to program for a non-Marantz receiver/pre- amp. Jump to a Device Panel Group Without Changing Inputs 1 Pop up the Device menu, by tapping the Device Menu bar.
- Page 12 Getting Started Using the Scroll Arrows or the Left and Right Hard Buttons to Jump to Panels You can browse all of the panels within a Device or Macro group by using the scroll arrows at the top and bottom of the screen. When you are on the macro side, the arrows are on the left;...
- Page 13 All of your device groups have been programmed with one- touch jump buttons to all of the panels for that device. Simply touch the tab label and the RC9200/5200 will jump to the appropriate panel. 1. To view the TV s Effects 2.
-
Page 14: Operating A Device
Marantz receiver/preamp. Should you own another brand, see the programming instructions on page 31-32. Menu, 4 Way Arrows, Channel Up and Channel Down are typically programmed to chan- ge with the device selected. - Page 15 To exit INFO panel display: Tap the INFO button again. The Setup Panels Most of the RC9200/5200 s features can be set to your own wishes. 1 Tap the Mode button at the bottom of the screen 2 Choose SETUP.
- Page 16 Getting Started F i r s t s e t u p p a n e l S e t t i n g F u n c t i o n A d j u s t i n g LCD S l e e p S e t s h o w l o n g t h e t o u c h s c r e e n T a p t h e L C D b u t t o n a n d u s e...
-
Page 17: The Mode Menus
Getting Started The Mode Menus To help you plan how your RC9200/5200 will operate your home theater system, you should practice using the three mode menus. Working with Modes All customization is done via the three Mode menus. They differ in their capabilities:... - Page 18 The Mode menu pops up. 2 Tap the mode you want to use. The label of the active mode appears on the RC9200/5200 icon. You can now work in the selected mode. Note USE mode is the normal operating mode for the RC9200/5200.
-
Page 19: Managing Memory
You can choose to manually manage your memory by choosing a smaller template file to program with. There are two configurations built-in. The default Marantz file and the memory saving stripped- down Revert file. The default Marantz file offers these unique featu- res: 43 pre-programmed templates for home theater components. -
Page 20: Introduction
3 Use DEL mode to delete all of the device groups that you don t like (see page 40). 4 Use ADD mode to add the device groups for each Marantz com- ponent (see page 35-40). When you are prompted to add with or without RC codes, choo- se WITH RC CODES. - Page 21 RC9200/5200. Relabel any buttons as needed to match your existing remote controls. Check all of your devices. 12 Switch to LEARN mode and teach the RC9200/5200 all of your non-Marantz components RC Codes (see page 28-32). 13 Switching back and forth between USE and LEARN modes, test all codes and reteach as necessary.
- Page 22 Customizing Your RC9200/5200 Complex Operation? Macros or Help... If your entire system is new to you, practice using the RC9200/5200 manually for a few days before programming any macros. You ll find that your home theater requires many operations that require multiple steps to do.
- Page 23 Customizing Your RC9200/5200 want to construct a macro to watch or listen to a specific source. This may require that both the Television and the Surround Receiver be set to new inputs. Some components have discrete commands to select sources (meaning the command will only have one effect on the com- ponents, like the CD input on most receivers).
-
Page 24: Programming Help Lists
1 Write a list of all of the actions in the operation you want to record. 2 Gather all of the remote controls you will need for the operation. 3 Navigate to the Device side of the RC9200/5200. 4 Select ADD from the Mode menu. Choose Create New Device when prompted (see page 35-40). -
Page 25: Macro/Panel Jump Capabilities
Device Panel Buttons Can t Perform Jumps/Macros You can program a macro to be played back when any button on the Macro side of the RC9200/5200 is pressed (see page 43). You can program a macro to be played back when a device group is selected by either pressing a button on a home panel or by selecting the device via the Device Menu (see page 26). -
Page 26: Programming Macros & Panel Jumps
Before proceeding with programming, make sure that you understand how to move around in the Edit window and how to read the RC9200/5200 s shorthand notation for each macro step (see page 43). 1 Write a list of all of the actions in the operation you want to record. - Page 27 Customizing Your RC9200/5200 examples adaptable to your purposes? If you have only a few macros to program, you may be better off deleting all of them and creating a new Macro group. 3 Use DEL mode to delete all of the macro groups that you don t like (see page 40-42).
- Page 28 It is possible to program a macro to occur when you select a device (the macro will occur both when you press a home button AND when you select the device from the pull down Device menu). To program: 1 Navigate to the Device side of the RC9200/5200. User Guide...
- Page 29 2 Tap the mode button and press the LEARN mode button. 3 Tap the Device Tab and reveal the Device Menu. 4 While bracing the RC9200/5200 with your right hand, press and hold the Backlight button with a left hand finger.
-
Page 30: Reference
Most commands learn correctly when you press and hold them until the OK indicator appears. However, sometimes the RC9200/5200 will say OK, yet the command will not operate the component properly. If this occurs, try re-teaching the command with a brief tap. After a short delay the OK indicator will appear. - Page 31 2 Switch to Learn mode via the Mode button. Additional empty buttons appear, which can be programmed and labeled. 3 Point the device s original remote control to the RC9200/5200 s learning eye as shown on page 28. 4 Tap the RC9200/5200 button you want to program.
- Page 32 The device tab is active when the name of a device is displayed. 2 Switch to Learn mode via the Mode button 3 Point the device s original remote control to the RC9200/5200 s learning eye as described above. 4 Tap the device tab to open the Device menu.
- Page 33 Reference And/Or Locally Per Device The Hard buttons are defined as the five hard buttons on the right side of the screen (Mute, Channel Up/Down, Volume Up/Down) and the nine buttons below the screen (don t count Home, since you cannot program it).
-
Page 34: Labeling Buttons, Frames And Menu Items
You cannot label Home menu buttons directly. You have to label them via the Device menu (see page 34). You can label part of the Home panel greeting: the words Welcome , To , Marantz and Home Theater can be relabeled to personalize your RC9200/5200. User Guide... - Page 35 Reference Labeling a Button or a Text Frame 1 Navigate to the panel containing the button/frame you want to label. 2 Switch to Label mode via the Mode button 3 Tap the button/frame you want to label. The display shows a virtual auto-zooming mini-keyboard.
- Page 36 2 Tap the device tab to open the Device menu. -or- Tap the macro tab to open the Macro menu. 3 Touch and hold either the RC9200/5200 s Left or Right button and tap the device you want to program. Even when you want to program the currently active device/macro group, you have to tap it in the Device/Macro menu.
-
Page 37: Working With Device And Macro Groups
Working with Device and Macro Groups If you have a device that is not provided in the Device menu, you can add it to the RC9200/5200. You cannot add devices to the Home menu directly. You have to add them via the Device menu. - Page 38 (see pages 15,17 and 57). Receivers are both AMPS and TUNERS - Since you typically use the two sections of your Marantz receiver at different times, we have separated them into two devices. You will find the amp section in AMPS and the Tuner section in TUNERS.
- Page 39 Reference All of the devices shown are Marantz model # s with the exception of the first division, called Other. Below the Other division are three device templates that are meant for other purposes. DSS - Since Marantz does not make a DSS receiver (yet!), we included a template with codes.
- Page 40 Reference Creating a New Device From a Marantz Template If you have the exact Marantz model # in the list, add the device with RC codes. If you have a Marantz component not listed, or your component is not Marantz, add the device without RC codes and use the LABEL and LEARN modes to customize it to your liking.
- Page 41 Reference Copy Existing Device Choose this option to copy a device that is already active (you are already using it). It is often useful to have two almost identical device groups for your Television. The only difference between the two is one would have the Vol+ and Vol- Direct Access buttons program- med locally with the televisions internal volume + and - com- mands.
-
Page 42: Deleting And Restoring
The device or macro tab is active when the name of a device or macro is displayed. 2 Switch to Move mode via the Mode button The RC9200/5200 displays the menu. 3 Tap the menu item of your choice. The menu item is highlighted. - Page 43 When you have deleted a control panel button or a menu item, the button or item is no longer visible in Use mode but remains in the RC9200/5200 s memory. This allows you to restore it in ADD mode. User Guide...
- Page 44 Warning Do Not Delete the Left and Right hard Buttons! Remember, your RC9200/5200 is programmed at the factory with the Browse feature. If you accidentally reprogram the Left/Right hard buttons from the home panel, you cannot restore them with the remote control.
-
Page 45: Recording Macros
Reference Recording Macros Edit Window Notation Before you begin to program a Macro, study the notation used in the EDIT Window. Each type of action has its own notation. TV - When only a device name is lis- ted, the macro step will be a Device Action (the action that occurs when the Device is selected, which is typi- cally the preamp/receiver s source... - Page 46 Reference Delay - A delay counts as one of the 255 macro steps. Delays can be adjusted in 1/10th of a second inter- vals to be any value between .1 second and 99.9 seconds. Adjusting Delays - When a delay is Selected, you can adjust the delay with the plus and minus buttons.
- Page 47 Reference 8 Tap Save and assign a label to the macro. The macro is ready to be used. There are two extra commands you can record as any step in a macro: Recording a Device Action (Source Switching or Input) To record a Device menu item containing a source switching com- mand, open the Device menu, hold down the Right button (labeled Action) and tap the device you want to switch to.
- Page 48 Reference mands to it, allowing the device to warm up): Tap Delay. to decrease or increase the length of the delay. Use the arrow buttons to move the delay to the right place. 5 Press the Left button to close the macro. A confirmation screen appears where you can save or cancel the macro.
- Page 49 6. Using the Remote Control with Radio Frequency Warning To use the Remote Control with radio frequency (RF) you need an RF Extender, which is only included with the RC9200. It is an optional accessory for the RC5200. By default, the Remote Control uses infrared (IR) signals to operate devices.
- Page 50 Reference or more devices with RF signals, you have to change the Remote Control’s RF IR settings for those devices. 1 Make sure the Device tab is active.The Device tab is active when the name of a device is displayed at the right side of the touch screen . 2 Tap the Mode button and select RF IR.
- Page 51 Reference 6 Try out the devices for which you just changed the RF IR settings. Note It is possible that a device does not respond properly when operated with RF signals. In that case, you have to reconfigure the Remote Control to operate the device with IR signals again.
- Page 52 Save, duplicate and share configuration files, codes or devices with other Remote Controls. Preview new configuration files on RC9200/5200 Emulator. In this way you can check how the RC9200/5200 s interface will look like. Import new graphics to create new buttons and designs.
- Page 53 Internet Fun Daniel Tonks (the illustrator who created the button art for your RC9200/5200) maintains a superb site about remote controls with a dedicated RC5000 bulletin board and lots of file sharing and swap- ping from hundreds of downloadable RC5000 configurations.
-
Page 54: Rc5000 Setup
The display is too light or too dark Adjust the contrast dial on the left side. The RC9200/5200 shuts itself off This is a feature of the RC9200/5200 to save power. You can change the length the RC9200/5200 stays on in the Settings (see page 13). - Page 55 (see page 9). The RC9200/5200 won t edit, label or delete commands If the label locked appears on the RC9200/5200 icon, the device control panels have been locked to prevent unwanted changes. You cannot modify or delete commands for this device.
- Page 56 Invalid configuration file version The bulletin boards and friendly users at www.remotecentral.com and www.prontoedit.com can often give you help with problems on weekends or in evenings when your dealer or Marantz techni- cal support may not be available. Recharging Problems...
-
Page 57: Frequently Asked Questions
How do I reset the RC9200/5200? Normally, you never have to reset the RC9200/5200. However, if the RC9200/5200 s display freezes or if you notice unusual behavi- or, you might need to reset. You will not lose any saved program- med commands or macros. - Page 58 RC5000 Setup and a Windows PC. Procedure for reverting to the memory saving REVERT file: 1 Touch and hold the RC9200/5200 icon for a few seconds. The first setup panel appears. 2 Scroll to the second setup panel.
-
Page 59: Overview Of Symbols
Overview of Symbols Pause Stop Play, Normal run, normal speed Reverse Play, Normal run, normal speed Fast Forward, Scan Forwards, Fast run, fast speed Rewind, Scan Backwards, Fast run, fast speed Slow Motion Forwards, Slow run, slow speed Slow Motion Backwards, Slow run, slow speed Eject, Open/Close Record, general Key, Lock... -
Page 60: Specifications
Overview of Symbols Page number up Page number down Page enlargement TV and text mixed 1st or 2nd language Last view, previous program Power, Stand-by Zone focus: long distance Zone focus: very short distance Single or multi-digit selection Brightness, brilliance Contrast Brightness/contrast Color saturation... - Page 61 Hardware Adjustable high-resolution (320 x 240) liquid crystal display (LCD) Large touchscreen Fourteen programmable direct-access buttons Backlighting for LCD and direct-access buttons Built-in Marantz codes Infrared sending and learning eyes 3-wire (RS232) serial port connector Software Dynamic, animated interface Editable macros (up to 255 commands per macro)
-
Page 62: The Revert Configuration
The Revert Configuration Why Use The Revert Configuration By deleting the Marantz factory default, you will add 800K of free memory. The Revert configuration includes all of the button art and fundamental features of the Default configuration; however, it does not have all of the pre-programmed Marantz RC codes, nor does it have all of the demonstration macro groups (Help, FAV CD, etc.). -
Page 63: Index
Index with a PC, 47 add a device, 35 A Marantz Template, 38 restoring groups, 39 Delays, 24 add a macro group, 35 Delete Mode, 16 procedure, 39 step by step, 40 restoring groups, 39 Switch Modes, 17 Add Mode, 16... - Page 64 Left and Right hard buttons, 10 programming, 31 Left menu bar, 8 Naming, 32 Level Setting, 14 Navigating Control Panels, 7 List of Marantz Devices, 36, 57 Nesting Macros 45 Local Progamming, 31 NO IR, 9 low memory, 50 On Commands 20...
- Page 65 Troubleshooting, 49 RC5000 Setup 47 Buttons are not sending, 49 Internet, 48 Devices do not respond, 49 RC9200/5200 icon, 3 display is blank, 49 Recharging Contacts, 2 display is to dark, 49 Recharging dock, 4 display is too light, 49...
- Page 66 Service and Support For service and support, please contact Marantz customer service at 1-800-447-1970. When you contact Marantz customer service, you will be asked for the technical information listed on the third panel of Setup. To view this information, follow these steps.
- Page 67 Printed in the USA...
Need help?
Do you have a question about the RC9200 and is the answer not in the manual?
Questions and answers