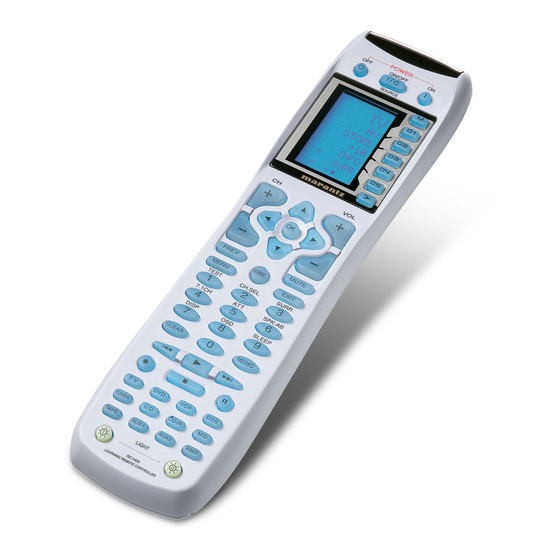
Marantz RC1400 User Manual
Learning remote control
Hide thumbs
Also See for RC1400:
- Reference manual (2 pages) ,
- Specifications (1 page) ,
- Full line catalog (39 pages)
Table of Contents
Advertisement
Advertisement
Table of Contents

Related Manuals for Marantz RC1400


Summary of Contents for Marantz RC1400
- Page 1 Model RC1400 User Guide Learning Remote Control...
-
Page 3: Table Of Contents
MAIN FEATURES ........2 NAMES OF PARTS & FUNCTIONS ..4 Button Names and Functions ..... 4 LCD Indicators ........... 7 Display and Functions in Setup Mode ..8 PAGE 1 MENU ............8 PAGE2 SETUP ............8 PAGE3 TIMER ............9 PAGE4 CLONE ............. -
Page 4: Main Features
In the factory default setting, the remote control is preset for signals for Marantz AV equipment products. If you are using Marantz products, you can perform remote control without any additional settings. - Page 5 - Cloning Function This remote control features a cloning system. This enables you to clone the programmed information from one RC1400 to another, by simply pushing a series of buttons. You can select whether to copy all programmed information or copy the information for each source.
-
Page 6: Names Of Parts & Functions
NAMES OF PARTS & FUNCTIONS Button Names and Functions q Infrared Transmitter and Learning Sensor This transmitter emits infrared light. Press the buttons while pointing the transmitter towards the infrared receiver window of the amplifier or other AV equipment. Be sure to also point towards other remote controls when using the learning function. -
Page 7: Mute Button
i MUTE button This button is used to mute the audio for the amplifier and television. o GUIDE button This button is used to display the menus for the DVD player, DSS (satellite broadcasting tuner), or other AV equipment. ! 0 EXIT button This button is used to cancel settings in the menu or program. - Page 8 ! 9 CH (Channel) button This is used to change channels. @ 0 CURSOR buttons These buttons are used when controlling the cursor of the amplifier, DVD, or other AV equipment. @ 1 LCD Information about the sources and modes are shown on the LCD.
-
Page 9: Lcd Indicators
LCD Indicators Information about currently selected source and direct code names are displayed on the LCD. LEARN NAME MACRO 1 2 3 4 PAGE A Source Name indicator This displays the name of the selected source, s u c h a s D V D , t e l e v i s i o n , o r o t h e r A V equipment (up to five characters). -
Page 10: Display And Functions In Setup Mode
D1 PRESET: This is used for setting AV equipment by various manufacturers. This is also used when selecting Marantz TV and DVD codes. D2 LEARN: This is used when learning codes from other remote controls. D3 NAME: This is used when changing the text displayed on the LCD. -
Page 11: Page3 Timer
RC1400 remote control. D2 RX-S: This is used on the receiving unit (slave) when copying the programmed information for selected source from another RC1400 remote control. D3 TX: This is used on the sending unit (master) when copying information to another RC1400 remote... -
Page 12: Loading Batteries
Loading Batteries Insert the three supplied batteries (AAA type) as shown in the figure below. Load the batteries with the polarity in the correct direction (plus + and minus - ends). Remove the back cover. Insert the new batteries (AAA type) with correct polarity. -
Page 13: Battery Replacement Interval
Battery Replacement Interval Under normal usage, alkaline batteries last approximately four months. When the batteries wear out, a battery mark is displayed on the LCD. Although the remote control can still be used when the battery mark is displayed, the batteries should be replaced as soon as possible. -
Page 14: Setting The Time
CD-R TAPE AUX1 AUX2 LIGHT LEARN RC1400 Learning Remote Controller PAGE When you bought this remote control and insert the batteries to the remote control at first, the steps 1 to 3 are skipped. Starts from step 4 to set the time. -
Page 15: Checking The Time
Whenever the batteries are replaced, the clock shows 00:00. Please reset the clock. (The time setting is not backed up.) Checking the Time To check the time, hold down the > button y for three seconds or more. The current time is displayed for five seconds. -
Page 16: Basic Operation
USE Mode (Normal operation status) This remote control is preset with a total of 12 types of remote codes, including Marantz TV (television), DVD, VCR (VCR deck), DSS (satellite broadcasting tuner), TUNER, CD, CD-R, MD, TAPE (tape deck), AUX1, AUX2, and AMP (amplifier). -
Page 17: Preset Mode
Laser disc player AMPLIFIER Amplifier or receiver RECEIVER/TUNER • When using Marantz products, TV and DVD can be set to TV1 (TV/VDP: Projector) and TV2 (PDP: Plasma display), and DVD1 (first DVD player) and DVD2 (second DVD p l a y e r ) , r e s p e c t i v e l y , t o m a t c h t h e customer’s operating environment. -
Page 18: Entering And Setting The Manufacturer Number Directly
Entering and Setting the Manufacturer Number Directly Refer to the manufacturer number list. This example shows how to set a SAMSUNG DVD player. LEARN LEARN PAGE LEARN LEARN View the supplied manufacturer number l i s t , a n d f i n d t h e n u m b e r o f t h e manufacturer for the device that you are using. -
Page 19: Setting Equipment Not Appearing In Manufacturer Number List
To set the manufacturer number for another source device, repeat the procedure in steps 4 to 6. After the settings are completed, press the M button r. Press the buttons on the remote control to check that the DVD can be operated correctly. -
Page 20: Learn Mode
For codes which are not learned, the remote control will transmit either the Marantz preset codes from the initial settings, or remote codes from another manufacturer’s AV equipment which is set by the customer. - Page 21 Hold down the M button r for three seconds or more. The menu is displayed. Press the D2 (LEARN) direct button t. The LEARN setting (LEARN) is displayed. The LEARN indicator then blinks. Press the DVD source button !4 . (PLAY) !3 button.
-
Page 22: Programming The Direct Buttons And Rewriting Names
If FULL is displayed no matter how many times you try the learning operation, the remote control cannot accept any more new codes until some of the previously learned codes are deleted from the memory. Delete some of the learned buttons from the sources. - Page 23 If ERROR is displayed on the LCD, some error has prevented the command from being learned. If this happens, repeat the procedure for steps 4 and 5. • After learning is completed, the remote control automatically switches to name rewriting mode. The left end “...
-
Page 24: Rewriting Names
Rewriting Names This remote control allows the rewriting of names for the sources and direct buttons. This operation is performed for each individual source. This example shows how to change the source name from DVD to AVD and AUDIO to SOUND. -
Page 25: Erasing Programmed Codes (Returning To Initial Settings)
cursor button @0 . Press the The letter is changed to “A”. • The cursor buttons can be used to move the blinking indicator of the section to be rewritten. cursor buttons @0 to Press the select AUDIO on the direct button indicator. - Page 26 Hold down the M button r for three seconds or more. The menu is displayed. Press the D5 (ERASE) direct button t. Press the DVD source button !4 . LEARN indicators blink. Press the button ( : PLAY) that you want to erase while holding down the CLEAR button !6 .
-
Page 27: Erasing Direct Button Pages
Erasing Direct Button Pages This example shows how to erase the entire direct button second page learned from the DVD player. LEARN LEARN PAGE PAGE PAGE LEARN PAGE Hold down the M button r for three seconds or more. The menu is displayed. Press the D5 (ERASE) direct button t. -
Page 28: Erasing Sources
Erasing Sources This procedure clears all codes and names programmed to the DVD, TV, or other sources. All codes and names in the four direct button pages are also erased. This example shows how to erase the names and codes learned from the DVD player. LEARN LEARN PAGE... - Page 29 Hold down the M button r for three seconds or more. The menu is displayed. Press the D5 (ERASE) direct button t. LEARN indicators blink. Press the CLEAR button !6 while holding down the POWER ON and OFF buttons w at the same time. Press the D4 (YES) direct button t to erase.
-
Page 30: Programming Macros
PROGRAMMING MACROS This remote control can program a series of button operations in sequence. Macros are a function that makes it possible to use a single button operation to perform a complex series of button operations any number of times. A single button can be programmed to perform up to 20 steps in sequence. -
Page 31: Programming Macros
Programming Macros This example shows how to program a macro to the M-01 button. (The screens shown in the example are the default factory states. If the names of direct buttons were rewritten, these modified names would be displayed.) Switch amplifier to DVD source → Play DVD player Æ... -
Page 32: Executing Macro Programs
• Use the cursor button to increase the time and button to decrease the time. The interval time can be set from 0.5 seconds to 5 seconds. • To stop the time adjustment, press the D5 (CANCEL) direct button. 4-5 Press the OK cursor button @0 . 4-6 Press the TV source button !4 . -
Page 33: Changing Names Of Macro Programs
Changing Names of Macro Programs Under the factory default settings, the names of the macro programs are set from M-01 to M-20, but you can change them to any desired name. The text can have up to six characters, and it is entered using the numeric buttons. -
Page 34: Erasing Steps Of Macro Programs
Erasing Steps of Macro Programs This example shows how to delete the TV and INPUT steps from the following macro programmed to M-01. The program is changed from DVD → PLAY → TIME → TV → INPUT → AMP → AUTO DVD →... -
Page 35: Overwriting Steps In Macro Programs
Overwriting Steps in Macro Programs This example shows how to change the macro programmed to M-01 from DVD → PLAY → AMP → AUTO DVD → PLAY → TV → INPUT. LEARN LEARN LEARN MACRO MACRO MACRO PAGE PAGE PAGE Hold down the M button r for three seconds or more. -
Page 36: Inserting Steps In Macro Programs
Inserting Steps in Macro Programs This example shows how to change the macro programmed to M-01 from DVD → PLAY → AMP → AUTO DVD → PLAY → TV → INPUT → AMP → AUTO LEARN LEARN LEARN MACRO MACRO MACRO PAGE PAGE... -
Page 37: Clearing Macro Programs
Clearing Macro Programs W h e n c l e a r i n g m a c r o s , t h e m a c r o s programmed to the button are erased. Modified macro names are also returned to the factory default settings. -
Page 38: Setting The Macro Timer
Setting the Macro Timer Setting the macro timer enables the macro program to automatically turn the power for a device on or off or perform other operations. In the settings, you can select to execute the macro timer everyday or only once. Be sure to set the clock to the correct time before using the timer. -
Page 39: Executing The Macro Timer
Executing the Macro Timer The macro program starts when the time that was set is reached. The TIMER indicator lights up whenever the macro timer is activated. Note: To execute the macro timer, place the remote control facing the infrared sensor of the device to be operated. -
Page 40: Clone Mode
CLONE MODE Creating Copies Using Clone Mode All of the codes programmed to the RC1400 remote control can be copied to another RC1400 using a few simple operations. • The remote control can copy the entire contents or the contents for specific source buttons. -
Page 41: Copying By Source
Press the > button y to display the fourth page CLONE menu. Press the D3 (TX) direct button t. The transmitting side is now ready. Hold down the M button r of the receiving remote control for three seconds or more. The menu is displayed. - Page 42 Place the receiver sensor of the receiving remote control (top) so that it is facing the transmitter of the transmitting remote control (top) at a distance of about 5 cm (2 inches). Hold down the M button r of the transmitting remote control for three seconds or more.
-
Page 43: Setup
SETUP Setting the Lighting Time • The LCD lights up when the LIGHT buttons !5 are pressed. The LCD remains lit while the pressed button is held down, and it goes off when the button is released. • The LCD continues to light up if another button is pressed while it is lit or if pressed within two seconds after the light goes off. -
Page 44: Setting The Macro Interval Time
Setting the Macro Interval Time When a macro program is executed, control signals are transmitted in sequence. This transmission interval (interval time) can be set in 0.5-seconds units from 0.5 to 5 seconds. If the interval time is set in this Setup mode, the interval times for all programmed macros are changed. -
Page 45: Adjusting The Display Contrast
Adjusting the Display Contrast The contrast of the LCD can be adjusted. Adjust for maximum visibility according to your viewing environment. LEARN LEARN PAGE 1 2 3 4 1 2 3 4 Hold down the M button r for three seconds or more. -
Page 46: Adjusting The Time
Adjustting the Time Example: Setting to 6:20PM (18:20) LEARN LEARN PAGE When you bought this remote control and insert the batteries to the remote control at first, the steps 1 to 3 are skipped. Starts from step 4 to set the time. Hold down the M button r for three seconds or more. -
Page 47: Other Functions
Direct Button Indicators and Operation Function Command Note AMP PAGE 1 1 AUTO SELECT AUTO SURROUND SELECT DOLBY MODE 3 DTS SELECT DTS MODE 4 EX/ES SELECT EX/ES 5 DIRECT SELECT SOURCE DIRECT PAGE 2 1 MCH-ST SELECT MULTI CH STEREO 2 STEREO SELECT STEREO MODE 3 VIRTUA... - Page 48 Function Command Note PAGE 3 1 PICT ENTER PICTURE SELECT MENU 2 SURR SURROUND ON/OFF 3 S-ZOOM SUPER ZOOM ON/OFF 4 S-Z IN SUPER ZOOM :ZOOM IN 5 S-Z OT SUPER ZOOM :ZOOM OUT PAGE 4 1 DISP DISPLAY 2 SLEEP SELECT SLEEP TIMER CD PAGE 1 1 DISC+...
- Page 49 Function Command Note PAGE 3 1 VIS + VHS INDEX SEARCH NEXT 2 VIS - VHS INDEX SEARCH PREVIOUS DSS PAGE 1 1 DISP BRINGS UP ON SCREEN CH MARKER 2 PREV GOES TO PREV. SELECTED CH 3 TV/VCR SELECT TV/VCR 4 AUDIO SELECT AUDIO MODE 5 EJECT...
- Page 50 POWER ON/OFF SOURCE PREV MUTE GUIDE MENU EXIT TEST CH.SEL SURR 7.1CH SPK-AB DISP SLEEP CLEAR MEMO TUNER CD-R TAPE AUX1 AUX2 LIGHT RC1400 Learning Remote Controller...
- Page 51 “Dolby”, “Pro Logic” and the double-D symbol are trademarks of Dolby Laboratories. “DTS” and “DTS Digital Surround” are trademarks of Digital Theater Systems, Inc. Circle Surround II, SRS and symbol are trademarks of SRS Labs, Inc. Circle Surround II technology is incorporated under license from SRS Labs,Inc.
Need help?
Do you have a question about the RC1400 and is the answer not in the manual?
Questions and answers