Table of Contents
Advertisement
Quick Links
Advertisement
Table of Contents

Related Manuals for Marantz RC5000i


Summary of Contents for Marantz RC5000i
- Page 2 RC5000i Remote Control User Guide The information in this manual is copyright-protected. No part of this manual may be copied or reproduced in any form without prior written consent from Marantz America, Inc. MARANTZ AMERICA, INC. CORPORATION SHALL NOT BE LIABLE FOR OMISSIONS OR FOR TECHNICAL OR EDITORIAL ERRORS CONTAINED IN THIS MANUAL.
-
Page 3: Table Of Contents
Introduction 1. The Marantz RC5000i 2. Battery Getting Started 1. Activating the RC5000i 2. Navigating Control Panels 3. Operating a Device 4. Adjusting the Settings 5. The Mode Menus 6. Managing Memory Customizing Your RC5000i 1. Introduction 2. Programming Remote Codes 3 Deciding between Macros or Help Lists 4. -
Page 4: Introduction
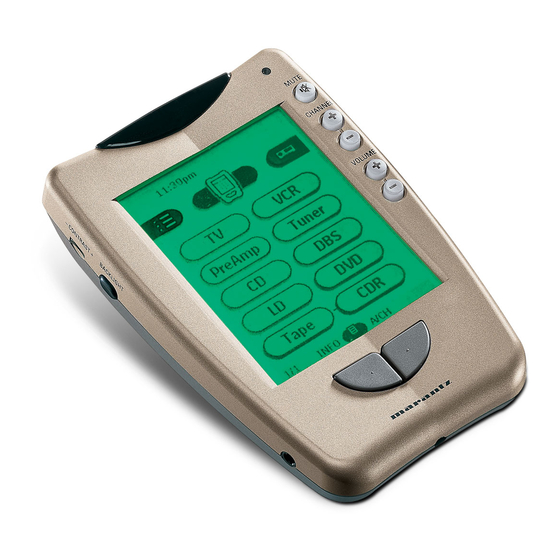
Introduction The RC5000i can be used for all devices that understand infrared remote control signals. Its easy-to-use touchscreen and its intuitive interface make it a perfect remote control for every user. The RC5000i is completely customizable and programmable. You can add devices and functions, relabel buttons, record macros and animate your macros. -
Page 5: Battery
Tap again to select: Use the Control Panel to operate your components Installing the Battery Pack 1 Slide the battery door off the back of the RC5000i. User Guide Home Icon: RC5000i icon: press and hold to enter the Setup Mode. shortcut buttons. - Page 6 Recharge or replace the batteries as soon as possible to ensure perfect performance. Note The RC5000i retains all settings when batteries have run out or when you replace them. You will only have to reset the clock. Recharging Dock...
- Page 7 Use the recharging dock only with the Philips NiMH rechargeable battery pack. It cannot be used with AA batteries. 1 Slide the battery door off the back of the RC5000i. 2 Install the plastic AA battery tray in the battery compartment.
-
Page 8: Getting Started
RC5000i on. Use Mode The RC5000i has different “modes.” When you activate the RC5000i for the first time, it starts up in Use mode allowing you to immediately operate your devices. In Use mode the RC5000i icon (like pop up with USE as an option. -
Page 9: Navigating Control Panels
Three Divisions of Control Panel Types Your RC5000i is capable of displaying hundreds of different control screens. By grouping them into sensible divisions, it is easy to navigate to the control panel you want. The three main divisions are: — The Home group disp-... - Page 10 Note When you jump to a Device, the RC5000i will change the input of your home theater receiver/preamp (using the pull down menus is exactly the same thing as pressing a Home button).
- Page 11 These Device buttons perform two actions when pressed: 1 Jumps to the main panel of the Device Group. 2 Changes your home theater receiver/preamp to the appropriate input. See page 30 to program for a non-Marantz receiver/preamp. Jump to a Device Panel Group Without Changing Inputs 1 Pop up the Device menu, by tapping the Device Menu bar.
- Page 12 Using the Left and Right Hard Buttons (Back and Ahead) to Browse Your Last Six Panels The RC5000i always remembers the last six panels you’ve viewed. By using the Left and Right hard buttons at the base of the remote, you can navigate freely back and forth among the six panels.
- Page 13 All of your device groups have been programmed with “one- touch” jump buttons to all of the panels for that device. Simply touch the tab label and the RC5000i will jump to the appropriate panel. 1. To view the Setup panel, press the Setup tab.
-
Page 14: Operating A Device
By tapping the touchscreen buttons, you send commands to the device you have selected. When you send a command, the RC5000i icon changes to show that it is transmitting signals. Before Touching The name of the device you are controlling is always displayed on the device menu tab. -
Page 15: Adjusting The Settings
Adjusting the Settings Most of the RC5000i’s features can be set to your own wishes. 1 Touch and hold the RC5000i icon for a few seconds. The first setup panel appears. You can display the second and third setup panel by using the scroll buttons. - Page 16 Second setup panel Setting Hide/Show Macro Hide/Show Device Warning! Both Macro and Device should be left visible and usable when using RC5000i standalone for programming. When the Button is labeled Hide, you will User Guide Function Hide - Turns off Macro Navigation.
-
Page 17: The Mode Menus
To exit Setup Mode Tap the Setup label on the RC5000i icon. The Mode Menus To help you plan how your RC5000i will operate your home theater system, you should practice using the three mode menus. Working with Modes All customization is done via the three Mode menus. - Page 18 Getting Started 3 Select the mode you wish to use to customize your RC5000i by touching the appropriate button on the Mode Menu. When you operate your devices, the RC5000i is in Use mode. For actions other than operating (like programming buttons, recording...
-
Page 19: Managing Memory
Managing Memory As you customize your remote, the RC5000i will manage memory automatically. It will keep deleted groups of panels restorable as long as possible. When you need additional memory, it will notify you that it needs to do “Memory Cleanup,” which will permanently erase everything you have deleted so far. -
Page 20: Customizing Your Rc5000I
3 Use DEL mode to delete all of the device groups that you don’t like (see page 40). 4 Use ADD mode to add the device groups for each Marantz component (see page 35-40). When you are prompted to add with or without RC codes, choose WITH RC CODES. - Page 21 RC5000i. Relabel any buttons as needed to match your existing remote controls. Check all of your devices. 12 Switch to LEARN mode and teach the RC5000i all of your non- Marantz components’ RC Codes (see page 28-32). 13 Switching back and forth between USE and LEARN modes, test all codes and reteach as necessary.
-
Page 22: Deciding Between Macros Or Help Lists
“Power” button. The RC5000i cannot “look” at your components to see if they are on or off. So, if you recorded a macro intended to power up a non- Marantz home theater, it wouldn’t be very reliable. - Page 23 Thus, to construct a macro that selects the EXT1 input: 1) Channel Up (selects the Antenna A input) 2) Input (toggles to the Antenna B input) 3) Input (toggles to the EXT 1 input) User Guide Customizing Your RC5000i...
-
Page 24: Programming Help Lists
1 Write a list of all of the actions in the operation you want to record. 2 Gather all of the remote controls you will need for the operation. 3 Navigate to the Device side of the RC5000i. 4 Select ADD from the Mode menu. Choose “Create New Device” when prompted (see page 35-40). -
Page 25: Macro/Panel Jump Capabilities
Device Panel Buttons Can’t Perform Jumps/Macros You can program a macro to be played back when any button on the Macro side of the RC5000i is pressed (see page 43). You can program a macro to be played back when a device group is selected by either pressing a button on a home panel or by selecting the device via the Device Menu (see page 26). -
Page 26: Programming Macros & Panel Jumps
Before proceeding with programming, make sure that you understand how to move around in the Edit window and how to read the RC5000i’s shorthand notation for each macro step (see page 43). 1 Write a list of all of the actions in the operation you want to record. - Page 27 (see page 43). Delays - When you select Delay, use the plus and minus arrows to set the amount of delay (see page 44). User Guide Customizing Your RC5000i...
-
Page 28: Programming Macros As A Device Action
It is possible to program a macro to occur when you select a device (the macro will occur both when you press a home button and when you select the device from the pull down Device menu). To program: 1 Navigate to the Device side of the RC5000i. User Guide... -
Page 29: Protecting Your Work From Changes
2 Tap the mode button and press the LEARN mode button. 3 Tap the Device Tab and reveal the Device Menu. 4 While bracing the RC5000i with your right hand, press and hold the Backlight button with a left hand finger. -
Page 30: Reference
Most commands learn correctly when you press and hold them until the OK indicator appears. However, sometimes the RC5000i will say OK, yet the command will not operate the component properly. If this occurs, try re-teaching the command with a brief tap. After a short delay the OK indicator will appear. - Page 31 5 Press and hold the corresponding button on your device’s original remote control. If the RC5000i has learned the command successfully, OK flashes on the RC5000i icon. You can let go of the button you’re holding. If the RC5000i has not learned the command successfully, you hear a short buzz and FAIL appears on the RC5000i icon.
- Page 32 Device menu. The label “device” starts flashing on the RC5000i icon. 6 Press and hold the button the RC5000i has to learn on your device’s original remote control. If the RC5000i has learned the command successfully, OK flashes on the display.
- Page 33 Programming Direct Access Buttons Globally And/Or Locally Per Device Direct Access buttons are defined as the five hard buttons on the right side of the screen (Mute, Channel Up/Down, Volume Up/Down). WARNING Direct-access buttons can be programmed with a global function and/or for a dedicated (local) command for that device.
-
Page 34: Labeling Buttons, Frames And Menu Items
Macro Tab) and Left/Right hard buttons (these are prelabeled at the factory to be Back and Ahead - reflecting the RC5000i’s unique ability to browse the last six panels you’ve viewed). You cannot label Home menu buttons directly. You have to label them via the Device menu (see page 34). - Page 35 Labeling a Button or a Text Frame 1 Navigate to the panel containing the button/frame you want to label. 2 Switch to Label mode via the Mode button 3 Tap the button/frame you want to label. The display shows a “virtual auto-zooming”...
- Page 36 2 Tap the device tab to open the Device menu. -or- Tap the macro tab to open the Macro menu. 3 Touch and hold either the RC5000i’s Left or Right button and tap the device you want to program. Even when you want to program the currently active device/macro group, you have to tap it in the Device/Macro menu.
-
Page 37: Working With Device And Macro Groups
User Guide... - Page 38 Each time you touch the scroll arrow down, more devices will appear as follows: All of the devices shown are Marantz model #’s with the exception of the first division, called “Other.” Below the “Other” division are four device templates that are meant for other purposes.
- Page 39 Status - This template is used to provide status screens you can jump to during a macro. Five panels are created with the device name “Status.” If you add additional Status devices, they will be named Status2, Status3, Status4 and so on.
- Page 40 Reference Creating a New Device From a Marantz Template If you have the exact Marantz model # in the list, add the device with RC codes. If you have a Marantz component not listed, or your component is not Marantz, add the device without RC codes and use the LABEL and LEARN modes to customize it to your liking.
- Page 41 Copy Existing Device Choose this option to copy a device that is already active (you are already using it). It is often useful to have two almost identical device groups for your Television. The only difference between the two is one would have the Vol+ and Vol- Direct Access buttons programmed locally with the televisions internal volume + and - commands.
-
Page 42: Deleting And Restoring
The device or macro tab is active when the name of a device or macro is displayed. 2 Switch to Move mode via the Mode button The RC5000i displays the menu. 3 Tap the menu item of your choice. The menu item is highlighted. - Page 43 When you have deleted a control panel button or a menu item, the button or item is no longer visible in Use mode but remains in the RC5000i’s memory. This allows you to restore it in ADD mode. User Guide...
- Page 44 Warning Do Not Delete the Left and Right hard Buttons! Remember, your RC5000i is programmed at the factory with the Browse feature. If you accidentally reprogram the Left/Right hard buttons from the home panel, you cannot restore them with the remote control.
-
Page 45: Recording Macros
Recording Macros Edit Window Notation Before you begin to program a Macro, study the notation used in the EDIT Window. Each type of action has its own notation. User Guide Reference TV - When only a device name is listed, the macro step will be a Device Action (the action that occurs when the Device is selected, which is typically the preamp/receiver’s... - Page 46 Reference Recording A Macro Step By Step Note To record a macro, there must be at least one macro group in the Macro menu. To create these groups, see page 35-40. Read the instructions for Adding Device Groups (see page 35-36), then note the differences when Adding Macro Groups (see page 39).
- Page 47 8 Tap Save and assign a label to the macro. The macro is ready to be used. There are two extra commands you can record as any step in a macro: Recording a Device Action (Source Switching or Input) To record a Device menu item containing a source switching command, open the Device menu, hold down the Right button (labeled Action) and tap the device you want to switch to.
- Page 48 Reference commands to it, allowing the device to warm up): Tap Delay. delay. Use the arrow buttons right place. 5 Press the Left button to close the macro. A confirmation screen appears where you can save or cancel the macro. 6 Tap Save.
-
Page 49: Rc5000 Setup
If you want to personalize your Remote Control even more, beyond its standard programming features, RC5000 Setup is the tool for you to use. RC5000 Setup is the RC5000i’s companion software that you can download from the following internet address: http://www.marantzamerica.com/rcsetup.htm. -
Page 50: System Requirements
Internet Fun Daniel Tonks (the illustrator who created the button art for your RC5000i) maintains a superb site about remote controls with a dedicated RC5000 bulletin board and lots of file sharing and swapping from hundreds of downloadable RC5000 configurations. -
Page 51: Troubleshooting
Adjust the contrast dial on the left side. The RC5000i shuts itself off This is a feature of the RC5000i to save power. You can change the length the RC5000i stays on in the Settings (see page 13). Devices do not respond to commands from the RC5000i Make sure the RC5000i is in Use mode (see page 6). - Page 52 (see page 9). The RC5000i won’t edit, label or delete commands If the label locked appears on the RC5000i icon, the device control panels have been locked to prevent unwanted changes. You cannot modify or delete commands for this device.
- Page 53 Invalid configuration file version The bulletin boards and friendly users at www.remotecentral.com and www.prontoedit.com can often give you help with problems on weekends or in evenings when your dealer or Marantz technical support may not be available. Recharging Problems The batteries won’t recharge Make sure you are using the rechargeable battery pack included with your recharging dock and not the AA batteries.
-
Page 54: Frequently Asked Questions
You will not lose any saved programmed commands or macros. Carefully press the reset button on the back of the RC5000i with a paperclip or sharp pencil. The RC5000i restarts and beeps to indicate it is ready for use. - Page 55 (see page 57). WARNING Procedure for reverting to the memory saving REVERT file: 1 Touch and hold the RC5000i icon for a few seconds. The first setup panel appears. 2 Scroll to the second setup panel.
-
Page 56: Overview Of Symbols
Overview of Symbols Pause Stop Play, Normal run, normal speed Reverse Play, Normal run, normal speed Fast Forward, Scan Forwards, Fast run, fast speed Rewind, Scan Backwards, Fast run, fast speed Slow Motion Forwards, Slow run, slow speed Slow Motion Backwards, Slow run, slow speed Eject, Open/Close Record, general Key, Lock... - Page 57 Overview of Symbols Page number up Page number down Page enlargement TV and text mixed 1st or 2nd language Last view, previous program Power, Stand-by Zone focus: long distance Zone focus: very short distance Single or multi-digit selection Brightness, brilliance Contrast Brightness/contrast Color saturation...
-
Page 58: Specifications
AC5000 Recharge Package* *The AC5000 Recharge Package is only included with an RC5000i purchased by itself. It is available as an optional accessory for the RC5000i packaged with the SR14EX. The specifications and design of this product are subject to change without notice. -
Page 59: The Revert Configuration
Why Use The Revert Configuration By deleting the Marantz factory default, you will add 800K of free memory. The Revert configuration includes all of the button art and fundamental features of the Default configuration; however, it does not have all of the pre-programmed Marantz RC codes, nor does it have all of the demonstration macro groups (Help, FAV CD, etc.). -
Page 60: Index
Index add a device, 35 A Marantz Template, 38 restoring groups, 39 add a macro group, 35 procedure, 39 restoring groups, 39 Add Mode, 16 Adjusting the Settings, 13 Anchored Macros, 21 Back and Ahead Buttons, 10 location, 2 re-programming, 31... - Page 61 30 Left and Right hard buttons, 10 programming, 31 Left menu bar, 8 Level Setting, 14 List of Marantz Devices, 36, 57 Local Progamming, 31 low memory, 50 Macro Menu Bar, 3 Macro Tips, 21 Macro/Panel Jumps, 23...
- Page 62 43 source selection, 30 with a PC, 47 Protecting Your Work, 27 RC5000 Setup 47 Internet, 48 RC5000i icon, 3 Recharging Contacts, 2 Recharging dock, 4 Reset Button, 2 Restore Deleted Device, 39 Restore Marantz Default, 57 Restoring, 41...
-
Page 63: Service And Support
Service and Support For service and support, please contact Marantz customer service at 1-800-447-1970. When you contact Marantz customer service, you will be asked for the technical information listed on the third panel of Setup. To view this information, follow these steps. - Page 64 Printed in the USA...
Need help?
Do you have a question about the RC5000i and is the answer not in the manual?
Questions and answers