Table of Contents
Advertisement
/ Perfect Charging / Perfect Welding / Solar Energy
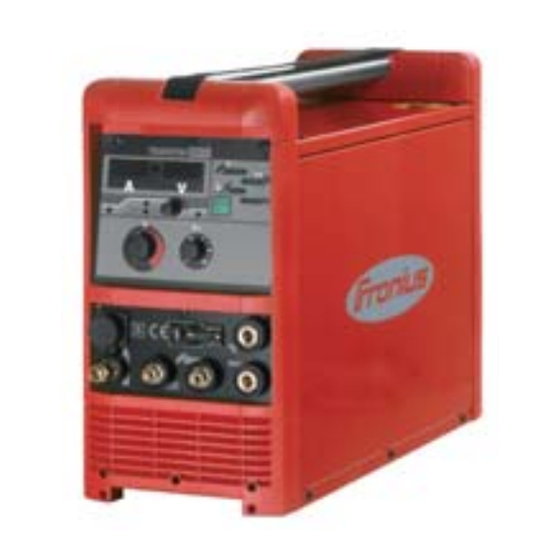
MagicWave 2600
MagicWave 2600 Cel
MagicWave 3000
TransTig 2600
TransTig 2600 Cel
TransTig 3000
42,0426,0022,EA 003-22032021
Fronius prints on elemental chlorine free paper (ECF) sourced from certified sustainable forests (FSC).
Operating instructions
TIG power source
Advertisement
Table of Contents

Related Manuals for Fronius MagicWave 2600


Summary of Contents for Fronius MagicWave 2600
- Page 1 / Perfect Charging / Perfect Welding / Solar Energy Operating instructions MagicWave 2600 MagicWave 2600 Cel TIG power source MagicWave 3000 TransTig 2600 TransTig 2600 Cel TransTig 3000 42,0426,0022,EA 003-22032021 Fronius prints on elemental chlorine free paper (ECF) sourced from certified sustainable forests (FSC).
-
Page 3: Table Of Contents
Control panel for TransTig Connections, switches and system extensions MagicWave / TransTig connections with Fronius welding torch central connector F MagicWave / TransTig connections with welding torch central connector GWZ MagicWave / TransTig connections with welding torch central connector GWZ... - Page 4 Establish a connection with the workpiece Connect the welding torch TIG Operating Modes General Symbols and explanations 2-step Special 2-step 4-step 4-step with intermediate lowering Special 4-step: Version 1 Special 4-step: Version 2-4 Special 4-step: Version 5 TIG welding Safety Preparation Select operating mode Select process...
- Page 5 MagicWave 2600/2600CEL MagicWave 3000 TransTig 2600/2600CEL TransTig 3000...
-
Page 6: Safety Instructions
Safety Instructions Explanation of DANGER! Safety Instruc- tions Indicates an immediate danger. ▶ Death or serious injury may result if appropriate precautions are not taken. WARNING! Indicates a possibly dangerous situation. ▶ Death or serious injury may result if appropriate precautions are not taken. CAUTION! Indicates a situation where damage or injury could occur. -
Page 7: Environmental Conditions
The device is intended exclusively for the welding process specified on the rating plate. Utilization for any other purpose, or in any other manner, shall be deemed to be "not in accordance with the intended purpose." The manufacturer is not responsible for any damage resulting from improper use. -
Page 8: Personal Protection And Protection Of Others
This may affect a number of device types in terms of: connection restrictions criteria regarding maximum permissible grid impedance criteria regarding the minimum required short-circuit power both at the interface with the public grid See technical data In this case, the operator or the person using the device should check whether or not the device is allowed to be connected, where appropriate through discussion with the power supply company. -
Page 9: Danger From Toxic Gases And Vapors
power range, the type of weld metal, the resonance properties of the workpiece, the workplace environment, and many other factors. Danger from The fumes produced during welding contain toxic gases and vapors. toxic gases and Welding fumes contain substances that cause cancer, as stated in monograph 118 from vapors the International Agency for Research on Cancer. -
Page 10: Risks From Grid Current And Welding Current
Do not undertake welding on containers in which gases, fuels, mineral oils, and the like are/were stored. Residues pose a risk of explosion. Risks from grid An electric shock can be fatal. current and weld- Do not touch voltage-carrying parts inside or outside the device. ing current During MIG/MAG welding and TIG welding, the welding wire, the wirespool, the feed rollers, as well as all pieces of metal that are in contact with the welding wire, are live. -
Page 11: Stray Welding Currents
Stray welding If the following instructions are not observed, stray welding currents may occur, which currents pose a risk of the following: Fire Overheating of components connected to the workpiece Destruction of ground conductors Damage to the device and other electrical equipment Ensure that the workpiece terminal is securely connected to the workpiece. -
Page 12: Emf Measures
Shield, if necessary Shield other devices in the vicinity Shield the entire welding installation EMF measures Electromagnetic fields may cause health problems that are not yet known: Effects on the health of persons close by, e.g., those with pacemakers and hearing aids Persons with pacemakers must seek advice from their doctor before staying in the immediate vicinity of the device and the welding process... -
Page 13: Undesired Welding Results
Only use suitable load-carrying equipment from the manufacturer when transporting devices by crane. Attach chains or ropes to all designated attachments of the suitable load-carrying equipment. Chains or ropes must be the smallest angle possible from vertical. Remove gas cylinder and wirefeeder (MIG/MAG and TIG devices). In the event of crane attachment of the wirefeeder during welding, always use a suitable, insulating wirefeeder hoisting attachment (MIG/MAG and TIG devices). -
Page 14: Safety Measures At The Setup Location And During Transport
When no welding is taking place, close the valve of the shielding gas cylinder. Leave the cap on the valve of the shielding gas cylinder when the cylinder is not connec- ted. Follow the manufacturer's instructions and applicable national and international provi- sions for shielding gas cylinders and accessories. -
Page 15: Maintenance And Repair
Do not mix original coolant from the manufacturer with other coolants. Only connect system components from the manufacturer to the cooling unit circuit. If there is damage due to use of other system components or other coolants, the manu- facturer accepts no liability for this and all warranty claims are forfeited. Cooling Liquid FCL 10/20 is not flammable. -
Page 16: Safety Symbols
Copyright Copyright of these Operating Instructions remains with the manufacturer. Text and illustrations were accurate at the time of printing. Fronius reserves the right to make changes. The contents of the Operating Instructions shall not provide the basis for any claims whatsoever on the part of the purchaser. If you have any suggestions for improvement, or can point out any mistakes that you have found in the Operating Instructions, we will be most grateful for your comments. -
Page 17: General
General Principle The TIG power sources MW 2600 / 2600 CEL / 3000 (AC/DC) or TT 2600 / 2600 CEL / 3000 (DC), designed as primary switched welding systems, are a further development of transistor controlled welding systems. The supply voltage is rectified and chopped by a fast transistor switch with 80 kHz. -
Page 18: Warning Notice On The Device
The power sources are all generator-compatible and offer the greatest possible robust- ness in operation thanks to protected operating elements and powder-coated housing. The wealth of available operating modes and special functions means the power sources are just as competent when performing MMA welding as TIG welding. Warning notice US power sources are equipped with additional warning notices on the device. -
Page 19: Minimum Equipment For Welding Operations
Minimum equipment for welding operations General Depending on the welding process, certain minimum equipment is required for working with the power source. The following description contains the minimum equipment required for the respective welding procedure. TIG AC welding MagicWave power source Grounding cable TIG welding torch with rocker switch Gas connection (shielding gas supply) with gas pressure regulator... -
Page 20: System Components
System components General The TransTig and MagicWave power sources can be operated with numerous system extensions and options. Overview Fig.4 System extensions and options Power source Cooling unit Trolley with gas cylinder holder TIG welding torch Standard / Up/Down Remote control Electrode cable Grounding cable... -
Page 21: Control Panel
Control Panel General WARNING! Danger due to incorrect operation. This can result in severe personal injury and damage to property. ▶ Read safety instructions ▶ Read all Operating Instructions, including those for the system components An essential feature of the control panel is the logical arrangement of the operating ele- ments. -
Page 22: Magicwave Control Panel
(15) (18) (19) (21) Fig.5 Control panel for MagicWave 2600 / 2600 CEL / 3000 Welding current indicator ... for displaying the main current I Set value ... desired welding current Actual value ... actual welding current Welding voltage indicator... - Page 23 2-step mode ... TIG welding with HF ignition 2-step mode symbol LED indicator for starting current I ... lights up when the starting current I active LED indicator for main current I ... lights up when the main current I is active (10) DownSlope adjuster ...
-
Page 24: Control Panel For Transtig
adjustment of the ignition current to the respective tungsten electrode dia- meter Important! In the electrode operating mode, the adjuster is deactivated. (18) Process key ... to select the process, depending on the selected operating mode. (19) (20) (21) (19) For the TIG AC welding process, select the operating mode 2-step mode / 4-step mode. - Page 25 Manual metal arc welding Manual metal arc welding symbol Contact ignition, can only be combined with TIG 2-step mode, or TIG 4-step mode Contact ignition symbol 4-step mode ... TIG welding with HF ignition 4-step mode symbol 2-step mode ... TIG welding with HF ignition 2-step mode symbol LED indicator for starting current I ...
- Page 26 (15) Final current controller I ... percentage adjustment of the main flow to the final flow. Adjustment is only possible in 4-step mode. Lowering takes place via the torch trigger. (16) Overtemperature indicator ... lights up if the power source heats up too much (e.g.
-
Page 27: Connections, Switches And System Extensions
Connections, switches and system extensions MagicWave / TransTig connec- tions with Fronius welding torch central con- nector F Fig.7 MagicWave connections on the front of the Fig.8 TransTig connections on the front of the device device Remote control connection socket ... standardized connection socket for sys- tem expansions Torch control connection socket ... -
Page 28: Magicwave / Transtig Connections With Welding Torch Central Connector Gwz
MagicWave / TransTig connec- tions with weld- ing torch central connector GWZ Fig.7 MagicWave connections on the front of the Fig.8 TransTig connections on the front of the device device Remote control connection socket ... standardized connection socket for sys- tem expansions Torch control connection socket ... -
Page 29: Magicwave / Transtig Connections With Welding Torch Central Connector Gwz
MagicWave / TransTig connec- tions with weld- ing torch central connector GWZ Fig.7 MagicWave connections on the front of the device Power switch ... for switching the power source on and off Shielding gas connection socket Gas-test button ... for setting the required quantity of shielding gas on the gas pressure regulator. -
Page 30: Before Installation
Before installation Safety WARNING! Danger due to incorrect operation. This can result in severe personal injury and damage to property. ▶ Do not use the functions until you have fully read and understood the Operating Instructions ▶ Read and understand all the Operating Instructions for the system components, especially the safety rules, in full Intended use The power source is only intended for TIG welding and MMA welding. -
Page 31: Generator-Powered Operation
Generator- The power sources are compatible with any generator if the maximum specified apparent powered opera- power is at least: tion MW 2600 / TT 2600: 18 kVA MW 2600 CEL / TT 2600 CEL: 20 kVA MW 3000 / TT 3000: 22 kVA NOTE! The voltage delivered by the generator must never fall outside of the mains voltage toler- ance range. -
Page 32: Commissioning
Commissioning General WARNING! Danger of electric shock! This can result in severe personal injury and damage to property. ▶ Set the power switch to the "O" position ▶ Disconnect the device from the mains The commissioning of the power source is described as follows: for the main application TIG welding, based on a standard configuration for a TIG welding system. -
Page 33: Establish A Connection With The Workpiece
Connect the shielding gas cylinder: Remove the protective cap of the shielding gas cylinder Briefly turn the valve of the shielding gas cylinder to the left to remove surround- ing dirt Check the seal on the gas pressure regulator Screw the gas pressure regulator onto the shielding gas cylinder and tighten it When using a TIG welding torch with integrated gas connection: Connect the gas pressure regulator to the shielding gas connection socket on the rear of the power source using the gas hose... -
Page 34: Tig Operating Modes
TIG Operating Modes General WARNING! Danger due to incorrect operation. This can result in severe personal injury and damage to property. ▶ Read these Operating Instructions ▶ All system component Operating Instructions, especially the safety rules Follow the guidelines referring to setting, setting range, and units of measurement for the available welding parameters in the chapter "Program level preferences". -
Page 35: 2-Step
Spot welding time G-... G-H / G-L: Gas post-flow time 2-step NOTE! The welding parameter StS must be set to "OFF" (section Available TIG paramet- ers). With the power source in its delivery condition, the welding parameter StS is set to "OFF". Welding: Pull back the torch trigger and hold it in this position End of welding: Release the torch trigger down... -
Page 36: 4-Step
Special 2-step mode The explanation of the symbols and abbreviations can be found in the section Symbols explanations. 4-step NOTE! The welding parameter SFS must be set to "OFF" (section "Program level prefer- ences”). With the power source in its delivery condition, the welding parameter SFS is set to "OFF". -
Page 37: Special 4-Step: Version
NOTE! The welding parameter SFS must be set to "OFF" (section "Program level prefer- ences”). With the power source in its delivery condition, the welding parameter SFS is set to "OFF". Intermediate lowering to the set lowering current IE during the main current phase: Push the torch trigger forward and hold it in this position Resume main current: Release the torch trigger down... - Page 38 Special 4-step: The variants of the special 4-step mode shown below enable the intermediate lowering Version 2-4 to the set lowering current by means of TIG torches with double-button function. Select 4-step mode Set the setup parameter SFS to "2, 3, 4 or 5" for the desired variant (section "Pro- gram level preferences”)
-
Page 39: Special 4-Step: Version
The explanation of the symbols and abbreviations can be found in the section Symbols explanations. Special 4-step: The following variant of the special 4-step mode allows an increase and decrease of the Version 5 welding current without welding torch Up / Down. The longer the torch trigger is pressed during welding, the further the welding current increases (up to the maximum). -
Page 40: Tig Welding
TIG welding Safety WARNING! Danger due to incorrect operation. Operating the equipment incorrectly can cause serious injury and damage. ▶ Do not use the functions described here until you have fully read and understood the following documents: ▶ These Operating Instructions ▶... -
Page 41: Select Operating Mode
Select operating WARNING! mode Danger of electric shock. This can result in severe personal injury and damage to property. ▶ When the power switch is switched to position "I", the tungsten electrode of the welding torch is live. Ensure that the tungsten electrode is not touching any people or electrically conductive or grounded parts (housing, etc.) (1+4) (2+4) -
Page 42: Cap-Shaping (Magicwave)
Cap-shaping When the AC welding process is selected, automatic cap-shaping is available for the (MagicWave) MagicWave power sources. For optimum results, this takes into account the set elec- trode diameter. The automatic cap-shaping ensures the formation of the optimum cap during the welding start. -
Page 43: Hf Ignition
For information on setting the SYn parameter, refer to chapter "Program levels P1-P3", section "Program level AC parameter P3". HF ignition For information on setting the setup parameter HFt, refer to the section "Program level preferences”. Use welding parameter HFt to set the time interval of the HF pulses to 0.01 s. When the power source is delivered, the welding parameter HFt is set to "0.01s". -
Page 44: Contact Ignition
Tilt the welding torch to the normal position Welding Contact ignition Proceed as follows to ignite the arc: Position at the ignition point so that there is a distance of approximately 2 to 3 mm (0.08 to 0.12 in.) between the tungsten electrode and the workpiece. -
Page 45: Ignition Monitoring
Raise the welding torch and tilt it into the normal position, the arc ignites Welding Ignition monitor- If no arc emerges within 5 seconds, the power source automatically switches off. Repeated pressing of the torch trigger is required for a new attempt. -
Page 46: Manual Metal Arc Welding
Manual Metal Arc Welding Safety WARNING! Danger due to incorrect operation. This can result in severe personal injury and damage to property. ▶ Do not use the functions described here until you have fully read and understood the Operating Instructions. ▶... -
Page 47: Select Operating Mode
Select operating WARNING! mode Danger of electric shock. This can result in severe personal injury and damage to property. ▶ When the power switch is switched to position "I", the tungsten electrode of the welding torch is live. Ensure that the tungsten electrode is not touching any people or electrically conductive or grounded parts (housing, etc.). - Page 48 Welding voltage display shows open circuit voltage Connect remote control TPmc if necessary (set dynamic and HotStart) Preselect welding current IH Initiate welding process.
-
Page 49: Remote Control
Remote control Safety WARNING! Danger due to incorrect operation. This can result in severe personal injury and damage to property. ▶ Read and understand these Operating Instructions ▶ Read and understand all the Operating Instructions for the system components, especially the safety rules WARNING! Danger of electric shock! This can result in severe personal injury and damage to property. -
Page 50: Tig Pulse Remote Control Tr 50Mc
Main current IH adjuster ... for stepless adjustment of the welding current AC arc frequency adjuster ... for changing the arc concentration Balance adjuster ... for changing the positive and negative half-wave in the MMA and TIG AC range. Important! When using the remote control for manual metal arc welding in the AC or DC range, the values set in the device apply for the HotStart current, HotStart time and dynamics. -
Page 51: Tig Foot Remote Control Tr 52Mc
0.2–2 Hz 2–20 Hz 20–200 Hz 200–2000 Hz The illustration below shows TIG pulsing with the DC welding process selected. TIG pulsing - welding current progression curve IS ... Starting current IE ... Final current tUp ..UpSlope tDown ... DownSlope F-P .. -
Page 52: Tig Spot Welding Remote Control Tr 51Mc
TIG foot remote control TR 52mc Function: 2-step mode indicator lights up as soon as the remote control is connected (auto- matic switching) Set main current adjuster IH to desired maximum current Set gas pre-flow time and gas post-flow time directly at the power source (section "Program level preferences”) Initiate ignition process by lightly stepping on the pedal... - Page 53 Controller for spot welding current Remote control connection socket Spot welding time controller SPt (0.1 - 8 s) TIG spot welding remote control TR 51mc Functional sequence: 2-step mode indicator lights up as soon as the remote control is connected (auto- matic switching) Set current lowering time on the power source Use special spot welding nozzle (sits insulated on the cone)
- Page 54 Remote control TP mc Remote control TP mc-CEL Welding current adjuster ... for stepless adjustment of the welding current Dynamic adjuster ... dYn - dynamic - dynamic correction To obtain the best possible welding results, the arc-force dynamic will sometimes need to be adjusted.
- Page 55 I (A) HTI ..Hot current time = 0-2 s, fact- ory setting 0.5 s HCU .. HotStart current = 0-100% ..Main current = set welding current Function During the specified hot-current time (Hti), the welding current is increased to a cer- tain value.
-
Page 56: Working With Program Levels
Working with program levels Overview The following figure shows an overview of the welding parameter settings in the program level preferences, using the MagicWave control panel as an example. A detailed descrip- tion of these settings can be found in the following chapters. Setup parameters for rod electrode: Hti .. -
Page 57: Program Level Preferences
"Program level preferences” Access Select the desired operating mode TIG/Electrode Switch off power source Switch on the power source while holding down the operating mode (3) or process (4) button. Release mode (3) or process (4) button Select and Select the desired parameter using the operating mode (3) or process (18) button change setup Change the parameter value using the torch trigger parameters... - Page 58 Lowering current Unit: % Setting range: 0 - 100 of the main current I Factory setting: 50 High Frequency time High frequency ignition: Time interval of the HF pulses Unit: Seconds Setting range: 0.01 - 0.4 Factory setting: 0.01 Start-Current Starting current Unit: - Setting range: rel / abs...
- Page 59 Unit: Seconds Setting range: 0.2 - 2.0 Factory setting: 0.5 Hot-start current HotStart current Unit: % Setting range: 0 - 100 Factory setting: 50 To obtain the best possible welding result, the HotStart function will sometimes need to be adjusted. Advantages: Improved ignition properties, even when using electrodes with poor ignition properties...
- Page 60 the arc's short circuit. The risk of the rod electrode sticking is therefore largely ruled out. Setting range of the parameter dYn 0 ..soft and low-spatter arc 100 ..harder and more stable arc Program save the set parameters by pressing the torch trigger Factory Reset the welding system by pressing the torch trigger...
-
Page 61: Program Levels P1 - P3
Program levels P1 - P3 Access Switch on the power source while holding down the operating mode (3) or process (18) button. The display shows "---" for level preferences. Press the torch trigger until --- appears .."Program level preferences” P1 appears ... -
Page 62: Program Level Ac Parameters P3 (Magicwave)
Enter new code again to check The code is automatically stored after the third acknowledgment Power source is ready for welding Deactivate code: Enter program level P2 Enter current code Set the IH digit with the adjuster Confirm digit with operating mode button (3) Repeat the procedure twice until "Cod ON"... -
Page 63: Fault Diagnosis And Correction
Fault diagnosis and correction Safety WARNING! Danger of electric shock. This can result in severe personal injury and damage to property. ▶ Before carrying out maintenance work on the device, carry out the following meas- ures ▶ Set the power switch to - O - ▶... -
Page 64: Power Source
Err 118 Cause: Supply voltage error (+5V, +15V) Err 119 Cause: Serial transmission error Err 120 Cause: Power module error Err U-P Cause: Primary overvoltage or undervoltage Err 113 Cause: ADC gain error Error message from PC board UTMS1 Err 004 Cause: Timer error (82C54) Err 006... - Page 65 No welding current Power switch ON, overtemperature indicator illuminates Cause: Overloading Remedy: Observe the duty cycle Cause: Thermal automatic circuit breaker has tripped Remedy: Wait until the power source automatically comes back on after the end of the cooling phase Cause: Fan in the power source is faulty Remedy:...
- Page 66 Poor-quality weld properties Cause: Incorrect welding parameters Remedy: Check settings Cause: Incorrect ground connection Remedy: Check ground connection and terminal for polarity Welding torch gets very hot Cause: Welding torch is inadequately sized Remedy: Observe duty cycle and load limits Cause: For water-cooled systems only: Coolant flow too low Remedy:...
-
Page 67: Service, Maintenance And Disposal
Risk of damage to electronic parts. Do not bring the air nozzle too close to elec- tronic parts. Also clean the cooling air ducts if there is a large accumulation of dust Disposal Materials should be disposed of according to valid local and national regulations. Spare parts MagicWave 2600 MagicWave 3000 TransTig 2600 TransTig 3000... -
Page 68: Technical Data
Technical data Special voltage WARNING! Danger due to insufficiently dimensioned electrical installations. Serious damage to property possible. ▶ The mains lead and its fuse protection must be rated accordingly. ▶ The technical data shown on the rating plate applies. MagicWave MW 2600 MW 2600CEL 2600/2600CEL... - Page 69 MagicWave 3000 MW 3000 MW 3000 Grid voltage 3x230 V 3x400 V Mains voltage tolerance -20% / +15% -20% / +15% Mains fuse, slow-blow 20 A 16 A Apparent power at 40% ED 9.7kVA 50% ED 6.1 kVA 60% ED 11.8 kVA 100% ED 4.6 kVA...
- Page 70 TT 2600 TT 2600CEL Cos phi1 150 A 0.99 0.99 260 A 0.99 0.99 Efficiency Welding current range 3 - 260 A 3 - 260 A Welding current at 10 min/40°C 60% ED 260 A 260 A 100% ED 220 A 230 A Open circuit voltage 83 V DC...
- Page 71 TT 3000 TT 3000 Welding current at 10 min/40°C 35% ED 300 A 60% ED 220 A 65% ED 300 A 100% ED 170 A 260 A Open circuit voltage 83 V DC 83 V DC Standardized working voltage 10.1 - 22.0 V 10.1 - 22.0 V Electrode 20.1 - 32.0 V...
- Page 72 FRONIUS INTERNATIONAL GMBH Froniusstraße 1 A-4643 Pettenbach AUSTRIA contact@fronius.com www.fronius.com Under www.fronius.com/contact you will find the addresses of all Fronius Sales & Service Partners and locations...
Need help?
Do you have a question about the MagicWave 2600 and is the answer not in the manual?
Questions and answers