Table of Contents
Advertisement
Quick Links
Air-Cooled Scroll Chiller
Installation, Operation, Maintenance
Supersedes: QTC3-NM1 (1021)
Form QTC3-NM1 (822)
035-24487-000
QTC3040T to QTC3225T
With Brazed Plate Heat Exchanger
Style B (60 Hz) 4-12 Fan
40 ton to 230 ton
140 kW to 800 kW
LD18971a
R-410A
Issue Date:
Products are produced at a
August 3, 2022
f a c i l i t y w h o s e q u a l i t y -
management systems are
ISO9001 certified.
Advertisement
Table of Contents

Related Manuals for Quantech QTC3040T


Summary of Contents for Quantech QTC3040T
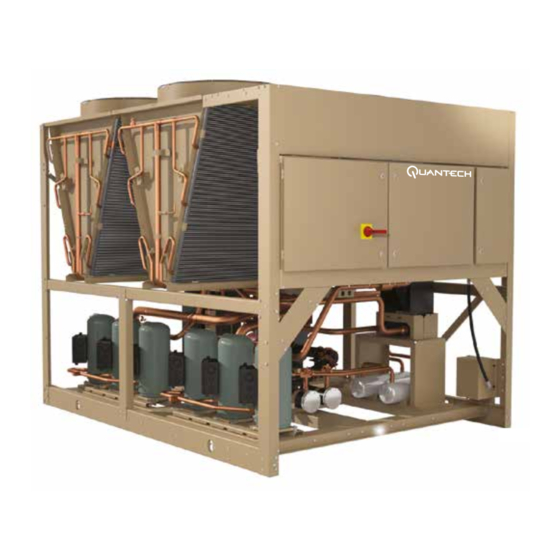
- Page 1 Air-Cooled Scroll Chiller Installation, Operation, Maintenance Supersedes: QTC3-NM1 (1021) Form QTC3-NM1 (822) 035-24487-000 QTC3040T to QTC3225T With Brazed Plate Heat Exchanger Style B (60 Hz) 4-12 Fan 40 ton to 230 ton 140 kW to 800 kW LD18971a R-410A Issue Date:...
- Page 2 Johnson Controls will NOT be responsible for damage/problems resulting from improper connections to the controls or application of improper control signals. Failure to follow this warn- ing will void the manufacturer’s warranty and cause serious damage to property or personal injury. QUANTECH...
- Page 3 Revisions made to this document are indicated in the following table. These revisions are to technical information, and any other changes in spelling, grammar, or formatting are not included. AFFECTED PAGES DESCRIPTION Flow switch section updated ASSOCIATED LITERATURE MANUAL DESCRIPTION FORM NUMBER Equipment Standard Limited Warranty QTC-NM2 QUANTECH...
- Page 4 FORM QTC3-NM1 ISSUE DATE 08/03/2022 UNIT NOMENCLATURE 3110T Base Product Type Q = Quantech T = Variable Speed Scroll Development Level (Engineering Change or PIN) Nominal Capacity QTC3055T QTC3110T QTC3060T QTC3120T QTC3070T QTC3125T QTC3075T QTC3130T Design Series QTC3080T QTC3140T B = Design Series...
-
Page 5: Table Of Contents
Single-Point Supply Connection – Terminal Block, Non-Fused Disconnect Switch or Circuit Breaker ......................39 SECTION 5 – TECHNICAL DATA ........................45 Operational Limitations (English) ........................45 Physical Data QTC3040T – QTC3225T 60 Hz ....................47 Electrical Data ..............................50 Compressor Heaters ............................50 Electrical Notes .............................. 60 Dimensions .............................. - Page 6 VSD Fan ............................... 160 Changing the Switch Point of the Thermal Dispersion Flow Switch ............. 160 Load Limiting ..............................164 Compressor Run Status ..........................164 Alarm Status ..............................164 Remote BAS/EMS Temperature Reset Using a Voltage or Current Signal ..........165 QUANTECH...
- Page 7 Condenser Fan Motors ..........................183 Condenser MCHX Cleaning ......................... 183 Operating Parameters ..........................183 On-Board Battery Back-Up ........................... 183 Thermal Dispersion Flow Switch ........................183 Overall Unit Inspection ..........................183 Brazed Plate Heat Exchanger (Evaporator) Heater ..................184 Temperature ..............................187 QUANTECH...
- Page 8 FIGURE 30 - Leaving Water Temperature Control Example ................156 FIGURE 31 - Setpoint Adjust ..........................157 FIGURE 32 - Condenser Fan Locations .......................161 FIGURE 33 - Microboard Layout ..........................170 FIGURE 34 - I/O Board Relay Contact Architecture .....................174 FIGURE 35 - Printer to Microboard Electrical Connections ..................178 QUANTECH...
- Page 9 TABLE 31 - Outdoor Air Sensor Temperature/Voltage/Correlation ...............171 TABLE 32 - Entering/Leaving Chilled Liquid Temp. Sensor, Temperature/Voltage Correlation ......172 TABLE 33 - Pressure Transducers ........................173 TABLE 34 - Data Logging to Flash ........................175 TABLE 35 - Troubleshooting ..........................181 TABLE 36 - SI Metric Conversion .........................189 QUANTECH...
- Page 10 THIS PAGE IS INTENTIONALLY LEFT BLANK...
-
Page 11: Section 1 - General Chiller Information And Safety
WARRANTY SAFETY AND QUALITY Quantech warrants all equipment and materials against Standards for Safety and Quality defects in workmanship and materials for a period of QTC3 chillers are designed and built within an ISO... -
Page 12: About This Manual
This manual and any other document supplied with system other than by suitably trained and qualified per- the unit are the property of Quantech which reserves sonnel. all rights. They may not be reproduced, in whole or in... - Page 13 Use only the refrigerant specifically designated for the unit. Any other type of refrigerant may cause damage to the equipment and will void the warranty. QUANTECH...
- Page 14 THIS PAGE INTENTIONALLY LEFT BLANK...
-
Page 15: Section 2 - Product Description
ASTM 1654 rating of “6”. Units are designed in accordance with NFPA 70 (National Electric Code), ASHRAE/ANSI 15 Safety code for mechanical refrigeration, ASME, and rated in accordance with ARI Standard 550/590. QUANTECH... -
Page 16: Figure 1 - Compressor Enclosure For Qtc3040He
They feature ball bearings that are Canadian Registration Number (CRN) double sealed and permanently lubricated. Application & Proof of Conformance Since all QTC3 brazed plate evaporators are catego- rized as pressure “H” fittings per CSA-B51, a CRN QUANTECH... - Page 17 RAM to eliminate chiller failure due to AC powered failure/battery discharge. Programmed Unit Keys setpoints are retained in lithium battery-backed RTC This section is used to: memory for 5 years minimum. • Set time • Set unit options QUANTECH...
-
Page 18: Communications
(in compliance with NEC Article 440-14), can be cooler. Hot gas by-pass is installed on only refrigerant supplied to isolate the power voltage for servicing. (This system #1 on two-circuited units. (Factory-Mounted) option includes the Single-Point Power connection.) QUANTECH... - Page 19 AHRI conditions. The fans are three-bladed for 60 Hz and five-bladed for 50 Hz. Vibration Isolators Level adjusting, spring type 1 in. (25.4 mm) or seismic deflection or neoprene pad isolators for mounting un- der unit base rails. (Field-mounted) QUANTECH...
-
Page 20: Figure 2 - Unit Components (Front)
FORM QTC3-NM1 SECTION 2 – PRODUCT DESCRIPTION ISSUE DATE 08/03/2022 POWER POWER PANEL PANEL ITEM DESCRIPTION Fan Assemblies MCHX Condenser Control Panel Compressors Receiver Included with Optional Heat Recovery Condenser Filter Driers FIGURE 2 - UNIT COMPONENTS (FRONT) QUANTECH... -
Page 21: Figure 3 - Unit Components (Side)
SECTION 2 – PRODUCT DESCRIPTION ISSUE DATE 08/03/2022 ITEM DESCRIPTION Fan Deck MCHX Condenser Coil Headers Control and Power Panels Compressors Brazed Plate Evaporator Formed Steel Base Rails Hydro-Kit Pumps And Motors (Optional) FIGURE 3 - UNIT COMPONENTS (SIDE) QUANTECH... -
Page 22: Figure 4 - Power Panel Components
FORM QTC3-NM1 SECTION 2 – PRODUCT DESCRIPTION ISSUE DATE 08/03/2022 LD13248 ITEM DESCRIPTION Fan Contactor Fan Fuses Fan Contactor Disconnect Switch (Optional) XTBF1 Compressor Contactors Compressor Overloads FIGURE 4 - POWER PANEL COMPONENTS QUANTECH... -
Page 23: Figure 5 - Power Panel / Control Components
FORM QTC3-NM1 SECTION 2 – PRODUCT DESCRIPTION ISSUE DATE 08/03/2022 LD13248 ITEM DESCRIPTION Fan Contactor Fan Fuses Control Relay Microcomputer Control Center Display Keypad XTBC1 Microboard XTCB2 XTBF2 Compressor Contactors Compressor Overloads FIGURE 5 - POWER PANEL / CONTROL COMPONENTS QUANTECH... -
Page 24: Table 2 - Complete Pin Number Description
SP Circuit Breaker w/ Lockable Handle, 65kA SCWR (PIN 16 &17) SP Circuit Breaker w/ Lockable Handle MP Supply w/Ind Sys CB&L Ext Handles No Control Transformer Required Cntrl Transformer TRANS Control Transformer Required (PIN 18) Special Control Transformer Required QUANTECH... - Page 25 Valves VALVES Electronic Expansion Valve (PIN 32) Special Optional Valves Req’d No Hot Gas Bypass required Hot Gas Bypass HGBP Hot Gas Bypass required - 1 circuit (PIN 33) Special Hot Gas Bypass required GAUGE PIN 34 Special Quote QUANTECH...
- Page 26 Special Enclosure Panels Acoustic Blanket No Acoustic Blanket required ACOUSTIC Special Acoustic Blanket required (PIN 49) No Documents Required Base, Material & Witness Documents SR Documents Base Document SRDOCS (PIN 50) Base & Material Documents Base & Witness Documents Special Quote QUANTECH...
- Page 27 Shipping Bag (Factory Prep) Container Shipped without Shipping Bag (Factory Load Mexico Port) No Containerization required without Shipping Bag Container Shipped without Shipping Bag (Factory Prep) Buy American Act Compliance without Shipping Bag Special quote PIN 58 PIN 58 Marketing Purposes Only! QUANTECH...
- Page 28 Pump Package Options PKGOPT Dual Pump, Standard (PIN 60) Dual Pump, Full Feature VSD Single Pump, Full Feature VSD Dual Pump, Full Feature PIN 61 PIN 61 Marketing Purposes Only! Guangzhou, China Mfg Location Monterrey, Mexico San Antonio, Texas QUANTECH...
-
Page 29: Figure 6 - Process And Instrumentation Diagram
Low pressure vapor enters at the compres- sion valve where pressure is reduced and further cool- sor where pressure and superheat are increased. The ing takes place before entering to the cooler. QUANTECH... - Page 30 THIS PAGE IS INTENTIONALLY LEFT BLANK...
-
Page 31: Section 3 - Rigging, Handling And Storage
• Ensure that all openings, such as water connec- Major damage must be reported immediately to your tions, are securely capped. local Quantech representative. • Do not store where exposed to ambient air tem- peratures exceeding 112°C (44.5°F). QUANTECH... -
Page 32: Moving The Chiller
5. Attach lifting rigging from the crane and slowly the top rails. Use only the lifting holes provided. complete the removal from the container then lift Lifting Instructions are placed on a label on the chiller up and away. and on the shipping bag. QUANTECH... -
Page 33: Figure 7 - Unit Rigging/Lifting Points
FORM QTC3-NM1 SECTION 3 – RIGGING, HANDLING AND STORAGE ISSUE DATE 08/03/2022 LD18120 4 Fan Units LD18121 5 - 10 Fan Units FIGURE 7 - UNIT RIGGING/LIFTING POINTS QUANTECH... - Page 34 THIS PAGE IS INTENTIONALLY LEFT BLANK...
-
Page 35: Section 4 - Installation
See Physical Data quirements consistent with the amount QTC3040T – QTC3225T 60 Hz on page 47 for oper- and type of refrigerant charge. ating weight. If the unit is elevated beyond the normal... -
Page 36: Spring Isolators (Optional)
Hand stop valves should be installed in all lines to fa- cilitate servicing. 7. A chilled water flow switch, (either by Quantech or others) MUST be installed in the leaving water pip- Piping to the inlet and outlet connections of the chiller ing of the cooler. -
Page 37: Pipework Arrangement
If aluminum to follow these recommendations could cause damage wiring is used to supply power to the chiller, AL-CU to the unit, or loss of performance, and may invalidate compression fittings should be used to transition from the warranty. QUANTECH... -
Page 38: Relief Valves
25 to 26 for system 1, and XTBC2 – Terminals 27 taneous operation of load limiting and temperature reset (PWM input) cannot to 28 for system 2. See Figure 5 on page 23, Figure be done. 13 on page 44 and unit wiring diagram. QUANTECH... -
Page 39: Single-Point Supply Connection - Terminal Block, Non-Fused
LETHAL VOLTAGES are present inside and unit as a result of the chilled liquid the panel AFTER disconnecting power, freezing. BEFORE working on equipment. FIGURE 9 - SINGLE-POINT SUPPLY CONNECTION – TERMINAL BLOCK, NON-FUSED DISCONNECT SWITCH OR CIRCUIT BREAKER QUANTECH... -
Page 40: Figure 10 - Control Wiring Inputs
To prevent serious injury or death, the technician should verify that NO LETHAL VOLTAGES are present inside the panel AFTER disconnecting power, BEFORE working on equipment. FIGURE 10 - CONTROL WIRING INPUTS QUANTECH... -
Page 41: Table 3 - Chemical Specification Of Water
< 5 No Limit Total Hardness (odH) mg/L 4.0–8.5 No Limit Nitrate (NO3-) < 100 No Limit Iron (Fe) mg/L < 0.2 No Limit Aluminum (Al) mg/L < 0.2 No Limit Manganese (Mn) mg/L < 0.1 No Limit QUANTECH... -
Page 42: Figure 11 - Thermal Dispersion Flow Switch
3. Wiring of Thermal Dispersion Flow Switch a. The wire connection of thermal dispersion switch contains 5 pins, the central pin is Pin #5 used for programming, which is unneces- sary for wiring. See Table 13 on page 130. QUANTECH... - Page 43 No extension cable between them is al- filled with liquid. Mount the thermal dispersion lowed. flow switch on the bottom of the horizontal pipes only if the pipe is free from buildup. QUANTECH...
-
Page 44: Figure 13 - Control Wiring Outputs
The unit evaporator heater uses 120 VAC. Disconnecting 120 VAC power from the unit, at or below freezing temperatures, can result in damage to the evaporator and unit as a result of the chilled liquid freezing. FIGURE 13 - CONTROL WIRING OUTPUTS QUANTECH... -
Page 45: Section 5 - Technical Data
1. For leaving liquid temperature below 40°F (4°C) (to 10°F [-12°C]) optional low temperature glycol kit required. Contact your nearest Quantech Office for application requirements. 2. For leaving liquid temperature higher than 55°F (13°C), contact the nearest Quantech Office for application guidelines. 3. The evaporator is protected against freezing to -20°F (-29°C) with an electric heater as standard. -
Page 46: Table 5 - Ethylene And Propylene Glycol Correction Factors
24.0 26.0 20.0 25.1 17.9 20.0 24.3 19.0 30.0 25.9 30.0 24.9 40.0 26.9 -8.1 40.0 25.6 -6.0 50.0 28.0 -28.9 50.0 26.6 -28.0 NOTE: Water Pressure Drop Curves may extend past the minimum and maximum water flow ranges. QUANTECH... -
Page 47: Physical Data Qtc3040T - Qtc3225T 60 Hz
* Side extension kit (standard), evaporator nozzle remains 3 in. ** Rated in accordance with AHRI Standard 550/590 at an air on condenser temperature of 95°F and a leaving chilled water temperature of 44°F. NOTE: Additional rating information can be provided by your local Quantech technical support. QUANTECH... - Page 48 Water Connections Size, in. ** Rated in accordance with AHRI Standard 550/590 at an air on condenser temperature of 95°F and a leaving chilled water temperature of 44°F. NOTES: Additional rating information can be provided by your local Quantech technical support. QUANTECH...
- Page 49 * Side extension kit (standard), evaporator nozzle remains 3 in. ** Rated in accordance with AHRI Standard 550/590 at an air on condenser temperature of 95°F and a leaving chilled water temperature of 44°F. NOTE: Additional rating information can be provided by your local Quantech technical support. QUANTECH...
-
Page 50: Electrical Data
70 W heaters; ZP235, compressor use 120 that liquid slugging and oil dilution does not damage W heaters and ZP285, ZP385, and ZP485 utilize 150 the compressors on start. W heaters. If power is OFF more than two hours, the QUANTECH... -
Page 51: Table 9 - Pump Electrical Data (60 Hz)
Reference PIN 59 for Pump Model. Use this table along with Table 11 - Electrical Data Without Pumps on page 52 to determine electrical data of the unit plus the pump. TABLE 10 - TRANSFORMER LOAD VOLT 2000 3000 14.4 13.0 QUANTECH... -
Page 52: Table 11 - Electrical Data Without Pumps
ISSUE DATE 08/03/2022 TABLE 11 - ELECTRICAL DATA WITHOUT PUMPS MIN DUAL MAX DUAL CHILLER VOLTAGE MIN CKT. MIN N/F ELEM ELEM MODEL CODE AMPS DISC SW FUSE AND FUSE MIN CB MAX CB 040T 050T 055T 060T 070T 075T 080T QUANTECH... - Page 53 15.3 17.4 17.4 17.4 15.3 48.5 48.5 48.5 48.5 48.5 48.5 48.5 48.5 48.5 48.5 48.5 48.5 27.6 27.6 27.6 23.1 27.6 27.6 27.6 23.1 24.4 24.4 24.4 24.4 24.4 24.4 17.4 17.4 17.4 15.3 17.4 17.4 17.4 15.3 QUANTECH...
- Page 54 TABLE 11 - ELECTRICAL DATA WITHOUT PUMPS (CONT’D) MIN DUAL MAX DUAL CHILLER VOLTAGE MIN CKT. MIN N/F ELEM ELEM MODEL CODE AMPS DISC SW FUSE AND FUSE MIN CB MAX CB 085T 090T 095T 100T 110T 120T 125T QUANTECH...
- Page 55 42.5 15.3 42.5 42.5 15.3 57.7 57.7 57.7 57.7 57.7 57.7 57.7 57.7 57.7 57.7 57.7 57.7 30.9 30.9 30.9 23.1 30.9 30.9 30.9 23.1 26.9 26.9 26.9 26.9 26.9 26.9 21.5 21.5 21.5 15.3 21.5 21.5 21.5 15.3 QUANTECH...
- Page 56 TABLE 11 - ELECTRICAL DATA WITHOUT PUMPS (CONT’D) MIN DUAL MAX DUAL CHILLER VOLTAGE MIN CKT. MIN N/F ELEM ELEM MODEL CODE AMPS DISC SW FUSE AND FUSE MIN CB MAX CB 130T 140T 150T 160T 170T 1000 1000 1200 1000 1000 1200 1000 1000 QUANTECH...
- Page 57 15.3 NOTES: Reference PIN 59 for Pump Model. Use this table along with Table 9 - Pump Electrical Data (60 Hz) on page 51 to determine electrical data of the unit plus the pump. Does not include control transformer. QUANTECH...
-
Page 58: Table 12 - Wiring Lugs
ALTERNATE (1) # 6 - 500 (1) 4 - 300 (1) # 6 - 500 (1) 4 - 300 QTC3040T (1) # 6 - 500 (1) 4 - 300 (1) # 6 - 500 (1) 4 - 300 (1) # 6 - 500... - Page 59 (4) 4/0 - 500 QTC3225T (2) # 6 - 500 (2) 250 - 500 (3) 2/0 - 400 (2) 250 - 500 (3) 2/0 - 400 (2) # 6 - 500 (2) 3/0 - 250 (1) 250 - 500 QUANTECH...
-
Page 60: Electrical Notes
FACTORY MOUNTED CIRCUIT BREAKER -58 = 575-3-60 FULL LOAD AMPS HERTZ MAXIMUM MINIMUM CIRCUIT AMPACITY MINIMUM MIN NF MINIMUM NON FUSED RATED LOAD AMPS S.P. WIRE SINGLE POINT WIRING UNIT MTD SERV SW UNIT MOUNTED SERVICE (NON-FUSED DISCONNECT LOCKED ROTOR AMPS QUANTECH... - Page 61 WIRING AND ITEMS SHOWN THUS ARE (INCLUDING COIL SUPPRESSOR) NOT SUPPLIED BY YORK - KCR CONTROL RELAY ITEMS THUS ENCLOSED FORM A COMPO- PUMP CONTACTOR PART NENTS OR SETS OF COMPONENTS - KP (INCLUDING COIL SUPPRESSOR) 035-21966-101 REV Y QUANTECH...
- Page 62 Low ambient kit -FSC for fan -MF1 is only fitted on systems with less than 4 fans. Only fitted on QTC3090T Only fitted on QTC3085T, QTC3090T Input dual point circuit breaker option replaces input terminal block. Field installed on remote evaporator units. QUANTECH...
- Page 63 G System 3 with 5-fans - details shown on drawing - 123 Auxiliary switches for manual motor protectors Auxiliary switches for manual motor protectors for 3 compressor units only LON module option for smart chiller enclosure Smart chiller assembly QUANTECH...
-
Page 64: Figure 14 - Elementary Wiring Diagram
At the top of the pages the numbers 1 to 11 go from left to right. Find drawing number 2 and in column number 1 across the top of the page, locate wire number 1. FIGURE 14 - ELEMENTARY WIRING DIAGRAM QUANTECH... - Page 65 1 5 9 10 7 11 4 12 -J13 -J11 RS485 RS232 -TB1 -TB3 -K16 -K17 -K18 -K20 -K21 -K22 -K23 -K24 2 3 4 2 3 4 5 6 -K15 -K19 LD29089b DWG. 1 FIGURE 14 - ELEMENTARY WIRING DIAGRAM (CONT’D) QUANTECH...
-
Page 66: Figure 15 - Elementary Wiring Diagram
At the top of the pages the numbers 1 to 11 go from left to right. Find drawing number 2 and in column number 1 across the top of the page, locate wire number 1. FIGURE 15 - ELEMENTARY WIRING DIAGRAM QUANTECH... - Page 67 +EXT NB32 NB32 NB49 =1-KM3 =2-KM1 =2-KM2 =2-KM3 =1-YLLSV =1-YHGSV =2-YLLSV =2-YHGSV +EXT +EXT +EXT +EXT =2-ECH1 =2-ECH2 =2-ECH3 +EXT +EXT +EXT -XTBC2 =2-XTBF -XTBC2 =2-XTBF NB58C NB59C NB57C LD29243b DWG. 2 FIGURE 15 - ELEMENTARY WIRING DIAGRAM (CONT’D) QUANTECH...
-
Page 68: Figure 16 - Fan Wiring, Standard Low Sound Or Ultra Quiet, Qtc3070T - Qtc3225T
SECTION 5 – TECHNICAL DATA ISSUE DATE 08/03/2022 FAN WIRING 035-21583-125 REV - A 1L1/1.1 1L2/1.1 1L3/1.1 =1-F4 NB21 NB15 NB27 =1-F5 X/2.8 -AMB 2/1.2 LD21181a FIGURE 16 - FAN WIRING, STANDARD LOW SOUND OR ULTRA QUIET, QTC3070T - QTC3225T QUANTECH... - Page 69 FORM QTC3-NM1 SECTION 5 – TECHNICAL DATA ISSUE DATE 08/03/2022 2L1/1.5 2L2/1.5 2L3/1.5 =2-F4 NB27 =2-F5 Y/2.8 LD21181b FIGURE 16 - FAN WIRING, STANDARD LOW SOUND OR ULTRA QUIET, QTC3070T - QTC3225T (CONT’D) QUANTECH...
-
Page 70: Figure 17 - Fan Wiring, High Air Flow
FORM QTC3-NM1 SECTION 5 – TECHNICAL DATA ISSUE DATE 08/03/2022 FAN WIRING 035-21583-118 REV F LD21180a FIGURE 17 - FAN WIRING, HIGH AIR FLOW QUANTECH... - Page 71 FORM QTC3-NM1 SECTION 5 – TECHNICAL DATA ISSUE DATE 08/03/2022 LD21180b FIGURE 17 - FAN WIRING, HIGH AIR FLOW (CONT’D) QUANTECH...
- Page 72 SECTION 5 – TECHNICAL DATA ISSUE DATE 08/03/2022 SINGLE AND DUAL POINT WIRING OPTIONS SINGLE AND DUAL POINT WIRING OPTIONS 035-21583-116 REV C SINGLE POINT WIRING OPTIONS DUAL POINT WIRING OPTIONS DWG. 16 LD21208 FIGURE 18 - SINGLE AND DUAL POINT WIRING OPTIONS QUANTECH...
- Page 73 THIS PAGE IS INTENTIONALLY LEFT BLANK...
- Page 74 FORM QTC3-NM1 SECTION 5 – TECHNICAL DATA ISSUE DATE 08/03/2022 PUMP WIRING 035-21583-105 REV E DWG. 5 QUANTECH...
- Page 75 FORM QTC3-NM1 SECTION 5 – TECHNICAL DATA ISSUE DATE 08/03/2022 PUMP WIRING DWG. 5 LD16758a QUANTECH...
-
Page 76: Figure 19 - Compressor Wiring
FORM QTC3-NM1 SECTION 5 – TECHNICAL DATA ISSUE DATE 08/03/2022 COMPRESSOR WIRING 035-21589-106 REV N FIGURE 19 - COMPRESSOR WIRING QUANTECH... - Page 77 FORM QTC3-NM1 SECTION 5 – TECHNICAL DATA ISSUE DATE 08/03/2022 FIGURE 19 - COMPRESSOR WIRING (CONT’D) QUANTECH...
- Page 78 2L2C 2L3C 1L1A 1L2A 1L3A -QSD -QSD 1L1C 1L2C 1L3C TRANSFORMER AND TERMINALS ARE FOUND ON POWER SIDE 1L1A 1L2A 1L3A OF DIVIDER PANEL 1L1B 1L2B 1L3B 1L1C 1L2C 1L3C 140C LD13234C FIGURE 20 - POWER OPTIONS CONNECTION DIAGRAM QUANTECH...
-
Page 79: Figure 20 - Power Options Connection Diagram
FORM QTC3-NM1 SECTION 5 – TECHNICAL DATA ISSUE DATE 08/03/2022 2L1C 2L2C 2L3C -KP1 -KP2 2L1A 2L2A 2L3A 2L1B 2L2B 2L3B 2L1C 2L2C 2L3C LD13234D FIGURE 20 - POWER OPTIONS CONNECTION DIAGRAM (CONT’D) QUANTECH... -
Page 80: Figure 21 - Power Panel
FORM QTC3-NM1 SECTION 5 – TECHNICAL DATA ISSUE DATE 08/03/2022 POWER PANEL 035-21589-101 REV H FIGURE 21 - POWER PANEL QUANTECH... - Page 81 FORM QTC3-NM1 SECTION 5 – TECHNICAL DATA ISSUE DATE 08/03/2022 FIGURE 21 - POWER PANEL (CONT’D) QUANTECH...
- Page 82 227A 228A 229A -ELINK -J14 GND B PORT2A RS485 PORT2B RS232 PORT3 RS485 NB49 NB34 NB39 223A 123A GNDA 223I 123I GNDI -AMB 223E 123E GNDE -XTBC2 NB41 NB49 NB19 NB49 NB19 LD29090a FIGURE 22 - MICRO PANEL CONNECTIONS QUANTECH...
-
Page 83: Figure 22 - Micro Panel Connections
2-TC:BRN 55 -J10 NB50 BST:BLK NB42 BST:RED SFE:BLK BST:SCR SFE:WHT -J11 A-POS J11/QPA1:BLK J11/QPA2:BLK SFE:BRN A-NEG J11/QPA1:RED J11/QPA2:RED SFE:BLU J11/QPA1:SCR J11/QPA2:SCR GNDA GNDB NB37 NB19 NB46 -F10 -J13 1.5A NB19 NB72 NB39 LD29090b FIGURE 22 - MICRO PANEL CONNECTIONS (CONT’D) QUANTECH... -
Page 84: Dimensions
Recommended minimum clearances: Side to wall – 6 ft; rear to wall – 6 ft; control panel to end wall – 4 ft; top – no obstructions allowed; distance between adjacent units – 10 ft. No more than one adjacent wall may be higher than the unit. QUANTECH... - Page 85 Recommended minimum clearances: Side to wall – 6 ft; rear to wall – 6 ft; control panel to end wall – 4 ft; top – no obstructions allowed; distance between adjacent units – 10 ft. No more than one adjacent wall may be higher than the unit. QUANTECH...
- Page 86 Recommended minimum clearances: Side to wall – 6 ft; rear to wall – 6 ft; control panel to end wall – 4 ft; top – no obstructions allowed; distance between adjacent units – 10 ft. No more than one adjacent wall may be higher than the unit. QUANTECH...
- Page 87 Recommended minimum clearances: Side to wall – 6 ft; rear to wall – 6 ft; control panel to end wall – 4 ft; top – no obstructions allowed; distance between adjacent units – 10 ft. No more than one adjacent wall may be higher than the unit. QUANTECH...
- Page 88 Recommended minimum clearances: Side to wall – 6 ft; rear to wall – 6 ft; control panel to end wall – 4 ft; top – no obstructions allowed; distance between adjacent units – 10 ft. No more than one adjacent wall may be higher than the unit. QUANTECH...
- Page 89 Recommended minimum clearances: Side to wall – 6 ft; rear to wall – 6 ft; control panel to end wall – 4 ft; top – no obstructions allowed; distance between adjacent units – 10 ft. No more than one adjacent wall may be higher than the unit. QUANTECH...
- Page 90 Recommended minimum clearances: Side to wall – 6 ft; rear to wall – 6 ft; control panel to end wall – 4 ft; top – no obstructions allowed; distance between adjacent units – 10 ft. No more than one adjacent wall may be higher than the unit. QUANTECH...
-
Page 91: Weight Distribution And Isolator Mounting Positions
Quantech technical Sample Isolator Location Drawings support. Be aware, weights will change with each op- tion along with possible isolator changes. -
Page 92: Clearances
(1.3 m) NOTES: 1. No obstructions allowed above the unit. 2. Only one adjacent wall may be higher than the unit. 3. Adjacent units should be 10 ft (3 m) apart. FIGURE 24 - UNIT CLEARANCES – ALL MODELS QUANTECH... -
Page 93: Isolator Locations
FORM QTC3-NM1 SECTION 5 – TECHNICAL DATA ISSUE DATE 08/03/2022 ISOLATOR LOCATIONS FOUR FAN ISOLATOR LOCATIONS QTC3040THE,QTC3050THE, QTC3055THE, QTC3060THE, QTC3080THE LD18078 FOUR FAN ISOLATOR LOCATIONS QTC3070TSE, QTC3075TSE, QTC3085TSE LD18079 All dimensions are inches unless otherwise specified. QUANTECH... - Page 94 FORM QTC3-NM1 SECTION 5 – TECHNICAL DATA ISSUE DATE 08/03/2022 FIVE and SIX FAN ISOLATOR LOCATIONS QTC3095TSE, QTC3110TSE, QTC3090THE, QTC3100THE LD18080 EIGHT FAN ISOLATOR LOCATIONS QTC3125TSE, QTC3140TSE, QTC3130THE LD18081 All dimensions are inches unless otherwise specified. QUANTECH...
- Page 95 FORM QTC3-NM1 SECTION 5 – TECHNICAL DATA ISSUE DATE 08/03/2022 TEN FAN ISOLATOR LOCATIONS QTC3160TSE, QTC3150THE, QTC3170THE LD18082 TWELVE FAN ISOLATOR LOCATIONS QTC3205THE, QTC3225THE VIEW LD21040 All dimensions are inches unless otherwise specified. QUANTECH...
-
Page 96: Isolator Information
MODEL NUMBER RATED CAPACITY (LB) DEFLECTION RATED (IN.) COLOR CODE 029-25334-008 (433997) 1350 1.320 DK. PURPLE 029-25334-009 (433998) 1800 1.020 DK. GREEN 029-25334-010 (433999) 2400 0.900 GRAY 029-25334-012 (434000) 2720 0.770 WHITE 029-25334-013 (434001) 3570 0.880 GRAY / RED QUANTECH... - Page 97 10. Installation is complete. 4. Bolt or anchor all isolators to supporting structure utilizing base slotted holes (“C”). 5. Place equipment on top of isolators making sure that mounting holes of the equipment line up with isolator positioning pin (“H”). LD13790 QUANTECH...
- Page 98 1818 RED/BLACK 029-25336-013 (688697) 1450 2450 029-25336-014 (688698) 1690 1140 2892 PINK 029-25336-015 (688699) 2000 1318 3342 PINK/BLACK 029-25336-016 (688700) 2640 1854 4283 PINK/GRAY PINK/GRAY/ 029-25336-017 (688701) 3080 2004 4629 ORANGE PINK/GRAY/ 029-25336-018 (688702) 3740 2134 4930 DK BROWN QUANTECH...
- Page 99 13. Installation is complete. of (2) 5/8 UNC A325 grade 5 SAE bolts or weld ("G") ("E") ("A") ("A") ("E") GROMMET 1/4 - 3/8 GAP EQUIPMENT ("F") WASHER ("E") ("F") ("C") ("C") ("B") LD13763B QUANTECH...
- Page 100 029-25335-001 (434002) CHARCOAL UP TO 825 UP TO 374 TYPE B MODEL P/N ISOLATOR COLOR WEIGHT RANGE (LB) WEIGHT RANGE (KG) 029-25335-002 (434004) BRICK RED 826 TO 1688 375 TO 766 029-25335-004 (434005) CHARCOAL 1689 TO 4000 767 TO 1814 QUANTECH...
- Page 101 (“A”) be in- stalled on a level surface. Shim or grout as re- quired, leveling all isolator bases to the same elevation (1/32 in. maximum difference can be tolerated). TOP BOLT ("B") TOP WASHER ("C") ("B") ("A") SECTION D-D LD13762B QUANTECH...
- Page 102 THIS PAGE IS INTENTIONALLY LEFT BLANK...
-
Page 103: Section 6 - Commissioning
If you do NOT, the evapora- tor may freeze and ruin the system. 9. Purge the air from the charging pipe. 10. Open the valve on the drum to charge the remain- ing 10% of the system charge into the low side. QUANTECH... - Page 104 Ensure that connections of power cables with- in the panels to the circuit breaker or terminal blocks are tight. QUANTECH...
-
Page 105: Preparation - Power On
86°F (30°C), allow 24 hours. There should be a straight run of at least 5 pipe diam- eters on either side of the flow switch. The flow switch should be connected to terminals 13 and 14 of XTBC1 on the panel. QUANTECH... - Page 106 8. Change parameter 0-20 back to default value of readout taken in the previous step. option 1601 – “Reference [Unit]”. 9. Change parameter 0-22 back to default value of option 1610 – “Power [kW]”. 10. Put the VFD back into AUTO mode. LD18424 LD18420 QUANTECH...
- Page 107 NOTE: Power must be applied 24 hours before start- 8. Check that all power is wired to the chiller and up. Each heater should draw approximately 0.5 A to meets the following NEC and local codes ....1 A. a. High voltage..........b. Low voltage..........QUANTECH...
- Page 108 must be corrected. Remote Unit ID 11. Ensure that the Data Logging feature has been * Not on All Models **Viewable Only enabled ..............12. Verify correct compressor rotation and then turn the Unit Switch to OFF..........QUANTECH...
- Page 109 The superheat is calculated as the difference between the actual temperature of the returned refrig- erant gas in the suction line entering the compressor and the temperature corresponding to the suction pressure as shown in a standard pressure/tempera- ture chart. QUANTECH...
- Page 110 THIS PAGE IS INTENTIONALLY LEFT BLANK...
-
Page 111: Section 7 - Unit Controls
LD19046 INTRODUCTION IPU II AND I/O BOARDS The Quantech Control Center is a microprocessor The IPU and I/O boards are assembled to function as based control system designed to provide the entire a single microprocessor controller. The IPU II board control for the liquid chiller. -
Page 112: Transformer
1 a second. Display Messages may show characters indicating “greater than” (>) or “less than” (<). These characters indicate the actual values are greater than or less than the limit values which are being displayed. QUANTECH... -
Page 113: Status Key
OPTIONS is turned OFF. The system will not be al- The REMOTE CONTROLLED SHUTDOWN mes- lowed to run until the switch is turned back ON. sage indicates that either an ISN system or RCC has turned the unit OFF, not allowing it to run. QUANTECH... - Page 114 STATUS display mode. There- trol will not function unless the discharge transducer is fore, do not expect to see any other STATUS messages installed in the system. when in the MANUAL OVERRIDE mode. MANUAL QUANTECH...
- Page 115 The fault condition is cleared allowed to restart when the discharge pressure falls 40 when a 30 VDC signal is restored to the input. PSIG below the cutout. Discharge transducers must be installed for this function to operate. QUANTECH...
- Page 116 This condition must be present for 3 s to cause a system shutdown. The safety locks out a system after the first fault and will not allow automatic restarting. QUANTECH...
- Page 117 PRO- GRAM key is pressed. Once PROGRAM is pressed the anti-recycle timers will be set to the programmed anti-recycle time to allow the operator time to check setpoints, and if necessary, reprogram programmable values and options. QUANTECH...
-
Page 118: Figure 25 - Status Key Messages Quick Reference List
High Motor Current System X AC Timer System X Disch Limiting System X Suction Limiting System X Percentage Load Limiting Manual Overide Status System X Pumping Down (on shutdown) LD11297B FIGURE 25 - STATUS KEY MESSAGES QUICK REFERENCE LIST QUANTECH... -
Page 119: Display/Print Keys
A M B I E N T A I R T E M P 8 7 . 5 ° F This display shows the ambient air temperature. The minimum limit on the display is 0.4°F (-17.6°C). The maximum limit on the display is 131.2°F (55.1°C). QUANTECH... - Page 120 A detailed description of unit loading and unloading is perature rises above 45°F the heater is turned OFF. An covered under the topic of Capacity Control. under voltage condition will keep the heater OFF until full voltage is restored to the system. QUANTECH...
- Page 121 LOAD LIM – Load limiting enabled using contact clo- sure. See Standard Condenser Fan Control on page 162 for more information. PWM TEMP – EMS temperature reset *See Remote BAS/EMS Temperature Reset Using a Voltage or Current Signal on page 167. QUANTECH...
-
Page 122: Figure 26 - Operation Data
1 (410a) PUMP TOTAL RUN HOURS XXXXX (410a) * Block of information repeats for each system LD12585 UNIT DATA RETURN LIQUID TEMP 58.2 DEGF FIGURE 26 - OPERATION DATA LEAVING LIQUID TEMP 53.0 DEGF DISCHARGE AIR TEMP 55.3 DEGF QUANTECH... - Page 123 WED START=00:00AM STOP=00:00AM THU START=00:00AM STOP=00:00AM FRI START=00:00AM STOP=00:00AM QTC3 SAT START=00:00AM STOP=00:00AM LIQUID CHILLER HOL START=00:00AM STOP=00:00AM SAFETY SHUTDOWN NUMBER 1 SHUTDOWN @ 3:56PM 29 SEP 07 SYS 1 HIGH DSCH PRESS SHUTDOWN SYS 2 NO FAULTS QUANTECH...
- Page 124 Displays the type of Ambient Control; Standard or Low Ambient. L O C A L / R E M O T E M O D E X X X X X X X X X Displays Local or Remote control selection. QUANTECH...
- Page 125 A M B I E N T A I R T E M P X X X . X ° F Displays the Ambient Temp. at the time of the fault. QUANTECH...
- Page 126 S Y S F A N S T A G E X X X I / O C. M X X. 1 8. Y Y Displays the number of Fan Stages in the system active at the time of the fault. QUANTECH...
-
Page 127: Entry Keys
The ↑ (UP) arrow key, and ↓ (DOWN) arrow key are also used for programming the control panel such as changing numerical or text values when programming cooling setpoints, setting the daily schedule, changing safety setpoints, chiller options, and setting the clock. QUANTECH... -
Page 128: Setpoints Keys
ENTER/ADV key must point display entry screen will appear. be pressed to enter the data into memory. Notice that the RANGE was programmed for +/- X.X°F. This indicates the SETPOINT to be in the cen- QUANTECH... -
Page 129: Schedule/Advance Day Key
ISN control, remote reset option board, or remote PWM signal. These setpoints would only be valid if the To set the schedule, press the SCHEDULE/ADVANCE unit was operating in the REMOTE mode. DAY key. The display will immediately show the fol- lowing display. QUANTECH... -
Page 130: Table 13 - Cooling Setpoint, Programmable Limits And Defaults
* Refer to Engineering Guide for operation below 30°F (-1.1°C). Alternate thermal expansion valves must be used below 30°F (-1.1°C). * When using glycol, Leaving Chilled Liquid Setpoint should not be set below 20°F (-6.7°C). **Do not exceed 55°F (12.8°C) setpoint before contacting the nearest Quantech Office for application guidelines. After SUN (Sunday) schedule appears on the display... -
Page 131: Program Key
See Standard Condens- er Fan Control on page 162 in SECTION 7 – UNIT CONTROLS and Table 24 on page 164 and Table 25 on page 165. QUANTECH... - Page 132 OPER DATA key. The approximate tiView Panel, individual unit IDs are necessary for programmed value is calculated using the following communications with specific chillers on a single RS- formulas. 485 line. ID 0 - 7 is selectable. QUANTECH...
-
Page 133: Table 14 - Program Key Limits And Default
6.21 barg NOTES: * The minimum discharge pressure allowed is 235 psig. The Fan Differential Off Pressure High Limit will be lowered (reduced) to prevent go- ing below 235 psig based on where the fan control On Pressure is programmed. QUANTECH... -
Page 134: Figure 27 - Setpoints Quick Reference List
Table 12 provides a quick reference of the setpoints list for the Setpoints Keys. Timer Fan Control On-Pressure Fan Differential Off-Pressure Total Numbers Compressors Number of Fans Per System SYS / Unit Trip Volts Option Remote Unit ID LD07404c FIGURE 27 - SETPOINTS QUICK REFERENCE LIST QUANTECH... -
Page 135: Table 15 - Program Key Limits And Default
NORTH AMERICAN (R-410A/R-454B) or EUROPEAN (R-410A/R-454B Chiller or Heatpump) Evaporator Pump Control — — EXTERNAL, EXTERNAL KIT PUMPS 1 or KIT PUMPS 2 Evaporator Pump Total Run Hours (R-410A/ R-454B Chiller or Heatpump) 99999 — (1 Inc./Dec. per entry position) QUANTECH... - Page 136 S T A N D A R D T E M P E R A T U R E G L Y C O L L O W T E M P E R A T U R E G L Y C O L QUANTECH...
-
Page 137: Unit Keys
(Single System Display is similar) The chilled liquid is water. The Cooling Setpoint can be programmed from 40°F to 70°F (4.4°C to 21.1°C) S Y S S W I T C H S Y S S W I T C H QUANTECH... - Page 138 The microprocessor will then assign the “lead” to the system with the shortest average run time. C O N T R O L M O D E R E T U R N L I Q U I D QUANTECH...
- Page 139 R E S T A R T age to compressors. M A N U A L After a power failure, the UNIT switch must be tog- gled before restart at the unit is allowed. NORMALLY MANUAL RESTART should NOT BE SELECTED. QUANTECH...
- Page 140 If an error occurred, the following message will appear with the error code and no reboot will occur. F L A S H C A R D U P D A T E E R R O R XXXXX QUANTECH...
- Page 141 It is important that the date and time be correct, other- wise the daily schedule will not function as desired if programmed. In addition, for ease of troubleshooting via the History printouts, the day, time, and date should be correct. QUANTECH...
-
Page 142: Figure 28 - Unit Keys Options Programming Quick Reference List
(”Chiller” MUST be Selected Via No Jumper Installed (Viewable Only) Refrigerant Type R-410A (Programmed under Service Mode) Viewable Only) LD07405d Figure 28 provides a quick reference list for the Unit key setpoints. FIGURE 28 - UNIT KEYS OPTIONS PROGRAMMING QUICK REFERENCE LIST QUANTECH... -
Page 143: Bacnet, Modbus, N2, And E-Link Communications
P2 STOP BITS P1 BAUD RATE XXXXX P2 HW SELECT BIT P1 PARITY XXXXX XXXXX REAL TIME ERROR P1 STOP BITS RESET 1 = YES, 0 = NO 0 Note: See Table 18 on page 146 for error descriptions QUANTECH... -
Page 144: Figure 29 - Micro Panel Connections
P1, P2 PARITY NONE IGNORE NONE NONE, EVEN, ODD, IGNORE SELECTABLE P1 PROTOCOL BACNET BACNET BACNET, API SELECTABLE P2 PROTOCOL TERMINAL MODBUS CLIENT TERMINAL, MODBUS IO, MODBUS SERVER, API, MODBUS CLIENT SELECTABLE P1, P2 STOP BITS RESET REAL TIME ERROR QUANTECH... -
Page 145: Table 17 - Values Required For Bas Communication
This data can be read and modified using a BACnet and Modbus registers. or Modbus network connection. The Modbus Register The latest data map information is listed Address for these points is 1537 + BV #. on the Johnson Controls Equipment In- tegration website. QUANTECH... -
Page 146: Table 18 - Real Time Error Numbers
4. Water Cooled Scroll units use the same firmware as Air Cooled Scroll units, ignoring Fan Control. The table below shows the real time error numbers that may be encountered during communication setup and a description of each. QUANTECH... -
Page 147: Table 19 - Native Bacnet, Modbus, And N2 Communications Data Map
FORM QTC3-NM1 SECTION 7 – UNIT CONTROLS ISSUE DATE 08/03/2022 TABLE 19 - NATIVE BACNET, MODBUS, AND N2 COMMUNICATIONS DATA MAP QUANTECH... - Page 148 FORM QTC3-NM1 SECTION 7 – UNIT CONTROLS ISSUE DATE 08/03/2022 TABLE 19 - NATIVE BACNET, MODBUS, AND N2 COMMUNICATIONS DATA MAP (CONT’D) QUANTECH...
- Page 149 23 Low Superheat 24 Sensor Fault 25 Discharge Inhibit 26 MP/HPCO Inhibit 27 Pump Trip 28 Pump Fail Make Flow 29 High Ambient Temperature 30 Anti-Vacuum Low Pressure Cutout 31 Flow Switch Open 32 Leaving Chilled Liquid Temperature Sensor Fault QUANTECH...
- Page 150 Table 20 on page 151 lists the control parameters. Contact Quantech Product Support for These values are found under feature 54 in the E-Link the latest data points map.
-
Page 151: Table 20 - Yorktalk 2 Communications Data Map
FORM QTC3-NM1 SECTION 7 – UNIT CONTROLS ISSUE DATE 08/03/2022 TABLE 20 - YORKTALK 2 COMMUNICATIONS DATA MAP QUANTECH... - Page 152 FORM QTC3-NM1 SECTION 7 – UNIT CONTROLS ISSUE DATE 08/03/2022 TABLE 20 - YORKTALK 2 COMMUNICATIONS DATA MAP (CONT’D) QUANTECH...
- Page 153 FORM QTC3-NM1 SECTION 7 – UNIT CONTROLS ISSUE DATE 08/03/2022 TABLE 20 - YORKTALK 2 COMMUNICATIONS DATA MAP (CONT’D) QUANTECH...
- Page 154 FORM QTC3-NM1 SECTION 7 – UNIT CONTROLS ISSUE DATE 08/03/2022 TABLE 20 - YORKTALK 2 COMMUNICATIONS DATA MAP (CONT’D) QUANTECH...
- Page 155 FORM QTC3-NM1 SECTION 7 – UNIT CONTROLS ISSUE DATE 08/03/2022 TABLE 20 - YORKTALK 2 COMMUNICATIONS DATA MAP (CONT’D) QUANTECH...
- Page 156 FORM QTC3-NM1 ISSUE DATE 12/18/2020 TABLE 20 - YORKTALK 2 COMMUNICATIONS DATA MAP (CONT’D) QUANTECH...
-
Page 157: Section 8 - Unit Operation
6. If demand requires, the lag system will cycle ON with the same timing sequences as the lead system after the lead system has run for five min- utes. See the section on Capacity Control for a detailed explanation of system and compressor staging. QUANTECH... -
Page 158: Suction Pressure Limit Controls
2.5°F lenoid. Upon energizing any compressor, the 60 s Anti- (plus or minus 0.83°C to 1.39°C) leaving chilled liquid Coincidence timer will be initiated to prevent multiple control. compressors from turning ON. QUANTECH... -
Page 159: Leaving Chilled Liquid Control Override To Reduce Cycling
1. Step 1 is Hot Gas Bypass and is skipped when loading occurs. Hot Gas Bypass operation is inhibited during Pumpdown. 2. Step 3 is skipped when loading occurs. 3. Step 4 is skipped when unloading occurs. * STEP can be viewed using the OPER DATA key and scrolling to COOLING DEMAND. QUANTECH... -
Page 160: Leaving Chilled Liquid System Lead/Lag And Compressor Sequencing
Chilled Liquid Control the Hot Gas Bypass solenoid is energized only when the lead compressor is running and the LWT < SP, the Hot Gas Bypass solenoid is turned off when the LWT more than SP + CR/2. 2. Step 3 is skipped when loading occurs. 3. Step 4 is skipped when unloading occurs. QUANTECH... -
Page 161: Return Chilled Liquid System Lead/Lag And Compressor Sequencing
2. Any compressor is running and unload systems according to Table 23 on page 160. The microprocessor will lead/lag compressors 3. Daily Schedule is ON, Unit Switch is ON and Re- within each circuit to maximize individual compres- mote Stop is closed QUANTECH... -
Page 162: Evaporator Heater Control
When a fan stage is turned OFF (programmed on pres- sure minus programmed differential), the off pressure for the next stage is decreased 20 psig and ramped back to the programmed off pressure minus the differential over the next 20 s. QUANTECH... -
Page 163: Figure 32 - Condenser Fan Locations
SECTION 8 – UNIT OPERATION ISSUE DATE 08/03/2022 QTC3040HE, QTC3050HE QTC3095SE QTC3100HE QTC3070SE, QTC3075SE QTC3110SE QTC3130HE QTC3120HE, QTC3125SE, QTC3140SE QTC3160SE, QTC3170HE QTC3150HE QTC3205HE, QTC30225HE =2-MF1 =2-MF2 =2-MF3 =1-MF6 =1-MF5 =1-MF4 =2-MF4 =2-MF5 =2-MF6 =1-MF3 =1-MF2 =1-MF1 LD16764c FIGURE 32 - CONDENSER FAN LOCATIONS QUANTECH... -
Page 164: Table 24 - Qtc3 Standard Condenser Fan Control Using Discharge Pressure Only (2, 3, Or 4 Fans Per System)
** When a fan stage is turned off (Programmed ON pressure minus the differential), the OFF pressure for the next stage is decreased 20 PSIG and ramped back to the programmed OFF pressure minus the differential. The time delay (fan delay timer) between turning fan stages on and off is fixed at 5 seconds. QUANTECH... -
Page 165: Table 25 - Qtc3 Standard Condenser Fan Control Using Discharge Pressure Only
** When a fan stage is turned off (Programmed ON pressure minus the differential), the OFF pressure for the next stage is decreased 20 psig and ramped back to the programmed OFF pressure minus the differential. The time delay (fan delay timer) between turning fan stages on and off is fixed at 5 s. QUANTECH... -
Page 166: Load Limiting
Terminals 31 to 32. The alarm contacts will close when the various numbers of compressors. conditions allow the unit to operate, or the fault is reset during a loss of power, the contacts will remain open until power is reapplied and no fault conditions exist. QUANTECH... -
Page 167: Remote Bas/Ems Temperature Reset Using A Voltage Or Current Signal
New Setpoint = 7.22°C + 6.67°C = 13.89°C * Max Reset Value is the “Max EMS-PWM Remote Temp. Reset” setpoint value described in Remote Setpoint Control on page 129 under “Cooling Setpoints”. Programmable values are from 2°F to 40°F (1.11°C to 11.11°C). QUANTECH... - Page 168 THIS PAGE IS INTENTIONALLY LEFT BLANK...
- Page 169 Each display will also show the output connection on advance through the outputs. Using the ↑ and ↓ (UP/ the microboard for the respective output status shown. DOWN ) arrow keys will turn the respective digital out- For example: put ON/OFF or modify the value. QUANTECH...
-
Page 170: Service Mode
81 psig (5.6 bar) suction pressure. be required or advised. After the last start display, the microprocessor will display the first programmable The digital inputs will display the input connection and value under the PROGRAM key. ON/OFF status such as: QUANTECH... -
Page 171: Table 27 - I/O Digital Inputs
SYS 2 Condenser Fan Output 1 TB10-9 SYS 2 Condenser Fan Output 2 TB10-10 SYS 2 Condenser Fan Output 3 TB8-2 Evaporator Heater TB8-3 SYS 1 Alarm TB9-2 SYS 2 Alarm TB8-6 & 7 Evaporator Pump Starter TB10-7 SYS 2 Hot Gas Bypass Valve QUANTECH... -
Page 172: Figure 33 - Microboard Layout
FORM QTC3-NM1 SECTION 9 – SERVICE AND TROUBLESHOOTING ISSUE DATE 08/03/2022 I/O BOARD BOARD TB10 LD12721 FIGURE 33 - MICROBOARD LAYOUT QUANTECH... -
Page 173: Checking Inputs And Outputs
J6-6 = +5 VDC regulated supply to sensor. J6-9 = VDC input signal microboard. See Table 31 on page 173 for voltage readings that correspond to specific outdoor tempera- tures. J6-3 = drain (shield connection = 0 VDC) return QUANTECH... - Page 174 The output will be linear from 0.5 VDC to 4.5 VDC over the 600 psig (41.25 barg) range. Following 3.45 is the formula that can be used to verify the voltage output of the transducer. All voltage reading are in ref- 3.54 erence to ground (unit case). QUANTECH...
-
Page 175: Table 33 - Pressure Transducers
The voltage applied to either of these J9-6 = +5 VDC regulated supply to transducer. terminals would be determined by field wiring. J9-11 = VDC input signal to the microboard. See the formula above for voltage readings that correspond to specific discharge pressures. QUANTECH... -
Page 176: Figure 34 - I/O Board Relay Contact Architecture
SYS 2 TB10-5 COMPR 3 (6) SYS 2 TB10-7 HGSV TB10-8 TB10 SYS 2 TB10-9 FAN 2 SYS 2 TB10-10 FAN 4 TB8-6 EVAP PUMP TB8-7 HEAT EXCH TB8-2 HEATER LD12722 FIGURE 34 - I/O BOARD RELAY CONTACT ARCHITECTURE QUANTECH... -
Page 177: Table 34 - Data Logging To Flash
Sys 1 Discharge Temperature (discharge temperature sensors S1 Dsch Temp °F enabled) Sys 1 EEV Command (0 – 100%) 031-02755-001, -003 S1 EEV Cmd Sys 1 EEV Command (0.0 – 100.0%) 031-02755-004 S1 EEV PWM Sys 1 EEV PWM (0 – 100%) 031-02755-001, -003 QUANTECH... - Page 178 Sys 1 CSHALG_DIMINISHED_PID_ACTIVE_INDEX S1 Dim PID Index (0 = Disable, 1 = Active) Sys 1 CSHALG_ALGORITHM_CONTROL_ACTIVE S1 Alg Ctrl Act (0 = Disable, 1 = Enable) Sys 1 CSHALG_SUPERHEAT_EXCURSIONS_INDEX S1 Sheat Ex In (0 – 255 in x1 format) QUANTECH...
-
Page 179: Optional Printer Installation
3. Twisted Pair Shielded Cable (minimum 3 conduc- tor), #18 AWG stranded, 300 V minimum insula- tion, 25 ft (7.62 m) maximum length. 4. One 25 pin Cannon connector and shell. 5. Cannon P/N DB-25P connector, or equivalent. 6. Cannon P/N DB-C2-J9 shell. QUANTECH... -
Page 180: Figure 35 - Printer To Microboard Electrical Connections
Chiller Microboard TB3-3 TXD 2 RD TB3-2 CTS 5 CTS 7 SG TB3-5 GND Do not connect shield Shield (connect shield to Pin 5 at printer end. of the connector. LD12723 FIGURE 35 - PRINTER TO MICROBOARD ELECTRICAL CONNECTIONS QUANTECH... -
Page 181: Troubleshooting
5. Defective IPU II & I/O Board or 5. Replace IPU II & I/O Board or the Display the Display Board. Board. Contact Quantech Service be- fore replacing circuit Boards! 1. No chilled liquid flow. 1. Check chilled liquid flow. - Page 182 3. Contactor/Overload failure. 3. Replace defective part. 4. Compressor failure. 4. Diagnose cause of failure and replace. 1. Fouled evaporator surface. 1. Contact the local Quantech service Low suction pressure will be representative. observed. 2. Improper flow through the 2. Reduce flow to within chiller design specs.
-
Page 183: Section 10 - Maintenance
If system failure occurs due to improper maintenance during the warranty period, Quantech will not be liable for costs incurred to return the system to satisfactory CONDENSER FAN MOTORS operation. -
Page 184: Overall Unit Inspection
• DO NOT contact the coil with a hard object such the quarterly cleaning using steps 1-8: as a hose nozzle, hard vacuum nozzle or any other tool. Hard objects or tools can cause mechanical damage to the coil material and protective coat- ings on the coil. QUANTECH... - Page 185 10 mins. 6. Repeat the water rinse as described in Step 2 to remove the salt reducer solution. The final rinse should be thorough to ensure all cleaning solu- tion and salt reducer solution is removed from the coils. QUANTECH...
- Page 186 THIS PAGE IS INTENTIONALLY LEFT BLANK...
- Page 187 97.8 186.8 22.07 16.5 239.3 100.0 190.4 22.76 246.5 102.2 23.45 17.5 253.8 104.4 197.6 24.14 106.7 201.2 24.83 18.5 268.3 108.9 204.8 25.52 275.5 111.1 208.4 26.21 19.5 282.8 113.3 26.9 115.6 215.6 27.59 20.5 297.3 117.8 219.2 QUANTECH...
- Page 188 FORM QTC3-NM1 SECTION 10 – MAINTENANCE ISSUE DATE 08/03/2022 R-410A PRESSURE TEMPERATURE CHART PSIG TEMP ˚F PSIG TEMP ˚F QUANTECH...
-
Page 189: Temperature
(°C), subtract 32° and multiply by 5/9 or 0.5556. Example: (45.0°F - 32°) x 0.5556 = 7.22°C To convert a temperature range (i.e., a range of 10°F) from Fahrenheit to Celsius, multiply by 5/9 or 0.5556. Example: 10.0°F range x 0.5556 = 5.6°C range QUANTECH... - Page 190 5000 Renaissance Drive, New Freedom, Pennsylvania USA 17349 1-800-524-1330 Subject to change without notice. Printed in USA Copyright © 2022 www.Quantech-HVAC.com ALL RIGHTS RESERVED Form QTC3-NM1 (822) Issue Date: August 3, 2022 Supersedes: QTC3-NM1 (1021)
Need help?
Do you have a question about the QTC3040T and is the answer not in the manual?
Questions and answers