Table of Contents
Advertisement
Quick Links
Advertisement
Table of Contents

Related Manuals for dji MATRICE M30 EU


Summary of Contents for dji MATRICE M30 EU
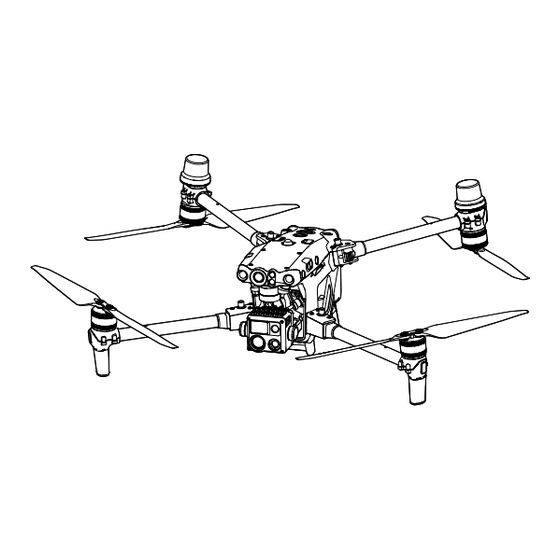
- Page 1 / M30 EU / M30 T EU User Manual v2.0 2023.09...
-
Page 2: Using Dji Pilot
Materials or any part of the Materials by reproducing, transferring or selling the Materials. Users should only refer to this document and the content thereof as instructions to operate DJI UAV. The document should not be used for other purposes. -
Page 3: Using This Manual
2 (Enterprise Series) using the link below: https://www.dji.com/matrice-30/downloads Tutorial Videos Go to the address below or scan the QR code to watch the DJI Matrice 30 tutorial videos, which demonstrate how to use the Matrice 30 safely. https://www.dji.com/matrice-30/video The operating temperature of this product is -20° to 50° C. It does not meet the standard operating temperature for military grade application (-55°... -
Page 4: Table Of Contents
Contents Using This Manual Legends Read Before Use Downloading DJI Assistant 2 (Enterprise Series) Tutorial Videos Product Profile Introduction Feature Highlights Flight Safety Flight Environment Requirements Wireless Communications Requirements Vision System and Infrared Sensing System Introduction Detection Range Calibrating the Vision System... - Page 5 Screen Gestures Shortcut Settings Video Transmission Remote Controller LEDs and Alert Remote Controller LEDs Remote Controller Alert Charging the Remote Controller and Checking the Battery Level Charging the Remote Controller Checking the Battery Level © 2022 DJI All Rights Reserved.
- Page 6 Battery Maintenance Capacity Calibration Battery Maintenance DJI Pilot 2 App Homepage Preflight Check View FPV Camera View Using FPV Camera View Primary Flight Display (PFD) Navigation Display Top Bar Intelligent Flight Battery Level Indicator © 2022 DJI All Rights Reserved.
- Page 7 DJI FlightHub 2 Firmware Update Using DJI Pilot 2 Aircraft and Remote Controller Battery Station and TB30 Batteries Offline Update Using DJI Assistant 2 (Enterprise Series) Aircraft and Remote Controller Appendix Introduction to the Carrying Case Specifications Aircraft Remote Controller...
- Page 8 Product Profile This chapter introduces the major features of the product. © 2022 DJI All Rights Reserved.
-
Page 9: Product Profile
The built-in DJI AirSense system detects nearby aircraft in the surrounding airspace, providing alerts in the DJI Pilot 2 app to ensure safety. Safety during takeoff, flight, and landing are improved with the safety beacons that help to identify the aircraft during flight and the auxiliary lights allow the vision positioning system to achieve an even greater performance at night or when there is low light. -
Page 10: Feature Highlights
Cloud Mapping: When the remote controller is logged in to DJI FlightHub 2, the aircraft can perform a cloud mapping task, which enables viewing of and generates a map on DJI FlightHub 2 simultaneously.* * For more details, refer to the DJI FlightHub 2 User Guide which is available from the official DJI website https://www.dji.com/flighthub-2/downloads. - Page 11 Flight Safety This chapter provides information about flight environment requirements, wireless communication requirements, and important flight safety features of the aircraft. © 2022 DJI All Rights Reserved.
-
Page 12: Flight Safety
Make sure to have training and practice before operating any actual flight. Practice with the simulator in DJI Assistant 2 or fly under the guidance of experienced professionals. Pick a suitable area to fly in according to the following flight requirements and restrictions. Fly the aircraft below 120 m (400 ft). Any flight altitude higher than that may violate local laws and regulations. -
Page 13: Vision System And Infrared Sensing System
Both systems work together to position the aircraft and sense obstacles during flight. To ensure a safe and steady flight, DO NOT block the vision and infrared sensors. © 2022 DJI All Rights Reserved. -
Page 14: Detection Range
Users can set the braking and warning distances in DJI Pilot 2. The aircraft brakes automatically when approaching the braking distance. When the aircraft is in the warning distance, DJI Pilot 2 will display an orange alert in obstacle information. When the aircraft is close to the braking distance, a red alert will appear in obstacle information. -
Page 15: Calibrating The Vision System
The vision systems installed on the aircraft is factory calibrated. If the aircraft experiences a collision or a significant change in the operating temperature, calibration may be required. DJI Pilot 2 will display a prompt when calibration is required. Follow these steps to calibrate the vision system when prompted: 1. -
Page 16: Obstacle Sensing
1m height). h. Small obstacles (e.g., iron wires, cables, tree branches, or leaves). i. The lens is dirty (e.g., from raindrops or fingerprints). j. In low-visibility environments (e.g., heavy fog or snow). © 2022 DJI All Rights Reserved. - Page 17 The vision system cannot function properly in dark environments and over surfaces without clear patterns or texture such as water and ice. The aircraft cannot avoid moving obstacles such as people, animals, or vehicles. © 2022 DJI All Rights Reserved.
-
Page 18: Return To Home
The Home Point can be updated before takeoff as long as the aircraft receives another strong to moderately strong GNSS signal. If the signal is weak, the Home Home Point will not be updated. After the Home Point is recorded, DJI Pilot 2 will issue a Point voice prompt. - Page 19 Home Point according to the current position, environment, and flight speed. A warning prompt will appear in DJI Pilot 2 when the battery level is low and only enough to complete an RTH flight. The aircraft will automatically fly to the Home Point if no action is taken after a countdown.
- Page 20 In case of loss of remote controller signal, the aircraft may enter ATTI mode and will automatically land. • It is important to set a suitable RTH altitude before each flight. Launch DJI Pilot 2 and set the RTH altitude. The default RTH altitude is 100 m.
- Page 21 Pay extra attention to the battery power prompts and warning prompts in DJI Pilot 2. • During Advanced RTH, if the lighting condition and environment becomes unsuitable for the vision systems, the aircraft cannot bypass the obstacles on the RTH path.
-
Page 22: Straight Line Rth
DJI M30 Series User Manual • When the remote controller signal is normal during Advanced RTH, the pitch stick can be used to control the flight speed, but the orientation and altitude cannot be controlled and the aircraft cannot be controlled to fly to the left or right. Constantly pushing the pitch stick to accelerate will increase the battery power consumption speed. -
Page 23: Landing Protection
1. The aircraft will land directly if landing protection determines the ground is suitable for landing. 2. If the ground is determined unsuitable for landing, the aircraft will hover. A prompt will appear in DJI Pilot 2 pending the next action by the user. The aircraft will start descending only when the battery level drops to 0%. -
Page 24: Flight Restrictions And Unlocking
Zones, which are further divided into Restricted Zones, Authorization Zones, Warning Zones, Enhanced Warning Zones, and Altitude Zones. Users can view such information in real time in DJI Pilot 2. GEO Zones are specific flight areas, including but not limited to airports, large event venues, locations where public emergencies have occurred (such as forest fires), nuclear power plants, prisons, government properties, and military facilities. - Page 25 In Flight: When the GNSS signal changes from weak to strong, a 100-second countdown will commence in DJI Pilot 2 if the aircraft exceeds the altitude limit. Altitude The aircraft altitude is limited when When the countdown is finished, the aircraft will Zones (Gray) flying inside an Altitude Zone.
- Page 26 Altitude Zone. The aircraft cannot fly back into the buffer zone in a horizontal direction after leaving the buffer zone. 20 m 20 m Buffer Zone Restricted Zone/ Authorized Zone Ground 20 m 20 m Altitude Zone Altitude Limit Ground © 2022 DJI All Rights Reserved.
-
Page 27: Unlocking Geo Zones
Custom Unlocking is tailored for users with special requirements. It designates user-defined custom flight areas and provides flight permission documents specific to the needs of different users. This unlocking option is available in all countries and regions and can be requested for via the DJI Fly Safe website at https://www.dji.com/flysafe. -
Page 28: Maximum Altitude & Distance Restrictions
Maximum Altitude & Distance Restrictions Maximum flight altitude restricts the aircraft flight altitude, while maximum flight distance restricts the aircraft flight radius around the Home Point. These limits can be set using the DJI Pilot 2 app for improved flight safety. -
Page 29: Calibrating The Compass
MATRICE 30 SERIES User Manual Calibrating the Compass Calibrate the compass when prompted to do so by the DJI Pilot 2 app or the aircraft rear indicators. Observe the following rules when calibrating the compass: • DO NOT calibrate the compass in locations with strong magnetic interference, such as near magnets, parking lots, or construction sites with underground reinforced concrete structures. - Page 30 Move the aircraft to a different location and try again. • A prompt will appear in DJI Pilot 2 if compass calibration is required before takeoff. The prompt will disappear after the calibration is complete.
-
Page 31: Dji Airsense
ADS-B Out devices. 2. If there is an obstacle between a manned aircraft and a DJI aircraft, DJI AirSense will not be able to receive ADS-B messages from the aircraft or send warnings to the user. Keenly observe your surroundings and fly with caution. -
Page 32: Pre-Flight Checklist
5 m away from the pilot. The pilot should be facing the rear of the aircraft. 9. To ensure flight safety, enter the flight view of DJI Pilot and check the parameters on the pre-flight checklist such as the control stick mode, RTH height, obstacle distance, and failsafe settings. It is recommended to set the failsafe action to RTH. -
Page 33: Flight Test
2. Power on the remote controller and the aircraft. 3. Launch DJI Pilot 2 and enter the camera view. 4. Wait for the aircraft self-diagnostics to complete. If DJI Pilot 2 does not prompt any irregular warning, the user can start the motors. - Page 34 Aircraft This chapter introduces the major features of the aircraft. © 2022 DJI All Rights Reserved.
-
Page 35: Aircraft
After the aircraft is linked to the remote controller (make sure the remote controller is connected to the internet), the DJI Pilot 2 app will display the prompt: “There’s a DJI device not activated”. Follow the on- screen instructions to activate the aircraft. Contact DJI Support if the activation fails. Refer to the Link the Remote Controller section for details. -
Page 36: Fpv Camera
32. Downward Beacon 33. Dongle Compartment Bottom View DO NOT disassemble the product without the assistance of a DJI authorized dealer (except for components allowed to be disassembled by users in this guide), otherwise it will not be covered under warranty. - Page 37 (kg) off altitude (m) takeoff altitude 5050 0 (3706 7206 recommended) 4400 0 (3000 6500 recommended) 4.069 4150 4.069 4735 Maximum flight altitude after takeoff is according to the national regulations. © 2022 DJI All Rights Reserved.
-
Page 38: Storing The Propellers
Use the H2.0 hex key to replace the propellers. It is recommended to replace the propellers only in an emergency situation during operations. After the flight is over, contact DJI Support or an authorized dealer for propeller check and maintenance as soon as possible. -
Page 39: Aircraft Indicators
MATRICE 30 SERIES User Manual Aircraft Indicators The aircraft has front and rear indicators. They can be turned off in DJI Pilot 2 for unobtrusive field operations. 1. Front LED Indicators 2. Rear LED Indicators When the aircraft is powered on but the motors are not running, the front indicators glow solid red to display the orientation of the aircraft. -
Page 40: Aircraft Beacons
The auxiliary lights located at the bottom of the aircraft will automatically turn on in poor light conditions to assist the downward vision system. The lights can also be manually turn on or off in DJI Pilot 2. The auxiliary lights will automatically turn on in low-light environments when the flight altitude is under 5 m. -
Page 41: Gimbal Cameras
C3 buttons for quick and easy control of the camera. Controlling the Camera with DJI Pilot 2 For information about how to control the camera in DJI Pilot 2, refer to the Gimbal Camera View section in the DJI Pilot 2 App chapter. ©... -
Page 42: Using The Microsd Card
The 3-axis gimbal stabilizes the camera, allowing the aircraft to capture clear and steady images and videos when in flight. Refer to the figure below for the tilt, pan, and roll range of the gimbal. Controllable Rotating Range +45° 0° -35° +35° -90° -120° +90° Ground Tilt Roll © 2022 DJI All Rights Reserved. -
Page 43: Gimbal Lock
The left dial controls the gimbal tilt. Dial left, the gimbal will tilt downwards. Dial right, the gimbal will tilt upwards. 2. Right Dial The right dial controls the gimbal pan. Dial left, the gimbal pan will rotate to the left. Dial right, the gimbal pan will rotate to the right. © 2022 DJI All Rights Reserved. -
Page 44: Gimbal Mode
Free Mode the rotation of the aircraft. Users can use the gimbal mode icon in the gimbal camera view in DJI Pilot 2 to quickly control the gimbal and achieve the following: The gimbal pan rotates to the center to be consistent with the aircraft Gimbal Recenter heading, and the gimbal tilt returns to the center (0°) from the current... - Page 45 Make sure that there is nothing obstructing the gimbal’s movements. DO NOT tap or knock the gimbal after the aircraft is powered on. Launch the aircraft from open and flat ground to protect the gimbal during takeoff. © 2022 DJI All Rights Reserved.
-
Page 46: Aircraft Rtk
1. Refer to the D-RTK 2 High Precision GNSS Mobile Station User Guide (available from https://www. dji.com/matrice-30/downloads) to set up the D-RTK 2 Mobile Station and link the aircraft and the station. Power on the D-RTK 2 Mobile Station and switch to the Broadcast mode for the M30 Series. -
Page 47: Ip Rating
PSDK Port The PSDK port on the top of the aircraft enables developers to connect PSDK payloads and develop more expansion functions. Visit https://developer.dji.com/ for more information about SDK development. Visit https://www.dji.com/matrice-30/downloads to learn more about the PSDK Mounting Bracket. - Page 48 Remote Controller This chapter introduces the features of the remote controller and includes instructions for controlling the aircraft. © 2022 DJI All Rights Reserved.
-
Page 49: Remote Controller
2. Connect to a Wi-Fi network to access the internet. Then set the time zone, date, and time. 3. If you have a DJI account, log in with your password. If you are a new user, create a DJI account and log in. -
Page 50: Remote Controller Overview
14. 5D Button View the default 5D button functions in DJI Pilot L1/L2/L3/R1/R2/R3 Buttons Go to camera view in DJI Pilot 2 to view the 2. Refer to Guide on the home screen for more specific functions of these buttons. - Page 51 Press the button halfway down for autofocus F-mode (Function). F-mode can be set to and all the way down to take a photo. A-mode (Attitude) or T-mode (Tripod) in DJI Pilot 2. 26. Right Dial Controls the pan of the gimbal.
- Page 52 37. Rear Cover Release Button For mounting external devices. 38. Alarm 32. C1 Button 39. Air Intake Customize functions in DJI Pilot 2. For heat dissipation. DO NOT block the air intake during usage. 33. C2 Button Customize functions in DJI Pilot 2.
-
Page 53: Mounting The Wb37 Intelligent Battery
1. Push the rear cover release button to the end to open the rear cover. Remove the screws to open the dongle compartment. 2. Insert the dongle into the USB-C connector. Close the dongle compartment. 3. Attach the dongle compartment with the screws. Close the rear cover. © 2022 DJI All Rights Reserved. -
Page 54: Mounting The Strap And Bracket Kit
3. Wear the strap, and attach the strap hooks to the handle holes. After use, hold the remote controller with one hand, unlock the strap hooks with the other hand to remove the remote controller, and then take off the strap. © 2022 DJI All Rights Reserved. -
Page 55: Adjusting The Antennas
Such as enable the mobile phone Wi-Fi. A prompt will appear in DJI Pilot 2 if the transmission signal is weak during flight. Adjust the antennas to make sure that the aircraft is in the optimal transmission range. - Page 56 The control sticks are not screwed in place securely. f. Antennas are not screwed in place securely. g. The remote controller has suffered other damage such as a cracked shell or compromised waterproof adhesive. © 2022 DJI All Rights Reserved.
-
Page 57: User Interface
Gallery Files Firefox Setting Guide Time Displays local time. DJI Pilot 2 Tap to open DJI Pilot 2. Gallery Tap to view stored images and videos. Files Tap to view stored files. Browser Tap to open the browser. Settings Tap to open system settings. -
Page 58: Screen Gestures
: Tap to enable or disable Wi-Fi. Hold to enter settings and connect to or add a Wi-Fi network. : Tap to enable or disable Bluetooth. Tap and hold to open settings and connect with nearby Bluetooth devices. © 2022 DJI All Rights Reserved. - Page 59 Slide the bar to adjust the volume and tap to mute. Note that after muting, all sounds of the remote controller will be completely disabled, including related alarm sounds. Please turn on the mute with caution. © 2022 DJI All Rights Reserved.
-
Page 60: Video Transmission
The remote controller vibrates or beeps twice to indicate an error or warning. For detailed information, see the real-time prompts on the touchscreen or in DJI Pilot 2. Swipe down from the top of the screen to open Shortcut Settings and turn on Mute mode to disable all voice alerts. -
Page 61: Charging The Remote Controller And Checking The Battery Level
4. It takes approximately 2 hours to fully charge the remote controller internal battery. It is recommended to use the DJI BS30 Battery Station for charging. Otherwise, use a certified USB-C charger with a maximum rated power of 65 W and maximum voltage of 20 V such as the DJI 65W Portable Charger. -
Page 62: Checking The Battery Level
Press the power button on the external battery, and the LEDs will indicate the current battery level of the external battery. High Alternatively, go to the home screen of the remote controller and check the battery levels of both the internal and external batteries on the status bar. © 2022 DJI All Rights Reserved. -
Page 63: Linking The Remote Controller And Control Stick Modes
Prepare To Fly 1. Power on the aircraft and the remote controller. 2. Run DJI Pilot 2 and tap Link Remote Controller to link. The status LED of the remote controller will blink blue, and the remote controller will beep during linking. -
Page 64: Control Stick Mode
MATRICE 30 SERIES User Manual Control Stick Mode There are three pre-programmed modes as well as custom modes that can be configured in DJI Pilot 2. The modes are Mode 1, Mode 2, and Mode 3. Mode 1 Left Stick... - Page 65 Keep the remote controller away from magnetic materials such as magnets and loudspeaker boxes to avoid magnetic interference. To avoid damage to the control sticks, it is recommended that the remote controller be stored in the carrying case when being carried or transported. © 2022 DJI All Rights Reserved.
- Page 66 Method 1: When the aircraft has landed, push the throttle stick down and hold. The motors will stop after three seconds. Method 2: When the aircraft has landed, push the throttle stick down, and perform the same CSC used to start the motors. Release both sticks once the motors have stopped. © 2022 DJI All Rights Reserved.
-
Page 67: Buttons Overview
DJI Pilot 2. Button Customization and Combinations Customizable Buttons The C1, C2, C3, and 5D buttons are customizable. Open DJI Pilot 2 and enter camera view. Tap and tap to configure the functions of these buttons. In addition, combination buttons can be customized using the C1, C2, and C3 buttons with the 5D button. - Page 68 Adjust Volume Back Button + Record Button Record Screen Back Button + Shutter Button Screenshot Back Button + 5D Button Toggle up - Home; Toggle down - Shortcut settings; Toggle left - Recently opened apps © 2022 DJI All Rights Reserved.
-
Page 69: Flight Mode Switch (N/S/F)
S-mode. F-mode (Function) F-mode can be set to T-mode (Tripod mode) or A-mode (Attitude mode) in DJI Pilot 2. T-mode is based on N-mode. The flight speed is limited to allow easier control of the aircraft. Attitude mode must be used with caution. - Page 70 1. DO NOT switch from N-mode to either S-mode or F-mode unless you are sufficiently familiar with the aircraft behavior under each flight mode. You must turn on Multiple Flight Modes in DJI Pilot 2 before switching from N-mode to other modes.
-
Page 71: Calibrating The Compass
Tap on the upper right corner of the gimbal camera view in DJI Pilot 2 to gain control of the gimbal camera. Link the two remote controllers one by one. Make sure to link the remote controller A with the aircraft first, and then link the remote controller B. - Page 72 B can only be used to update the firmware of remote controller B. 12. Uploading Logs Using DJI Pilot 2: The pilot can upload the logs of both the aircraft and remote controller A through remote controller A, and can upload the logs of remote controller B through remote controller B.
- Page 73 Intelligent Battery Station This chapter introduces the features of intelligent battery station. © 2022 DJI All Rights Reserved.
-
Page 74: Intelligent Battery Station
10. USB-C Maintenance Port 11. USB-C Charging Port (Recommended for Remote Controller) 12. USB-A Charging Port 13. Charging Mode Switch 13 12 11 14. Padlock Holes 15. Lock Clip 16. Handle 17. Pressure Valve 16 17 © 2022 DJI All Rights Reserved. -
Page 75: Warnings
1. Connect the battery station to a power outlet using the AC power adaptor cable. 2. Press the power button once to power on the battery station. 3. To charge the DJI RC Plus remote controller, connect the USB-C ports of the battery station and remote controller using a USB-C to USB-C cable. - Page 76 10° C (50° F) when inserted. When the WB37 battery is charged at the same time, the TB30 battery charging time will be slightly prolonged. © 2022 DJI All Rights Reserved.
-
Page 77: Battery Station Leds And Alert
Updating battery station firmware Solid red Battery station error* * Connect to the remote controller, run DJI Pilot 2, and tap HMS to diagnose the error. Buzzer Sound Description The buzzer beeps to indicate the following errors: a. When the battery status LED is red and the buzzer is beeping, it means there is an error with the battery. - Page 78 Intelligent Flight Battery This chapter introduces the features of intelligent flight battery. © 2022 DJI All Rights Reserved.
-
Page 79: Intelligent Flight Battery
The TB30 intelligent flight battery is equipped with high-energy battery cells and uses an advanced battery management system to power the aircraft. Only use a DJI-approved charging device to charge the intelligent flight battery. Make sure to fully charge the intelligent flight battery before using it for the first time. -
Page 80: Using Paired Batteries
The Battery Level Indicators will also show the current battery level during discharging. The indicators are defined below. : LED is on. : LED is off. : LED is flashing. Battery Level LED1 LED2 LED3 LED4 Battery Level 88%~100% 75%~88% 63%~75% 50%~63% 38%~50% 25%~38% 13%~25% 0%~13% © 2022 DJI All Rights Reserved. -
Page 81: Hot Battery Replacement
4.4 V before use. 2. When the aircraft is in flight after the above conditions are satisfied, and the DJI Pilot 2 app shows a critically low battery level warning, it is recommended to stop flying immediately and land the aircraft in an appropriate place. -
Page 82: Battery Storage
1. Battery performance will be affected if the battery is not used for an extended period. 2. Perform battery maintenance once every 50 cycles or 3 months or when prompted to do so by DJI Pilot 2, in the following steps:... - Page 83 In addition to the above, we recommend conducting the following checks for battery maintenance: a. Insert the battery into the aircraft and power it on to view the battery information in DJI Pilot 2. Make sure the difference in cell voltage is less than 0.1 V and the battery firmware is updated to the latest version.
- Page 84 DJI Pilot 2 App This chapter introduces the main functions of the DJI Pilot 2 app. © 2022 DJI All Rights Reserved.
-
Page 85: Dji Pilot 2 App
DJI Pilot 2 App The DJI Pilot 2 app is specifically developed for enterprise users. Manual flight integrates a variety of professional features that make flying simple and intuitive. Mission flight supports flight planning and autonomous operation of the aircraft, making your workflow much simpler and more efficient. - Page 86 If the DJI account logged in by the user has the DJI FlightHub 2 license, tap the cloud service on the app homepage to automatically log in to DJI FlightHub 2. DJI FlightHub 2 is a cloud- based integrated online management platform for aircraft, providing users with real-time aircraft monitoring and equipment and member management.
- Page 87 Read the Health Management System (HMS) section for more details. e. The maintenance information of the current aircraft is displayed here. If the aircraft has DJI Care, its validity period will also be shown. Tap to view the device information, including cycle count, flight duration, flight history, activation time, and flight mileage.
- Page 88 10. Camera View Tap to enter Preflight Check view and FPV camera view and switch to gimbal camera view. Refer to the Preflight Check View, FPV Camera View and Gimbal Camera View sections for more details. © 2022 DJI All Rights Reserved.
-
Page 89: Preflight Check View
MATRICE 30 SERIES User Manual Preflight Check View Tap Enter Camera View on the homepage of DJI Pilot 2 to enter Preflight Check view. 1. View the aircraft's health information, flight mode, intelligent flight battery level, remote controller role, remote controller internal and external battery levels, Home Point status, RTK status, and camera microSD card storage information. -
Page 90: Fpv Camera View
FPV Camera View Using FPV Camera View After tapping Enter Camera View on the homepage of DJI Pilot 2 and finishing the preflight check, you will be directed to FPV camera view by default. 1. Top Bar: displays the aircraft status, flight mode, signal quality, etc. Refer to the Top Bar section for more details. -
Page 91: Primary Flight Display (Pfd)
The higher the vertical speed, the longer the white line. 12. Altitude (ALT): displays the altitude of the aircraft relative to the takeoff point. © 2022 DJI All Rights Reserved. -
Page 92: Navigation Display
When the compass of the remote controller is working normally, the blue dot shows the direction of the remote controller. If the signal is poor during flight, point the arrow of the remote controller in Navigation Display to the direction of the aircraft. © 2022 DJI All Rights Reserved. - Page 93 Both the obstacle braking distance and the warning distance can be set in DJI Pilot 2. Follow the prompted instructions in the app to set them.
-
Page 94: Top Bar
NA will be displayed. Top Bar 1. Back: Tap to return to the homepage of the DJI Pilot 2 app. 2. System Status Bar: indicates the aircraft flight status and displays various warning messages. If a new alert appears during flight, it will also be displayed here and continue flashing. -
Page 95: Intelligent Flight Battery Level Indicator
Intelligent Flight Battery Level Indicator Sufficient battery Critical Low battery level (Green) level warning Low battery Remaining flight time level warning Auto landing (Red) 12:29 Power required to return home (Yellow) Battery level Indicator © 2022 DJI All Rights Reserved. -
Page 96: Ar Projection
AR Projection DJI Pilot 2 App supports AR projection, including: a. Home Point: When the Home Point is beyond the current view, it will be displayed on the edge of the view. -
Page 97: Gimbal Camera View
Camera Settings: Tap to enter the camera setting menu. The camera setting menu may vary by camera type. Select a camera type to view its parameters. Photo/Video Toggle: Tap to switch between photo and video modes, and select different shooting or recording modes. © 2022 DJI All Rights Reserved. - Page 98 25. Status of Photo/Video Upload to Cloud: displays the status of a photo/video upload from DJI Pilot 2 to DJI FlightHub 2 or the connection status of a live stream; tap to view the details. If you are using the DJI FlightHub 2 cloud service, you can quickly configure its media file upload settings.
- Page 99 26. Mission Flight Control/Status: displays the progress of a mission flight in gimbal camera view. Tap the Pause/Resume button to pause/resume the task, and tap the panel to view the mission flight name and actions. © 2022 DJI All Rights Reserved.
-
Page 100: Wide Camera View
Zoom Frame: After switching to a wide-angle camera as the main view, the zoom frame will display the field of view and camera zoom rate. Thermal Camera View This section mainly sets out the differences with zoom camera. Refer to the Gimbal Camera View section for more details. © 2022 DJI All Rights Reserved. -
Page 101: Laser Rangefinder (Rng)
The latitude and the longitude of the target can be obtained after a PinPoint is created on the target. 3. The linear distance between the target and the aircraft. 4. The altitude between the target and the aircraft. 5. The horizontal distance between the target and the aircraft. © 2022 DJI All Rights Reserved. -
Page 102: Smart Track
1. Tap to start or stop Smart Track. 2. The feature identifies a person, vehicle, or boat as the target. Alternatively, you can gesture on the screen to select another object as the target. © 2022 DJI All Rights Reserved. - Page 103 The aircraft is less than 5 meters from the target. b. The target is under the aircraft that the gimbal tilt needs to be greater than 80°. © 2022 DJI All Rights Reserved.
- Page 104 The tracking effect may decline in environments with poor visibility such as in a rain, fog, or haze. d. The tracked object/target may change in scenes with heavy traffic, crowds, or large clusters of similar objects. © 2022 DJI All Rights Reserved.
-
Page 105: Map View
Tap to draw an area on the map. Tap to clear all points, lines, and annotations on the current view. If the user is logged in on DJI FlightHub 2, performing this action will not clear the annotations distributed by DJI FlightHub 2. -
Page 106: Annotation Management And Synchronization
4. Tap and tap to change the custom remote controller settings to PinPoint, delete the selected PinPoint, or select the previous or next PinPoint. Users can quickly generate and select PinPoints by using the buttons. © 2022 DJI All Rights Reserved. - Page 107 There are five color options for the PinPoint, and it is recommended to set a color for each type of target as required by the operation scenario. 2. Tap to expand the PinPoint list to view all the target points. 3. Set whether to display the newly created PinPoint in video transmission view. © 2022 DJI All Rights Reserved.
- Page 108 5. Tap to sort PinPoints in forward or reverse chronological order, or in alphabetical order by their names. 6. Tap to delete the PinPoint. 7. Tap to enable or disable AR projection display for the PinPoint in video transmission view. © 2022 DJI All Rights Reserved.
-
Page 109: Line And Area Annotation Management
1. Tap to display the Edit Line view. 2. Tap to display the Edit Area view. 3. All the point, line and area information can be viewed on the map. Tap this icon to delete the information. © 2022 DJI All Rights Reserved. -
Page 110: Annotation Sharing
In Advanced Dual Operator mode, all point, line and area annotations can be synchronized with another remote controller. When connected to DJI Flighthub 2, the DJI Pilot 2 app and the point, line and area annotations of DJI Flighthub 2 can be synchronized with each other. They can be viewed on the remote controller and other devices logged into DJI Flighthub 2 for real-time sharing of locations and annotations. -
Page 111: Mission Flight
MATRICE 30 SERIES User Manual Mission Flight Tap on the home screen of DJI Pilot 2 to enter the flight route library, or tap the flight route icon in the camera view or in the map view to enter the flight route library. Users can view flight tasks or create a waypoint route, area route, or linear route flight task.These tasks are generated by the app. -
Page 112: Mission Flight - Setting Waypoints
Tap to upload the flight route. Once the upload is complete, tap the Start button to perform the current task. © 2022 DJI All Rights Reserved. - Page 113 RTH is triggered, the aircraft will follow the route and fly out of the area before ascending to the RTH altitude and returning to home. © 2022 DJI All Rights Reserved.
-
Page 114: Mission Flight - Live Mission Recording
Tap once on the picture to hide / show other buttons and tools on the screen. f. Tap to save the flight route settings and the AI Spot-check configurations, and a flight route is created. © 2022 DJI All Rights Reserved. - Page 115 The selection box position must be in the middle of the view and the size needs to be the same as the target size. If Advanced Dual Operator Mode is in use, Controller A must be used to complete the Demo Flight and mission upload. © 2022 DJI All Rights Reserved.
-
Page 116: In-Flight Editing
2. Tap to enter the Set Waypoints page. 3. Tap to enter the In-Flight Editing view. The edits will be merged into the original route after they are saved. 4. Tap to enter AI Spot-check page. © 2022 DJI All Rights Reserved. -
Page 117: Health Management System (Hms)
5. Manage Logs: displays the remote controller and aircraft log data of recent sorties. The user can assist by extracting the relevant logs to local storage or upload them directly to the DJI Support cloud, to facilitate troubleshooting by DJI Support. -
Page 118: Intelligent Battery Station Status And Log Management
Checking the Battery Station Status Run DJI Pilot 2, tap HMS to check the status of the battery station and batteries. If a warning appears, tap it for more detailed information and follow the prompted instructions to resolve the issue. - Page 119 Firmware Update This chapter introduces the methods of updating the firmware of the device. © 2022 DJI All Rights Reserved.
-
Page 120: Firmware Update
Battery Station and TB30 Batteries Use the DJI Pilot 2 app to update the firmware of the battery station as well as up to eight TB30 flight batteries at the same time. 1. Insert the TB30 batteries into the battery port and power on the battery station. -
Page 121: Offline Update
1. Connect the remote controller or aircraft to the PC one by one, as the assistant software does not support the updating of multiple DJI devices at the same time. 2. Make sure the PC is connected to the internet and the DJI device is powered on with a battery level higher than 25%. - Page 122 Appendix This chapter provides the specifications. © 2022 DJI All Rights Reserved.
-
Page 123: Appendix
Appendix Introduction to the Carrying Case 1. Cables and Screws 2. TB30 Intelligent Flight Battery 3. Reserved 4. Aircraft body 5. Propellers 6. Remote controller and manuals © 2022 DJI All Rights Reserved. -
Page 124: Specifications
1676 High Altitude (must be used in countries and regions with C2 certification) Ingress Protection Rating IP55 GPS+Galileo+BeiDou+GLONASS (GLONASS is supported GNSS only when RTK module is enabled) Operating Temperature -20° to 50° C (-4° to 122° F) © 2022 DJI All Rights Reserved. - Page 125 3840×2160 Photo Size 4000×3000 Thermal Camera Thermal Imager Uncooled VOx Microbolometer DFOV: 61° Focal length: 9.1 mm (equivalent: 40 mm) Lens Aperture: f/1.0 Focus: 5 m to ∞ Noise Equivalent Temperature ≤50mK@F1.0 Difference (NETD) © 2022 DJI All Rights Reserved.
- Page 126 65° (H), 50° (V) Operating Environment Surfaces with clear patterns and adequate lighting (> 15 lux) Infrared Sensing Systems Obstacle Sensing Range 0.1-10 m 30° Operating Environment Large, diffuse, and reflective obstacles (reflectivity >10%) © 2022 DJI All Rights Reserved.
-
Page 127: Remote Controller
Operating Time Internal Battery + External Battery: Approx. 6 hours Ingress Protection Rating IP54 GNSS GPS+Galileo+BeiDou Operating Temperature -20° to 50° C (-4° to 122° F) O3 Enterprise Operating Frequency 2.4000-2.4835 GHz, 5.725-5.850 GHz © 2022 DJI All Rights Reserved. -
Page 128: Intelligent Battery Station
Max. output power of 10 W (5 V, 2 A) Power Consumption < 8 W (when not charging battery) Output Power Approx. 30 W (when warming up battery) Operating Temperature -20° to 40° C (-4° to 104° F) © 2022 DJI All Rights Reserved. - Page 129 [5] The maximum operating time was tested in a lab environment and is for reference only. [6] The charging time was tested in a lab environment at room temperature. The value provided should be used for reference only. © 2022 DJI All Rights Reserved.
-
Page 130: Troubleshooting Procedures
5. Make sure to read the whole manual to learn more before use. When the aircraft detects a risk after powering on, there will be a warning prompt on DJI Pilot 2. Pay attention to the list of situations below. -
Page 131: Disposal
Make sure that the MTOM is not larger than 3998 g for any flight. 2. DO NOT use any non-qualified replacement parts, such as intelligent flight batteries or propellers, etc. 3. DO NOT retrofit the aircraft. © 2022 DJI All Rights Reserved. - Page 132 Direct Remote ID 1. Transport Method: Wi-Fi Beacon. 2. Method of uploading the UAS Operator Registration Number to the aircraft: Enter DJI Pilot 2 > GEO Zone Map > UAS Remote Identification, and then upload UAS Operator Registration Number. 3. According to applicable rules, operators shall provide the correct registration number to broadcast in flight.
- Page 133 UGZ databases. In the future, DJI Geo zones will coexist with EU UGZs, as UGZs are still not available in many countries. Users are responsible for checking local regulations and for any flight restrictions where they intend to operate.
- Page 134 1. Warning message appears 2. Cannot take off 3. Users can apply on the DJI official website after manual approval Authorization Zones Appear blue in the app. Users will be prompted with a warning message, and flight is limited by default.
- Page 135 Pilots who are planning to fly medium-sized UAVs in Approved Zones at an altitude higher than 120 m, or in GEO Zones other than Approved Zones, must obtain permission via UTMISS before taking off. © 2022 DJI All Rights Reserved.
-
Page 136: Far Remote Id Compliance Information
The aircraft monitors the Remote ID system functionality from pre-flight to shut down. If the Remote • ID system malfunctions or has a failure, an alarm will be displayed in a DJI flight control app such as DJI Pilot 2. -
Page 137: After-Sales Information
MATRICE 30 SERIES User Manual After-Sales Information Visit https://www.dji.com/support to learn more about after-sales service policies, repair services, and support. © 2022 DJI All Rights Reserved. - Page 138 This content is subject to change without notice. Download the latest version from https://www.dji.com/matrice-30/downloads If you have any questions about this document, please contact DJI by sending a message to DocSupport@dji.com. DJI and MATRICE are trademarks of DJI. Copyright © 2022 DJI All Rights Reserved.
Need help?
Do you have a question about the MATRICE M30 EU and is the answer not in the manual?
Questions and answers