
Related Manuals for ProLights EclExpo Flood150VW


Summary of Contents for ProLights EclExpo Flood150VW
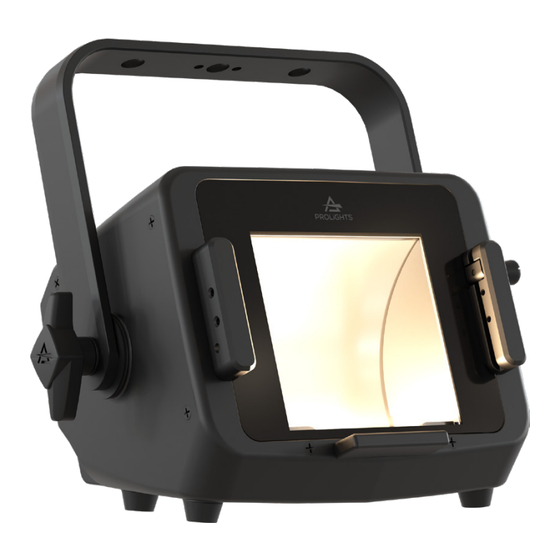
- Page 1 EclExpo Flood150VW 150W asymmetric LED floodlight, with Variable White CCT 2,700K - 6,500K USER MANUAL English version REV.01-08/23...
- Page 2 PROLIGHTS product are trademarks OWNED or licensed by Music & Lights S.r.l., its affiliates, and subsidiaries. PROLIGHTS is a registered trademark by Music & Lights S.r.l. All right reserved. Music & Lights – Via A. Olivetti, snc - PROLIGHTS is a registered trademark by Music & Lights S.r.l. All right reserved. Music & Lights – Via A. Olivetti, snc - 04026 - Minturno (LT) ITALY.
-
Page 3: Table Of Contents
BARNDOOR (CODE ECLEXPOFL150BDBK - OPTIONAL) ..........23 CRMX WIRELESS KIT (CODE ECLEXPOFL150WKBK - OPTIONAL) ......24 15 - MAINTENANCE MAINTENANCE AND CLEANING THE PRODUCT............26 REPLACING THE FUSE ....................26 VISUAL CHECK OF PRODUCT HOUSING ..............26 TROUBLESHOOTING ..................... 27 PROLIGHTS - EclExpo Flood150VW... -
Page 4: Safety Information
• Do not reapply power until repairs have been completed. • Refer any service operation not described in this manual to PROLIGHTS Service team or an authorized PROLIGHTS service center. Installation •... - Page 5 • Warning! Disconnect the fixture from AC mains power and allow to cool for at least 10 minutes before handling. • Only technicians who are authorized by PROLIGHTS or Authorised service partners are permitted to open the fixture. • Users may carry out external cleaning, following the warnings and instructions pro- vided, but any service operation not described in this manual must be referred to a qualified service technician.
- Page 6 • This device complies with Part 15 of the FCC Rules. Operation is subject to the fol- lowing two conditions: 1. This device may not cause harmful interference, and 2. This device must accept any interference received, including interference that may cause undesired operation. Other approvals PROLIGHTS - EclExpo Flood150VW...
-
Page 7: Packaging
• C6002B: Slim aluminum clamp, 200kg loading, 48-51mm tubes, M10 bolt, Black 2 - TECHNICAL DRAWING Ø246 mm [9.7 in] 110 mm [4.3 in] 283 mm 176 mm 179 mm [11.1 in] [6.9 in] [7.0 in] Weight: 3,2 kg / 7,05 lbs Fig. 01 PROLIGHTS - EclExpo Flood150VW... -
Page 8: Installation
C6002 RSR0630A/B clamp steel security cable 283 mm [11.1 in] 110 mm [4.3 in] 25 mm [1.0 in] 35 mm [1.4 in] Ø6 mm Ø13 mm [0.5 in] [0.2 in] 229 mm Fig. 02 [9.0 in] PROLIGHTS - EclExpo Flood150VW... -
Page 9: Connection To The Mains Supply
• In case you wish to run the product through an external battery, then connect the product to an external battery (24-36V) into the dedicated XLR4p socket; to disconnect power, disconnect the Battery from the socket. PROLIGHTS - EclExpo Flood150VW... -
Page 10: Product Overview
8. DMX IN (5-p XLR): 1 = GND, 2 = sign-, 3 = sign+, 4 N/C, 5 N/C. 9. DMX OUT (5-p XLR): 1 = GND, 2 = sign-, 3 = sign+, 4 N/C, 5 N/C. 10. ANTENNA of Wireless DMX Receiver internal module. Fig. 03 PROLIGHTS - EclExpo Flood150VW... -
Page 11: Dmx Connection
... . DMX IN DMX OUT DMX IN DMX OUT DMX IN DMX OUT DMX IN DMX OUT DMX512 Controller Fig. 05 - Example 15 DMX channels configuration PROLIGHTS - EclExpo Flood150VW... -
Page 12: Construction Of The Dmx Termination
5. Ensure that the receiver units are not connected to any other transmitter. Please refer to "Reset the receiver" paragraph. 6. Enable TX LINK to ON to link transmitter to receivers (please note that TX LINK will be avaible only if WDMX mode is set to Transmitter). PROLIGHTS - EclExpo Flood150VW... -
Page 13: Unlinking The Transmitter
• The wireless icon on the receiver display indicates the received signal strength. WDMX TO DMX (RX) This function enable or disable the retransmission of the wireless DMX signal received throught the DMX port on the receiver side. PROLIGHTS - EclExpo Flood150VW... -
Page 14: Control Panel
The product is equipped with rotatory knobs for manual control of the product, those are enabled only in Stand Alone mode and they enable access to control certain attributes according to the selected STAND ALONE mode asindicated in the following chapter. PROLIGHTS - EclExpo Flood150VW... -
Page 15: Menu Structure
To choose the desired unit of temperature measurement. UNIT °F TRANSFER WITHOUT To transfer the same menu settings of one fixtures to all CONFIGURA- the other in the daisy chain, including or not the dmx TION ADDRESS address. WITH DMX ADDRESS PROLIGHTS - EclExpo Flood150VW... - Page 16 VALUE ERROR To see any error messages. MESSAGE FIXTURE View informations about fixture model. MODEL DEVICE LABEL To see device label. SOFTWARE View informations about software VERSION version. RDM UID View ID for the RDM control. PROLIGHTS - EclExpo Flood150VW...
- Page 17 6500K <000 - 255> MANUAL User generated color preset COLOR assigning values to each primary color <000 - 255> attribute. After enabled this mode, the unit will be automatically assigned as STROBE <000 - 255> Master PROLIGHTS - EclExpo Flood150VW...
-
Page 18: Rdm Functions
DIMMER_INFO 0x0340 Settings Dimmer CURVE 0x0343 Settings Dimmer CURVE_DESCRIPTION 0x0344 Settings OUTPUT_RESPON- Dimmer 0x0345 SE_TIME Settings OUTPUT_RESPONSE_ Dimmer 0x0346 TIME_ DESCRIPTION Settings MODULATION_FRE- Dimmer 0x0347 QUENCY Settings MODULATION_FRE- Dimmer 0x0348 QUENCY_ DESCRIPTION Settings SENSOR_DEFINITION Sensors 0x0200 PROLIGHTS - EclExpo Flood150VW... - Page 19 Manual WW/CW mode rer PIDs Manufactu- Set level of CW in Manual MANUAL CW 0x82E3 0 - 255 rer PIDs WW/CW mode 0: Auto Manufactu- 1: High 0 - 3 0x82D2 rer PIDs 2: Silent 3: Off PROLIGHTS - EclExpo Flood150VW...
-
Page 20: Shortcuts
This error message indicates that an overheating has occurred and the led has been [TEMPERATURE TOO HIGH] switched OFF by the product protection system. [MAINTENANCE TIME] Need to be done standard maintenance and also reset of elapsed time [DMX ACTIVE] Transfer configuration is used with dmx signal connected PROLIGHTS - EclExpo Flood150VW... -
Page 21: Dmx Charts
EXTENDED Channel BASIC STANDARD EXTENDED DIMMER DIMMER DIMMER DIMMER DIMMER WARM WHITE DIMMER FINE DIMMER FINE COLD WHITE STROBE STROBE CCT FINE CCT FINE CROSSFADE WARM WHITE WARM WHITE FINE COLD WHITE COLD WHITE FINE FUNCTION PROLIGHTS - EclExpo Flood150VW... - Page 22 6400K - 6500K 248 ÷ 255 CCT FINE 000 ÷ 255 CROSSFADE CCT to WW/CW 0~100% 000 ÷ 255 WARM WHITE 0~100% 000 ÷ 255 WARM WHITE FINE 000 ÷ 255 COLD WHITE 0~100% 000 ÷ 255 PROLIGHTS - EclExpo Flood150VW...
- Page 23 Stand Alone Manual Color 082 ÷ 083 Menu Stand Alone 084 ÷ 085 Output Control Constant 086 ÷ 087 Output Control Dynamic 088 ÷ 089 RESERVED 090 ÷ 253 FACTORY DEFAULT OF ALL 254 ÷ 255 CONTROLLED FUNCTION PROLIGHTS - EclExpo Flood150VW...
-
Page 24: Accessories Installation
Insert the anti-glare louvre into the slot (DETAIL 1). Pull the knob out (DETAIL 2) and insert the acces- sory filter frame from the top into the guide on the hardware of the unit (DETAIL 3). Then release the knob (DETAIL 3). NOTE: To remove the accessory, reverse the procedure. Fig. 08 PROLIGHTS - EclExpo Flood150VW... -
Page 25: Barndoor (Code Eclexpofl150Bdbk - Optional)
Unscrew the knob of the barndoor accessory (DETAIL 1). Then mount the barndoor by screwing the knob with the hole on the unit hardware (DETAIL 2). NOTE: To remove the accessory, reverse the procedure. Fig. 09 PROLIGHTS - EclExpo Flood150VW... -
Page 26: Crmx Wireless Kit (Code Eclexpofl150Wkbk - Optional)
To install the wireless kit, you need to open the apperecchio and follow the following instructions: Unscrew the screws as shown in Figures 1 and 2 and remove the top cover. Unscrew the screw and remove the antenna cover. Fig. 10 PROLIGHTS - EclExpo Flood150VW... - Page 27 Secure the antenna in the space provided and screw in the 2 screws in Figure 5. Finally, attach the TIMO board using the appropriate connector, and reassemble the cover by screwing all the screws back in. NOTE: To remove the accessory, reverse the procedure. Fig. 11 PROLIGHTS - EclExpo Flood150VW...
-
Page 28: Maintenance
WARNING: the use of alcohol or any other detergent could damage the lenses. • All other service operations on the product must be carried out by PROLIGHTS, its approved service agents or trained and qualified personnel. -
Page 29: Troubleshooting
• Check if the Fuse is intact and eventually replace it if fault. necessary. • Contact the PROLIGHTS Service or authorized service partner. Do not remove parts and/or covers, or carry out any repairs or service that are not described in... - Page 30 Note...
- Page 32 PROLIGHTS is a trademark of prolights.it Via A.Olivetti snc MUSIC & LIGHTS S.r.l. support@prolights.it 04026 - Minturno (LT) ITALY musiclights.it Tel: +39 0771 72190...
Need help?
Do you have a question about the EclExpo Flood150VW and is the answer not in the manual?
Questions and answers