
Subscribe to Our Youtube Channel
Related Manuals for Heta SCAN-LINE GREEN 150


Summary of Contents for Heta SCAN-LINE GREEN 150
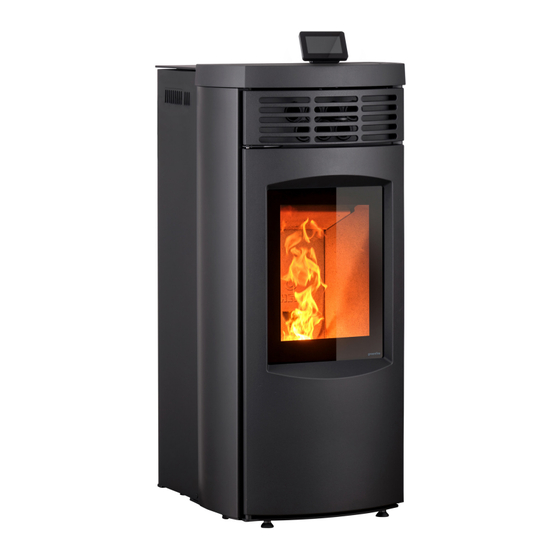
- Page 1 OPERATING AND INSTALLATION INSTRUCTIONS SCAN-LINE GREEN 150 www.heta.dk DANISH DESIGN . DANISH QUALITY . DANISH PRODUCTION...
-
Page 2: Table Of Contents
Congratulations on your new wood stove, we are confident that you will be more than satis- fied with your new Heta stove. Especially if you follow the following advice and instructions. The Green 150 pellet stove is approved under EN 14785. -
Page 3: Before Installation
It is impor- tant that upon receipt check your Heta product completely and report any damage or defects to your dealer. 2 x M4x6 0008-0036... - Page 4 CHR list Operating / Instruction manual Data plate Required tools are not supplied. 8056-0000-DK DOP-Scan-line 1000 -XXXX-2016 Heta A/S Jupitervej 22 7620 Lemvig Denmark Produk�ons år: 2016 DS/EN 13240, AEA, NS 3058/3059, Aus §15A Produkt beskrivelse Produk�onsnummer Scan-Line 1000 brændeovn Afstand �l brændbart materiale - bag ovn...
-
Page 5: Operating Instructions
The burn pot must be empty Of wood pellets before start-up. Wood pellets Only burn wood pellets in the pellet stove, Heta recommends 6 mm wood pellets. Remember to close the pellet lid, otherwise the lid sensor will be activated and the wood pellets... -
Page 6: Display
Never open the stove door while Transparent protective film the stove is in operation. When It is recommended that you remove the protec- the oven is switched on, all sur- tive film before using the Display to guarantee faces and glasses are extremely the best performance of the sensitive (touch) hot and should only be handled surface. -
Page 7: Menu Overview
Menu overview Slide to turn on/off. Swipe for at tænde Justering Power Thermostat Combustion Manuel pellet setting feed Power Power level Power level Auto Calibrazione Ventilatore... - Page 8 Thermostat Temperature To select room temperature Temperature Combustion setting Combustion levels Combustion levels...
- Page 9 Manual pellet feed Manual pellet feed Important The burn pot must be empty for wood pellets before start-up. See page 5. Manual pellet feed Manual pellet feed 00:00...
- Page 10 Settings Settings System Menu Screen Menu Only for service technician Settings Time and Date Language Adjusting pellet quantity Display Menu Brightness Standby brightness Display stand-by Screen Saver Control panel address Restart Display Alarm with sound Delete errors System Info Background Display Info Text black/white...
-
Page 11: Timer Setting
Information Røggas temperatur Stue temperatur Luftstøm Ventila Flue gas temp. Room temp. Airflow Chimney fan 27°C 24°C 0 rpm Auger Combustion leve Next service Hours of Snegl Arbejdstid Tændinger opperation 0.0 s 2200 h Timer setting Er52 Possible menus: TIMER- DAILY 22°... -
Page 12: Settings
Settings 1. Select the desired language. Confirm or cancel the change 2. Set the correct date and time. Switch on/off manually on the display Change of output/heat On the display, you can switch between three Press and slide to the right on the display. different heat levels. -
Page 13: Monthly Cleaning
Semi annually / Annually Internal flue pipe and chimney fan (*) The stove’s internal flue pipe must be kept free from ash and soot. Clean the pipe with a clea- ning brush and vacuum the ash room. Remove the chimney fan and clean any ash or soot off the housing and blades. -
Page 14: Vermiculitestone
Vermiculitestone Smoke baffle A must be removed monhly to remove ash. See page 14. To remove all the stones, first remove B, C, then D and finally A. The stones are put back in reverse order. NOTE: That the vermiculite stones are a porous material and must be treated accordingly. -
Page 15: Ash Cleaning
Ash cleaning - must be monthly Ash cleaning - semi-annually or annually... -
Page 16: Cleaning Interval
Cleaning interval Parts / Frequency Daily Weekly Monthly Semi-/annually Burn pot Combustion chamber Glass Baffle plate Vermiculitestone Seals and gaskets Pellet tank Flue gas channel and chimney fan (*) Pressure switch (*) Convection fan (*) Internal flue pipe (*) Points marked with an asterisk (*) should only be carried out by an authorised dealer. If the directions and cleaning schedule in this cleaning manual are not observed the warranty will become void. -
Page 17: Chimney Fire
C° mbar Green 150 ø80 1,58 0,10 * Weight tablel Scan-Line Green 150 Steel 160 kg Complete soapstone 242 kg Average temperature in the flue pipe connector: ~ Top soapstone 167 kg 105°C. Pos. A, B and C fig. 1. -
Page 18: Adjustment Of The Combustion Air
Adjustment of the combustion air stion produces dark flames, several factors may Before starting, see page 5 the section on be having an influence. Pellet type and chimney ignition and manual pellet feeding. Start the will be the most significant factors, and the fol- pellet stove in power 2, choose between basic lowing section describes the relevant solutions. -
Page 19: Error Codes And Descriptions
Error codes and descriptions Error Description of error Possible cause Solution codes code Er01 STB is tripped or defec- Mechanical circuit breaker if STB can be activated again by pres- tive (voltage fault). the pellet tank has been too sing the safety switch behind the See page 17. -
Page 20: Wood Pellets
If the water content is very high, it will negatively impact the energy level, just as you risk more Heta A/S recommends using Premium wood ash build-up inside the chimney. However, wa- pellets from Heatlets.dk to get the most out ter is a necessary component of the wood pel- of your pellet stove. -
Page 21: Parts
Parts Vermaculite and burn pot Pos. Name Qty. 0023-026170 Baffle 0023-026242 Vermiculite, rear, 0023-026243 Vermiculite, side, right 0023-026244 Vermiculite, side, left 0030-022924 Burn pot Parts Gasket - Pellet lid Parts - Door 0023-024597 Gasket Pos. Name Qty. 1 0008-0087 M4x12 Hexagon socket flat countersunk head screw 2 0008-1002 M6x6 Hexagon socket... -
Page 22: Garantee
Using pellets of poor quality or pellets made of - The warranty conditions specified below: materials other than pure wood can damage Heta wood-burning stoves are subjected to stove components. As a result, the warranty is thorough quality inspections throughout the considered null and void and the manufacturer’s... -
Page 23: Installation Instructions
Installation ..................25 Distance Provisions ................26 Disassembling soapstone before installation ........27 Stovedrawings/measurments ............28 Installation of HETA-climate Wi-Fi ............ 28 Installation of external fresh air ............29 EU Declaration of Conformity ............31 Remember The stove and chimney installation, must comply with local regulations, including those referring to national and European standards. -
Page 24: Installation Instructions
European and possibly local re- tions enclosed herein. gulations. You must follow local regulations with Heta A/S disclaims all liability in relation to in- regard to installation of chimney and connection correct use of the stove, abnormal usage by the to the chimney. -
Page 25: The Chimney Connection
The chimney connection have the possibility to add external combustion air flow. A sealed air intake can be connected to The flue gas system is dependent on a slight the stove’s air intake connector. underpressure in th e combustion chamber and it is very important that the chimney exhausts to outside air and not to an enclosed or semi- Installation... -
Page 26: Distance Provisions
Distance Provisions There is a difference between installation next to We recommend a minimum of 5 cm to facilitate flammable wall or non-flammable wall. If the wall air circulation around the stove. is made of non-flammable material, the stove in If in doubt, contact your chimney sweep for ad- principle may be placed flush against it. -
Page 27: Disassembling Soapstone Before Installation
Disassembling soapstone before installation... -
Page 28: Stovedrawings/Measurments
Stovedrawings/measurments Heta combustion air system Rear outlet Rear outlet Top outlet Installation of HETA-climate Wi-Fi Accessory... -
Page 29: Installation Of External Fresh Air
Installation of external fresh air kit Accessory External fresh air ø 80 mm 6000-026830 ø100 mm 6000-026831... - Page 30 Connection of external fresh air (flex pipe / fixed pipe) When using external fresh air, the piping must be removed the room (Flex pipe / fixed pipe) must be permanently mounted on the fresh air connection, the joint must be tight. Flex pipes / fixed pipes must be mounted on the outside the fresh air connection.
-
Page 31: Heta A/S
Adress Jupitervej 22, DK 7620 Lemvig EU Declaration of Conformity E-mail heta@heta.dk Website www.heta.dk DoC Scan-Line Green 150 2589-2022 Telephone +45 9663 0600 Product fiche Model identifier Scan-Line Green 150 The object of the declaration described above is Notified body relevant to the assessment and verification of...
Need help?
Do you have a question about the SCAN-LINE GREEN 150 and is the answer not in the manual?
Questions and answers