
Subscribe to Our Youtube Channel
Related Manuals for Omega DP461-S


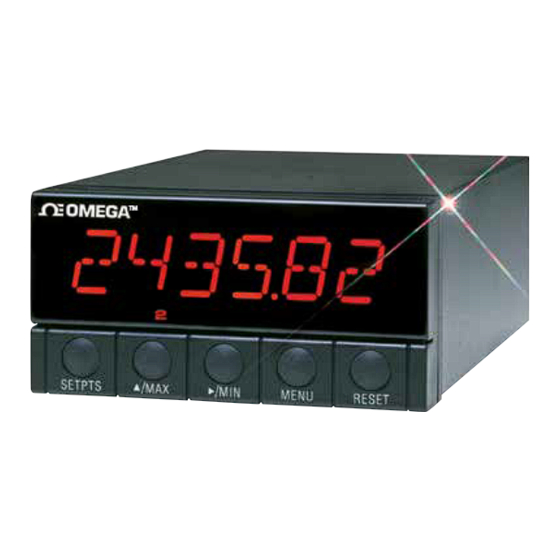
Summary of Contents for Omega DP461-S
- Page 1 User’s Guide Shop online at omega.com e-mail: info@omega.com For latest product manuals: www.omegamanual.info DP41-S High Performance Strain Gage Indicator...
- Page 2 Fax: (203) 359-7700 e-mail: info@omega.com For Other Locations Visit omega.com/worldwide The information contained in this document is believed to be correct, but OMEGA accepts no liability for any errors it contains, and reserves the right to alter specifications without notice.
-
Page 3: Table Of Contents
Table of Contents SECTION 1 INTRODUCTION Description................1-1 Features.................1-1 Available Models..............1-2 SECTION 2 UNPACKING .................2-1 SECTION 3 SAFETY CONSIDERATIONS Safety Considerations............3-1 SECTION 4 PARTS OF THE METER Front of the Meter ..............4-1 Rear of the Meter..............4-3 SECTION 5 SETUP Conditions Requiring Disassembly ........5-1 Assembly/Disassembly Opening ...........5-1 5.2.1 Safety Precaution/Product ID Label ........5-4... - Page 4 Table of Contents Potentiometer Input, programming the meter for a desired Display ............8-40 SECTION 9 METER FUNCTION MENUS Individual Lockout Information ..........9-1 Meter Function Menus ............9-7 9.2.1 Input..................9-7 9.2.2 RDG.CNF (Reading Configuration) ........9-7 9.2.3 RDG SC (Reading Scale) and RDG OF (Reading Offset)..9-9 9.2.4 IN CNF (Input Configuration) ..........9-11 9.2.5...
- Page 5 Table of Contents SECTION 11 PEAK AND VALLEY READINGS ........11-1 SECTION 12 ANALOG OUTPUT OPTION 12.1 Features Overview...............12-1 12.2 Unlocking ................12-2 12.3 “OUT.CNF”: Configuring the Output........12-2 12.4 “OT.SC.OF”: Setting Output Scale and Offset .....12-2 12.5 Board Installation; Entering the trim Data ......12-3 12.6 Filter Configuration “FIL.CNF”...
- Page 6 Table of Contents 16.11 Print Command and/or Reset of Alarms (PIN 11) ....16-2 16.12 Nonstandard RX (PIN 12) and Nonstandard TX (PIN 13) ...16-2 16.13 PUSH TO CAL (PIN 14)............16-3 16.14 +V EXT (PIN 15) ..............16-3 16.15 SP1 (PIN 16)................16-3 16.16 SP2 (PIN 17)................16-3 16.17...
- Page 7 Figures Figure 4-1 Front Detail .................4-1 Figure 4-2A AC Power - Connector Label for Rear Connectors ....4-3 Figure 4-2B DC Power - Connector Label for Rear Connectors ....4-4 Figure 4-3 Rear View with the optional 4-relay output board and a serial communications board installed.....4-5 Figure 4-4 Rear View with the optional BCD output board and a serial communications output board installed.
- Page 8 Figures Figure 7-9 AC Connector Wiring at P1 ..........7-4 Figure 7-10 DC Connector Wiring at P1 ..........7-4 Figure 8-1 S3 and S4 Main Board Jumper Positions......8-2 Figure 8-2 S1 and S2 Signal Input Jumper Positions ......8-3 Figure 8-3 Internally-Powered Bridge Input .........8-4 Figure 8-4 S3 and S4 Main Board Jumper Positions......8-16 Figure 8-5...
- Page 9 Figures Figure 15-2b Older RS-485 Option Board and Pin Designations ..15-1 Figure 16-1 Connector Label Detail .............16-1 Figure 16-2 Connection of External Power for Setpoint Transistors..16-3 Figure 18-1 Meter Housing and Panel Cutout........18-4 Table 4-1 Rear Connector Descriptions ..........4-5 Table 8-1 Meter’s Natural Gain Chart..........8-5 Table 8-2...
- Page 10 Notes, Warnings, and Cautions Information that is especially important to note is identified by these labels: • NOTE • WARNING • CAUTION • IMPORTANT NOTE: provides you with information that is important to successfully setup Note and use the Programmable Digital Meter. CAUTION or WARNING: tells you about the risk of electric shock.
-
Page 11: Section 1 Introduction
Introduction 1.1 DESCRIPTION This Strain Gage meter is part of a complete line of process indicators/ controllers, offering exceptional performance. The strain gage meter is front panel programmable to accept unipolar and bipolar DC voltage inputs and 0-20 or 4-20 mAdc inputs. The meter will accept inputs from most of the process sensors in use today such as transmitters, pressure transducers, and potentiometers. -
Page 12: Available Models
Introduction 1.3 AVAILABLE MODELS The following models and options are available. Optional boards are either installed at the time of purchase, or available as separate items and installed by the user after purchase. MAIN ASSEMBLIES MODEL NUMBER DESCRIPTION DP41-S Red LEDs, 115 V ac, 50/60Hz DP41-S-230 Red LEDs, 230 V ac, 50/60Hz DP41-S-GN... - Page 13 NOTES: Choose only one option per meter. Both computer communications comes with 6 ft. communications cable with phone plug termination. Note Free configuration software is available from www.omega.com or on the CD-ROM enclosed with your shipment. * Recommend purchase of DP40-9SC2 or DP40-25SC2...
-
Page 14: Section 2 Unpacking
Unpacking Unpack all items and make sure that every item on the packing list is present. The items you should receive are listed below. If something is missing, use the phone number for the Customer Service Department nearest you. Also, inspect the shipping container and enclosed equipment for any signs of damage. - Page 15 Unpacking Rear Protective Cover with Screw 20-Socket Ribbon Connector (P2 Connector) Panel-Mounting Gaskets (1 Spare) Strain Gage Owner’s Guide Quick Start Manual Other items may also be in the box depending on the options ordered. Refer to specific options described previously.
-
Page 16: Section 3 Safety Considerations
Safety Considerations 3.1 SAFETY CONSIDERATIONS This device is marked with the international caution symbol. It is important to read this manual before installing or commissioning this device as it contains important information relating to Safety and EMC (Electromagnetic Compatibility). Unpacking & Inspection Unpack the instrument and inspect for obvious shipping damage. -
Page 17: Section 4 Parts Of The Meter
Parts of the Meter 4.1 FRONT OF THE METER The following is a brief description of each part of the front of the meter. MENU RESET SETPTS Figure 4-1. Front Detail ITEM DESCRIPTION –.8.8.8.8.8. or 8.8.8.8.8.8. 6-digit, 14 segment, alphanumeric 0.54” high LED display with programmable decimal point. - Page 18 Parts of the Meter ITEM DESCRIPTION /MAX BUTTON During run mode, pressing this button displays the “HI RDG” (peak reading) value that has occurred up to the moment the ‘MAX’ button is pressed. This peak reading flashes, to distinguish its value from the current readings. Since this is a dynamic peak reading, the value will change if the value increases while reviewing it.
- Page 19 Parts of the Meter ITEM DESCRIPTION To return to the actual process display, without resetting the low- value memory, press the ‘MIN’ button once again. To reset the memory for current-value readings (start a new observation period), press the ‘RESET’ button once and the meter will return to the run mode.
-
Page 20: Rear Of The Meter
Parts of the Meter 4.2 REAR OF THE METER The following is a brief description of each part of the rear of the meter. The label on the top of the mounting sleeve (not the case) identifies the location of the connectors found at the rear of the meter. Figure 4-2A & figure 4-2B shows this label. -
Page 21: Figure 4-2B Dc Power - Connector Label For Rear Connectors
Parts of the Meter P2 / CABLE CONNECTOR TARE(T) PEAK(P) VALLEY(V) SWLIN2 PUSH TO CAL PEAK/VALLEY OR EXT RESET DIG RTN DISPLAY HOLD LOCKOUT EEPROM & RESET ALARMS AND/OR MENU PUSH BUTTON PRINT COMMAND 12 NONSTANDARD RX NONSTANDARD TX 13 14 PUSH TO CAL +V EXT 15 16 SP1... - Page 22 Parts of the Meter Figure 4-3 shows the rear of the meter with the optional 4-relay output board and a serial communications board installed. Figure 4-3. Rear View Figure 4-4 shows the rear of the meter with the optional BCD output board and a serial communications output board installed.
-
Page 23: Section 5 Setup
Setup 5.1 CONDITIONS REQUIRING DISASSEMBLY You may need to remove the sleeve or open the meter for several reasons: 1. To inspect the rating label on the case (not the same label as on the sleeve) (Section 5.2.1). 2. To check or change the 115 V ac or 230 V ac or main board jumpers (Sections 5.2.2 and 5.2.4). -
Page 24: Figure 5-1 Meter Exploded View
Setup REAR PROTECTIVE COVER COVER MOUNTING SCREW THUMBNUTS GASKET SLEEVE AC POWER BOARD MAIN BOARD ASSY CASE BEZEL Figure 5-1. Meter Exploded View Using Figures 5-1 as a guide, follow these simple instructions to open the meter: IMPORTANT: Turn-off the power and input signals from the unit before proceeding. -
Page 25: Figure 5-2 Board Assembly Removing/Installing Detail
Setup 5. Using Figure 5-2 as a guide, bend the side-panel detents on the case outward and pull the board assembly out of the case by the mounting screw stem. NOTE: From this point forward, these 5 steps are referred to as “Reveal the Note main board”. -
Page 26: Safety Precaution/Product Id Label
Setup 5.2.1 Safety Precaution/Product ID Label To look at the Rating/Product ID label on the case, you must follow the first step as described in Section 5-2. Refer to Figure 5-2 for the location of the Product Identification label. The meter is protected in accordance with Class I of EN61010. Refer to Safety Considerations page. -
Page 27: Main Board Power Jumpers
Setup 5.2.2 Main Board Power Jumpers To check voltage jumpers from 115 V ac to 230 V ac: CAUTION: The meter has no power-on switch; it will be in operation as soon as you apply power. To change the factory preset jumpers, disconnect the power from the unit. -
Page 28: Printed Circuit Board(S) Installation
Setup 5.2.3 Printed Circuit Board(s) Installation To install optional printed circuit board(s): “Reveal the Main Board” (refer to Section 5.2, Disassembly). Using Figure 5-4 as a reference, insert option board(s) into the corresponding slot(s) on the main board. Each circuit board is keyed to fit in it’s own position. -
Page 29: How To Access Jumpers
Setup 5.2.4 How to Access Jumpers To gain access to jumper S1 and S2 used to configure input type remove the mounting sleeve. The jumpers may be accessed through the slot in the case. To gain access to jumpers on the main board for power, excitation and lockout selection: 1. -
Page 30: Figure 5-6 Ac-Powered Main Board
Setup DISPLAY SIGNAL INPUT BD MAIN BD AC POWER BD Figure 5-6. ac-Powered Main Board PINS FOR RS 485 DETAIL A ALL PINS FOR RS232A DETAIL A PINS FOR ANALOG OUT PINS FOR RELAY Figure 5-7. dc-Powered Main Board... -
Page 31: Figure 5-8 Relay Option Board
Setup PIN 1 Figure 5-8. Relay Option Board 4 RELAY BOARD PIN 1 OF CABLE PIN 1 MAIN BOARD Figure 5-9. 4-Relay Option Board NOTE: Both the Dual Relay Output Board and the 4 Relay Output Board can Note be installed at J10. However, only one option board can be installed at a time. -
Page 32: Figure 5-10 Analog Output Option Board
Setup The Analog option board has been updated. The figure shown is the latest version. Some older versions of the analog output cards are not compatible with dc-powered meters. Check the J12 connector on the main board to ensure it has a 10 S1-A does not position connector. -
Page 33: Panel-Mount Assembly
Setup PIN 1 Figure 5-13. BCD Option Board 5.2.5 PANEL-MOUNT ASSEMBLY The meter can be mounted in a panel so that the front of the meter is flush with the vertical panel surface. Panel mounting can be seen as simply “sandwiching”... -
Page 34: Figure 5-14 Panel Mounting Assembly
Setup PANEL THICKNESS 0.25 [6.4] MAX 0.03 [0.8] MIN REAR PROTECTIVE COVER 0.06 COVER [1.5] 1.772 +0.024/-.000 MOUNTING 4PLCS [45.00 +0.61/-0.00] SCREW THUMBNUTS 3.622 +0.032/-.000 [92.00 +0.81/-0.00] PANEL SLEEVE METER CASE GASKET BEZEL Figure 5-14. Panel Mounting Assembly 6. Punch or cut a hole in the panel using the panel cutout dimensions in Figure 5-14. - Page 35 Setup WARNING: Do not “turn-on” the ac power and input signals until all connections are connected to the meter. 11. Set P1, the AC power connector, aside and connect or reconnect all other connectors to the back of the meter using Figures 4-3 and 4-4 in Section 4.2 as guides.
-
Page 36: Section 6 Jumper Positions
Jumper Positions 6.1 INTRODUCTION This section is for the configuration and setup of your jumper positions for readrate, unipolar or bipolar signal input, sensor input signal jumpers, sensor excitation jumpers, pushbutton lockouts and lockout of lockout configuration menus. 6.2 S1 JUMPER POSITIONS FOR READRATE AND UNIPOLAR OR BIPOLAR INPUT(S) The typical readrate for your meter is 3/per second. - Page 37 Jumper Positions BRIDGE - UNIPOLAR Jumpers for 0 to 100 mV range: (meter supplied excitation) Jumpers for 0 to 1 V range: (meter supplied excitation) Jumpers for 0 to 10 V range: (meter supplied excitation) Jumpers for 0 to 100 V range: (meter supplied excitation) BRIDGE - BIPOLAR Jumpers for -50 to +50 mV range: (meter supplied excitation) Jumpers for -500 to +500 mV range: (meter supplied excitation)
-
Page 38: Jumper Setting(S) For Sensor Excitation
Jumper Positions 6.4 JUMPER SETTING(S) FOR SENSOR EXCITATION 24 Vdc meter excitation (S2N, S2T, & S4B) 10 Vdc meter excitation (S2N, S2T, & S4A, S4C) 1.25 Vdc meter excitation (S2Q) 160 µA meter excitation (S2P) 1.6 mA meter excitation (S2P, S2V) 1). - Page 39 Jumper Positions DISPLAY SIGNAL INPUT BD MAIN BD S4A shown in storage position AC POWER BD Figure 6-2. ac-Powered Main Board Jumper Positions S3 and S4 S4 On ac-powered units, main board Installed For 24 Vdc excitation. (S4A located in storage position). S4A ,S4C Installed For 1.5 to 10 Vdc excitation.
-
Page 40: Jumper Setting(S) For Sensor Excitation Dc-Powered Unit
Jumper Positions 6.4.2 JUMPER SETTING(S) FOR SENSOR EXCITATION - dc Powered Unit Your dc-powered meter is capable of supplying either 1.25 to 12Vdc or 24 Vdc sensor excitation. (refer to Figure 6-3). • For 1.25 to 12Vdc excitation, install S1A and S4A jumpers, then adjust the potentiometer (R34) for proper voltage. -
Page 41: Section 7 Signal And Power Input Connections
Signal and Power Input Connections 7.1 INTRODUCTION The following describes how to connect your sensors to your meter with and without sensor excitation and how to connect the AC power to your meter. Prior to wiring the sensor to the meter, check with a multimeter that a proper excitation exists. -
Page 42: Figure 7-3 Voltage Input Without Sensor Excitation
Signal and Power Input Connections +OUTPUT VOLTAGE – S OUTPUT METER Figure 7-3. Voltage Input Without Sensor Excitation +EXCITATION +OUTPUT VOLTAGE – S COMMON METER – E JUMPER USER PROVIDED Figure 7-4. 3-Wire Voltage Input With Sensor Excitation +EXCITATION +OUTPUT VOLTAGE –... -
Page 43: Connecting Main Power
Signal and Power Input Connections – S METER – E Figure 7-6 Bridge Input with External Sensor Excitation – S – S METER – E JUMPER JUMPER USER USER PROVIDED PROVIDED Figure 7.8 Figure 7.7 Potentiometer Connections Potentiometer Connections with Internal Power Supply & with External Power Supply &... -
Page 44: Figure 7-9 Ac Connector Wiring At P1
Signal and Power Input Connections NEUTRAL EARTH LINE FUSE ~AC LINE ~AC NEUTRAL PROTECTIVE EARTH GND SWITCH GREEN WIRE Check for proper Earth grounding in the power distribution system (single phase). Figure 7-9. AC Connector Wiring at P1 Connect your AC meter power as described above. CAUTION: As mentioned in Section 5.2.2, the meter has no power ON/OFF switch. -
Page 45: Section 8 Methods For Scaling The Meter To Display In
8. Methods for Scaling the Meter to Display in Engineering Units 8.1 INTRODUCTION This section is for scaling the meter to read in desired engineering units. This meter is capable of producing any engineering units up to 6 digits regardless of decimal point. Even though this is a strain gauge input meter it is capable of working with high voltage, current and potentiometric inputs. -
Page 46: Figure 8-1 S3 And S4 Main Board Jumper Positions
The two most common methods of scaling, Method I scaling without simulating a known load, and Method II scaling by simu- lating known loads will be demonstrated. Sometimes end users simulate known voltages instead of known physical standards (pressures); this is covered in Method II. A third method is for a unique case where you are scaling with a known load and you want the display to have 3 or more decimal places. -
Page 47: Figure 8-2 S1 And S2 Signal Input Jumper Positions
Install jumpers on S1 and S2 as shown in Figure 8-2. TOP VIEWS Scaling to Display Engineering Units Figure 8-2. S1 and S2 Signal Input Jumper Positions B. Wire the transducer as shown in Figure 8-3 (Refer to Section 7 for additional information). -
Page 48: Engineering Units
+ EXC + SIG – SIG – S METER – EXC – E Figure 8-3. Internally-Powered Bridge Input C. The unit comes with all lockout bytes set in the unlocked position(“0”). Refer to Section 9.1 for information on lockout bytes. If the unit has been programmed previously make sure that at least the following lockout bytes are unlocked. - Page 49 RDG SC= display span/((sensor’s mV/Voutput) (natural gain)) RDG SC= 200/(10 x 10000) = 0.002 Where: display span= 200 – 0 = 200 Sensor’s output = 100 mV/10V EXC =10 mV/V Meter’s natural gain= 10000 (Obtained from Table 8-1) TABLE 8-1 METER’S NATURAL GAIN CHART MAX SENSOR JUMPER RANGE METER’S...
- Page 50 MENU SUBMENU 1 SUBMENU 2 DESCRIPTION L1CNF Skip past L2CNF Skip past L3CNF Skip past L4CNF Skip past INPUT BRIDGE Meter’s input. RDG.CNF RDG.1=0 Scaling y=mx+b RDG.2=0 Active decimal point RDG.3=0 Normal display brightness RDG.4=1 Leading zeros suppressed RDG.5= Disregard not used RDG.6= Disregard not used RDG.7=0...
- Page 51 2. Now you are in the run mode and the transducer is connected to the meter. Simulate no load on the transducer (just leave the pressure port open to atmosphere) and note the display reading. Assume the display shows “1.25”. To make the display indicate zeros you must go to the menu “RDG OF”...
- Page 52 MENU SUBMENU 1 SUBMENU 2 DESCRIPTION L1CNF Skip past L2CNF Skip past L3CNF Skip past L4CNF Skip past INPUT BRIDGE Meter’s input RDG.CNF RDG.1=0 2-point scaling IN.SC.OF RDG.2=0 Active decimal point RDG.3=0 Normal display brightness RDG.4=1 Leading zeros suppressed RDG.5= Disregard not used RDG.6= Disregard not used...
- Page 53 2. Now you are in the run mode and the transducer is connected to the meter. Simulate two loads on the transducer and record the meter display as “INPUT1” and “INPUT2” and record what each of these readings (“READ 1” and “READ 2”) should display on a piece of scrap paper or in the space provided below.
- Page 54 MENU SUBMENU 1 SUBMENU 2 DESCRIPTION IN.SC.OF INPUT 1 000013 This is where you READ 1 000000 enter the data INPUT2 080567 obtained during the READ 2 000160 calibration run (see above). DEC PT FFFF.FF Decimal point selection CNT BY Press the ‘RESET’...
- Page 55 Pressing the ‘RESET’ button one time brings you back one menu item, pressing the ‘RESET’ button two times returns you to the run mode. WARNING! this also results in a hard reset of your peak and valley and setpoints. Proceed through the flow chart below entering the values listed in submenu 1 and 2 columns.
- Page 56 MENU SUBMENU 1 SUBMENU 2 DESCRIPTION IN CNF INP.1=0 60 Hz ac power INP.2=0 Slow reading (S2A jumper omitted) INP.3=0 Unipolar input (S2B jumper omitted) INP.4=0 Std, for current inputs INP.5= Disregard not used INP.6=0 Disables IN.SC.OF INP.7=1 Ratiometric input IN.SC.OF Skip past DEC PT...
- Page 57 The following data will now be entered into the 2-point scaling “IN.SC.OF” method. “INPUT1”: –55.6 “READ 1”: 00000.0 “INPUT2”: 16136.6 “READ 2”: 04000.0 Ignore the decimal point position for the read values. Just note how many zero’s (or places to the right of the decimal) you need. In this example there were 4 decimal places needed and there are 4 zeros after the “4”...
- Page 58 MENU SUBMENU 1 SUBMENU 2 DESCRIPTION L1CNF Skip past L2CNF Skip past L3CNF Skip past L4CNF Skip past INPUT Skip past RDG.CNF Skip past RDG SC 0.00100 Enter new scale value from above. RDG OF Skip past (Leave as 000000) IN CNF INP.6=1 Activates “IN.SC.OF”...
-
Page 59: Voltage Input (Non-Ratiometric), Programming The Meter For A Desired Display
8.3 VOLTAGE INPUT (NON RATIOMETRIC), PROGRAMMING THE METER FOR A DESIRED DISPLAY An easy way to program your unit is to follow the example and step by step procedure below and just modify it for your exact require- ments. EXAMPLE: An end user wants to scale the meter for a 4000 PSI, 1-5 Vdc voltage output, pressure transducer. -
Page 60: Figure 8-5 S1 And S2 Signal Input Jumper Positions
(FACTORY CONFIGURED) SIGNAL INPUT BD DISPLAY MAIN BD AC POWER BD Figure 8-4 S3 Main Board Jumper Positions Install jumpers on S1 and S2 as shown in Figure 8-2. Scaling to Display Engineering Units TOP VIEWS Figure 8-5 S1 and S2 Signal Input Jumper Positions B. -
Page 61: Figure 8-6 Sensor Input Connections
+EXCITATION +OUTPUT VOLTAGE – S COMMON DP41 METER – E JUMPER USER PROVIDED Figure 8-6 Sensor Input Connections C. The unit comes with all lockout bytes set in the unlocked position(“0”). Refer to Section 9.1 for information on lockout bytes. If the unit has been programmed previously make sure that at least the following lockout bytes are unlocked. - Page 62 RDG SC= display span/((sensor’s output span) (natural gain)) RDG SC= 4000/(4 x 10000) = 0.100 Where: display span= 4000 – 0 = 4000 Sensor’s output span= 5 Vdc – 1 Vdc = 4 Vdc Meter’s natural gain= 10000 (Obtained from Table 8-1) VOLTAGE SENSOR’S METER’S...
- Page 63 MENU SUBMENU 1 SUBMENU 2 DESCRIPTION L1CNF Skip past L2CNF Skip past L3CNF Skip past L4CNF Skip past INPUT BRIDGE Meter’s input. RDG.CNF RDG.1=0 Scaling y=mx+b RDG.2=0 Active decimal point RDG.3=0 Normal display brightness RDG.4=1 Leading zeros suppressed RDG.5= Disregard not used RDG.6= Disregard not used RDG.7=0...
- Page 64 2. Now you are in the run mode and the transducer is connected to the meter. Simulate no load on the transducer (just leave the pressure port open to atmosphere) and note the display reading. Assume the display shows “996.5”. To make the display indicate zeros you must go to the menu “RDG OF”...
- Page 65 MENU SUBMENU 1 SUBMENU 2 DESCRIPTION L1CNF Skip past L2CNF Skip past L3CNF Skip past L4CNF Skip past INPUT BRIDGE Meter’s input RDG.CNF RDG.1=0 2-point scaling IN.SC.OF RDG.2=0 Active decimal point RDG.3=0 Normal display brightness RDG.4=1 Leading zeros suppressed RDG.5= Disregard not used RDG.6= Disregard not used...
- Page 66 2. Now you are in the run mode and the transducer is connected to the meter. Simulate two loads on the transducer and record the meter display as “INPUT1” and “INPUT2” and record what each of these reading (“READ 1” and “READ 2”) should display on a piece of scrap paper or in the space provided below.
- Page 67 MENU SUBMENU 1 SUBMENU 2 DESCRIPTION IN.SC.OF INPUT 1 009997 This is where you READ 1 000000 enter the data INPUT2 40998 obtained during the READ 2 003000 calibration run (see above). DEC PT FFFFF.F Decimal point selection CNT BY Press the ‘RESET’...
- Page 68 Pressing the ‘RESET’ button one time brings you back one menu item, pressing the ‘RESET’ button two times returns you to the run mode. WARNING! this also results in a hard reset of your peak and valley and setpoints. Proceed through the flow chart below entering the values listed in submenu 1 and 2 columns.
- Page 69 MENU SUBMENU 1 SUBMENU 2 DESCRIPTION IN CNF INP.1=0 60 Hz ac power INP.2=0 Slow reading (S2A jumper omitted) INP.3=0 Unipolar input (S2B jumper omitted) INP.4=0 Std, for current inputs INP.5= Disregard not used INP.6=0 Disables IN.SC.OF INP.7=0 Non ratiometric input IN.SC.OF Skip past DEC PT...
- Page 70 The following data will now be entered into the two point scaling “IN.SC.OF” method. “INPUT1”: 9949.5 “READ 1”: 00000.0 “INPUT2” 36614.2 “READ 2” 02000.0 Ignore the decimal point position for the read values. Just note how many zero’s (or places to the right of the decimal) you need. In this example there were 4 decimal places needed and there are 4 zeros after the “2”...
- Page 71 MENU SUBMENU 1 SUBMENU 2 DESCRIPTION L1CNF Skip past L2CNF Skip past L3CNF Skip past L4CNF Skip past INPUT Skip past RDG.CNF Skip past RDG SC 0.00100 Enter new scale value from above. RDG OF Skip past (Leave as 000000) IN CNF INP.6=1 Activates “IN.SC.OF”...
-
Page 72: Current Input, Programming The Meter For Adesired Display
8.4 CURRENT INPUT, PROGRAMMING THE METER FOR A DESIRED DISPLAY An easy way to program your unit is to follow the example and step by step procedure below and just modify it for your exact requirements. EXAMPLE: An end user wants to scale the meter for a 5000 PSI, 4-20 mA current output, pressure transmitter. -
Page 73: Figure 8-8 S1 And S2 Signal Input Jumper Positions
Install jumpers on S1 and S2 as shown in Figure 8-8. TOP VIEWS Scaling to Display Engineering Figure 8-8. S1 and S2 Signal Input Jumper Positions Units B. Wire the transducer as shown in Figure 8-9. (Refer to Section 7 for additional information) Always check the meter’s excitation prior to wiring your sensor to the meter. - Page 74 C. The unit comes with all lockout bytes set in the unlocked position(“0”). Refer to Section 9.1 for information on lockout bytes. If the unit has been program previously please make sure that at least the following lockout codes are unlocked. If they are not unlocked you will not be able to scale the meter.
- Page 75 After making all your choices, in submenu 1, enter these selections by pressing the ‘MENU’ button which will momentarily flash “STORED” on the display. If the item selected in submenu 1 has a submenu 2 associated with it, press the ‘MIN’ button to go to submenu 2. Select your choice by pressing the ‘MAX’...
- Page 76 MENU SUBMENU 1 SUBMENU 2 DESCRIPTION IN CNF INP.1=0 60 Hz ac power INP.2=0 Slow reading (S1A jumper omitted) INP.3=0 Unipolar input (S1B jumper omitted) INP.4=0 Std, for current inputs INP.5= Not used INP.6=0 Disables IN.SC.OF INP.7=0 Non ratiometric input IN.SC.OF Skip past DEC PT...
- Page 77 submenu 2 associated with it, press the ‘MIN’ button to enter the submenu 2. Select your choice by pressing the ‘MAX’ button and enter your choice by pressing the ‘MENU’ button. Pressing the ‘RESET’ button one time brings you back one ‘MENU’...
- Page 78 MENU SUBMENU 1 SUBMENU 2 DESCRIPTION INP.3=0 Unipolar input (S2B jumper omitted INP.4=0 Std, for current inputs INP.5= Disregard not used INP.6=0 Disables IN.SC.OF INP.7=0 Non ratiometric input IN.SC.OF Skip past DEC PT FFFFFF No decimal point for calibration run (Desired decimal point will be entered later) CNT BY...
- Page 79 Go back into the set up mode and follow the flow chart below entering the values in the submenus shown. MENU SUBMENU 1 SUBMENU 2 DESCRIPTION L1CNF Skip past L2CNF Skip past L3CNF Skip past L4CNF Skip past INPUT Skip past RDG.CNF Skip past RDG SC...
- Page 80 METHOD III: SCALING BY SIMULATING A KNOWN LOAD WITH THREE OR MORE DECIMAL POINT POSITIONS. An end user has a 3 inch of water pressure transducer with a 4-20 mA output. The end user wants to display in ten thousandths of an inch of water (desired display 0.0000 to 3.0000).
- Page 81 MENU SUBMENU 1 SUBMENU 2 DESCRIPTION L1CNF Skip past L2CNF Skip past L3CNF Skip past L4CNF Skip past INPUT BRIDGE Meter’s input RDG.CNF RDG.1=0 2-point scaling IN.SC.OF RDG.2=0 Active decimal point RDG.3=0 Normal display brightness RDG.4=1 Leading zeros suppressed RDG.5= Disregard not used RDG.6= Disregard not used...
- Page 82 2. Now you are in the run mode and the transducer is connected to the meter. Simulate two loads on the transducer and record the meter display as “INPUT1” and “INPUT2” and record what each of these readings should display (“READ 1” and “READ 2”) on a piece of scrap paper or in the spaces provided below, these numbers will be the INPUT values entered in the “IN.SC.OF”...
- Page 83 TABLE 8-4 READING SCALE (RDG SC) vs DECIMAL POINT SHIFT NUMBER OF SPACES DECIMAL POINT MOVES RDG SC TO THE LEFT VALUE 1.00000 0.10000 0.01000 0.00100 0.00010 Go back into the setup mode and enter the new “RDG SC” value, the 2-point calibration data and move the decimal point.
- Page 84 The unit is now completely scaled. If during verifying the calibration the display is not correct you can use the offset function (“RDG OF” if all values read high or low) or perform this calibra- tion again. 8.5 POTENTIOMETER, PROGRAMMING THE METER FOR A DESIRED DISPLAY An easy way to program your unit is to follow the example and step by step procedure below and just modify it for your exact...
-
Page 85: Figure 8-10 S3 And S4 Main Board Jumper Positions
A. Set the correct jumpers on the meter as shown in Figure 8-10. (Refer to Section 6 for additional information) Configure jumpers on S1 and S2 as shown in Section 6. Install jumpers S3A & S3C and S4A & S4C on the main board. S4A &... -
Page 86: Figure 8-11 S1 And S2 Signal Input Jumper Positions
TOP VIEWS Figure 8-11. S1 and S2 Signal Input Jumper Positions B. Wire the transducer as shown in Figure 8-12. (Refer to Section 7 Scaling to Display for additional information). Engineering Units Always check the meter’s excitation prior to wiring your sensor to the meter. - Page 87 C. The unit comes with all lockout bytes set in the unlocked position (“0”). Refer to Section 9.1 for information on lockout bytes. If the unit has been programmed previously make sure that at least the following lockout bytes are unlocked. If they are Not unlocked you will not be able to scale the meter.
- Page 88 Pressing the ‘MENU’ button will take you through all the different menu’s listed below. When you wish to enter a menu, to the submenu 1 stage, press the ‘MIN’ button. To make a selection, in submenu 1, press the ‘MAX’ button. If the submenu has more than one item to select use the ‘MIN’...
- Page 89 MENU SUBMENU 1 SUBMENU 2 DESCRIPTION RDG SC 0.00200 See calculations above RDG OF 0000000 IN CNF INP.1=0 60 Hz ac power INP.2=0 Slow reading (S1A jumper omitted) INP.3=0 Unipolar input (S1B jumper omitted) INP.4=0 Std, for voltage inputs INP.5= Disregard not used INP.6=0 Disables IN.SC.OF...
- Page 90 again press the ‘MAX’ button to make your selection. After making all of your choices, in submenu 1, enter these selections by pressing the ‘MENU’ button which will momentarily flash “STORED”, on the display. If the item selected in submenu 1 has a submenu 2 associated with it, press the ‘MIN’...
- Page 91 MENU SUBMENU 1 SUBMENU 2 DESCRIPTION IN CNF INP.1=0 60 Hz ac power INP.2=0 Slow reading (S2A jumper omitted) INP.3=0 Unipolar input (S2B jumper omitted) INP.4=0 INP.5= Disregard not used INP.6=0 Disables IN.SC.OF INP.7=1 Ratiometric input IN.SC.OF Skip past DEC PT FFFFFF No decimal point for calibration run...
- Page 92 Proceed back into the set up mode and follow the flow chart below entering the values in the submenus shown. MENU SUBMENU 1 SUBMENU 2 DESCRIPTION L1CNF Skip past L2CNF Skip past L3CNF Skip past L4CNF Skip past INPUT Skip past RDG.CNF Skip past RDG SC...
- Page 93 METHOD III: SCALING BY SIMULATING A KNOWN LOAD WITH THREE OR MORE DECIMAL POINT POSITIONS. EXAMPLE: An end user has a displacement sensor with 5 inches of travel and a 500 ohm output. You want to display in one ten thousandths of an inch (desired display 0.0000 to 5.0000).
- Page 94 MENU SUBMENU 1 SUBMENU 2 DESCRIPTION L1CNF Skip past L2CNF Skip past L3CNF Skip past L4CNF Skip past INPUT BRIDGE Meter’s input RDG.CNF RDG.1=0 2-point scaling IN.SC.OF RDG.2=0 Active decimal point RDG.3=0 Normal display brightness RDG.4=1 Leading zeros suppressed RDG.5= Disregard not used RDG.6= Disregard not used...
- Page 95 2. Now you are in the run mode and the transducer is connected to the meter. Simulate two loads on the transducer and record the meter displays as “INPUT1” and “INPUT2” and record what each of these readings (“READ 1” and “READ 2”) should display on a piece of scrap paper or in the spaces provided below.
-
Page 97: Section 9 Meter Function Menus
Meter Function Menus EXPLANATION OF LOCKOUT CONFIGURATIONS AND METER FUNCTION MENUS HOW TO USE THE TABLES IN SECTION 9 MIN/MAX/MENU These are the buttons on the meter you are to press to access the parameters given in the same column. MAIN MENU/ These are headings for the table columns. -
Page 98: Meter Function Menus
Meter Function Menus MENU MIN/MAX* BUTTON BUTTON MAIN MENU SUB MENU CONDITION “L1 CNF”: LOCKOUT CONFIGURATION #1 “L1C.1=0” Setpoint 1 change unlocked. “L1C.1=1” Setpoint 1 change locked out. “L1C.2=0” Setpoint 2 change unlocked. “L1C.2=1” Setpoint 2 change locked out. “L1C.3=0” Setpoint 3 (Alarm 1) change unlocked. - Page 99 Meter Function Menus MENU MIN/MAX* BUTTON BUTTON MAIN MENU SUB MENU CONDITION “L2 CNF”: LOCKOUT CONFIGURATION #2 “L2C.1=0” RDG.CNF (scale/offset method and display features) may be chosen. “L2C.1=1” RDG.CNF (scale/offset method and display features) is locked out. “L2C.2=0” Either RDG SC (computed input-to-display scale factor) RD.SC.OF (two data points, which determine the reading scale/offset) may be...
- Page 100 Meter Function Menus MENU MIN/MAX* BUTTON BUTTON MAIN MENU SUB MENU CONDITION “L2 CNF” “L2C.7=0” CNT BY (round off of display) can be specified. “L2C.7=1” CNT BY (round off of display) cannot be specified. “L2C.8=0” FIL CNF (adaptive/fixed filtering and for which output(s)) can be chosen.
- Page 101 Meter Function Menus MENU MIN/MAX* BUTTON BUTTON MAIN MENU SUB MENU CONDITION “L3 CNF” “L3C.3=1” AL CNF (mode of action of setpoints 3 & 4, often used as alarms) cannot be locked out. “L3C.4=0” AL FNC (Setpoints 3 & 4 independent or ganged with Setpoints 1 and 2) can be selected.
- Page 102 Meter Function Menus MENU MIN/MAX* BUTTON BUTTON MAIN MENU SUB MENU CONDITION “L4 CNF”: LOCKOUT CONFIGURATION #4 “L4C.1=0” BAUD (communication rate) can be chosen. “L4C.1=1” BAUD (communication rate) cannot be accessed. “L4C.2=0” SER.CNF (parity/stop-bit length) is selectable. “L4C.2=1” SER.CNF (parity/stop-bit length) is not selectable.
-
Page 103: Input
Meter Function Menus 9.2 METER FUNCTION MENUS 9.2.1 Input By pressing the ‘MAX’ and ‘MENU’ buttons you can select “BRIDGE”. Refer to the chart below to go the next level of programming of the meter. NOTE: Current, voltage or potentiometer inputs and their respective signal input ranges are selected via the push-on jumpers located at S2 on the top of the meter. - Page 104 Meter Function Menus MENU MIN/MAX/MENU * BUTTON BUTTON MAIN MENU SUB MENU DESCRIPTION “RDG.CNF”: READING CONFIGURATION Reading Scale & Offset: “RDG.1=0” Direct Format “RDG.1=1” 2-Coordinate format Decimal point effect: “RDG.2=0” Active “RDG.2=1” Independent Display Brightness: “RDG.3=0” Normal “RDG.3=1” 50% of Normal Leading Zeros on Display: “RDG.4=0”...
-
Page 105: Rdg Sc (Reading Scale) And Rdg Of (Reading Offset)
Meter Function Menus 9.2.3 RDG SC (Reading Scale) And RDG OF (Reading Offset) Typically, this would be used only when you cannot connect a known load to your meter, you require a display with 3 or more positions to the right of the decimal point position, you have scaled your meter using Input Scale and Offset (“IN.SC.OF”) and want to enter a constant multiplying factor, or you have an extremely large offset. - Page 106 Meter Function Menus MENU MIN/MAX BUTTON MIN/MAX* /MENU** MAIN BUTTON BUTTON MENU SUB MENU 1 SUB MENU 2 DESCRIPTION “RD.SC.OF”: READING SCALE & OFFSET INPUT 1 Item #1 of Coordinate #1 000000. Enter the first value displayed (“00000.0”) by the meter. READ 1 Item #2 of Coordinate #1.
-
Page 107: In Cnf (Input Configuration)
Meter Function Menus 9.2.4 IN CNF (Input Configuration) Input configuration is used to select: • 50 or 60 Hz line frequency [INP.1] • slow or fast read rate [INP.2] • unipolar or bipolar inputs • cold junction compensation [INP.5] INP.1 and INP.2 are related to each other. If your power requirements require 50 Hz, you can have optimum integration in FAST read mode (12/sec). -
Page 108: In.sc.of (Input Scale And Offset)
Meter Function Menus * The ‘MIN’ button allows you to sequence through INP.1, INP.2, INP.3, INP.4, INP.5, INP.6, and INP.7. The ‘MAX’ button allows you to select the “0” or “1” state for each “INP” condition. The ‘MENU’ button stores the selected values for all “IN CNF” condition(s) changed and advances the meter to “IN.SC.OF”. - Page 109 Meter Function Menus ** The ‘MIN’ button allows you to sequence through the digits of the applicable number being changed. The ‘MAX’ button changes the value of the digit to be displayed. The ‘MENU’ button stores the selected values for each input required in “IN.SC.OF”.
-
Page 110: Dec Pt (Decimal Point)
Meter Function Menus 9.2.6 DEC PT (Decimal Point) Refer to Section 8 for a detailed discussion of this feature. Decimal point is used to select the resolution of your meter display such as in one degree, tenths of a degree, hundredths of a degree or more. If “ERR 01”... -
Page 111: Cnt By (Count By)
Meter Function Menus 9.2.7 CNT BY (Count By) Count by is used to round off the meter values by 1’s, 2’s, 5’s, 10’s, 20’s, 50’s, or 100’s. This feature is normally set to “001” so that the display shows all possible values for the least-significant digit. If the combination of input-signal noise and selected resolution is high, however, your meter can round off the display to the nearest 2, 5, 10, 20, 50 or even 100 digits. -
Page 112: Fil.cnf (Filter Configuration)
Meter Function Menus 9.2.8 FIL.CNF (Filter Configuration) Filter configuration is used to select: • Adaptive Bandwidth Control (ABC) filtering or moving average filter [FIL.1] • whether the value displayed on the meter is filtered or unfiltered [FIL.2] • whether the value sent to the optional analog output is filtered or unfiltered [FIL.3] “FIL.1=0”... -
Page 113: Fil Ti (Filter Time Constant)
Meter Function Menus 9.2.9 FIL TI (Filter Time Constant) Filter time constant is used to determine the number of readings the meter will average before displaying an input value. The choices are 001, 002, 004, 008, 016, 032, 064, or 128. For fixed filtering, the averaged number of samples is fixed;... -
Page 114: Sp Cnf (Setpoints 1 & 2 Configuration)
Meter Function Menus 9.2.10 SP CNF (Setpoints 1 & 2 Configuration) Refer to Section 10 for an in-depth discussion of these features. Setpoint configuration is used to select: • the active zone of each setpoint to above and below the setting [SPC.1 &... -
Page 115: Al Cnf (Alarm Configuration)
Meter Function Menus * The ‘MIN’ button allows you to sequence through SPC.1, SPC.2, SPC.3, SPC.4, SPC.5, SPC.6, SPC.7 and SPC.8. The ‘MAX’ button allows you to select the “0” or “1” state for each “SPC” condition. The ‘MENU’ button stores the selected values for each “SPC” condition changed and advances the meter to the next configuration (“AL CNF”). - Page 116 Meter Function Menus MENU MIN/MAX/MENU * BUTTON BUTTON MAIN MENU SUB MENU DESCRIPTION Alarm 2 open-collector or relay output Active ON or OFF: “ALC.5=0” “ALC.5=1” Filtered/unfiltered reading compared with Alarm 2 (Setpoint 4) value: “ALC.6=0” Unfiltered “ALC.6=1” Filtered Alarms 1 & 2 (Setpoints 3 & 4) action and LEDs: “ALC.7=0”...
-
Page 117: Al Fnc (Alarm Function)
Meter Function Menus 9.2.12 AL FNC (Alarm Function) Refer to Section 10 for an in-depth discussion of these features. Alarm function is used to select: • whether the alarms are used in the process, high-deviation, low-deviation or band deviation modes [ALF.1 & ALF.3] •... -
Page 118: Al Rdg (Alarm Readings)
Meter Function Menus 9.2.13 AL RDG (Alarm Readings) Refer to Section 10 for an in-depth discussion of these features. Alarm reading is used to select the number of readings (from 01 to 15) the meter must make prior to activating the alarms. MENU MIN/MAX/MENU * BUTTON... -
Page 119: Sp Db (Setpoint Deadband)
Meter Function Menus 9.2.14 SP DB (Setpoint Deadband) Refer to Section 10 for an in-depth discussion of these features. Setpoint deadband is used to select the amount of hysteresis for the setpoints (programmable from “0000” to “9999”). MENU MIN/MAX/MENU * BUTTON BUTTON MAIN MENU... -
Page 120: Out.cnf (Output Configuration)
Meter Function Menus 9.2.16 OUT.CNF (Output Configuration) Output configuration is used to select: • whether or not to send data to the optional analog output board [OUT.1] • the analog output signal of 0-10 V dc or 4-20 mA DC [OUT.2] •... -
Page 121: Ot.sc.of (Output Scale And Offset)
Meter Function Menus 9.2.17 OT.SC.OF (Output Scale and Offset) Output scale and offset is used to calibrate your optional analog output to correspond to the engineering units you desire. MENU MIN/MAX/ BUTTON MIN/MAX * MENU ** MAIN BUTTON BUTTON MENU SUB MENU 1 SUB MENU 2 DESCRIPTION “OT.SC.OF”: OUTPUT SCALE &... -
Page 122: Baud (Baud Rate)
Meter Function Menus 9.2.18 BAUD (Baud Rate) Baud is used to select the baud rate for communication via the optional RS-232 or RS-485 communications boards. The choices are 300, 600, 1200, 2400, 4800, 9600, and 19200. MENU MIN/MAX/MENU * BUTTON BUTTON MAIN MENU SUB MENU... -
Page 123: Sercnf (Serial Communication Configuration)
Meter Function Menus 9.2.19 SERCNF (Serial Communication Configuration) Serial communication configuration is used to select: • no parity, odd parity, or even parity for communications [SER.1] • 1 stop bit or 2 stop bits [SER.2] • No parity, 1 stop is not allowed MENU MIN/MAX/MENU * BUTTON... -
Page 124: Address (Multipoint Communications Device Address)
Meter Function Menus 9.2.20 ADDRESS (Multipoint Communications Device Address) Address is used to give each meter a unique address while on a local area network using the optional RS-485 board. MENU MIN/MAX/MENU * BUTTON BUTTON MAIN MENU SUB MENU DESCRIPTION “ADDRES”: MULTIPOINT COMMUNICATIONS DEVICE ADDRESS... - Page 125 Meter Function Menus MENU MIN/MAX/MENU * BUTTON BUTTON MAIN MENU SUB MENU DESCRIPTION “DAT FT”: DATA FORMAT Alarms 1 & 2 Status Character: “DAT.1=0” Excluded “DAT.1=1” Included HI/LO (Peak/Valley) Status Character: “DAT.2=0” Excluded “DAT.2=1” Included Filtered Value to be transmitted: “DAT.3=0”...
-
Page 126: Bus Ft (Bus Format)
Meter Function Menus 9.2.22 BUS FT (Bus Format) Bus format is to select: • whether or not to include check sum with reading [BUS.1] • whether or not to include line feeds [BUS.2] • whether or not to have the meter respond in echo mode [BUS.3] •... -
Page 127: Sercnt (Serial Count)
Meter Function Menus * The ‘MIN’ button allows you to sequence through BUS.1, BUS.2, BUS.3, BUS.4, BUS.5, BUS.6, BUS.7 and BUS.8. The ‘MAX’ button allows you to select the “0” or “1” state for each “BUS” condition. The ‘MENU’ button stores the selected values for each “BUS” condition changed and advances the meter to the next configuration (“SERCNT”). -
Page 128: Analog Output Calibration Numbers
Meter Function Menus 9.2.24 ANALOG OUTPUT CALIBRATION NUMBERS The analog output calibration numbers (see Figure 12-1) are printed on the optional analog output board. These four numbers (CAL VZ, CAL VS, CAL mAS), must be entered into the meter to ensure that the analog output board is calibrated with the microprocessor. -
Page 129: Section 10 Setpoints/Alarms
Setpoints/Alarms SETPOINTS/ALARMS Setpoints 1 through 4 can be configured for a very large variety of zone and level signalling. SP1 and SP2 have balanced configurable hysteresis and are non-latching, suitable for control-level signalling. SP3 and SP4 are often used as ALarm 1 and ALarm 2, because they have single-sided hysteresis and can be configured for latching action. -
Page 130: Figure 10-1 Setpoints 1 & 2 Action
Setpoints/Alarms TIME 102% SP1 OR SP2 HYSTERESIS 100% VALUE SIGNAL LEVEL Figure 10-1. Setpoints 1 & 2 Action (Setpoint at 100 with 4% hysteresis) These two setpoints have selectable single-sided hysteresis. When used as alarms, the action is immediate (unless a delay is programmed) going into the alarm zone but turning off is deferred (if latching is not programmed) by the hysteresis amount. -
Page 131: Unlocking The Features
Setpoints/Alarms 10.2 UNLOCKING THE FEATURES All setpoint values and features can be set via the front-panel buttons or the optional serial communications boards (RS-232 or RS-422/485). Control from the front-panel buttons can be locked out by jumpers on S3A and S3C on the main board or by setting lockout bits “L3C.2”, and “L3C.6”... -
Page 132: Deviation Function For Alarms
Setpoints/Alarms 7. “SPC.6=0” compares the “SP 2” level to the UNFILTERED measurements. “SPC.6=1” compares “SP 2” to the FILTERED measurements. 8. “SPC.7=0” Enables both setpoints 1 and 2. “SPC.7=1” Disables both setpoints 1 and 2. 9. “SPC.8=0” ENABLES the two front-panel LED indicators for setpoints 1 and 2 when you have chosen “SPC.7=0”. -
Page 133: Selecting "Al Cnf" Alarm Configuration Features
Setpoints/Alarms SP1–SP3+HYS = 60 SP3 = 100 SP1–SP3 = 50 SP1–SP3 = 50 SP1–SP3–HYS = 40 SIGNAL SIGNAL LEVEL LEVEL ACTIVE ABOVE ACTIVE BELOW Figure 10-5. Low Deviation for both Active Above and Active Below SP1+SP3+HYS = 260 SP1+SP3 = 250 SP1+SP3–HYS = 240 SP3 = 100 SP1–SP3+HYS = 60... -
Page 134: Figure 10-7 Al Cnf Hysteresis
Setpoints/Alarms Figure 10-7 Illustrates the Alarm configuration for hysteresis. ALF .1=3 ALF .1=3 SP3 = ±5 ALC .1=0 ALC .1=1 ALARM ON DEAD BAND Figure 10-7. AL CNF Hysteresis 2. “ALC.2=0” turns the Alarm 1 (Setpoint 3) open-collector output ON when Setpoint 3 is active. - Page 135 Setpoints/Alarms 7. “ALC.7=0” ENABLES both Alarms 1 and 2 (Setpoints 3 and 4) action and LEDs. “ALC.7=1” DISABLES both Alarms 1 and 2 (Setpoints 3 and 4) action and LEDs. 8. “ALC.8=0” DISABLES Alarm reset at the P2-11 connector. “ALC.8=1” ENABLES Alarm reset at the P2-11 connector.
-
Page 136: Al Rdg": Alarm Readings-Select Delay In Alarm Action
Setpoints/Alarms 4. “ALF.4=0” makes Alarm 2 (Setpoint 4) a NON-LATCHING Alarm. “ALF.4=1” makes Alarm 2 (Setpoint 4) LATCHING. This means that once Alarm 2 (Setpoint 4) is triggered it will remain active until it is reset by pressing the ‘RESET’ button one time or by grounding P2-11 when configuration bit “ALC.8=1”... -
Page 137: Out.cnf": Control Flashing Of The Display
Setpoints/Alarms 10.10 “OUT.CNF”: CONTROL FLASHING OF THE DISPLAY You may wish to bring abnormal conditions to immediate attention by causing the display to flash. Press the ‘MIN’ button to see “OUT.6”. Press the ‘MAX’ button to select “0”, “1”, “2”, “3”, “4”, or “5”. “OUT.6=0”... -
Page 138: Section 11 Peak And Valley Readings
Peak and Valley Readings PEAK AND VALLEY READINGS The meter examines every new reading to see if it is greater than the stored PEAK or less than the stored VALLEY readings. If you have unlocked access to these values with “L1C.5=0” and “L1C.6=0” (part of the first lockout byte “L1 CNF”), you can view the PEAK (“HI RDG”) by pressing the ‘MAX’... -
Page 139: Section 12 Analog Output Option
Analog Output Options ANALOG OUTPUT OPTION If you received your meter with the optional analog board installed, you should not have to enter the trim data as described in Section 12.5. Your meter converts display readings into an independently-scaled-and- offset isolated voltage and/or current analog output. Isolation is accomplished via opto-isolators on the board. -
Page 140: Unlocking
Analog Output Options 12.2 UNLOCKING 1. Press the ‘MENU’ button until “L3 CNF” is displayed, then press the ‘MIN’ button until “L3C.7” is displayed. 2. Press the ‘MAX’ button (if required) to set “L3C.7=0”, unlocking the choice of current or voltage as the calibrated output. 3. -
Page 141: Board Installation; Entering The Trim Data
Analog Output Options 4. Store this value by pressing the ‘MENU’ button and then advance to “OUTPT2”. Use the ‘MIN’ and ‘MAX’ buttons to enter the desired output for the display value in step 3. For example, enter “20.0000” for calibrated current or “10.0000”... - Page 142 Analog Output Options If you are installing an analog output board, follow this “one time only” procedure: 1. Write down the four (4) numbers inscribed on the top edge of your analog output board below: CAL VZ = CAL VS = CALmAZ = CALmAS = 2.
-
Page 143: Filter Configuration "Fil.cnf" Value To Be Transmitted
Analog Output Options 12.6 FILTER CONFIGURATION “FIL.CNF” VALUE TO BE TRANSMITTED ON ANALOG OUTPUT 1. Press the ‘MENU’ button until the display shows “FIL.CNF”. 2. Press the ‘MAX’ button until the display shows “FIL.3=0”, “FIL.3=1”, “FIL.3=2”, or “FIL.3=3”. 3. “FIL.3=0” Transmits the unfiltered value of your signal input. “FIL.3=1”... -
Page 144: Features Overview
BCD Option 13.1 FEATURES OVERVIEW 1. 6 BCD digits (24 lines plus 1 polarity, 3 decimal-point location code, 1 overflow, 1 timing, 1 control, 4 card address, and 3 isolation power lines). 2. Furnished 40-line mass-terminated connector: pin compatibility with 50- pin BCD cable assignments. -
Page 145: Figure 13-2 Bcd Option Board
BCD Option Figure 13-2 shows the board connections and pin designators. The locations of the jumpers are also shown. PIN 1 Figure 13-2. BCD Option Board 13-2... -
Page 146: Bcd Card Jumper Table
BCD Option 13.2 BCD CARD JUMPER TABLE JUMPER WHEN USED Brings OVERFLOW signal to P8-U18 Insert for 3-digit multiplex Remove for 6-digit readout Insert for 3-digit multiplex or one-line card-address enable 4-line card-address enable Insert for 3-digit multiplex Insert for 6-digit readout P8-U20 must be low to enable card Remove for high or open enable P8-L20 must be low to enable card... -
Page 147: 50-Line Cable Compatibility
BCD Option 13.4 50-LINE CABLE COMPATIBILITY The 40 lines of the BCD connector are compatible with lines 9 through 48 of some 50-line busses (left-most 8 and right-most 2 are not used by this BCD option). 13.5 SELECTING THE SOURCE OF BCD DATA: “OUT.CNF” If “L3C.7=0”... -
Page 148: Digit At A Time Card Address
BCD Option 13.10 6 DIGIT AT A TIME CARD ADDRESS Jumpers S2A and S4A are removed for full parallel (6-digit output). If jumper S3A is installed, the outputs are enabled by line P8-L20 ALONE: a low level enables the outputs when jumper S5C is installed, and a high or open level does the job if S5C is removed. -
Page 149: Select Data Polarity: Jumper S8
BCD Option 13.11 SELECT DATA POLARITY: JUMPER S8 Inserting the jumper in S8B (the usual shipping position) makes the output data (including decimal point code) positive-true. Placing the jumper in S8A converts the data to negative-true. 13.12 DECIMAL POINT ADDRESS CODE P8-U15, P8-L8 and P8-U8 output a 3-bit positive-true binary code for the location of the decimal point: “001”... -
Page 150: Features Overview
Relay Options 14.1 FEATURES OVERVIEW The Dual Relay Output Board and 4 Relay Output Board provides two isolated (354 V per IEC spacing, 500 test), 7-ampere Form-C electro-mechanical relays that enable setpoint-triggered switching to an external device (plus two 1-ampere Form-C electro-mechanical relays for 4 Relay Option). -
Page 151: Figure 14-2 4 Relay Board Jumpers And Plugs
Relay Options Figure 14-2 below show the locations of the 4 Relay Output Board jumpers, the P10 plug connecting the board to the Main Board, and the positions of P6, P7 and P18, the output plugs. Figure 14-2. 4 Relay Board Jumpers and Plugs. Table 14-2 shows which jumpers are assigned to each relay. -
Page 152: Wiring/Connections
Relay Options 14.2 WIRING/CONNECTIONS WARNING: Do not connect ac power meter until you have completed all input and output connections. Failure to do so may result in injury! This device must only be installed electrically by specially trained electrician with corresponding qualifications. -
Page 153: Features Overview
RS-232 or RS-485 Option Board 15.1 FEATURES OVERVIEW The Isolated Serial RS-232 Communications Board provides an isolated digital communications channel between a single meter and another meter or device, or between a single meter and a computer. The Isolated Serial RS-485 Communications Board adheres to the IEC standard, providing an isolated channel between up to 32 meters and a single computer or intelligent device–but can actually address up to 199 devices. -
Page 154: Figure 15-1 Rs-232/Rs-485 Option Board And Pin Designations
RS-232 or RS-485 Option Board Figure 15-1 gives the board connections and pin designators for RS-232/RS-485. METER RJ-12 PIN (J4) RS232 RS485 HALF DUPLEX RS485 FULL DUPLEX RX-TX- RX+/TX+ Figure 15-1. RS-232/RS-485 Option Board and Pin Designations Figure 15-2 shows board connections and pin designators for older RS-232 and RS-485 option cards. -
Page 155: Front-Panel Pushbutton Configuration
RS-232 or RS-485 Option Board 15.2 FRONT-PANEL PUSHBUTTON CONFIGURATION Setup configuration can be accomplished via the front panel buttons or via your computer if you use the configuration setup program. If you are going to use a computer, your choices include “AUTO SET” or “MANUAL SET” for establishing communication with your meter. -
Page 156: Section 16 External Control Lines
External Control Lines EXTERNAL CONTROL LINES P2, the 20-pin connector at the rear of the main board, connects to the setpoint transistor collectors and permits remote control of significant meter features. The meter case label gives the names (abbreviated functions) of each of the twenty pins of P2, the center-bottom connector. -
Page 157: Push To Cal (Pin 6)
External Control Lines 16.6 PUSH TO CAL (PIN 6) The Push To Cal feature is only available for the Strain Gage meter and the Universal meter when configured for the BRIDGE mode. This feature allows you to connect an external calibration resistor to P2-6 and P2-14 at the rear of the meter. -
Page 158: Push To Cal (Pin 14)
External Control Lines 16.13 PUSH TO CAL (PIN 14) See Section 16.6. 16.14 +V EXT (PIN 15) This is the pin on which to bring in isolated external 5 to 30 V to power the snubbing diodes of the four setpoint/alarm open-collector transistors. 16.15 SP1 (PIN 16) The open-collector of the first setpoint transistor (can carry 150 mA). -
Page 159: Error Mode Message
Troubleshooting TROUBLESHOOTING - DISPLAY MESSAGES AND TROUBLESHOOTING GUIDE A flashing alpha-numeric message in the display generally indicates an incorrect combination of jumpers and/or configuration values. 17.1 ERROR MODE MESSAGES 17.1.1 Flashing “999999” (Numerical Overflow) The maximum number of counts in the display cannot exceed –99999 or 999999. -
Page 160: Flashing "-Open" (Open Sensor Indication)
Troubleshooting 17.1.7 Flashing “-OPEN” (Open Sensor Indication) Coupled with the proper jumper selection, a “-OPEN” indicates the input is below the bottom limit of the range selected. 17.1.8 Flashing “I OVSC” (Input Overscale) This display occurs when the input scale and/or offset applied to the input signal causes the display to go into a numerical overflow. - Page 161 Troubleshooting “ERR 02” POSSIBLE CAUSE: Active decimal (RDG.2) has been selected and/or DEC PT (decimal point) position has been moved one or more places to the left driving the programmed Setpoint value into numerical overflow. TO CORRECT: Display will flash “ERR 02” message for a short period of time, then automatically correct the setpoint’s decimal point position and move to the next menu item.
- Page 162 Troubleshooting “I OVSC” POSSIBLE CAUSE: The input scale and/or offset values chosen are large enough to drive the display into numerical overflow. TO CORRECT: Reduce the input and/or the input scaling/offset. Refer to “IN.SC.OF” in Section 9.2.5. “R OVSC” POSSIBLE CAUSE: The reading scale and/or offset values chosen are large enough to drive the display into numerical over- flow.
-
Page 163: Section 18 Specifications
Specifications 18.1 CURRENT INPUT INPUT RANGES(+10%): 0-20 mA and 4-20 mA RESOLUTION: 1µA MAXIMUM INPUT: 200 mA INPUT OHMS: SENSOR EXCITATION: 10V, to 30 mA 24V, to 25 mA 18.2 VOLTAGE INPUT INPUT RANGES: UNIPOLAR: 100 mV 10 V 100 V BIPOLAR: ±50 mV ±0.5 V... - Page 164 Specifications CONVERSION TECHNIQUE: Dual-slope READRATE and DISPLAY UPDATE/Programmable INTEGRATION TIME: 3 samples/sec: 100 msec 13 samples/sec, 60 Hz: 16.7 msec 12 samples/sec, 50 Hz: 20 msec DISPLAY LEDs: 6, 0.54” (13.8mm)h, red, 14-segment 4, 0.12” x 0.24” (3 x 6mm), red lamp SYMBOLS: –.8.8.8.8.8.
- Page 165 Specifications RELAY OUTPUT: Dual Form-C relays or 4 Form-C relay POWER RATING FOR RESISTIVE LOADS: DUAL AND 4 RELAY: Two relays at P6 and P7 Normally open contact, 7 amp; 30Vdc or 230Vac Normally closed contact, 7 amp; 30Vdc or 230Vac 4 RELAY ONLY: Two relays at P18 Normally open contact, 1 amp;...
- Page 166 Specifications ENVIRONMENTAL OPERATING TEMP RANGE: 0 to 50 ºC (32 to 140°F) STORAGE TEMP RANGE: –40 to 85 ºC (–40 to 202°F) HUMIDITY: up to 95% non-condensing at 40°C (104°F) FRONT PANEL: NEMA-4 rated MECHANICAL DIMENSIONS (H x W x D): 1.89 x 3.78 x 5.86in.
- Page 167 Specifications FLASHING MESSAGES DURING PROGRAMMING (configuration mode) NUMERICAL OVERFLOW: “999999” OFFSET OVERFLOW: “ERR 01” SETPOINT OVERFLOW: “ERR 02” NOT STORED IN EEPROM: “NOSTOR” VALUE PUT IN EEPROM: “STORED” DURING MEASUREMENT (RUN MODE) INPUT TOO LARGE, POSITIVE: “+ OVLD” INPUT TOO LARGE, NEGATIVE: “–...
- Page 168 Factory Preset Values JUMPER POSITIONS: ac Powered unit S1: NONE S2: A, F, L, N, T, S3: A, C S4: A, C dc Powered unit S1 (dc power board): A S1: NONE S2: A, F, L, N, T S3: A, C, D S4: A S5: A LOCKOUT CONFIGURATION(S)
- Page 169 Factory Preset Values Decimal Point “DEC PT” Position: FFFFFF. Count By “CNT BY”: 001 Filter Configuration “FIL.CNF”: FIL.1=0 FIL.2=1 FIL.3=1 Filter Time Constant “FIL TI”: 064 Setpoint Configuration “SP CNF”: SPC.1=0 SPC.2=0 SPC.3=1 SPC.4=0 SPC.5=0 SPC.6=1 SPC.7=0 SPC.8=0 Alarm Configuration “AL CNF”: ALC.1=0 ALC.2=0 ALC.3=1...
- Page 170 Factory Preset Values Data Format “DAT FT”: DAT.1=0 DAT.2=0 DAT.3=1 DAT.4=0 DAT.5=0 DAT.6=0 DAT.7=0 DAT.8=0 Bus Format “BUS FT”: BUS.1=0 BUS.2=0 BUS.3=1 BUS.4=0 BUS.5=1 BUS.6=0 BUS.7=0 BUS.8=1 Serial Count “SERCNT”: 00001 ANALOG OUTPUT CAL VZ: CAL VS: CAL mAZ: CAL mAS: 19-3...
-
Page 171: Section 20 Record Your Setup Values
Record your Setup Values JUMPER POSITIONS: Current S1: _______ S2: ________________ S3: _______ S4: ________________ Voltage S1: _______ S2: ________________ S3: _______ S4: ________________ Potentiometer S1: _______ S2: ________________ S3: _______ S4: ________________ LOCKOUT CONFIGURATION(S) L1 CNF L2 CNF L3 CNF L4 CNF L1C.1=___ L2C.1=___ L3C.1=___... - Page 172 Record your Setup Values Reading Scale & Offset (2-coordinate Format): INPUT 1= __________ READ 1= __________ INPUT 2= __________ READ 2= __________ Input Configuration “IN CNF”: INP.1=____ INP.2=____ INP.3=____ INP.4=____ INP.5=____ INP.6=____ INP.7=____ Input Scale and Offset “IN.SC.OF”: INPUT 1: _________ READ 1: _________ INPUT 2: _________ READ 2: _________...
- Page 173 Record your Setup Values Output Scale and Offset “OT.SC.OF”: READ 1: ________ OUTPT 1: ________ READ 2: ________ OUTPT 2: ________ Baud Rate “BAUD”: _______ Serial Communication Configuration “SERCNF”: SER.1=____ SER.2=____ Address “ADDRES” (for RS-485): ______ Data Format “DAT FT”: DAT.1=____ DAT.2=____ DAT.3=____...
- Page 174 © Copyright 2017 OMEGA ENGINEERING, INC. All rights reserved. This document may not be copied, photocopied, reproduced, trans- lated, or reduced to any electronic medium or machine-readable form, in whole or in part, without the prior written consent of OMEGA...
- Page 175 Where Do I Find Everything I Need for Process Measurement and Control? OMEGA…Of Course! Shop online at omega.com TEMPERATURE M U Thermocouple, RTD & Thermistor Probes, Connectors, Panels & Assemblies M U Wire: Thermocouple, RTD & Thermistor M U Calibrators & Ice Point References M U Recorders, Controllers &...
Need help?
Do you have a question about the DP461-S and is the answer not in the manual?
Questions and answers