Advertisement
Quick Links
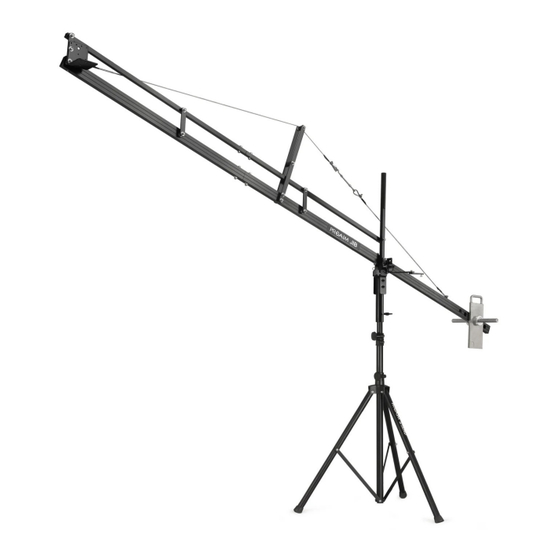
What's In The Box
Please inspect the contents of your shipped package to ensure you have received everything that is listed
below.
Front Section
Middle Section
End Section
6mm Allen Keys
No part of this document may be reproduced, stored in a retrieval system, or transmitted by any form or by any means,
electronic, mechanical, photo-copying, recording, or otherwise, except as may be expressly permitted by the applicable copyright
12FT Camera Crane Jib, Stand & Jr. Pan-Tilt
(P-12-JS-JRPP)
A s s e m b l y M a n u a l
2 x Spanner - 17
1 x Spanner - 13
All rights reserved.
statutes or in writing by the Publisher.
Central Pool
Adapter
Central Post
Weight Shank
Weight Closers
2 x Flower
Tool Pouch
Knob
3 x Velcro
1 x Knob
1
1
Jib Stand
Advertisement

Related Manuals for PROAIM P-12-JS-JRPP


Summary of Contents for PROAIM P-12-JS-JRPP
- Page 1 12FT Camera Crane Jib, Stand & Jr. Pan-Tilt (P-12-JS-JRPP) A s s e m b l y M a n u a l What’s In The Box Please inspect the contents of your shipped package to ensure you have received everything that is listed below.
- Page 2 15 mtr XLR Cable, 3 mtr Cable 12V Joystick Controller with Safety cap 12V AC Adapter Jr. Pan-Tilt Head Storage Bag 4 x Wings Nuts MS Check nut Jib Stand Bag (Size:-1/4) Universal Adapter 3 x L-Type Allen key 2 x Fuse Jib Section Storage Bag Index Sr.
- Page 3 Extend the legs along the Center Post to their widest position and re-tighten the lower knob for added stability. Assembling The Jib Arm Insert the Center Post of the Jib onto the Stand, as shown in the image. ...
- Page 4 Re-insert the black washers and push the shank to tighten the attachment with the dome nut. Tighten the dome nut from both sides using a wrench and secure the Jib section using a pin, as shown in the image. ...
- Page 5 Remove the bolts in the front of the Middle section using the spanner and Allen key, as shown in the image. Align the middle and end sections together to insert the bolt and nuts. Tighten the bolt using the spanner and Allen key to secure it.
- Page 6 Remove the bolts of the Center pool Adapter by loosening them. Then, align the central pool adapter in the center of the wire puller and insert the bolt, as shown in the image. After inserting the bolt in the Central pool adapter, tighten it using the Allen key.
- Page 7 Jr. Pan-Tilt Head is properly Attached to the Jib. Connect the 4-pin male connector of the cable to the 4-pin female connector on the head for panning and tilting. Attaching Joystick Controller Unwrap the Velcro strap around the 12V joystick controller and safely remove the cap, as shown in the image.
- Page 8 Attach one end of the 12v adapter cable to the adapter. Connect the electric plug of the 12v adapter wire to the universal adapter. Attach the 4-pin Power Cable with the Joystick Controller. Joystick Controlled Movement Functions ...
- Page 9 NOTE: Proaim Jr. Pan tilt offers complete 360° pan & tilt inaudible movements while keeping your camera safe and secure. YOUR PROAIM 12FT CAMERA CRANE JIB WITH STAND ALL DRESSED UP AND READY TO GO! (SHOWN WITH OPTIONAL ACCESSORIES) Warranty: We offer one year warranty for our products from date of purchase. Within this period of time, we will repair it without charge for labor or parts.
Need help?
Do you have a question about the P-12-JS-JRPP and is the answer not in the manual?
Questions and answers