
Related Manuals for Tesla CG5400SW


Summary of Contents for Tesla CG5400SW
- Page 1 FREE STANDING GAS OVEN CG5400SW CG6400SX User Manual Product images are for illustrative purposes only and may differ from the actual product.
-
Page 2: Important Warnings
Dear User, We suggest you read the user manual carefully before using the product and keep it at your disposal. NOTE This user manual is prepared for more than one model. Some of the features specified in the manual may not be available in your appliance. -
Page 3: Electrical Safety
an oven accessory (tray, wire grill etc.). the oven get hot. As you open the oven door, step back to avoid the hot vapour coming out from the 35. Do not put objects that children may reach on the interior. There is risk of burning. appliance. -
Page 4: Gas Safety
16. Make sure the plug is inserted firmly into wall 11. Make sure that there is no liquid or humidity in the socket to avoid sparks. outlet where the product plug is installed. 17. Do not use steam cleaners for cleaning the 12. -
Page 5: Intended Use
Intended Use 1. This product is designed for home use. hanging them on the handle or for heating Commercial use of the appliance is not permitted. purposes. 2. This appliance may only be used for cooking 4. The manufacturer assumes no responsibility for purposes. -
Page 6: Gas Connection
Gas Connection WARNING! Before starting any work related with gas installation, turn off gas supply. Risk of explosion. Please operate your oven in dry atmosphere. 4. Re-inspect the gas connection. 1. Fit the clamp to the hose. Push one of the hose 5. - Page 7 Gas hose passage way Connect the appliance to the gas piping tap in shortest possible route and in a way that ensure no gas leakage will occur. In order to carry on a tightness and sealing safety check ensure that the knobs on the control panel are closed and the gas cylindir is open.
-
Page 8: Reduced Gas Flow Rate Setting For Hob Taps
Ventilation of room The air needed for burning is received from room air and the gases emitted are given directly in room. For safe operation of your product, good room ventilation is a precondition. If no window or room to be utilized for room ventilation is available, additional ventilation should be installed. - Page 9 Removal of the lower burner and installation of the injector to the gas oven The lower burner door has been fixed with two screws. As shown in figure 8, remove it with the help of a screw driver. Remove the door by pulling upwards as shown in figure 9. Remove the burner from its place by pulling it to yourself as shown in figure 10.
-
Page 10: Introduction Of The Appliance
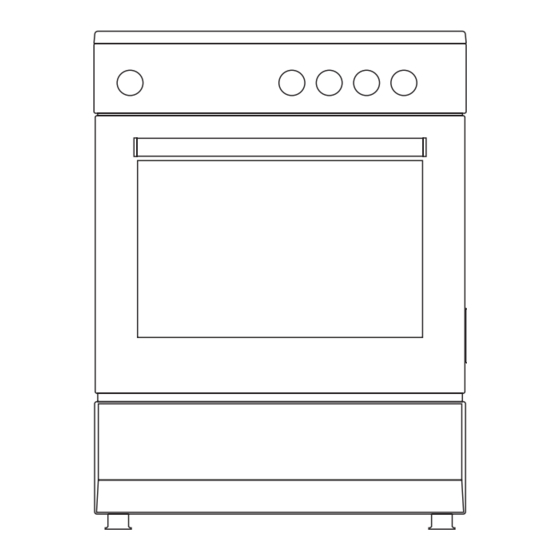
INTRODUCTION OF THE APPLIANCE 1. Oven setting 7. Lamp 2. Cooker section control Switches 8. Grill 3. Button for light 9. Large burner 4. Door 10. Middle burner 5. Handle 11. Auxiliary burner 6. Plastic leg... - Page 11 Accesories Deep tray* Used for pastry, big roasts, watery foods. It can also be used as oil collecting container if you roast directly on grill with cake, frozen foods and meat dishes. Tray / Glass tray* Used for pastry (cookie, biscuit etc.), frozen foods. Circular tray* Used for pastry frozen foods.
-
Page 12: Technical Features Of Your Oven
Technical features of your oven Specifications 50x60 60x60 Outer width 500 mm 600 mm Outer depth 555 mm 610 mm Outer height 830 mm (860 with plastic leg) 830 mm (860 with plastic leg) Lamp power 15-25 W Supply voltage 220-240V AC/380-415V AC 50/60 Hz Left Front Ø55mm 950 W... -
Page 13: Installation Of Your Oven
G30,28-30 mbar G30,50 mbar G30,37 mbar Burner G31,37 mbar Specifications Injector 0,85 0,75 0,85 Rapid Gas flow m³/h m³/h m³/h Burner Power 2,90 2,90 2,90 Injector 0,65 0,60 0,65 Semi-Rapid Gas flow m³/h m³/h m³/h Burner Power 1,70 1,70 1,70 Injector 0,50 0,43... -
Page 14: Chain Lashing Illustration
• WARNING: The kitchen furniture near the appliance must be heat resistant. WARNING! • WARNING: Do not install the appliance beside refrigerators or coolers. Heat radiated by the appliance increases the energy consumption of cooling devices. • WARNING: Do not use the door and/or handle to carry or move the appliance. Chain lashing illustration Before using the appliance, in order to ensure safe use, be sure to fix the appliance to the wall using thechain and... -
Page 15: Control Panel
CONTROL PANEL 1. Function selection button 4. Front right heater NOTE 2. Rear left heater 5. Rear right heater The control panel above is only for 3. Front left heater 6. Light button illustration purposes. Consider the control panel on your device. Mechanical timer*:Used for determining the period for cooking in the oven. -
Page 16: Using Cooker Section
USING COOKER SECTION Using gas burners Flame cut-off safety device (FFD); operates instantly when safety mechanism activates due to overflown liquid over upper hobs. 1. The valves controlling the gas cookers have special security mechanism. In order to light the cooker always press on the switch forward and bring it to flame symbol by turnin counter clockwise. -
Page 17: Program Types
PROGRAM TYPES Function Button: Used for determining the heaters to be used for cooking the dish to be cooked in the oven. Heater program types in this button and their functions are described below. All heater types and program types consisting of these heaters may not be available at all models.be available at all models. -
Page 18: Installation Of The Oven Door
INSTALLATION OF THE OVEN DOOR Figure 14 Figure 15 Figure 16.1 Figure 16.2 Figure 17.1 Figure 17.2 Completely open the Bring the hinge lock Afterwards, close the To remove the oven oven door by pulling it to the widest angle as oven door as to lean on door, pull it upwards to yourself. -
Page 19: Cleaning And Maintenance Of The Oven's Front Door Glass
Cleaning And Maintenance Of The Oven’s Front Door Glass Remove the profile by pressing the plastic latches on both left and right sides as shown in figure 23 and pulling the profile towards yourself as shown in figure 24. Then remove the inner-glass as shown in figure 25. If required, middle glass can be removed in the same way. -
Page 20: Troubleshooting
TROUBLESHOOTING You may solve the problems you may encounter with your product by checking the following points before calling the technical service. Check Points In case you experience a problem about the oven, first check the table below and try out the suggestions. Problem Possible Cause What to Do... -
Page 21: Recommendations For Energy Saving
Problem Possible Cause What to Do When operating the oven Plastic or other not heat resistant At high temperatures, use suitable burnt or plastic odour coming accessories are being used inside glassware accessories. out. the oven. Do not open oven door frequently, if the food you are cooking does Oven door is opened frequently not require turning. -
Page 22: Environmentally-Friendly Disposal
ENVIRONMENTALLY-FRIENDLY DISPOSAL Dispose of packaging in an environmentally-friendly manner. This appliance is labelled in accordance with European Directive 2012/19/EU concerning used electrical and electronic appliances (waste electrical and electronic equipment - WEEE). The guideline determines the frame work for the return and recycling of used appliances as applicable throughout to the EU. - Page 24 tesla.info...
Need help?
Do you have a question about the CG5400SW and is the answer not in the manual?
Questions and answers