Table of Contents
Advertisement
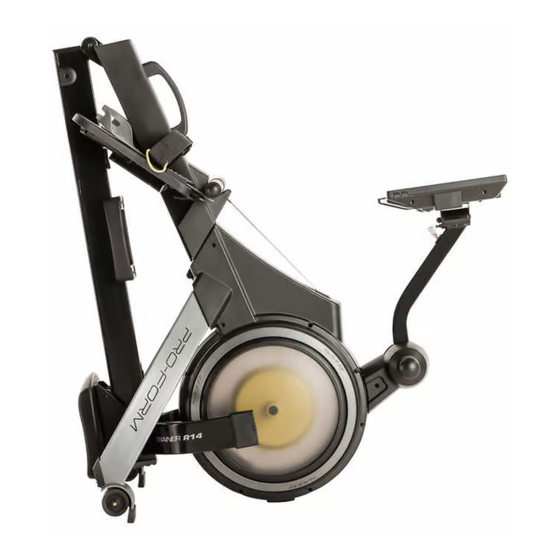
proform.com
Model No. PFRW98921.0
Serial No.
Write the serial number in the space
above for reference.
Serial
Number
Decal
REGISTER YOUR
PRODUCT
To register your product and
activate your warranty today,
go to my.proform.com.
MEMBER CARE
For service at any time, go to
my.iFIT.com.
Or call 1-833-680-IFIT
(1-833-680-4348)
Mon.–Fri. 6 a.m.–6 p.m. MT
Sat. 8 a.m.–12 p.m. MT
Please do not contact the store.
CAUTION
Read all precautions and
instructions in this manual before
using this equipment. Keep this
manual for future reference.
USER'S MANUAL
Advertisement
Table of Contents

Related Manuals for Pro-Form Trainer R14


Summary of Contents for Pro-Form Trainer R14
- Page 1 proform.com Model No. PFRW98921.0 USER’S MANUAL Serial No. Write the serial number in the space above for reference. Serial Number Decal REGISTER YOUR PRODUCT To register your product and activate your warranty today, go to my.proform.com. MEMBER CARE For service at any time, go to my.iFIT.com.
-
Page 2: Table Of Contents
TABLE OF CONTENTS WARNING DECAL PLACEMENT ............. . . 2 IMPORTANT PRECAUTIONS . -
Page 3: Important Precautions
IMPORTANT PRECAUTIONS WARNING: To reduce the risk of serious injury, read all important precautions and instructions in this manual and all warnings on the rower before using the rower. iFIT assumes no responsibility for personal injury or property damage sustained by or through the use of this product. - Page 4 STANDARD SERVICE PLANS...
-
Page 5: Before You Begin
The model ance, and toning the body. The TRAINER R14 rower is number and the location of the serial number decal are designed to let you enjoy this effective exercise in the shown on the front cover of this manual. -
Page 6: Part Identification Chart
PART IDENTIFICATION CHART Use the drawings below to identify the small parts needed for assembly. The number in parentheses below each drawing is the key number of the part, from the PART LIST near the end of this manual. The number following the key number is the quantity needed for assembly. -
Page 7: Assembly
ASSEMBLY 1. To use the assembly steps in this manual, first see the helpful tips below. • Assembly requires two persons. • Assembly requires the following tool(s): one Phillips screwdriver • Place all parts in a cleared area and remove the packing materials. - Page 8 3. Have a second person hold the Rail (2) during this step. Attach the Stabilizer (3) to the Frame (1) with two M10 x 14mm Screws (61). Then, hold the Rail Handle (34), pull the Rail (2) outward, and rest the Rail on the floor (see the drawing in step 4).
- Page 9 5. Slide the Seat (23) to the front of the Rail (2). Next, attach the Rear Stop (87) to the Rail (2) with two M4 x 8mm Screws (104). Then, attach the Rail Cap (38) to the Rail (2) with two M4 x 19mm Screws (69). 6.
- Page 10 7. While a second person holds the Console (75) and the Upright (77) near the Frame (1), con- nect the Upright Wire (84) to the Main Wire (109). Tip: The wire connectors should slide together easily and snap into place with an audible click.
- Page 11 9. Plug the Power Adapter (108) into the receptacle on the front of the rower. Note: To plug the Power Adapter (108) into an outlet, see HOW TO PLUG IN THE POWER ADAPTER on page 12. 10. Make sure that all parts are properly tightened. Extra parts may be included. Place a mat beneath the rower to protect the floor.
-
Page 12: How To Use The Rower
HOW TO USE THE ROWER HOW TO PLUG IN THE POWER ADAPTER HOW TO ADJUST THE CONSOLE VIEWING ANGLE IMPORTANT: If the rower has been exposed to cold To adjust the temperatures, allow it to warm to room temperature console to the before you plug in the Power Adapter (A). - Page 13 HOW TO MOVE THE ROWER IN THE FOLDED HOW TO FOLD AND STORE THE ROWER POSITION The rower can be stored in a folded position to con- Take any necessary measures to protect your floor. serve space. Store the rower in a location where See HOW TO FOLD AND STORE THE ROWER at the children cannot tip it.
- Page 14 Then, pull the Rail Handle (K) inward until the Folding HOW TO ROW ON THE ROWER Clamp (O) engages the bar on the Stabilizer (P). Sit on the seat, place your feet in the footrests, and adjust the straps to fit your feet. Then, hold the row bar with an overhand grip.
-
Page 15: How To Use The Console
HOW TO USE THE CONSOLE CONSOLE DIAGRAM FEATURES OF THE CONSOLE HOW TO TURN ON THE CONSOLE The advanced console offers an array of features The included power adapter must be used to operate designed to make your workouts more effective and the rower. - Page 16 HOW TO USE THE TOUCH SCREEN 3. Log into or create an iFIT account. The console features a tablet with a full-color touch Follow the prompts on the screen to log into your screen. The following information will help you use the iFIT account or to create an iFIT account.
- Page 17 HOW TO USE THE MANUAL MODE Drag upward on the screen to enter the fullscreen display mode. Drag downward on the screen to 1. Touch the screen or press any button on the view the workout information displays. console to turn on the console. Touch the various workout information displays See HOW TO TURN ON THE CONSOLE on to view more options.
- Page 18 HOW TO USE A FEATURED WORKOUT When you select a workout, the screen will show an overview of the workout that includes details To use a featured workout, the console must be con- such as the duration and distance of the workout nected to a wireless network (see HOW TO CONNECT and the approximate number of calories you will TO A WIRELESS NETWORK on page 24).
- Page 19 IMPORTANT: The calorie goal shown in the When the workout ends, a workout summary will workout description is an estimate of the appear on the screen. If desired, you can select number of calories that you will burn during options such as adding the workout to your sched- the workout.
- Page 20 HOW TO CREATE A DRAW-YOUR-OWN-MAP If you want to start and end your workout at the WORKOUT same point, touch Close Loop or Out & Back in the map options. You can also select whether you want 1. Touch the screen or press any button on the your workout to snap to the road.
- Page 21 HOW TO USE AN IFIT WORKOUT 4. Select an iFIT workout from the home screen or the workout library. To use an iFIT workout, you must be logged into your iFIT account (see step 3 below) and the console Touch the buttons at the bottom of the screen to must be connected to a wireless network (see HOW select either the home screen (Home button) or the TO CONNECT TO A WIRELESS NETWORK on...
- Page 22 6. Create a list of favorite iFIT workouts if desired. THE OPTIONAL HEART RATE MONITOR To mark an iFIT workout as a favorite, simply view Whether your the overview or workout summary of the desired goal is to iFIT workout and touch the favorites button (heart burn fat or to symbol).
- Page 23 HOW TO CHANGE CONSOLE SETTINGS Equipment • Equipment Info IMPORTANT: Firmware updates are always • Equipment Settings designed to improve your exercise experience. As a • Maintenance result, new settings and features may not be described • Wi-Fi in this manual. Take time to explore the console to learn how new settings and features work.
- Page 24 The screen will show the progress of the update. 3. Enable Wi-Fi. When the update is complete, the console will turn off and then turn back on. If it does not, unplug the Make sure that Wi-Fi ® is enabled. If it is not power adapter, wait for several seconds, and then enabled, touch the Wi-Fi toggle to enable it.
-
Page 25: Fcc Information
FCC INFORMATION This equipment has been tested and found to comply with the limits for a Class B digital device, pursuant to Part 15 of the FCC Rules. These limits are designed to provide reasonable protection against harmful interference in a residential installation. This equipment generates, uses, and can radiate radio frequency energy and, if not installed and used in accordance with the instructions, may cause harmful interference to radio communications. -
Page 26: Maintenance And Troubleshooting
MAINTENANCE AND TROUBLESHOOTING MAINTENANCE HOW TO ADJUST THE REED SWITCH Regular maintenance is important for optimal If the console does not display correct feedback, the performance and to reduce wear. Inspect and properly reed switch should be adjusted. tighten all parts each time the rower is used. Replace any worn parts immediately. -
Page 27: Exercise Guidelines
EXERCISE GUIDELINES Aerobic Exercise—If your goal is to strengthen your WARNING: cardiovascular system, you must perform aerobic Before beginning this exercise, which is activity that requires large amounts or any exercise program, consult your physi- of oxygen for prolonged periods of time. For aerobic cian. -
Page 28: Part List
PART LIST Model No. PFRW98921.0 R1221A Key No. Qty. Description Key No. Qty. Description Frame Clamp Rail Row Bar Rest Stabilizer Frame Handle Left Flywheel Pivot Axle Seat Carriage 17mm Spacer Accent Ring 2.3mm Spacer Right Shield M6 x 15mm Washer Left Shield M6 Locknut Disc... - Page 29 Key No. Qty. Description Key No. Qty. Description M4 x 12mm Blunt Screw Power Adapter Resistance Motor Main Wire M5 Nut Console Bracket Resistance Disc M6 Shoulder Bolt M3 x 8mm Screw Pivot Disc M4 x 8mm Screw M8 x 80mm Shoulder Bolt M4 x 12mm Screw –...
-
Page 30: Exploded Drawing
EXPLODED DRAWING A Model No. PFRW98921.0 R1221A... - Page 31 EXPLODED DRAWING B Model No. PFRW98921.0 R1221A...
-
Page 32: Ordering Replacement Parts
ORDERING REPLACEMENT PARTS To order replacement parts, please see the front cover of this manual. To help us assist you, be prepared to provide the following information when contacting us: • the model number and serial number of the product (see the front cover of this manual) •...
Need help?
Do you have a question about the Trainer R14 and is the answer not in the manual?
Questions and answers
need to turn on screen Jan 19 2025
To turn on the screen for the Pro-Form Trainer R14, touch the screen or press any button on the console. Note that it may take a few moments for the console to be ready for use.
This answer is automatically generated