
Related Manuals for Amcrest IP8M-DT3949EW-AI


Summary of Contents for Amcrest IP8M-DT3949EW-AI
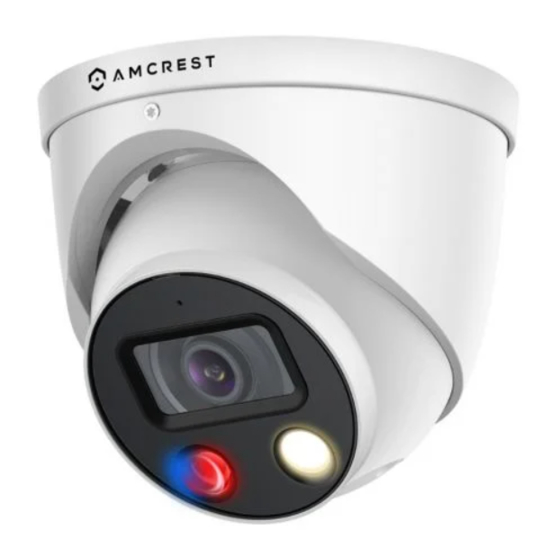
- Page 1 IP8M-DT3949EW-AI 8MP Dual Illumination Active Deterrence Fixed-focal Turret Camera User Manual Version 1.0.0 January 26 , 2023...
-
Page 2: Table Of Contents
Contents Overview ..........................3 Installation Guide .........................4 Camera Access Setup ......................4 Desktop Access Setup......................5 App Setup ..........................5 Playback ..........................11 Setup..........................12 Camera ..........................12 Audio ..........................19 Network ..........................19 Event ..........................24 Storage..........................32 Destination.........................34 System ..........................36 Information ........................38 Alarm ..........................39... -
Page 3: Overview
The camera also features flexible storage options to store recordings to a microSD card (up to 256GB), SFTP/FTP, NAS, NVR, or using the Amcrest Cloud. All these features can be accessed and customized using a web browser or even using the Amcrest View Pro app using a mobile device. -
Page 4: Installation Guide
This section will provide information on how to setup and access your camera through the following methods: Desktop Access (Web UI) Amcrest View Pro app Amcrest Cloud Note: Additional software such as Amcrest Surveillance Pro can be used to access the camera. For more information on Amcrest Surveillance Pro, please visit amcrest.com... -
Page 5: Desktop Access Setup
Amcrest Cloud App Setup Amcrest Cloud allows you to access your device from anywhere in the world. Please note, you will need an Amcrest Cloud account to proceed with Amcrest Cloud app setup. You can register for a cloud account in the Amcrest Cloud app or from the Amcrest Cloud website at amcrestcloud.com... - Page 6 Note: Connect your mobile device to the same network that your camera is on. 2. Register for an Amcrest Cloud account. To register click on Sign Up and fill out the form to complete registration. 3. Tap on Add Camera 4.
- Page 7 Download and install the Amcrest View Pro app for the App Store or Google Play Store. Open the app on your mobile device and allow the app to load.
- Page 8 6. Scan the QR code. The QR code can be found on the serial tag along with a scannable barcode. Note: IP/Domain/DDNS can be used to establish a DDNS connection. For more information on how to setup a DDNS connection, visit amcrest.com/support...
- Page 9 The default username and password will be admin. Tap “Start Live View”. For more information about Amcrest View Pro and its functionalities visit amcrest.com/support Using the Web UI The web user interface (web UI) will be the recommended method for accessing the AI features and settings for your camera.
- Page 10 Button Function Name Function Description Click this option to manually activate an alarm if an external alarm is Relay Out connected. Blue/Red Lights Click this option to manually activate the warning LEDs. Siren Activation Click this option to manually activate the built-in siren (IE Mode only). Click this option and use your mouse on the interface to digitally zoom Digital Zoom in on an area.
-
Page 11: Playback
Playback The Playback tab allows the user to playback the camera’s recorded video. Below is a screenshot of the Playback tab: This is the interface for the playback menu. There are 5 main sections: Section 1: Allows the user to filter between video (.mp4) or snapshots (.jpg). Section 2: Allows the user to playback events based on calendar dates. -
Page 12: Setup
Manual events. The “All” option will select all recording types in the interface. Cloud Storage The Cloud Storage tab allows the user quick access to the Amcrest Cloud website. At this website (amcrestcloud.com) users can register for new accounts as well as view or modify existing accounts. - Page 13 Brightness: This slider is used to adjust playback and recorded video window brightness. The value ranges from 0 to 100. The default value is 50. The larger the number, the brighter the video is. When you input the value here, the bright section and the dark section of the video will be adjusted accordingly.
- Page 14 To reset to default settings, click the Reset Defaults button. To refresh the screen, click on Refresh. To save the settings, click the Save button. BLC Mode This menu allows the user to adjust back light compensation settings. Below is an explanation of the features provided in this menu.
- Page 15 Profile: This dropdown box allows the user to select which profile to modify. The 3 options are Day, Night, and General. Mode: This dropdown box allows the user to select different Day & Night balance modes. The 2 options are Color and B&W.
- Page 16 Smart Codec: This option allows the user to enable or disable the smart codec. Smart codec is a function in most Amcrest cameras which aim to reduce bandwidth consumption without losing visible image quality by intelligently increasing compression where it will not make a visible difference in the scene.
- Page 17 Frame Interval: This field allows the user to set the P frame amount between two I frames. The value ranges from 1 to 150 seconds. Default value is 50. Recommended value is frame rate *2. Watermark Settings: This function allows the user to verify if the video has been tampered with. Watermark Character: This field allows the user to set the watermark’s text.
- Page 18 Logo Overlay The logo overlay menu allows the user to enable or disable the Amcrest overlay logo in the interface. Click the enable option to enable the Amcrest overlay and click save to apply the setting. To disable the Amcrest overlay, click disable, then click save to apply the setting.
-
Page 19: Audio
Audio This menu allows the user to modify audio settings for the camera. Please note, this device has a dongle wire connection which allows the user to connect an external RCA microphone or speaker. If using an external microphone, make sure to enable the “Line In” option located in the Audio In Device dropdown menu. Below is an explanation for each of the fields on the Audio menu: Main Stream: Sets the audio settings for the main stream: Enable: This checkbox allows the user to enable audio recording. - Page 20 QR code scanning feature cannot be used. QR Code: This image is a Quick Response (QR) code. By scanning this image using the Amcrest View app, this camera can establish a connection with the app.
- Page 21 Connection The Connection tab is where users can configure port connections. Below is an explanation of the fields on the Connection settings tab: Max Connections: This field allows the user to specify the maximum number of users that can be connected to the camera at the same time.
- Page 22 For purposes of this guide, AmcrestDDNS will be used. AmcrestDDNS is a free DDNS service provided by Amcrest, and it must be renewed every year. A renewal reminder email will be sent to the email entered in the username field below. To use AmcrestDDNS, enter the domain name set for the camera in the Domain Name field and enable the Type option.
- Page 23 Password: This field allows the user to enter the password associated with the SMTP username. Sender: This field allows the user to enter the sender email address. This email address will be the one that sends out all emails pertaining to the alerts and alarm emails sent by the camera. Title: This field allows the user to define the subject line of the email that is sent to the receivers.
-
Page 24: Event
HTTPS Hypertext Transfer Protocol Secure (https) is a combination of the Hypertext Transfer Protocol (HTTP) with the Secure Socket Layer (SSL)/Transport Layer Security (TLS) protocol. This menu allows the user to enable and create HTTPS certificates. To enable HTTPS, click Create. Enter the requested information related to the certificate, region, IP or domain name of the camera, state, location, etc., and click Create. - Page 25 After the motion detection zone is set, click the enter button to exit the motion detection screen. Remember to click the save button on the motion detection settings screen, otherwise the motion detection zones will not go into effect. Clicking the cancel button to leave the motion detection zone and will not save the zone setup.
- Page 26 To reset to default settings, click the Reset Defaults button. To refresh the page, click the Refresh button. To save the settings, click the Save button. Smart Motion Detection Smart Motion Detection (SMD) uses an advanced algorithm to differentiate between human and motor vehicle shapes within a scene and send alarms only when a person or vehicle is detected.
- Page 27 Setting an IVS Rule All IVS rules can only be set and/or modified using the web user interface. They cannot be set using the Amcrest View Pro app or any other platforms associated with your device. For more information on setting IVS rule, refer to the information below.
- Page 28 Snapshot: This checkbox allows a snapshot of the IVS event to be sent to registered email address once triggered. Draw Rule: This option allows the user to use their mouse to customize (draw) a rule/area on the screen. This will be the area or line in which an IVS rule will be triggered.
- Page 29 Cross: The rule will trigger when a target enters or exits the area. Appears: The rule will trigger when a target appears inside the area. Direction: This dropdown menu allows the user to choose whether the rule will be triggered if an object enters, exits, or enters &...
- Page 30 3. In the Direction menu, choose if the rule will be triggered if the object enters only, exits only, or enters & exits a set region. 4. Select an object filter, human or vehicle. This will allow only human or vehicles in the detection area to trigger an event.
- Page 31 To reset to default settings, click the Reset Defaults button. To refresh the page, click the Refresh button. To save the settings, click the Save button. Abnormality This menu allows the user to adjust abnormality event settings. This menu has 4 tabs: SD Card, Network, Illegal Access, and Security Exception.
-
Page 32: Storage
Disarming The disarming menu allows the camera to automatically disarm any motion activated features that are currently enabled in the camera. Below is an explanation of the features provided in this menu. Disarming: Enable or disable (close) the disarming feature. Disarm by Period: Allow the device to only disarm based on a schedule. - Page 33 Below is an explanation of the fields on the Record Schedule settings tab: Record Type: These checkboxes allow the user to select which recording type they want to configure on the schedule. There are 3 types of recordings: General: General recording means that the camera captures all footage for the specified time period. General recording is represented by the color green.
-
Page 34: Destination
Motion: Motion Detection means that the camera only takes snapshots when the motion detection alarm is activated. Motion recording is represented by the color yellow. Alarm: Alarm means that the camera only takes snapshots when an alarm is activated. Alarm recording is represented by the color red. - Page 35 Path This tab is where the user can designate a path for recorded video and snapshots to reside in. Below is an explanation of the fields on the Path settings tab: Event Type: This column designates storage options available to the camera. The options are SD Card, FTP, and NAS.
-
Page 36: System
Save button. Cloud Storage This menu redirects the user to the Amcrest Cloud web site. At this website (amcrestcloud.com) users can register for new accounts as well as view or modify existing accounts. For more information on Amcrest Cloud visit: amcrestcloud.com... - Page 37 To reset to default settings, click the Reset Defaults button. To refresh the page, click the Refresh button. To save the settings, click the Save button. Date & Time This tab is where the user can configure the date and time settings for the camera. Below is an explanation of the fields on the Date &...
-
Page 38: Information
Go to amcrest.com/firmware Search for the model number of your camera and download the latest firmware file. Return to the web user interface for your camera and press the Browse button to locate and import the firmware file you just downloaded. -
Page 39: Alarm
Please refer to your router manufacturer’s documentation to learn how to enable uPnP on your router. Below is a step-by-step walkthrough that details how to setup Amcrest cameras for Remote Web Access using UPnP and DDNS:... - Page 40 6. Click the Connections menu item on the left-hand menu and ensure that the HTTP port has changed. 7. Click the DDNS menu item on the left-hand menu, pick Amcrest DDNS from the drop-down box, click the checkbox next to Server Type, and then click the Save button on the bottom right.
- Page 41 Amcrest cameras can sync with Amcrest Cloud; a service that stores recorded video streams to enable long-term storage. Amcrest Cloud also allows the user to easily find and download recorded video for playback from any internet connected PC or Mac computer.
- Page 42 4. View your camera live or watch recorded clips using the menu button on the top of the page. You can also use the Amcrest Cloud app on iOS and Android to add more cameras, play recordings, and view your camera live, from anywhere.
- Page 43 Note: To view setup videos for many of the steps outlined in this guide, go to http://amcrest.com/videos This user manual is for reference only. Slight differences may be found in the user interface. All the designs and software here are subject to change without prior written notice.
- Page 44 All trademarks and registered trademarks mentioned are the properties of their respective owners. To contact Amcrest support, please do one of the following: Visit http://amcrest.com/contact and use the email form Call Amcrest Support using one of the following numbers: Toll Free US: (888) 212-7538...
Need help?
Do you have a question about the IP8M-DT3949EW-AI and is the answer not in the manual?
Questions and answers