Sign In
Upload
Download
Table of Contents
Contents
Add to my manuals
Delete from my manuals
Share
URL of this page:
HTML Link:
Bookmark this page
Add
Manual will be automatically added to "My Manuals"
Print this page
×
Bookmark added
×
Added to my manuals
Manuals
Brands
Hunter Manuals
Tyre Changers
TC33 Series
Operation instructions manual
Hunter TC33 Series Operation Instructions Manual
Hide thumbs
1
2
3
4
Table Of Contents
5
6
7
8
9
10
11
12
13
14
15
16
17
18
19
20
21
22
23
24
25
26
27
28
29
30
31
32
33
34
35
36
37
38
39
40
41
42
43
44
45
46
47
48
49
50
51
52
53
54
55
page
of
55
Go
/
55
Contents
Table of Contents
Bookmarks
Table of Contents
Table of Contents
Getting Started
Introduction
For Your Safety
Hazard Definitions
Important Safety Instructions
Decal Placement (TC33)
Decal Placement (TC33M)
Electrical
Specific Precautions/Power Source
Equipment Installation and Service
Equipment Specifications
Safety Summary
Tire Bead Loosening with Powerout (TC33 Model Only)
Wheel Lift Pedal (TC33 Model Only) (Optional)
Wheel Rotation Pedal
Air Inflation Pedal
Inflator and Pressure Limiter
Bead Press Arm (Optional)
Bead Press Arm with Horizontal Roller (TC33 Model Only) (Optional)
Command Unit (TC33M Model Only)
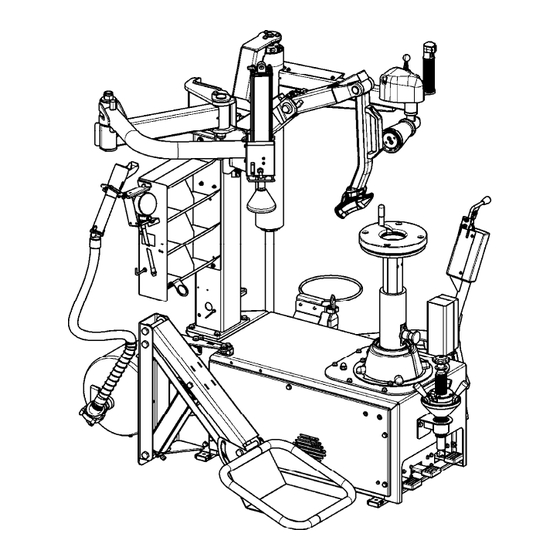
Equipment Components
Tc33
Tc33M
Basic Procedures
Side Shovel Bead Loosening (TC33 Model Only)
Placing Wheel on TC
Wheel Support Plate Height Adjustment
Standard and High Offset Wheels
Reverse Drop Center Wheels
Large Pilot Hole Wheels
Roller Bead Loosening (TC33M Model Only)
Demounting Standard Tires from Rim
Mounting Standard Tire to Rim
Precautionary Notes
Mounting Tough, Low Profile Tires
Tire Inflation
Removal of Wheel from TC
Advanced Procedures
Advanced Demounting Procedures
Optional Bead Press Arm
Optional Bead Press Arm with Horizontal Roller (TC33 Model Only)
Advanced Mounting Procedures
Optional Bead Press Arm
Optional Bead Press Arm with Horizontal Roller (TC33 Model Only)
Advanced Bead Loosening Procedures (TC33M Model Only)
Bead Loosening Soft Sidewall, Tall Profile Tires
Bead Loosening Tough, Low Profile Tires
Bead Loosening "AH" Wheels
Advanced Demounting Procedures (TC33M Model Only)
Using "HM" Bead Lever and Sleeve Protector
Using Bead Depressor "Tail" (Optional) and Bottom Roller to Demount Upper Bead Without Sleeve Protector
Demounting Lower Bead Without Sleeve Protector
Cylindrical Rims/Bead Loosening and Demounting Lower Bead
Advanced Mounting Procedures (TC33M Model Only)
Mounting of Stiff Sidewall, Low Profile Tires
Removal of Bead Depressor "Tail" (Optional)
Mounting Low Profile Tires on Rounded Edged Rims
Mounting Stiff, Low Profile Tires on Rounded Edged Rims Only Using Rollers (TC33M Model Only)
Matching/Optimizing of Tire to Rim (TC33M Model Only)
Maintenance and Calibration
Maintenance Schedule
Maintenance Replacement Parts
Calibrating and Adjusting the Position of the Column
Checking and Adjusting the Bead Rollers
Checking and Adjusting the Position of the Bead Breaker Arm
Advertisement
Quick Links
Download this manual
OPERATION INSTRUCTIONS
7102-M029-00 Rev. 00 (04/2021)
TC33 Series Tire Changer
TC33
TC33M
Copyright 2021 Hunter Engineering Company
Table of
Contents
Previous
Page
Next
Page
1
2
3
4
5
Advertisement
Table of Contents
Need help?
Do you have a question about the TC33 Series and is the answer not in the manual?
Ask a question
Questions and answers
Related Manuals for Hunter TC33 Series
Tyre Changers Hunter TC39 Series Operation Instructions Manual
(37 pages)
Tyre Changers Hunter TC37 Series Operation Instructions Manual
(33 pages)
Tyre Changers Hunter TC33M Operation Instructions Manual
(55 pages)
Tyre Changers Hunter TCX575 Operation Instructions Manual
Tire changer (48 pages)
Tyre Changers Hunter TCX450 Operation Manual
Tire changer (52 pages)
Tyre Changers Hunter TCX640 Operation Manual
Tire changer (52 pages)
Tyre Changers Hunter TCX550 Operation Manual
Tire changer (52 pages)
Tyre Changers Hunter TCX3000 Instruction Manual
Hydraulic car tyre changer (152 pages)
Tyre Changers Hunter TCX56 Operating Instructions Manual
Standard version, leverless version (68 pages)
Tyre Changers Hunter TCA28 Installation Instructions Manual
(28 pages)
Tyre Changers Hunter TCX50 Operation Manual
(52 pages)
Tyre Changers Hunter Revolution Series Operation Instructions Manual
(12 pages)
Tyre Changers Hunter TCA34R Series Operation Instructions Manual
(34 pages)
Tyre Changers Hunter TCX50H Series Operation Manual
(55 pages)
Tyre Changers Hunter TCX 58 Operating Instructions Manual
(84 pages)
Tyre Changers Hunter TCX50C Operation Manual
(50 pages)
This manual is also suitable for:
Tc33m
Table of Contents
Save PDF
Print
Rename the bookmark
Delete bookmark?
Delete from my manuals?
Login
Sign In
OR
Sign in with Facebook
Sign in with Google
Upload manual
Upload from disk
Upload from URL


Need help?
Do you have a question about the TC33 Series and is the answer not in the manual?
Questions and answers