Advertisement
Quick Links
Advertisement

Subscribe to Our Youtube Channel
Related Manuals for Sartorius 1100


Summary of Contents for Sartorius 1100
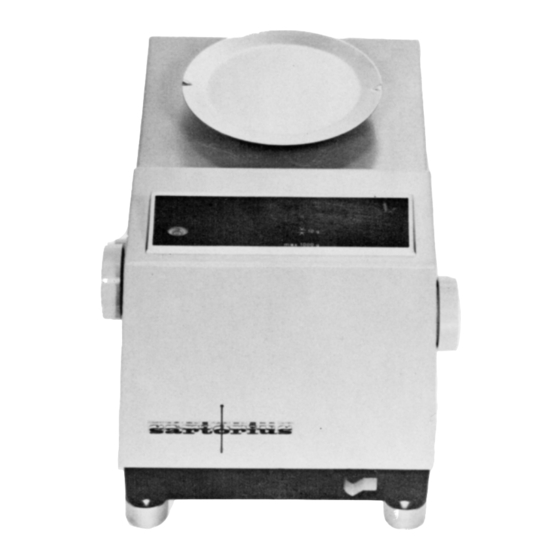
- Page 1 1100 Instructions for Installation and Operation...
- Page 2 Contents of supply 1 precision balance 1 cable 1 protective dust cover 1 instruction manual 1. Unpacking 2. Installation 3. Checking 4. Weighing 5. Taring 6. Replacing lamps 7. Zero point adjustment of calibrated balance...
- Page 3 Unpacking 1.1. Open carton, remove balance. 1.2. Remove plastic cover and tape...
-
Page 4: Installation
Installation 2.1. Pull off knobs and pan support 2.2. Use screw driver to move 2 bolts under the base plate 90 anti-clockwise. Lift balance housing carefully. 2.3. Check voltage, before connecting to line. - Page 5 2.4. Insert knobs and pan support. Attach pan. Disengage transport lock a), switch b) light on. Bulb c) lights up. 2.5. Level balance by adjusting front feet, observe spirit level. 2.6. Focus scale image. 2.7. To adjust intensity of scale illumination: remove perforated metal cover, loosen screw a), adjust lamp holder and re-tighten it.
- Page 6 Checking 3.1. Adjust zero. 3.2. Place check weight on pan Model 1103: 2000 g Model 1104: 1000 g Model 1106: 200 g Reading must be exact “1/00“ or “2/00“. 3.3. To correct reading: Turn knurled disc counter-clockwise if reading is high, clockwise if reading is low.
- Page 7 3.4. Zero and sensitivity adjustments (3.1. – 3.3.) are mode alternately until both readings are correct. 3.5. Secure transport lock by turning knob counter- clockwise 3.6. Remove balance pan, pan support, operation knobs and cable. Attach balance housing. Press locking bolts with screw driver and turn 90 clock-wise.
- Page 8 Weighing 4.1. Check zero and correct, if necessary. Place sample on pan. Turn knob until mark coincides with scale division. 4.2. Read result. Model 1106: 28,42 g 4.3. Model 1104: 284,2 g 4.4. Model 1103: 284,2 g...
- Page 9 Taring 5.1. Turn knob until scale is at “zero”. Direction of movement of knob is the same as that of the scale. 5.2. If the word “Tare” appears, turn knob as indicated by arrow.
- Page 10 Replacing lamps 6.1. Loosen lamp bracket, insert spare bulb, re-center lamp (see Fig. 2.7.).
- Page 11 Zero point adjustment of calibrated balance 7.1. Turn knob for tare until stop. 7.2. Adjust zero point.
- Page 12 Balances 1100 model 1103 model 1104 model 1106 weighing range 2000 g 1000 g 100 g taring in the optical range 1000 g 500 g 100 g total weight capacity 3000 g 1500 g 250 g optical range 2000 g...
- Page 14 All rights reserved. No part of this publication may be printed or translated in any form or by any means without the prior written permission of Sartorius AG. Sartorius AG reserves the right to make change to the technology, features, specification and design of the equipment without notice.
Need help?
Do you have a question about the 1100 and is the answer not in the manual?
Questions and answers